This
post was originally published on
this siteOriginally posted at: http://www.nerdfitness.com/
Pull-ups are my favorite exercise of all time.
They work all of the “pull” muscles in your body – your back, biceps, forearms.
They are indicative of your level of fitness – anybody that can do a pull-up is in pretty good shape.
And anybody that can do 10 or more is clearly in great shape.
Lastly, pull-ups make you feel like a badass after doing them.
However, pull-ups are also hard as hell, especially if you’re just getting started. Unlike other exercises that can be completed with just your body weight (like squats, lunges, and push ups), pull-ups and other exercises that strengthen your pull muscles require at least one piece of equipment or something to hang from!
On top of all of that, if you can’t do one yet, how the heck are you supposed to work on them to get better?
I’ve recently received thousands of emails from fellow rebels who are working towards their first pull-up but aren’t there quite yet.
Whether you’re 300 pounds overweight and can’t even look at a pull-up bar without freaking out, or you’re half an inch away from finally being able to do your first pull-up, this article is for you – sorry it took so long for me to write!
Pull-ups are quite the intimidating exercise, but like Optimus Prime has taught us, we can make small changes and improvements over time that will result in the ultimate goal:
One. Freaking. Pull-up.
It will take a combination of two things to get your chin up over that bar:
- Decreasing body fat so you have less weight to pick up!
- Increasing strength to pick up your bodyweight and move above the bar!
I realize doing those two things is much easier said than done.
What most people don’t realize is that they spend too much time on the strength part, not realizing that decreasing their body weight is as important and impactful (if not more so!).
Which is why most people never get to do a pull-up!
After all, there’s nothing more frustrating than putting in the effort for months (or years) and not seeing results and getting demoralized. And unfortunately, this is what I see from most people: Lots of well-intentioned but misguided effort in the gym and no changes.
You probably don’t have years to make the mistakes that I did and want to skip this problem, and you just want to start getting results today.
In addition to the free resources below, we also offer 1-on-1 Online Coaching, where you’ll get personalized instruction for your body type and goals, and professional accountability from a Coach on Team Nerd Fitness!
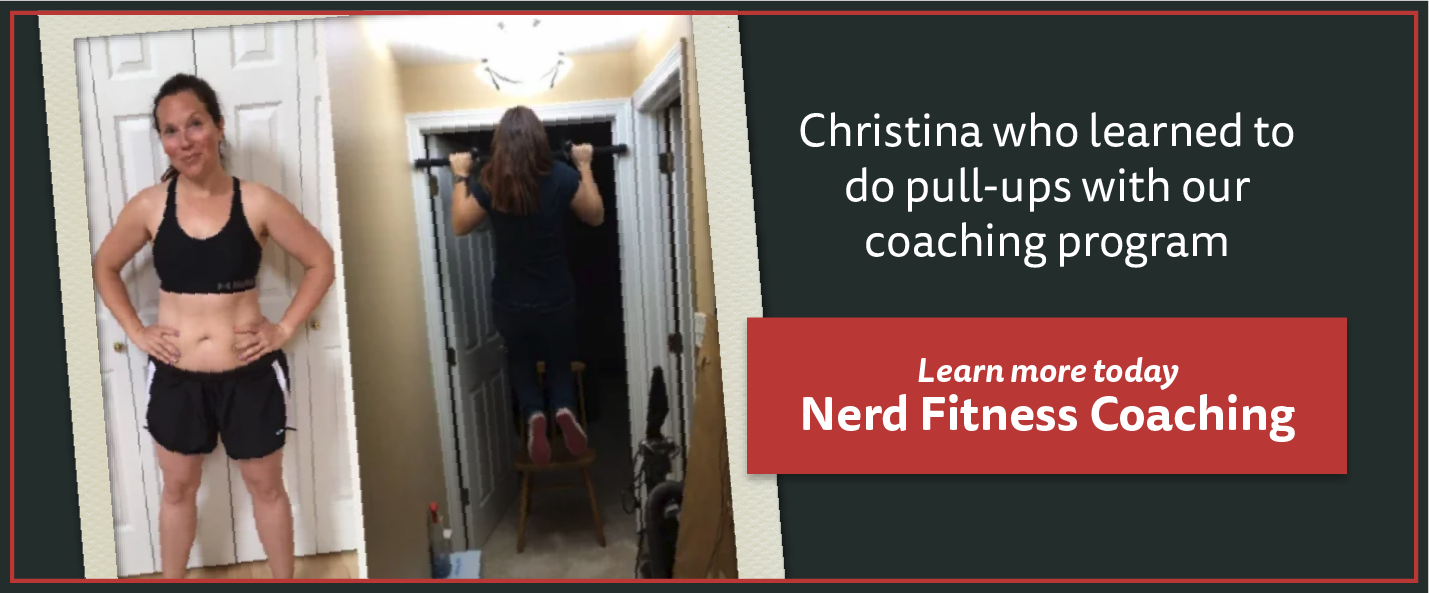
You can schedule a free call with our team to learn more about coaching by clicking on the image below of Christina! She’s one of our coaching clients who went from 0 pull-ups to now doing sets of 10!
But enough of that, let’s get into the nitty-gritty of how to get your first pull-up!
A few tips to get started
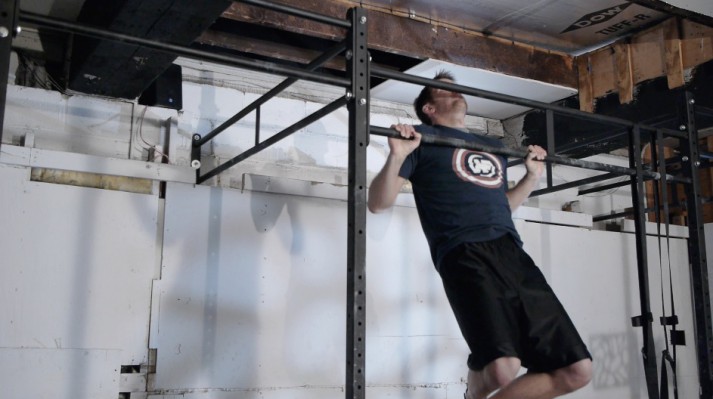
This should hopefully be obvious, but the more you weigh, the more you have to lift in order to complete a pull-up. If you’re truly serious about completing a pull-up, start by getting your diet under control. I’m a HUGE fan of the Paleo Diet, because I know it works. A few folks have already lost 10+ pounds in just over a week following the Paleo Diet in the Nerd Fitness Academy. As you start to weigh less, you’ll have less weight to pick up and move up over that bar! Got it? Good.
MAKE YOUR BACK EXERCISES A PRIORITY. A lot of people do every other exercise before doing any back-related exercises, if they do any at all. After warming up properly, your first exercise should always be the stuff that you want to work on the most – in this case it’ll be your back.
The progression below is just a path that I’ve created, but does NOT need to be followed to a T. I give sample sets and reps and when to move up, but if you feel like you can progress sooner or want to try doing full pull-ups sooner than I recommend, that’s OKAY. This is the slower progression method, where some people will want to do fewer reps and progress to the next levels sooner – that’s okay.
I recommend moving up to the next level when you can do 3 sets of 8 reps of a particular exercise. If you want the accelerated path, move on up as soon as you can do 3 sets of 5 reps.
Almost every exercise below has a video to show you how to do it. Click on the picture or the video below it.
If you want to know how to incorporate the progressions below into a regular training routine, you can put your email address below to download our beginner bodyweight workout! It’s a great way to get strong as you
also get better at your pull-ups!
Grab Your Beginner Bodyweight Routine Worksheet. No Gym Required!
- Complete this workout at home, no equipment required
- Avoid the common mistakes everybody makes when doing bodyweight exercises
- Learn how to finally get your first pull-up
Level 1: Bent Over Dumbbell Rows
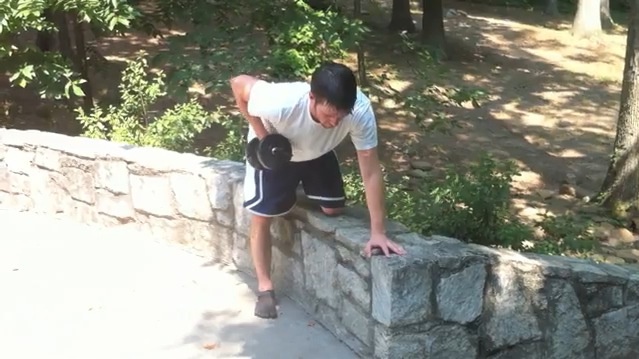
Bent Over Dumbbell Row Video
We’re going to start with these, the most basic of back exercises, in case you’re starting from ABSOLUTELY square one. For these exercises, focus on lifting more and more as you get stronger. Every OTHER day, pick up a dumbbell that you can lift for three sets of 8 repetitions with a 2-minute break between sets. As soon as you can do 3 sets of 8 reps, it’s time to move up to a heavier dumbbell.
- As soon as you can do dumbbell rows with at least a 25-pound (10kg) dumbbell or heavier, consider moving up to the next level.
- If you are a little bit bigger than the average bear, you might want to stick with this step until you lose a little bit more weight and get stronger – maybe go to 35 or 40-pound (18kg) dumbbells.
Level 2: Body Weight Rows
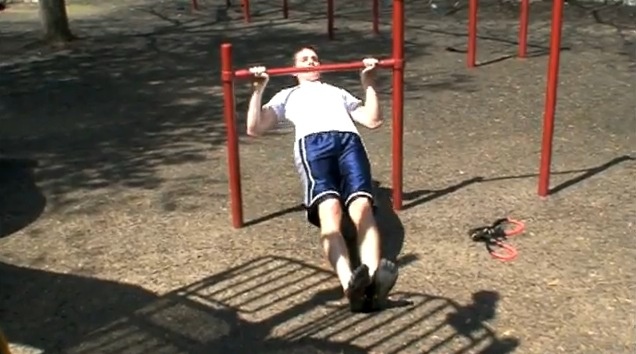
Body Weight Rows Video
Body weight rows are the PERFECT precursor to pull-ups – they work the same muscles, just at a different angle. You can also make adjustments. You know how I HATE HATE HATE exercise machines? Here, I wholeheartedly recommend the use of a smith machine…but ONLY for rows! Because you can adjust the height of the bar, you can adjust how difficult the exercise is. If you’re just getting started, put the bar very high, so you only have to lean back slightly. If you’re stronger, you can start with a lower bar.
Here’s a whole post I did on body weight rows (also called inverted rows).
My advice:
- Clench your butt and keep your abs tight and body straight throughout the exercise. Focus your mind on PULLING with your arms.
- Set the bar at a height where it’s challenging for you to complete 3 sets of 8 reps with two minutes of rest between sets.
- As soon as you can complete all 3 sets of 8 reps, lower the bar!
- If you need to make the exercise easier, bend your knees and put your feet flat on the ground. You can drop your hips too to make things easier.
A sample routine that starts with your back exercises
- Monday – 3 sets of 8 reps of overhand bodyweight rows
- Wednesday – 3 sets of 8 reps of underhand bodyweight rows (hands reversed)
- Friday – 3 sets of 8 reps of overhand bodyweight rows
- (And then go underhand, overhand, underhand the following week)
As soon as you’re doing bodyweight rows where your body is at a 45-degree angle or lower, you can progress to level 3.
IF YOU DON’T HAVE ACCESS TO A BAR FOR INVERTED ROWS: Try using your kitchen table, or move up to Level 3 and progress with caution there.
IF YOU HAVE ACCESS TO A GYM OR WANT TO JOIN A GYM, I know they can be intimidating! We have multiple chapters on how to find a gym and get started using the equipment, in our free guide Strength Training 101: Everything You Need to Know. Grab our nerdy guide when you join the Nerd Fitness Rebellion with your email in the box below:
Download our comprehensive guide
- Everything you need to know about getting strong.
- Workout routines for bodyweight AND weight training.
- How to find the right gym and train properly in one.
Level 3A: Assisted Pull-Ups
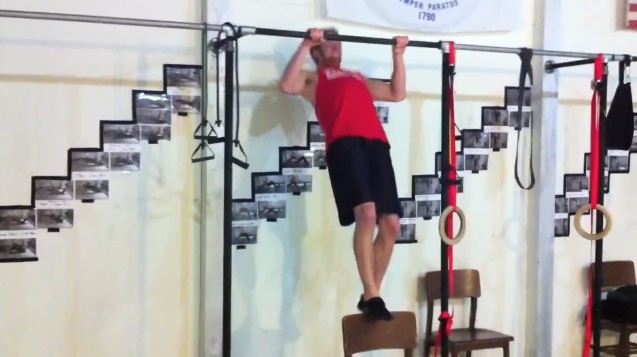
Assisted Pull-ups Video
Personally, I don’t like using the assisted pull-up machine in a gym as it doesn’t give you the full feeling of a pull-up, but it’s certainly better than nothing.
Instead, I recommend doing one of these alternatives:
- Assisted Pull-ups with chair – (either one foot or two depending on your needs) – your feet are ONLY there for support, use your upper body as much as possible.
- Assisted Pull-ups with exercise band – (you can get different types of exercise bands with different levels of strength). Put your foot in the exercise band and pull yourself up.
- Assisted pull-ups with a partner – (have a friend hold your feet behind you and help you complete each rep). Have your friend use the least amount of help possible to get you through your workouts.
My advice:
- Clench your butt and keep your abs tight throughout the exercise – try not to swing like crazy.
- Keep your shoulder blades pinched behind you throughout the movement and focus on PULLING the bar down with your arms.
- Use the least amount of assistance that you can handle – as soon as you can do multiple pull-ups with both feet on the chair, switch to just one foot.
- If you’re using an exercise band, try to get a few bands of varying tension so you can decrease the resistance as you get stronger.
- As soon as you can do 3 sets of 8 with assistance, it’s time to move on up.
A sample level 3 routine:
- Monday – Assisted Pull-ups – 3 sets of 8 reps
- Wednesday – Body weight rows – 3 sets of 8 reps
- Friday – Assisted Chin Ups – 3 sets of 8 reps
Level 3B: Negative Pull-Ups
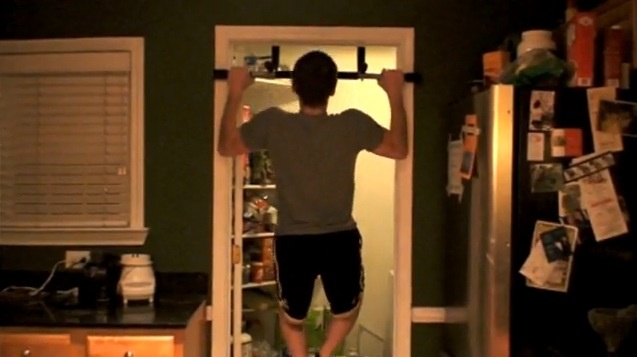
Now, let’s say you don’t have a rubber band, you don’t have somebody to hold your feet, and you don’t have a chair – you ONLY have a pull-up bar. That’s okay – you can do what we call negatives. When doing a negative, you jump above the bar and try to lower yourself slowly and in control until you’re at the bottom of the movement. This can be very dangerous if you’re very overweight, which is why I’d recommend moving slowly through steps 1-3A first.
However, once you have a decent amount of back strength, doing negatives is a great way to build arm and back strength.
You can either jump above the pull-up bar, and then begin to lower yourself back down IN CONTROL, or you can hop up on a chair to get above the bar and then lower yourself back down. Again, the name of the game is “in control.”
You don’t need to lower yourself so slowly that one repetition destroys you…lower yourself in a controlled speed – Counting to three during the movement is a good tempo.
Here’s a sample workout using everything up to this point:
- Monday – Assisted Chin Ups – 3 sets of 8 repetitions
- Wednesday – Body Weight Rows – 3 sets of 8 repetitions
- Friday – Negative Pull-ups – 3 sets to failure – capped at 5 repetitions for each set.
For your negative pull-ups, do as many as you can (up to 5 reps) per set – jump and lower yourself in control, then jump right back up and lower yourself. If you can do 5, wait 2 minutes and then start again. If you can’t do 5, do as many as you can in control, wait 2 minutes and then start again.
Once you’re doing 3 sets of 5 repetitions on your negative pull-ups, along with your assisted chin-ups and body weight rows…you’re ready.
Level 4 – Chin Ups and Pull-Ups

Pull-up Video
My dear rebel, it’s time.
Depending on your weight, your level of fitness and strength, and how far along you are in these progressions, you might be able to start with more than one pull-up.
For MANY people, especially if you have spent time in the gym in the past working on your biceps (like most guys do), you might find it easier to start with chin ups (with your palms facing toward you) for your first exercise before trying pull-ups (with your palms facing away from you).
I’ve already covered how to do a pull-up/chin-up in another article, so I won’t get into it too much here…just focus on these things:
- Pull your shoulder blades back as you’re going through the movement, and focus on pulling the bar down.
- Again, keep your butt clenched and your abs tight throughout the movement.
- Get your chin above the bar, or it doesn’t count as a full rep.
- Do whatever you need to get through the full rep.
- If you can only do one rep, try to do at least 3 sets of one rep…after your three sets, add in some negatives to exhaust the muscle.
At this point, here’s a Level 4 routine set up for a week:
- Monday – Chin ups – 3 sets for maximums repetitions
- Wednesday – Inverted Rows – 3 sets for max repetitions
- Friday – Pull-ups – 3 sets for maximum repetitions
Level 5 – Next steps
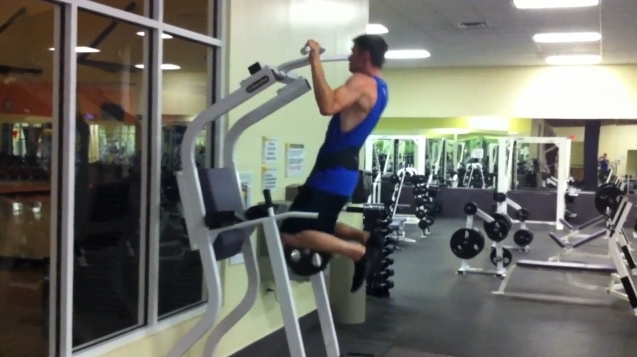
Once you’re able to do 3 sets of 10 pull-ups or chin-ups, you have a few options:
Personally, my favorite thing to do in a gym is weighted pull-ups; if you’re at this level and interested in doing so, here’s what you need to do:
- Get a weight belt. I bought this one on Amazon and it’s worked out incredibly well for me. I’ve tried doing the whole “put weights in a backpack” and it certainly works, but the angle of the weights hanging off your back is weird. With a weight belt, the weight hangs down between your legs (not a euphemism) so it feels more natural.
- Add small amounts at a time. Most gyms will have 2.5 lb (roughly 1kg) weights; you might feel stupid putting on a big weight belt and only hanging a tiny weight off it, but you need to start somewhere.
- Consistently add more weight. I’ll warm up with two sets of 5 pull-ups with no extra weight, and then do 3 sets of 5 weighted pull-ups. If I can complete all 3 sets of 5 reps (with my chin over the bar for every rep), I’ll make a note to add 2.5 or 5lbs (1 or 2kg) to my weight belt for the next time.
So, here’s an advanced sample routine for back exercises:
- Monday – Weighted Chin Ups – 3 sets of 5 reps
- Wednesday – Elevated Feet Body Weight Rows – 3 sets of max repetitions
- Friday – Wide Grip Pull-ups – 3 sets of maximum repetition
- (The following week, I’d alternate by doing the chin ups without weight, and then doing weighted pull-ups
Don’t Make These Pull-up Mistakes!

My work here is done – it’s now up to you to take care of business.
As you start to get stronger with your pull-ups, it’s important to check in and make sure you’re doing them correctly. 90% of people I see doing pull-ups in a gym are doing them incorrectly!
Here are the 5 big mistakes people make when doing a pull-up:
I want this for you so badly, because in my head there’s no greater exercise than a pull-up. It makes you feel like a badass, you get super strong, and it’s an amazing benchmark and milestone on the path to a leveled up life!
Just ask Christina, who can now do multiple sets of pull-ups – her story is incredible: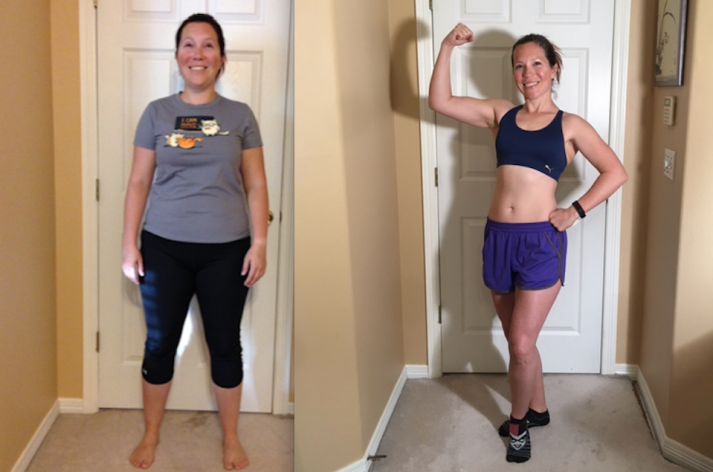
Or Bronwyn, who lost 50+ lbs and now does chin-ups with her daughter on her back!
I know you might be overwhelmed right now, and you might be worried you’re gonna spend months without getting results.
Although that happens for many, it’s because they don’t have the right plan (or nutrition) in place!
You can absolutely do this on your own and follow the program above, but if you’re looking for more specific guidance or you want to avoid the guesswork and be told exactly what to do on what days to get to a pull-up on schedule, check out our coaching program!
We’ve helped tons of men and women get their first pull-ups with our 1-on-1 Online coaching program, where our coaches build a program that incorporates pull-ups and fits your busy life!
You can schedule a free call with our team to see how coaching can help you succeed by clicking on the image below:

Anyways! In case you don’t need a long article, here’s a the short version:
How To Do A Pull-up (short version)
- Can’t complete a pull-up yet? Instead, begin with bent over rows or bodyweight rows, progressing until you can complete a pull-up.
- Start with your hands on a bar about shoulder width apart, using an overhand grip (palms facing away).
- Pull until the bar reaches chin level. Focus on pinching your shoulder blades down and back (towards each other), and keep your entire body tight. Lower yourself slowly.
- Feel like a superhero after doing each one.
No matter your starting point, whether you’re a guy or girl, you CAN do pull-ups. And you WILL do pull-ups. You don’t need to follow the progression above exactly – it’s merely one path that you can take in order to reach the promised land…where the pull-ups flow like wine and the women instinctively flock like the Salmon of Capistrano.
Follow the path that works for your schedule, your experience, and your level of comfort with this movement – there’s no shame in going slowly and progressing safely. And if you’re gung ho about pull-ups, ready for negatives and trying to squirm for that first rep, feel free to go for it. Just be safe.
When you DO finally do a pull-up, I want to be the first to know – email me at steve@nerdfitness.com and tell me about it!
For the Rebellion,
-Steve
PS: If you are interested in learning more about pull-ups, bodyweight workout routines, and getting started with strength training, I applaud you – this is the BEST decision you make in your life.
If you want more specific instruction, we walk you through each step of the process in our free guide, Strength Training 101: Everything You Need to Know. Grab it free when you sign up in the box below:
Download our comprehensive guide
- Everything you need to know about getting strong.
- Workout routines for bodyweight AND weight training.
- How to find the right gym and train properly in one.
###
 Don’t Miss the Deadline! Today (3/8/19) is the last day to enter the success story giveaway! Three prizes in all for three randomly chosen (complete = write-up and photos) submissions: a $200 Primal Kitchen gift certificate for one person and a 5-book Primal library for two additional people. Everyone submitting (at any time) will receive a 20% off voucher for an order of their choosing on PrimalKitchen.com or PrimalBlueprint.com. Email me your story along with pictures. Please use the subject heading “My Primal Story.” Complete details here.


 The relationship between stress and carbohydrates is confusing, with seemingly contradictory arguments bouncing around the online health sphere.


 For now classes are 6pm and 640pm at 2840 Wildwood st in the Boise Cloggers studio.
Book your class NOW!
click this ==>


