This post was originally published on this site

Originally Posted At: https://breakingmuscle.com/feed/rss

Whether you call them boulder shoulders, capped delts, or the start of a classic v-taper, a set of muscular shoulders is one the most common aesthetic goals for many lifters.
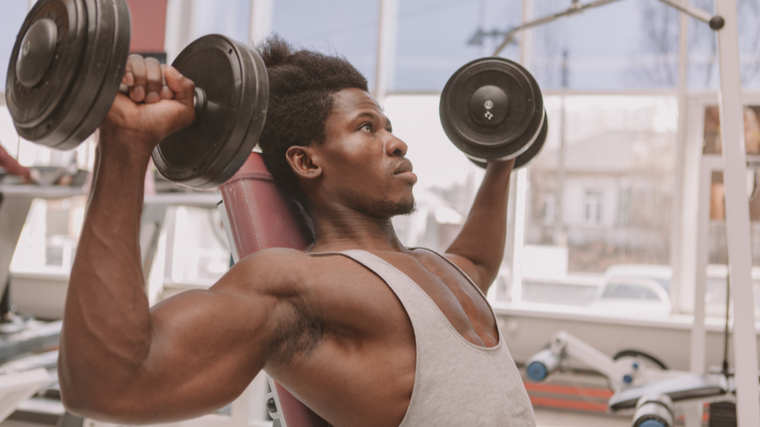
Man sitting in gym pressing dumbbells overhead
Credit: Ihor Bulyhin / Shutterstock

That’s not to mention the overall performance boost you get from strengthening one of the most important joints in the upper body. Your shoulders are involved, to some degree, in almost all upper body movements. The versatile joint can perform a variety muscle actions in multiple directions.

To minimize your time and maximize your effort, your need to train the shoulders with a combination of exercises and motions. This means incorporating exercises designed for strength and power, high volume training, and isolation-focused work. Here is a rundown of the most effective exercises to attack your shoulders from all angles.

Best Shoulder Exercises

Machine Shoulder Press

In order to maximize muscle recruitment, you need to produce high levels of force. Being in a more stable and supported position allows you to direct that force into the exercise you’re trying to perform. This is why well-designed exercise machines can be invaluable.

Imagine trying to fire a cannon out of a canoe — it’s unlikely you’re going to hit your target. The machine shoulder press creates the most amount of total-body stability so you can take the muscles through a full range of motion with more focus. You can also safely take those muscles closer to failure without worrying about controlling free weights.

How to Do the Machine Shoulder Press

Adjust the seat height so that the handles are slightly below shoulder-height. This is going to make sure there is constant tension in the muscle throughout the whole range of motion. Take an overhand (palms facing away) grip. If you have limited shoulder mobility, use a neutral grip (palms facing each other).

Raise your feet with a box, step, or foot pegs if the machine includes them. Lifting your feet will elevate the knees so that you can more successfully keep your low back in contact with the bench for added support. A secure footing also makes you less likely to slide forward in the seat when the set becomes challenging.

Benefits of the Machine Shoulder Press

  • This exercise allows focus on recruiting the shoulder muscles without concern for balancing and stabilizing weights.
  • The seat’s back support can benefit lifters who have recurring lower back problems, by providing external torso stability.
  • The shoulder press machine allows muscular failure to be reached more safely than overhead barbell or dumbbell exercises.

High Incline Dumbbell Press

This is very similar to the machine shoulder press, but dumbbells allow you to take your shoulders through a longer range of motion. Your elbows can start the movement down by the sides of your body, move upward to the mid-point of the press, and moving together as your elbows lockout towards your body’s midline, stacking above your shoulders and underneath your wrists.

Dumbbells also offer the ability to rotate your hand position as you press, which can accommodate any wrist or elbow discomfort. This dumbbell press is an ideal alternative for lifters with joint problems.

How to Do the High Incline Dumbbell Press

Set an adjustable bench one notch below 90-degrees. This high angle allows the benefits of an overhead shoulder press while further reducing joint stress. The top part of the shoulder press is the joint’s most vulnerable position. By taking the bench down one notch from fully upright, you can still take the shoulders through a full range of movement but it’s safer because your upper back and shoulders have more room to move.

Begin with the dumbbells at shoulder-height, palms facing away from you. Press upward with control, bringing your thumbs toward each other as the weights pass above your head. Maintain control of the dumbbells and don’t allow them to bounce together at lockout. Pause briefly before returning to the starting position.

Benefits of the High Incline Dumbbell Press

  • The high incline dumbbell press combines the upper-body support benefits of a seated press with the joint-friendly adjustability of dumbbells.
  • This press variation works well as a type of “bridge” between shoulder training and chest training, due to the bench angle. A slightly lower angle would begin to emphasize the chest more than the shoulder muscles.

Seated Arnold Press

Success leaves clues and if this exercise was good enough for Arnold, then it’s good enough for you. This comprehensive movement incorporates full range of motion at the shoulders and elbows, plus coordinated movement at shoulder blades. This all combines to engage the serratus anterior, lateral and rear deltoids, trapezius, teres major and minor, plus some lats.

Sounds good to be able to hit all of those muscles in one go, right? Maybe. The problem is that you are spreading the effort, intensity, and force across so many muscles in varying amounts, so it might not be a top choice for building strength. But it’s a good pick when looking to accumulate more training volume to stimulate overall growth.

How to Do the Seated Arnold Press

Set an adjustable bench at an extremely high angle, one notch below fully upright. Elevate your feet to really lock into the seat. Start with the two dumbbells at shoulder-height in front of the body with your palms facing towards you. Start to press them up. Once your hands reach eye-level, start to rotate your arms out to the side as you continue pressing. A common mistake with this exercise is rotating your hands to early, which just makes the exercise a basic seated shoulder press.

Rotate consistently as you press upward. At the top of the press, your hands should be facing forward. If you have limited shoulder mobility, they may end up neutral (facing each other). Reverse the entire motion on the way down back to the starting position.

Benefits of the Seated Arnold Press

  • The Arnold press works the shoulders through a longer range of motion than a traditional shoulder press. This can create a greater stimulus for muscle growth.(1)
  • This exercise recruits more muscles throughout the shoulders and upper back, which creates greater stability, reduced risk of injury, and an increased growth stimulus.

Single-Arm Standing Dumbbell Press

Unilateral training can be very beneficial because we have something called the bilateral deficit, or BLD. While I do share the same initials, rest assured I did not come up with this concept. The bilateral deficit is essentially the body’s ability to more efficiently recruit individual limbs compared to working both limbs together.(2) For example, if you can shoulder press two 40-pound dumbbells simultaneously, you can likely press one 45 or 50-pound dumbbell for the same number of repetitions.

You can use the bilateral deficit to your advantage with the single-arm standing dumbbell press. This will not only allow you to use a relatively greater load, for increased strength and muscle gains, but the standing position can increase the range of motion and improve shoulder mobility.

How to Do the Single-Arm Standing Dumbbell Press

Stand behind a vertical bench, holding a dumbbell at shoulder-level in one hand with your free hand on top of the bench for support. Push into the bench to create stability as you press the weight to lockout above your head. Lower the weight under control. Perform all reps with one arm before switching sides.

Benefits of the Single-Arm Standing Dumbbell Press

  • The single-arm standing dumbbell press allows you to use relatively heavier weights than pressing two dumbbells together, which can lead to greater size and strength.
  • The added bench support provides stability and can help to reduce lower back strain.
  • This standing position incorporates core strength and total-body stability.

Dumbbell Z Press

This exercise has become relatively popular over the last few years. In part, possibly because it’s named after one of the greatest strongmen of all-time, Žydrūnas Savickas, also known as “Big Z.” While the Z press is often performed with a barbell, using a pair of dumbbells can further increase the core stability challenge.

The Z press requires, and can improve, mobility in your thoracic spine (upper back) and it creates tremendous core engagement because your upper body is entirely unsupported. This means you probably won’t be moving very heavy weights, but the exercise can be great for accumulating plenty of muscle-building volume.

How to Do the Dumbbell Z Press

Sit on the ground with your legs extended straight. If you lack hip mobility or if it’s too uncomfortable, sit on a very low box or step. Make sure you keep your shoulders stacked over your hips and your spine straight.

Bring two dumbbells to shoulder-level with your palms facing forward. Press both weights overhead to lockout, being sure to keep your upper body vertical as you stabilize the weights. Pause very briefly at lockout and lower the dumbbells to your shoulders.

Benefits of the Dumbbell Z Press

  • The Z press builds major core strength because you’re forced to support the weight as it moves.
  • The exercise reinforced strict pressing technique and eliminates the ability to swing the weights using your lower body. Leaning backward to cheat the movement also becomes much more apparent and easier to correct.

Dumbbell Cuban Press

Legend has it that this exercise was initially used by the Cuban Olympic weightlifting team to strengthen their shoulders. It was also popularized by the legendary late strength coach Charles Poliquin. The Cuban press trains the smaller internal stabilizer muscles of the shoulder and upper back, as well as the aesthetic outer shoulder muscles.

It walks the fine line between being a “prehab” movement focused on preserving and building shoulder health and being a strict muscle-building movement with a long time under tension.

How to Do the Dumbbell Cuban Press

Stand with two light dumbbells at your sides with your palms facing behind you. Lift your elbows up and out to the side with your hands hanging straight down. Once your elbows are in line with your shoulders, rotate your arms to point your hands toward the ceiling, with the weights around eye-level. Keep a roughly 90-degree angle at your elbows.

Finish by fully extending your arms and press to lockout. Reverse the process to lower the weights to the starting position. This exercise is a lot harder than it looks, so you won’t need much load or too many sets and reps. Starting with two sets of eight to 10 reps to learn the movement with very light weights.

Benefits of the Dumbbell Cuban Press

  • The dumbbell cuban press strengthens shoulder stabilizers, including the rotator cuff, during the rotation movement prior to pressing.
  • The exercise is typically performed slowly with an emphasis on technique, which increases the overall time under tension. This can contribute to greater muscle growth.

Behind-the-Neck Press

This exercise is performed with a barbell and, as the name suggests, the bar travels behind the neck instead of in front. This bar path makes it easier to stay in a stronger, safer position with your upper body stacked and in alignment. However, it does require good upper back mobility and it makes the initial part of the press significantly more challenging for both your shoulders and your triceps.

The biggest complaint (or fear) some lifters have is that the behind-neck position requires a good amount of shoulder mobility in order to successfully go through the full range of motion. If you don’t have the mobility to perform the movement, don’t worry. There are many other exercises you can do, this is just not one of them. But the behind-the-neck press has been a staple for weightlifters and bodybuilders for decades, so it’s not an exercise to steer away from if you can handle it.

How to Do the Behind-the-Neck Press

Set a barbell in a power rack at roughly shoulder-height. Grab the bar with your hands just outside shoulder-width and pull your elbows forward to sit directly below your wrists. Unrack the weight and take a small step backward. Brace your core, and keep your legs and torso stable as you press the weight up. Fully extend your arms at the top.

To lower the weight, focus on pulling your elbows towards the sides of your body to load the shoulders more than the triceps. Keep your elbows beneath your wrists throughout the exercise. Depending on your mobility, the bar might gently touch the base of your neck before you press back up again.

Benefits of the Behind-the-Neck Press

  • The behind-the-neck press helps to build functional mobility by training the shoulders, upper back muscles, and shoulder blades through a long range of motion.
  • The bar path and body position reinforces strict pressing technique which puts emphasis on muscle recruitment instead of momentum.

Military Press

To many experienced lifters, this exercise is the end-all-be-all shoulder movement. The classic standing barbell press is a hallmark of old school weightlifting, classic bodybuilding, and all-around power and athleticism.

With this more common variation of the shoulder press, the barbell moves in front of the body. This creates two distinct challenges. First, core stability — You need to be more active in pulling your ribs down and tucking your hips under to stay stacked. Second, core control — You are unable to press straight up because the bar begins underneath your chin, so you have to move the barbell in an arching motion around your head while maintaining a strong center.

How to Do the Military Press

Set the barbell in a power rack at roughly shoulder-height. Grab the bar with your hands just outside shoulder-width. Take a small step back with the bar resting across the fronts of your shoulders. Brace your abs and press up, staying as close to your face as possible without hitting your chin, nose, or forehead (obviously).

As you reach the lockout, “punch” your head between your arms. Your biceps should end up in-line with your ears. Maintain control of the bar by attempting to pull the bar apart as you’re pressing the weight above your head. This one small change can make a big difference in how the movement feels on your muscles and joints.

Benefits of the Military Press

  • The military press is often considered a gold standard movement, on par with the flat bench press, for assessing and building upper body strength.
  • This overhead press allows you to move potentially heavy weights, overloading the shoulders for greater strength and muscle gains.

Push Press

The push press has been wide-spread with the rise in popularity of things like CrossFit and HIIT-style group fitness workouts. In the push press, you are focusing on dip and drive — using your legs and hips to get the weight above your head.

Using your legs allows you to move a load that you wouldn’t otherwise be able to press with strict form for as many reps. At the top of the rep, you can really overload your shoulders and triceps as they control the weight back down with a slow eccentric contraction.

How to Do the Push Press

Hold a barbell in front of your shoulders, with a shoulder-width grip and your hands facing away from your body. Bend your knees slightly and drop your hips as if you were about to initiate a front squat. Quickly and powerfully extend your legs and drive your hips forward to get the weights moving off your body.

When the barbell is in motion, use your arms to guide it above your head to lockout. Think “legs drive, arms guide.” Don’t squat too deep before rising. You’ll only make it harder to get the weights above your head quickly. For maximum power output, be sure to get the weights moving using leg drive, not shoulder pressing strength.

Benefits of the Push Press

  • This can be a great exercise for building upper body strength due to the use of heavy weights and total-body coordination.
  • The strict eccentric portion of each repetition lets you accumulate significant volume and time under tension, which benefits muscle growth.

Machine Lateral Raise

The machine lateral raise is a great exercise for isolating and emphasizing the lateral, or side, part of the shoulder muscle. The lateral head of the shoulder primarily responsible for abducting the arm, or raising it away from the midline of the body.

Many very successful bodybuilders will prioritize lateral raise variations like this to help create a classic v-taper upper body. The machine lateral raise offers constant resistance compared to a dumbbell, which offers varying levels of resistance due to the changing pull of gravity throughout the range of motion.

How to Do the Machine Lateral Raise

Sit in the machine with your chest supported on the pad, if available. With most machines, you’ll perform this exercise with your elbows bent at roughly 90-degrees and the pads sitting on the outside of your upper arms.

Lift both arms until they’re parallel with the floor. Your elbows and upper arms should be in-line with your shoulders. Lower the pads with control. The bent arm position helps to focus the work on the shoulders and reduces the temptation to use your traps and upper back muscles.

Benefits of the Machine Lateral Raise

  • The machine provides a controlled setup which makes it safer to take sets up to, or beyond, muscular failure.
  • The machine lateral raise offers constant resistance throughout the entire range of motion, creating a longer time under tension and greater muscle-building stimulus.

Cable Lateral Raise

This version of the lateral raise is normally performed unilaterally (one arm at a time). The cable provides constant tension, so you are forced to work against the resistance throughout the whole range of motion.

The movement is also more strict because it is harder to use momentum to lift the weight due to the cable pulley. The cable setup also allows you to increase muscular stress in the lower portion of the repetition, compared to dumbbell lateral raises which have reduced resistance in the bottom of each rep.

How to Do the Cable Lateral Raise

Attach a single handle to a cable pulley set just below your knee. Stand sideways to the pulley with your non-working arm near the weight stack. Grab the handle with your palm facing the cable pulley. Begin with your arm slightly bent and your hand just below your belly button. Raise the handle sideways until your elbow is in line with your shoulder. Imagine reaching your hand out as far away from your body as you can. This should stop you from lifting your shoulders and engaging your traps.

Hold the top position for one second and initiate the eccentric portion as slowly. Pause briefly in the bottom position before starting the next rep to emphasize the stretched position.

Benefits of the Cable Lateral Raise

  • The cable lateral raise provides high-tension with relatively light weights. It can be humbling and much harder than you think, making it a joint-friendly way to train without needing to move heavy weights.
  • The unilateral movement allows you to concentrate on the working muscle, which can improve the mind-muscle connection and boost muscle growth.

Chest-Supported Lateral Raise

This version of the classic dumbbell lateral raise puts you in a more supported position with a greater opportunity use strict form and avoid momentum. This shifts more stress onto the side head of the shoulders.

The chest-supported lateral raise is perfect for high volume with slow repetitions. The bench support  reduces lower back strain by removing your ability to swing your torso when lifting the weights.

How to Do the Chest-Supported Lateral Raise

Set an adjustable bench slightly below vertical. Straddle the bench with your chest supported on the back pad. Bring your arms slightly in front of you, holding a dumbbell in each hand with your palms facing each other.

Raise your arms up and out to the sides. Focus on feeling tension in your shoulders and not your traps or back. Pause briefly when your hands reach shoulder-height. You can further reduce momentum and increase muscle tension by taking two seconds to raise the weights and two seconds to lower them.

Benefits of the Chest-Supported Lateral Raise

  • The stabilized body position significantly reduces lower back strain, making it an ideal option for lifters with back issues.
  • The chest-supported lateral raise reinforces strict exercise performance by limiting the ability to swing your body and create momentum.

Machine Rear Delt Flye

The rear deltoid is the forgotten child of the shoulder family. It gets some secondary attention during many pulling movements like pull-ups, rows, and deadlifts, but this relatively small muscle head rarely gets the attention it deserves when it comes to direct shoulder training.

The rear deltoid is not only important for building a well-rounded, well-muscled shoulder. It also plays a key role in overall shoulder joint health. Strong posterior deltoids are associated with rotator cuff health and overall shoulder mobility.(3)

How to Do the Machine Rear Delt Flye

Adjust the seat height until the handles are in-line or slightly higher than your shoulders. If the handles are too low, you’ll get a lot of help from the muscles in the upper back and triceps which are both stronger than the rear deltoids.

Face into the seat, brace against the pad, and grab the handles with a thumbs-up grip. Keep your arms slightly bent as you pull back until your elbows are even with your shoulders. Focus on separating your hands as far away from your body as possible instead of pulling your shoulders together.

Benefits of the Machine Rear Delt Flye

  • The machine rear delt flye allows total-body support for focused work on the small target muscle.
  • This exercise is ideal for working the rear deltoids with a high volume of work without fatiguing surrounding muscles. Performing the exercise three to four times per week with two to three sets of 10-15 can be an effective way to emphasize the rear delts.

Single-Arm Cable Rear Delt flye

The cable rear delt flye allows you to take the muscle through a very long range of motion, across your entire body, with constant tension. The adjustable pulley makes it easier to set the height of the cable appropriately for your body compared to rear delt machines with fewer seat height options.

When performed correctly and with strict technique, this is an extremely effective high-tension, isolation exercise to zone in on the rear delt with minimal contribution from other body parts.

How to Do the Single-Arm Cable Rear Delt Flye

Set the cable pulley to just above shoulder-height. You can either hold the end of the cable without a handle attachment or, if it’s uncomfortable, grab a single rope handle. Set up perpendicular to the cable and grab the handle palm-down with your outside arm. Begin with your arm straight and your hand in line with your chin.

This is where the muscle will be at its most lengthened under load. Reach your arm away from your body, keeping your hand at chin-height to avoid recruiting muscles in the upper back. Don’t twist your upper body as your arm extends to the side. Pause briefly when your arm is extended directly to your side before returning to the starting position.

Benefits of the Single-Arm Cable Rear Delt Flye

  • The cable pulley provides constant tension for improved muscle growth.
  • The single-arm cable rear delt flye helps to improve the mind-muscle connection by limiting the muscles that can contribute to the movement.
  • The standing position recruits your core stabilizers, particularly your oblique muscles, more than many other shoulder movements.

Pike Push-Up

The full handstand push-up is a very advanced skill, but you can use a variation to successfully improve strength and shoulder mobility, with the latter being a major benefit.

By setting your feet on an elevated platform and “piking” your body into an L-shape, you build overhead pressing strength using only your bodyweight, while improving your leverage and reducing the overall load you need to press.

How to Do the Pike Push-Up

Place your hands on the floor and your knees on a 20 to 24-inch box or bench. Hinge at your hips to bring your upper body close to perpendicular to the ground. Bend your elbows to lower your head down toward the ground.

Keep your core engaged and maintain a stable position as you press up. Keep your hips stacked over your ribcage, and your shoulders over your hands. In the fully locked out position, drive your shoulders toward your ears to engage your serratus anterior (near your chest, ribs, and abs). This will open your upper back and shoulders for more range of motion.

Benefits of the Pike Push-Up

  • The pike push-up works well as a thorough upper body warm-up performing, performing several sets of three to five reps before any other pressing exercises.
  • The inverted position helps to build core strength while also improving hip and hamstring mobility and stability.
  • This is one of the few bodyweight exercises to emphasize the shoulders. The majority of push-up variations emphasize the chest or triceps.

The Shoulder Muscles

Because your shoulder muscles are comprised of three separate heads, each emphasized by different movements and functions, a well-designed shoulder workout recognizes and addresses their differences. This is the most efficient way to build maximum size and strength.

Anterior Deltoid

The anterior deltoid, or front delt, is located in the front section of the shoulder muscle. It, appropriately, is involved in raising the arm from your side, in front of your body, to an overhead position.

Because this is an extremely common movement, the anterior deltoid is stimulated and recruited during many common exercises including many variations of the chest press, all varieties of overhead pressing, and even many biceps curls. Specific isolation exercises targeting the anterior deltoid are not often a focus of shoulder workouts, to avoid overtraining the frequently used muscle.

Lateral Deltoid

The lateral, or side, delt is the most aesthetically important section of the shoulders because it’s responsible for most of the visible width of the muscle. When looking to dramatically change your physique, emphasizing the side deltoid using lateral raise variations is the most efficient approach, but the side delts are also heavily recruited during any overhead press movement.

Posterior Deltoid

The posterior, or rear, deltoid head is sometimes considered part of the “upper back” musculature, but it resides specifically on the shoulder itself. This muscle head attaches along the shoulder blade and is involved in moving the shoulder blades toward and away from your spine. The rear delts also play a major role in pulling your upper arm backward from an extended position.
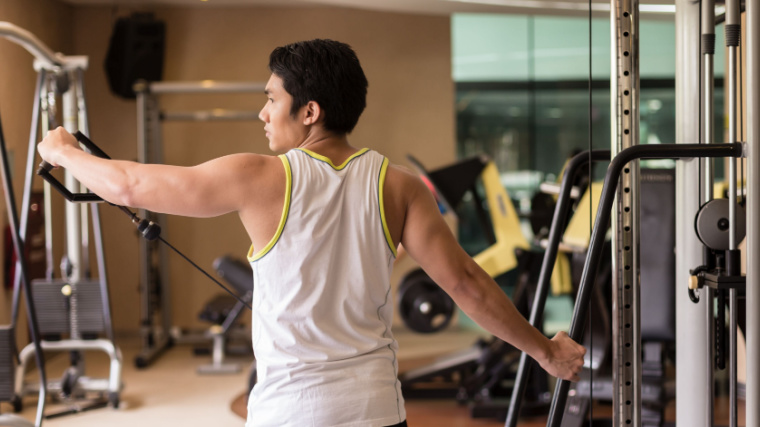
person in gym doing cable shoulder exercise
Credit: Kzenon / Shutterstock

These two functions are similar to many back muscles, like the rhomboids, trapezius, and teres. While the rear delts contribute to many back exercises, they are often “overpowered” by relatively larger muscles, which is why rear delt flye variations are needed to prioritize the muscle.

How Often Should You Train The Shoulders?

Similar to other muscle groups, training a muscle more frequently seems to be better for strength, hypertrophy, and athletic performance.(4) Most people will do well training shoulders two times per week, as you’ll get a lot of extra work from many other upper body exercises like presses and rows.

If you were going to do a short-term specialization phase, you could train shoulders up to four or five times per week with a well-planned routine that manipulates volume and intensity to allow recovery and growth.

How to Progress Your Shoulder Training

Categorize exercises into movements that focus on strength, volume, or isolation (single-joint). Pick one exercise for each of those categories. Strength exercises are programmed with relatively heavy weights and low reps. Volume movements are more efficiently trained with moderately challenging weights in the eight to 15 rep range. Isolation exercises include flye and raise variations which involve only the shoulder joint, not the elbow (which is involved in pressing exercises).

The most common mistake when it comes to shoulder training is doing too much isolation work — too many flyes and raises with less pressing. This could be a symptom of using a chest, shoulder, and triceps workout in your training split, or having an upper body workout which makes the shoulders a relatively lower priority compared to the back and chest.
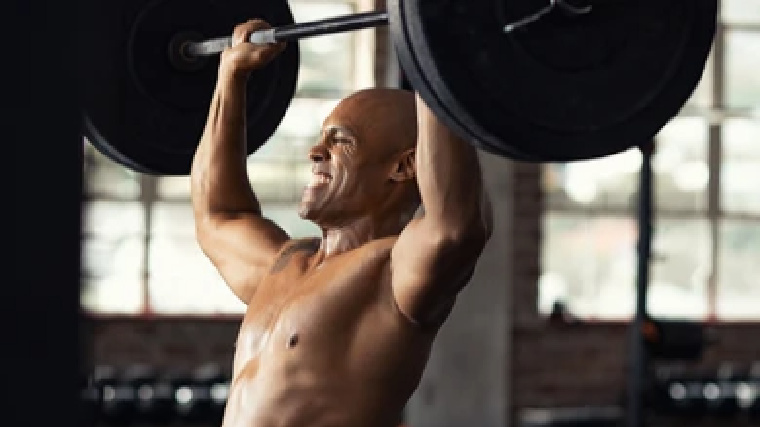
muscular person in gym straining while pressing barbell
Credit: Rido / Shutterstock

However because your shoulders are involved in many movements indirectly, you can generally get away with relatively less direct volume as long as you achieve sufficient volume each week. Try to approach shoulder training with two main phases: Intensity and accumulation.

In an “intensity” phase, focus more on building strength and power. Pick either a strength movement, a volume movement, and an isolation movement or a strength and two isolation movements, and focus your shoulder training on this limited selection of movements.

In an “accumulation” phase, the focus is on performing more total volume so, appropriately, pick a volume exercise plus two isolation movements or three isolation exercises. Workouts will involve racking up the reps and piling on the muscle-building tension.

Alternating between those two phases, spending several weeks in each, can help you keep as much strength as possible during the accumulation phase while maintain work capacity and conditioning during the intensity phase, as muscle growth rolls in throughout both.

How to Warm-Up Your Shoulders

The design of the shoulder joint makes it versatile and crucial to a number of movements, but it can also be prone to injury if trained improperly. A simple and effective shoulder warm-up can mean the difference between results and nagging injuries, so take the time to get blood flowing before any session. Grab a resistance band and try this simple circuit.

  • Scapular Pull-Up: Hang from a pull-up bar with a shoulder-width, overhand grip. Keep your arms straight as you “reverse shrug” and drive your shoulders and shoulder blades toward the ground. Hold the top position briefly before reversing the motion to push your body away from the bar. Perform 10 repetitions before moving to the next exercise.
  • Yoga Push-Up: Get on the ground with your feet well-beyond shoulder-width and your hands in-line with your shoulders. Descend into a standard push-up. When your chest is slightly above the floor, press up while pushing your hips back at an upward angle. You should feel a stretch in your hamstrings as your torso and legs form an upside down “V” shape. Reverse the motion and perform for three to five reps.
  • Band Pull-Apart: Take a palms-down grip on a resistance band. Begin with your arms extended in front of your chest. Keep your arms nearly locked while pulling your hands in line with your shoulders. The band should touch your chest before returning to the starting position. Perform 10 to 15 repetitions before repeating the first exercise. Perform a total of three circuits.

The Path to Bolder, Boulder Shoulders

“Shoulder press and lateral raise” is often the default shoulder workout for beginners. While those are two fundamental exercises, complete shoulder development requires a better thought-out approach to training. By choosing specific exercises to emphasize power, strength, or particular muscle heads, you can take your shoulder development and strength to the next-level. Rethink your approach to shoulder training, incorporate the right movements, and you’ll be on the way to a stronger, wider set of delts.

References

  1. Baroni, B. M., Pompermayer, M. G., Cini, A., Peruzzolo, A. S., Radaelli, R., Brusco, C. M., & Pinto, R. S. (2017). Full Range of Motion Induces Greater Muscle Damage Than Partial Range of Motion in Elbow Flexion Exercise With Free Weights. Journal of strength and conditioning research31(8), 2223–2230. https://doi.org/10.1519/JSC.0000000000001562
  2. Nazário-de-Rezende, Fernando et al. Déficit bilateral em exercício multiarticular para membros superiores. Revista Brasileira de Medicina do Esporte [online]. 2012, v. 18, n. 6 [Accessed 26 October 2022] , pp. 385-389. Available from: <https://doi.org/10.1590/S1517-86922012000600008>. Epub 14 Feb 2013. ISSN 1806-9940. https://doi.org/10.1590/S1517-86922012000600008.
  3. Dyrna, F., Kumar, N. S., Obopilwe, E., Scheiderer, B., Comer, B., Nowak, M., Romeo, A. A., Mazzocca, A. D., & Beitzel, K. (2018). Relationship Between Deltoid and Rotator Cuff Muscles During Dynamic Shoulder Abduction: A Biomechanical Study of Rotator Cuff Tear Progression. The American journal of sports medicine46(8), 1919–1926. https://doi.org/10.1177/0363546518768276
  4. Schoenfeld, B. J., Ogborn, D., & Krieger, J. W. (2016). Effects of Resistance Training Frequency on Measures of Muscle Hypertrophy: A Systematic Review and Meta-Analysis. Sports medicine (Auckland, N.Z.)46(11), 1689–1697. https://doi.org/10.1007/s40279-016-0543-8

Featured Image: Halfpoint / Shutterstock

The post The 15 Best Shoulder Exercises for Width and Strength appeared first on Breaking Muscle.

Be Nice and Share!
This post was originally published on this site

Originally Posted At: https://breakingmuscle.com/feed/rss

Most lifters in the gym have performed the classic flat bench press to build chest size and upper body pressing strength. When it comes to variations of this time-honored exercise, most lifters adjust the angle to target the “upper chest” using an incline press or focus on the “lower pecs” with a decline bench.

muscular person in gym performing barbell press
Credit: ARENA Creative / Shutterstock

However, many people overlook a highly effective adjustment right at their fingertips, literally. By moving your hand position slightly inward, you turn the chest-building flat bench press into the triceps-building close-grip bench press.

This changes the training stimulus and emphasizes the tricep muscles, increases the movement’s range of motion, and still builds serious upper body pressing power. Here’s everything you need to know about getting started with this simple movement for size and strength.

How to Do the Close-Grip Bench Press

The close-grip bench press biases the triceps muscles with specific exercise performance and a longer range of motion. As its name implies, the close-grip bench press requires your hands to be closer than during a standard bench press. This increases the range of motion and puts your elbows through more elbow flexion and extension, which emphasizes your triceps over your chest.

Step 1 — Set Up on the Bench

person in gym preparing to bench press
Credit: MDV Edwards / Shutterstock

Lie down on a flat bench. Push your feet into the floor to slide yourself up the bench until your eye are under the barbell. Pull your shoulders down and back. Place your hands around the bar in a pronated (palm down) grip with your hands close to shoulder-width apart. (1)

The basic technique should almost identical to your standard flat bench press setup. The primary difference is that your hands should now be at least one fist-width (four to six inches) closer than the chest-focused exercise. This is essential for recruiting more triceps into the movement.

Form Tip: While a relatively close grip is necessary, taking an excessively close grip can be counterproductive, creating more joint strain and less muscular stress. Some old school lifters believe your thumbs should be able to touch during the close-grip bench press. This is inaccurate, impractical, and inefficient advice. Having your hands roughly in line with your shoulders will be effective for the majority of lifters.

Step 2 — Unrack the Bar

muscular person in gym performing bench press
Credit: Reshetnikov_art / Shutterstock

Fill your belly and chest with a deep breath and lift the bar from the support pins. Maintain full body tension from your flat feet through your core to your shoulders.

With stiff arms, guide the bar forward until it is over your shoulders. Keep your shoulders pinched back to engage your upper back for support.

Form Tip: The bar should feel balanced when it settles into the ideal position. If you feel like you’re “fighting” an unstable weight above your body, it is either still too far above your face or too far toward your abs. Control the weight and reach a strong, stable position before lowering the weight.

Step 3 — Lower the Bar

person lowering barbell to chest
Credit: Skydive Erick / Shutterstock

Lower the bar toward your torso, keeping your elbows stacked under your wrists. This position keeps your tricep under tension, avoids compensation from the deltoids (shoulders), and minimizes strain on your joints.

Keep your elbows close to your ribs. If they begin to flare out to the sides, tuck them back in toward your body. Bring the bar down as close to your body as your mobility allows, ideally reaching near your sternum and lower chest.

Form Tip: Don’t allow your wrists to bend back throughout the rep. Keep your knuckles facing the ceiling. This will keep your wrists in a more favorable, less stressful position. It also helps to keep your wrists stacked above your elbows, which is a more powerful pressing position than falling out of line.

Step 4 — Press to the Starting Position

person in gym doing bench press
Credit: Daniel Krason / Shutterstock

After reaching your maximum comfortable depth, press the bar up to its starting position. Keep your feet flat on the floor and feel total-body engagement. Maintain a neutral wrist position above your elbows.

The bar should end up balanced directly over your shoulders, in the same position it was in after being unracked.

Form Tip: Because the objective of the exercise is to challenge the triceps, actively squeeze your triceps in the locked out position before performing the next repetition.

Close-Grip Bench Press Mistakes to Avoid

There are multiple mistakes that can happen in the close-grip bench press because this free weight exercise has many variables that must be controlled by the lifter.

In contrast, certain machine exercises can lock you into pre-determined positions that do not offer as much positional choice. In other words, manipulating a barbell requires more focus and more muscular control than a similar machine movement. Here’s what to watch out for during this exercise.

Elbows Flaring Out

This is probably the most common mistake people make when doing any triceps exercise. Your elbows must track under your wrists to emphasize the lengthening of the muscle during the eccentric, or lowering phase, of the repetition.

person in gym performing bench press
Credit: Sarayut Sridee / Shutterstock

When your elbows flare out to the sides, your shoulders are more strongly contracted, which reduces the load on the triceps.

Avoid it: Use a slow tempo when bringing the bar down toward your chest. Take three seconds to lower the weight and focus controlling your elbow angle. Keep your elbows forward toward your feet rather than out to the side. Once you’ve practiced and feel comfortable, gradually increase the bar speed to a point in which you are able to control your elbow position throughout the entire movement.

Gripping Too Narrow or Too Wide

If your grip is too narrow, your elbows will likely flare out excessively, forcing your deltoids to contribute more to the movement. A too-narrow grip position can also contribute to internal rotation of the shoulder which, over time, may increase the risk of injury to the supraspinatus muscle of the shoulder joint.

muscular person in gym holding barbell overhead
Credit: David Herraez Calzada / Shutterstock

However, a grip that’s too wide can be just as counterproductive, by decreasing the demand on the triceps and increasing chest recruitment. A close-grip bench press without a close grip is a plain old bench press.

Avoid it: Research has shown that the optimal grip for a close-grip bench press is the the same as the distance between the acromion (outer edge) of your shoulder blades.(2) During the setup phase of the exercise, place your hands shoulder-distance apart with your wrists, elbows, and shoulders in a straight line. This will create a customized grip as everyone has a unique shoulder width, rather than telling every lifter in every gym to arbitrarily set their hands 18 inches apart, for example.

Inefficient Bar Path

It is important to remember that the bar path in the bench press is not a strictly vertical line. The bar begins over your shoulders and will travel down and slightly forward as it’s lowered, in a slight arc-like path.

Compared to the standard bench press, the close-grip bench press has an increased range of motion and will therefore have a different touch-point on the body and a different bar path than the standard bench press.

person in gym lower barbell in bench press
Credit: Hryshchyshen Serhii / Shutterstock

It is important to remember that the bar will touch lower on your chest in a close-grip bench than a standard bench press. If you attempt to use the same touch-point for both movements, it will lead to excessive elbow flare to compensate for the inefficient motion.

Avoid it: Aim for the bar to touch around the narrowing point of the bottom of your sternum — the xiphoid process. However, the exact spot will vary slightly from person to person based on their arm length, ribcage size, and overall body position.

How to Progress the Close-Grip Bench Press

As a basic barbell exercise, the close-grip bench press can be adapted to suit a wide range of lifters’ capabilities with progressively heavier weights. However, if individuals cannot yet manage a full range of motion with the barbell, there are a few options to help achieve the exercise.

Close-Grip Floor Press

The floor press variation reinforces the same close-grip setup and general bar path with a reduced range of motion. While one benefit of the close-grip bench press (performed on a flat bench) is a relatively long range of motion, this floor press variation eliminates the lower portion of the exercise. This reduces shoulder strain while maintaining muscular stress on the triceps.

The close-grip floor press allows you to become familiar with the grip width and hand position, and encourages proper form while staying tight and controlling the movement. Don’t allow your elbows to rest on the ground.

Paused Close-Grip Bench Press

By incorporating a deliberate, long pause at the bottom and top of each repetition, you reinforce proper mechanics throughout the movement. Pause in the bottom, stretched position of every rep for two seconds. It’s crucial that you maintain tension and do not relax with the bar resting on your chest. Your muscles should be tight and engaged for the duration.

Press normally and hold the locked out position for two seconds. Again, don’t treat the pause as an opportunity for rest. Grip the bar hard, flex your triceps, and engage your core before lowering the weight again.

Benefits of the Close-Grip Bench Press

The close-grip bench press has multiple benefits, from performance to aesthetics and even longevity in barbell training. Here’s why you should incorporate this useful movement.

Strength and Performance

For powerlifters or gym-goers looking to increase their max bench press, the close-grip bench press has specific benefits with direct carryover to your bench. If you struggle specifically at lockout, you likely need to improve your triceps strength.

The close-grip bench press primarily challenges the triceps, leading to greater pressing strength.(3) This simple exercise variation could be what is missing from your training routine to push through your sticking point and reach a new bench press PR.

Muscle-Building and Aesthetics

Filling out the sleeves of a shirt is never a bad idea. While triceps dips and pushdowns challenge the lateral head of the triceps in particular, the close-grip bench press significantly recruits the medial and lateral head, leading to more well-rounded muscular development.

This compound (multi-joint) movement also has an increased effect on muscle hypertrophy because it allows you to use relatively heavy weights, which can be useful for stimulating growth.(4)

Joint Health

If you consistently train using a limited range of motion for any muscle or exercise, you can develop strength in that range. However, this can also create a greater risk for strains and tears when those muscles are put through a greater range of motion with “fully lengthened” or “fully shortened” positions. (5)

gray-haired person in gym performing bench press
Credit: Halfpoint / Shutterstock

The close-grip bench press does challenge a greater range of motion than the standard grip due to the positioning of the hands on the bar. The shoulder joints are worked through a longer distance. This will stress the triceps in the lengthened ranges, making them more robust and relatively less prone to injury.

Muscles Worked by the Close-Grip Bench Press

The close-grip bench press is most commonly known for challenging the triceps muscles, however there are more muscles involved than you may think.

Pectorals Major and Minor

The pectoralis major and pectoralis minor are your chest muscles and, while they are not the major contributors to the close-grip bench press, they do play an important role in the movement. During both the concentric (lifting) and eccentric (lowering) phases, both the pec major and minor are recruited to lift the weight and push your arms upward.

Anterior Deltoid

Your shoulder is comprised of three separate heads — the front (anterior), side (lateral), and rear (posterior). Each helps to raise the arm in its respective direction from your body’s midline. The anterior deltoid, specifically, contributes to raising and lowering your upper arm during the close-grip bench press.

However, be aware that if your anterior deltoid is fatiguing before other muscles groups during the exercise, your elbows are likely flaring too much. Adjusting your grip and/or bar path should ensure maximum focus on your triceps.

Triceps Brachii

Your triceps make up the majority of your upper arm, relative to your biceps. The triceps muscle consists of three heads — the lateral, medial, and long head — and together their main action is to extend the arm from a bent elbow position to full to elbow extension. The triceps contraction is emphasized in the lockout of the exercise where the triceps are more strongly recruited.

How to Program the Close-Grip Bench Press

When programming the close-grip bench press, the main consideration needs to be your goal. The most effective approach will be determined by what you want to achieve with the movement and how it fits into your overall training plan.

Strength

To prioritize strength-building, reps need to be kept in a relatively lower range while working with higher percentages of your one-repetition max (1RM). Train with two to six sets of one to five reps, using 80 to 95% of 1RM.

The amount of sets can vary based on your experience, conditioning, and abilities. More is not always better if you can’t handle it. Regardless of your total training volume, focus on using a fast bar speed and fully locking out each repetition.

Hypertrophy

Using moderate to high sets with moderate to higher reps will provide a greater hypertrophy adaptation. For muscle growth to occur, the muscle needs stimulus, volume, and fatigue.(6) Work with three to six sets eight to 20 repetitions, using of 55-65% of 1RM.

The goal is to reach muscular fatigue at the end of each set. If you’re performing more triceps-focused exercises in the same workout, use fewer sets and reps. If the close-grip bench press is your primary triceps exercise, give it the higher end of the workload.

Close-Grip Bench Press Variations

Beyond the close-grip bench press itself, there are some variations you can implement for comparable benefits of hypertrophy and improving your pressing power.

Banded Close-Grip Bench Press

To increase pressing power and/or improve your lockout ability, adding resistance bands of various tension to the close-grip bench press will challenge upper range of motion. Resistance bands offer accommodating resistance — they get more challenging as they’re stretched farther and offer relatively less resistance before they’re maximally stretched.

The biomechanics of the bench press, the lockout position requires less energy and benefits from a leverage advantage. As your elbows become more extended, the weight feels “lighter.” Bands require you to apply maximum tension as resistance increases toward the top position, forcing a stronger contraction. As the bar travels upward, band tension increases at the lockout. This forces you to consciously produce more power and drive hard to achieve lockout.

Machine Press

This is an excellent variation for hypertrophy goals. Using any machine that mimics a similar set up as the close-grip bench gives you more options for hypertrophy. The design of machines allows lifters to efficiently incorporate a variety of high-intensity techniques for increased training stimulus.

Options such as such as drop sets, partial reps, or even forced reps with a training partner allow for greater variations in your workouts. This is also a safer option than training beyond muscular fatigue with the close-grip bench press.

Close-Grip Push-Up

This triceps-focused push-up variation is a nice complement to any training program, as a primary exercise or as a muscle-exhausting finishing movement. Since your hands are closer together, like the close-grip bench press, the range of motion is greater than a standard push-up, thus making it more challenging.

If you cannot perform a full range of motion rep from your toes, you opt for modified versions such as a close-grip inclined push-up (with your hands elevated on a bench) or a kneeling close-grip push up.

Frequently Asked Questions

Why does the close-grip bench press hurt my shoulder?

There could be multiple factors at work, but most people’s shoulders hurt due to a lack of stability in the upper back. This requires a better focus on scapular retraction and depression — pulling your shoulder blades together and down.

During the exercise, make sure to squeeze your shoulder blades back toward your spine and “tuck” them down toward your back pockets. This stabilizes your entire shoulder girdle to support the load. If it’s done incorrectly, or not at all, your anterior deltoid is more strongly activated as your shoulder goes into protraction (reaching forward) and elevation (shrugging up to your ears).

A variety of upper back strengthening exercises and mobility drills can help, along with drilling proper pressing technique and cueing your upper back stabilizers before unracking the bar.

What alternative can I do if I don’t have a bench?

Any exercise that challenges your upper body pressing muscles in a supine position can be an effective alternative. If you don’t have a bench but can lie on the floor, this is a great alternative. A dumbbell or barbell floor press is a great exercise whenever a bench is unavailable. The focus on the upper half of the range of motion further emphasizes triceps recruitment.

Most commercial gyms have steps, boxes, and risers that can be used as modified bench. Ideally, you want the improvised bench to be the same height as a standard one. Place a yoga mat on top of the step or box to reduce the risk of your torso slipping off.

Get a Grip on Your Bench

The close-grip bench press can be performed either as an assistance exercise to boost your classic bench press or it can be approached as a main movement on its own to develop a stronger upper body. The added arm size is an incidental bonus. Apply this simple grip adjustment to a time-tested movement and you’ll soon welcome new levels of size and strength.

References

  1. Lockie, Robert & Moreno, Matthew. (2017). The Close-Grip Bench Press. Strength and Conditioning Journal. 39. 1. 10.1519/SSC.0000000000000307.
  2. Larsen, S., Gomo, O., & van den Tillaar, R. (2021). A Biomechanical Analysis of Wide, Medium, and Narrow Grip Width Effects on Kinematics, Horizontal Kinetics, and Muscle Activity on the Sticking Region in Recreationally Trained Males During 1-RM Bench Pressing. Frontiers in sports and active living2, 637066. https://doi.org/10.3389/fspor.2020.637066
  3. Saeterbakken, A. H., Stien, N., Pedersen, H., Solstad, T., Cumming, K. T., & Andersen, V. (2021). The Effect of Grip Width on Muscle Strength and Electromyographic Activity in Bench Press among Novice- and Resistance-Trained Men. International journal of environmental research and public health18(12), 6444. https://doi.org/10.3390/ijerph18126444
  4. Brandão, Lucas & Painelli, Vitor & Lasevicius, Thiago & Silva-Batista, Carla & Brendon, Helderson & Schoenfeld, Brad & Aihara, Andre & Cardoso, Fabiano & Peres, Bergson & Teixeira, Emerson. (2020). Varying the Order of Combinations of Single- and Multi-Joint Exercises Differentially Affects Resistance Training Adaptations. Journal of Strength and Conditioning Research. 34. 1. 10.1519/JSC.0000000000003550.
  5. Valamatos, M. J., Tavares, F., Santos, R. M., Veloso, A. P., & Mil-Homens, P. (2018). Influence of full range of motion vs. equalized partial range of motion training on muscle architecture and mechanical properties. European journal of applied physiology118(9), 1969–1983. https://doi.org/10.1007/s00421-018-3932-x
  6. Mangine, G. T., Hoffman, J. R., Gonzalez, A. M., Townsend, J. R., Wells, A. J., Jajtner, A. R., Beyer, K. S., Boone, C. H., Miramonti, A. A., Wang, R., LaMonica, M. B., Fukuda, D. H., Ratamess, N. A., & Stout, J. R. (2015). The effect of training volume and intensity on improvements in muscular strength and size in resistance-trained men. Physiological reports3(8), e12472. https://doi.org/10.14814/phy2.12472

Featured Image: Daniel Krason / Shutterstock

The post How to Do the Close-Grip Bench Press for Bigger, Stronger Triceps appeared first on Breaking Muscle.
Be Nice and Share!
This post was originally published on this site

http://www.marksdailyapple.com/

A man with psoriasis on his leg does exercises at home.Psoriasis is a skin disorder in which your skin cells reproduce too quickly, leading to scaly skin, rashes, or blisters. With plaque psoriasis (the most common form), red, flaky patches rise on the scalp, face, knees, elbows, lower back—anywhere on the body, really. Other types present differently. Inverse psoriasis, for example, appears as smooth red blotches mostly in skin folds, while the relatively rare erythrodermic psoriasis causes skin peeling on large areas of the body. Psoriasis can also affect fingernails and toenails.

Not only is psoriasis often itchy or painful, it can take a serious emotional toll. Patients report feeling embarrassed or stigmatized because of their skin’s appearance. Although there are a number of pharmaceutical, over-the-counter, and natural treatments available, there is no cure for psoriasis. The goal of treatment is to manage symptoms and put it into remission, but flare-ups can (and for many people do) occur regularly. 

For folks living with psoriasis, it can be hard to find relief. Some aspects of a Primal lifestyle may be able to help. 

What Causes Psoriasis

Scientists believe that psoriasis is caused by a combination of genetic predisposition and environmental triggers. But despite its prevalence—about 3 percent of U.S. adults have psoriasis1—it’s still somewhat inscrutable. 

Psoriasis is often confused with eczema, even by people making the diagnosis. Your doctor may opt for a skin biopsy to be sure. Both can present as dry, itchy, inflamed skin. And both may be triggered by stress, skin injuries, and cold, dry environments. However, they have different causes (only somewhat understood). With eczema, skin is overly sensitive due to dysregulation in the immune system, but skin cells do not turn over rapidly as with psoriasis. And whereas eczema is more common in kids, psoriasis is more common in adults. 

Most experts agree that psoriasis is an autoimmune disorder. Skin issues are the outward manifestation of the disease, but under the surface lurks chronic, systemic inflammation. People with psoriasis are at greater risk for other chronic health conditions like metabolic syndrome, cardiovascular disease, Crohn’s disease, diabetes, depression, and kidney and liver diseases.2 3 Around one in three people with psoriasis also develop a related condition called psoriatic arthritis. The worse your psoriasis, the greater the risk of developing these comorbidities. 

However, experts are unsure whether psoriasis causes inflammation, in turn leading to other problems. Another possibility is that some common factor leads to systemic inflammation which causes both psoriasis and other disorders to develop concurrently. Either way, strategies aimed at mitigating inflammation, like some of the ones I’ll mention today, are a must for psoriasis sufferers. 

How to Treat Psoriasis

There are several pharmaceutical options available. Whether or not you decide to go down that route is a decision you have to make with your doctor. Some of these drugs may reduce the risk of cardiovascular disease and other serious comorbidities. But like all drugs, they also have side effects. Some common psoriasis medications (acitretin, methotrexate, tazarotene) are not safe during pregnancy. The American Academy of Dermatologists advises people who are planning to become pregnant to avoid these medications (men should also avoid methotrexate when trying to conceive). 

Whatever you decide, I know a lot of my readers will also be interested in exploring nutrition, supplementation, and other behavioral options to augment their treatment. Psoriasis is notoriously stubborn. Even when someone is in remission, stress, illness, injury, certain medications, cold weather, and smoking or drinking alcohol can trigger a flare-up. It’s wise, therefore, to seek a multi-pronged approach aimed at tackling the rashes (outside) and managing inflammation (inside). 

Treating psoriasis with diet interventions

Eating a diet low in foods that cause inflammation and gut issues should be a top priority for psoriasis patients. First and foremost, I’d strongly suggest that anyone with psoriasis eliminate gluten. Celiac disease is three times more prevalent among psoriasis patients than in the general population.4 Mon-celiac gluten sensitivity probably is much more common as well. Of course, I don’t think anyone needs to be eating grains, but avoidance is an especially good idea for folks with autoimmune illness.  

Beyond that, you might consider trying an elimination and reintroduction diet like an autoimmune protocol, or AIP. AIP is no fun, but it might be worth it, especially if your psoriasis is poorly managed currently. Just don’t skip the reintroduction part. The idea isn’t to strictly limit your food choices forever but to identify trigger foods so you have more control over flare-ups.

And seriously moderating or avoiding alcohol is a no-brainer, both because it can intensify symptoms and due to the increased risk of liver disease.5 

Supplements to try

Supplementing with fish oil, selenium, and vitamins D and B12 may help, although some people don’t notice any particular benefit.6 (B12 and D, along with vitamin A, might also be useful when applied topically.7)

There is also a lot of interest in curcumin, a compound found in turmeric. A number of small trials have yielded some success, but it’s still early. A recent meta-analysis concluded that the available data do not support using curcumin topically, but taking it as an oral supplement shows promise.8

Stress reduction

As I’ve mentioned, stress leads to psoriasis flare-ups.9 Therefore, it’s worthwhile to moderate stress however you can manage.

Meditation and guided imagery seem to work.10 Treat yourself to a relaxing Epsom salt or oatmeal bath, then apply some of the topical treatments below.

Phototherapy

A variety of different phototherapy options are available to treat psoriasis. The best one for you depends on the type of psoriasis you have and how severe it is. Your doctor might opt for narrowband or broadband UVB, UVA, pulsed dye laser, LED, red light therapy, or something else based on your case.11 

Nature’s original phototherapy—aka sunlight—can also be an effective tool. Some psoriasis meds make you more photosensitive, though, so be aware. 

Topical treatments

Your doctor might recommend creams with salicylic acid, zinc pyrithione, or coal tar. Some folks are wary of the latter due to possible carcinogenic effects. Human studies suggest coal tar is safe when applied topically in creams or shampoos, and the FDA has deemed it so. Go with your comfort level here.

If you’re interested in a more natural route, try aloe vera, apple cider vinegar (diluted 1:1 with water), tea tree oil, or mahonia (Oregon grape) cream.12

The Bottom Line

Psoriasis is an autoimmune condition where your skin cells turn over too quickly, causing red, flaky, itchy, painful rashes. You can’t cure it, but you can get symptom relief. I’ve received quite a few Success Stories over the years from readers whose psoriasis went into remission after they started following the Primal Blueprint. I chalk that up primarily to removing pro-inflammatory foods, but sun exposure and stress management surely help too. 

Even with your best efforts, psoriasis flares are likely to come and go throughout your life. The best thing you can do is experiment. Find the combination of treatments that your skin responds to best to so you’re prepared next time. 

Primal Kitchen 7 Days, 7 Salads Challenge

The post Psoriasis: Causes and Treatments appeared first on Mark’s Daily Apple.

Be Nice and Share!
This post was originally published on this site

Originally Posted At: https://breakingmuscle.com/feed/rss

There are a lot of potential up-and-comers who could make some noise at the 2022 Mr. Olympia. Current International Federation of Bodybuilding and Fitness (IFBB) Pro League rookie Michal Križánek might be one of them.

In mid-July 2022, Križánek announced that he would be switching to the IFBB Pro League. A few months later, in October 2022, he earned his official IFBB Pro League card by winning the 2022 Amateur Olympia Italy. Now, with his first IFBB Pro League contest — the 2022 EVLS Prague Pro — on the horizon, the athlete shared a look at where he stands physique-wise in an Oct. 21, 2022, Instagram post. (Note: That contest will take place on Oct. 29, 2022, in Prague, Czech Republic.)

[Related: How to Eat More for Muscle and Strength Gains]

For someone vying for a roster spot in December’s Olympia, Križánek certainly looks the part of a shredded, well-trained mass dynamo. With a potentially momentous performance awaiting Križánek at the 2022 EVLS Prague Pro, he preceded this physique update with a short breakdown of a recent chest workout that he posted to his YouTube channel on Oct. 20, 2022.

Here’s an overview of that routine:

Michal Križánek | Chest Workout, Oct. 20, 2022

(Note: Specific reps were undisclosed.)

[Related: 11 Loaded Carry Variations Worth Trying]

Should Križánek transfer his training output and recent success to the stage in Prague, a victory would garner him automatic qualification to the 2022 Mr. Olympia. If he does not win, the athlete would need to take home a top-five result, at minimum, to earn points in the Olympia qualification standings. (Note: Only the top three in each bodybuilding division will qualify for the Olympia on a points basis. The points qualification period ends on Nov. 20, 2022.)

According to the IFBB website, the 2022 EVLS Prague Pro is a Tier 3 contest. That means second through fifth-place finishers will earn successive points ranging from six to three. With zero IFBB Pro League contests to his name, these points would be Križánek’s first as a professional in the event he doesn’t win outright.

[Related: Forced Reps — What They Are and How to Use Them]

It’s been quite a long and winding competitive journey for Križánek over the past few months. A victory in 2022 EVLS Prague Pro would assuredly not end it. The bodybuilder, like his peers, has aspirations of excelling on the Olympia stage. At his rapid pace of progression, it’s not clear what, if anything, could halt those dreams.

The 2022 Mr. Olympia will take place on Dec. 16-18, 2022, in Las Vegas, NV.

Featured image: @ifbb_pro_michalkrizokrizanek on Instagram

The post Bodybuilder Michal Križánek Looks Shredded Before His IFBB Pro League Debut appeared first on Breaking Muscle.
Be Nice and Share!
This post was originally published on this site

Originally Posted At: https://breakingmuscle.com/feed/rss

After almost three years away from competitive strength sports, Hafthor Björnsson is ready to go full throttle again and dial up the unique power that helps him live up to the nickname of “The Mountain.”

On Oct. 22, 2022, Björnsson shared a video on his YouTube channel where he trains and works through a light deadlift session while making a significant career announcement — he will be making a return to sanctioned powerlifting. The athlete disclosed that his first powerlifting appearance since December 2018 will happen on Dec. 3, 2022, but did not clarify what the competition is specifically.

[Related: The 12 Best Kettlebell Exercises for Conditioning, Mobility, and Strength]

Judging by Björnsson’s tenor while revealing his return to powerlifting, it seems the athlete will use this first undisclosed meet as a trial run of sorts. He wants to see “how the bar will react” while he lifts raw — a lifting style that can be a far cry from the lifting straps, wraps, and fully-equipped set-up of some strongman events.

In terms of setting reasonable expectations for himself as a powerlifter, Björnsson is aiming high. He wants to record a total of at least 1,000 kilograms (2,204.6 pounds). Björnsson’s all-time raw competition best total as a powerlifter is 1,100 kilograms (2,425 pounds) from the 2018 World Raw Powerlifting Federation (WRPF) Thor’s Powerlifting Challenge.

Here’s an overview of Björnsson’s all-time raw competition bests from his powerlifting career:

*Hafthor Björnsson | All-Time Raw Competition Powerlifting Bests

  • *Squat — No raw attempt
  • Bench Press — 250 kilograms (551.1 pounds)
  • Deadlift — 410 kilograms (903.9 pounds)
  • **Total — 506 kilograms (1,113.3 pounds)

*Note: According to Open Powerlifting, Björnsson has never recorded a raw squat during an official powerlifting contest.

**Note: According to Open Powerlifting, Björnsson has never competed in a three-lift raw powerlifting meet. This total includes only a bench press and deadlift.

[Related: Forced Reps — What They Are and How to Use Them]

Björnsson’s announcement of a powerlifting return comes on the heels of his “partial” comeback to strongman. In mid-October 2022, the 2018 World’s Strongest Man (WSM) champion revealed that he would push to break his own weight-over-bar World Record at the 2022 Rogue Invitational on Oct. 28-30. The current weight-over-bar mark from the 2019 Arnold Strongman Classic — which, again, Björnsson owns — is a weight of 56 pounds thrown over a height of 20’2″.

Should Björnsson officially surpass that record figure, he alluded to a future where he may try to break his own deadlift World Record of 501 kilograms (1,104.5 pounds) from the 2020 World’s Ultimate Strongman “Feats of Strength” series. In the event that the potential goal is successful, Björnsson would naturally be the first-ever strongman to deadlift over 501 kilograms.

[Related: 11 Loaded Carry Variations Worth Trying]

For an impeccably strong athlete like Björnsson, it appears he wants to rekindle the passions that pushed him to the top of the strength sports world. At this rate, knowing what Björnsson brings to the table, who’s to say the strongman/powerlifter won’t excel on a consistent level again?

Featured image: Hafthor Björnsson on YouTube

The post Hafthor Björnsson Plans to Make His Competitive Powerlifting Return appeared first on Breaking Muscle.
Be Nice and Share!
This post was originally published on this site

Originally Posted At: https://breakingmuscle.com/feed/rss

Max Shethar is no typical 20-year-old. Whereas many young people his age might focus on fitting general exercise into their otherwise packed schedules, the powerlifter spends much of his time training and refining his strength craft. That commitment is starting to pay off more and more.

On Oct. 23, 2022, Shethar (+140KG) shared a video of himself capturing a 342.3-kilogram (755-pound) raw back squat during the 2022 USA Powerlifting (USAPL) All-Valley Raw Championships. The contest took place in Bozeman, MT, on Oct. 22, 2022. According to Open Powerlifting, Shethar’s top squat is a new competition personal record (PR). The athlete wore a lifting belt, knee sleeves, and wrist wraps to help with the accomplishment.


View this post on Instagram


A post shared by Maxon Shethar (@the_one_rep_max)

[Related: 11 Loaded Carry Variations Worth Trying]

In addition to a new competition PR squat, a couple of other Instagram posts detailed that Shethar logged a 210-kilogram (463-pound) raw bench press PR. It wasn’t a PR try, but Shethar also made an unsuccessful attempt at deadlifting 355.1 kilograms (783 pounds) but could not lock out the rep. He would have to settle for a final pull of 330 kilograms (727.5 pounds). The athlete wore just wrist wraps for his bench press and just a lifting belt while deadlifting.

Here’s a complete overview of Shethar’s performance at the 2022 USAPL All-Valley Raw Championships:

Max Shethar (+140KG) | 2022 USAPL All-Valley Raw Championships Top Stats

  • Squat — 342.5 kilograms (755 pounds) | All-Time Raw Competition PR 
  • Bench Press — 210 kilograms (463 pounds) | All-Time Raw Competition PR
  • Deadlift — 330 kilograms (727.5 pounds)
  • Total — 882.5 kilograms (1,945.6 pounds)


View this post on Instagram


A post shared by Maxon Shethar (@the_one_rep_max)

[Related: Forced Reps — What They Are and How to Use Them]

This isn’t the first instance Shethar has shined on a sanctioned lifting platform this year.

In mid-June 2022, during a first-place performance at the 2022 United States Powerlifting Association (USPA) Drug Tested Matt Hurley Memorial Meet, the powerlifter broke two Juniors 18-19 World Records in the +140-kilogram division. The record marks were a 365-kilogram (804.7-pound) deadlift and a 907.2-kilogram (2,000-pound) total.

It was much of the same excellence for Shethar, sans any new records, during a first-place result at the 2022 USAPL Big Iron Classic State Championships. To this stage, since March 2017, he has never lost a powerlifting competition.

Here’s a rundown of some of the official results from Shethar’s career to date:

Max Shethar | Career Results*

  • 2017 USA Powerlifting (USAPL) Washington State Championships (93KG) — First place | Teen 1 division
  • 2018 USAPL Washington State Championships (125KG) — First place | Teen 1 division
  • 2018 USAPL Raw Nationals (125KG)— First place | Teen 2 division
  • 2019 USPA Drug Tested Washington State Open (+140KG) — First place | Juniors 16-17 division
  • 2021 USPA Ragnarok Invite II (140KG) — First place | Open/Juniors 18-19 division
  • 2022 USAPL Big Iron Classic State Championships (140KG) — First place | Open/Teen 3 division
  • 2022 USPA Drug Tested Matt Hurley Memorial Meet (+140KG) — First place | Open/Juniors 18-19 division

(*Note: At the time of this writing, the full results for the 2022 USAPL All-Valley Raw Championships contest have not been published, making it unclear precisely where Shethar finished.)

[Related: How to Do the Weighted Pull-Up — Benefits, Variations, and More]

After scoring his new PRs, Shethar might already have his next ambition in place. After joining the 800-plus-pound deadlift club in the summer of 2022, the athlete could be on a rapid path to an 800-plus-pound squat in the coming months. Whenever he does compete next; it’s apparent that Shethar may put on a show either way.

Featured image: @the_one_rep_max on Instagram.

The post 20-Year-Old Powerlifter Max Shethar (+140KG) Scores 755-Pound Squat, 463-Pound Bench Press PRs appeared first on Breaking Muscle.
Be Nice and Share!
This post was originally published on this site

http://www.marksdailyapple.com/

We’re officially celebrating 16 years here on Mark’s Daily Apple! To kick off a week of celebratory content we’re highlighting some of our most popular recipes here on the blog. From morning coffee to Mark’s Big Ass salad to slow-cooked pork carnitas there’s a recipe for every occasion. If you re-create any of our top recipes be sure to share photos with us on the MDA Instagram!

Primal Egg Coffee

Forget adding butter and coconut oil to your coffee. To truly supercharge your morning brew, add a few pastured egg yolks. This recipe is ideal for anyone who has a busy day ahead of them as egg coffee seems to work well pre-workout, boosting energy, motivation, and providing a nice source of branched-chain amino acids for the training ahead.

Get the Recipe!

Primal N’Oatmeal

On mornings when a bowl of oatmeal is what your body craves, this hearty and comforting Primal breakfast cereal is exactly what you need. Coconut flakes, almonds, pecans, and the milk of your choice are blended into a creamy, oatmeal-like cereal that’s sweetened with a single Medjool date and topped with fresh berries.

Get the Recipe!

Instant Pot “Sous Vide” Egg Bites

finished instant pot sous vide egg bites recipe on a board

Food cooked sous vide is delicious. The temperature is so precisely controlled that there’s virtually no risk of overcooking or undercooking, and for the most part, it’s a hands-off cooking method. Still, it’s cost-prohibitive for a lot of kitchens. The solution? These adorable little egg bites are not actually made in a sous vide, but instead in an Instant Pot. The end result is a light and fluffy egg bite bursting with flavor.

Get the Recipe!

Mark’s Big-Ass Keto Salad

Most of our reader’s have heard of Mark’s daily “big-ass salad.” It’s been a lunch of choice for a couple of decades at least. Over the years Mark adapted it to his personal tastes, nutritional experiments, and eventually keto practice. While some minimize vegetable intake when they’re eating keto, Mark has never found that necessary or beneficial. In fact, he highly recommends plenty of above-ground vegetables and even berries for an optimally varied, nutrient-dense keto diet.

Get the Recipe!

Bacon, Egg, Avocado, and Tomato Salad

Bacon, egg, avocado, tomato salad on white plate with form and lemon wedge

You’ve probably heard of BLTs and BLTAs, but have you heard of BEATs? We’re talking Bacon, Egg, Avocado, and Tomato salad. It’s a favorite around here for a quick and easy meal that is ready in less than two minutes if you already have hard-boiled eggs in the fridge. The secret ingredient is a squirt of lemon juice, which heightens the flavor and adds brightness to this otherwise simple but very satisfying salad.

Get the Recipe!

Greek Gyro Salad with Avocado Tzatziki

gyro taco salad with tzatziki guacamole recipe in a bowl

Inspiration struck after discovering Greek Tacos for the first time. The fresh Mediterranean flavors alongside silky avocado were impossible to ignore. This event let us to create a  deconstructed version, a Greek Gyro Salad Recipe.

Get the Recipe!

Ginger Turmeric Chicken Soup

This is the ultimate cold weather soup and perfect to keep on rotation all winter long. It’s easy to make, and you’ll usually have most of the ingredients you need on hand – just pick up a couple turmeric roots on your next grocery trip that you can have ready for when the mood strikes.

Get the Recipe!

Baked Ham:Mustard & Rosemary, or Sweet-spiced Glazed

A succulent ham pairs well with virtually any side, looks impressive in your serving dish, and makes the best leftovers. The best part about a good baked ham recipe is that it’s easy to prepare, and cook time is short compared to other sizable cuts of meat. We offer two baked ham recipes that play off of ham’s smoky, salty qualities: one version with spicy mustard, rosemary, and a touch of honey to round it out, and the other version that uses a sweet-savory-salty-spiced ham glaze in a jar.

Get the Recipe!

Crispy Pork Carnitas

Plate of shredded pork carnitas, avocado, salsa, fresh cilantro

As if slow-cooked, succulent pork wasn’t tempting enough, carnitas takes it one step further by caramelizing the pork in its own fat until the outside is perfectly browned and crisp. It’s difficult to resist the crispy, tender morsels of pork that come out of the oven. Try not to eat so much meat right out of the pan that you’re full before the carnitas makes it to the tablePlate of shredded pork carnitas, avocado, salsa, cilantro!

Get the Recipe!

Chocolate Collagen Pudding

Sure, Collagen Fuel (or Primal Fuel) is great in smoothies and shakes, but what about when you’re looking for a lower-carb dessert option that doesn’t blow your macros out of the water? This Chocolate Collagen Pudding does the trick quite nicely. This recipe has all of the flavor and creaminess without the sugar and additives. With two scoops of collagen plus cocoa powder and coconut milk, it satisfies even the most discerning chocolate lover.

Get the Recipe!

Oil_&_Vinegar_640x80

The post Most Popular MDA Recipes appeared first on Mark’s Daily Apple.

Be Nice and Share!
This post was originally published on this site

http://www.marksdailyapple.com/

Man eating a granola bar while sitting in front of buildingHey folks, Board-Certified Health Coach, and Primal Health Coach Institute’s Coaching Director, Erin Power is here to answer your questions about satiating hunger and tracking food. If you’re looking for skillful, caring guidance we’ve got strategies, tips, and support. Have a question you’d like to ask our health coaches? Leave it below in the comments or over in the Mark’s Daily Apple Facebook group.

Satiating hunger

Tamara asked:
“What’s the best way to stop feeling hungry between meals? I depend on snacks to get me through.”

Ah, hunger and snacking. You’re not alone with this question, Tamara. You know, I think one of the reasons we reach for snacks is…because we’re hungry. That may sound funny, but I’m being serious. Sure, many folks snack out of stress, boredom, or emotional eating. But I’ve helped many coaching clients cure that sort of mindless eating simply by helping them go through life more well-fed.

Now, to be clear, there are certain foods and lifestyle factors that mess with our hormonal and other signaling systems. A diet high in processed carbs and sweets tends to interfere with our natural, healthy hunger and satiation signals. It also causes our body to revolt against the constant insulin bath triggered by MORE carbs, MORE sugar, and frequent snacking. Similarly, lack of sleep and chronic stress and anxiety mess with our hormones and can throw hunger signals way out of whack.

But if you’re eating a Primal diet featuring an abundance of real, whole, minimally processed food, including high-quality protein and healthy fats, you’re well on your way to being in touch with true hunger and minimizing the need (or desire) for snacking.

However, if you’re eating Primal most of the time and still feeling hungry throughout the day, I’ve got a fairly dependable solution: more protein.

Here’s the thing: Your hunger comes from your cells, and your cells require nourishment. Specifically, they need:

  • Fuel (calories to provide energy for your body and brain)
  • Building blocks (amino acids and essential fatty acids that help your body continuously build and repair itself)
  • Information (minerals, vitamins, cholesterol, prebiotic fibres, etc.—all of which have incredibly important and nuanced roles in bodily function)

When your cells ask for food (i.e., you feel hungry), it’s to satisfy these needs. If cells aren’t getting these needs met, they are undernourished and cry out for more nourishment.

Now, of course, every body is different, and people bring different health conditions, life circumstances, and goals to the table. That said, if we are to generalize, there’s an easy way to give your cells and body more of the calories, building blocks, and information they’re asking for: eat more protein. As one of the most nutrient dense “human foods” on planet earth, it ticks all of the boxes in terms of the nourishment our cells are asking for.

How much more protein? MORE. Rather than get caught up in measuring and micromanaging, keep things simple: just aim for more, and see how it goes.

Time and time again when working with coaching clients, I find that this simple rule of prioritizing protein completely changes the game with hunger, appetite, and cravings.

Why? Well, protein-rich foods are incredibly high in minerals and amino acids, two of the most important factors that your cells are crying out for. If you eat more protein, you will feel less hungry. And I can tell you from experience that walking around feeling less hungry is a miracle cure for mindless snacking. Start there, and see how it goes!

Tracking food

Randi asked:
“Do you believe in tracking food? Do YOU do it?”

When it comes to eating in ways that support and nourish us, there are many helpful strategies out there. For SOME people, tracking their food intake for a while can be helpful (whether they are doing it on their own or working with a coach).

Done in a supportive way, tracking food can help some people develop greater awareness around what they’re actually eating and how that makes them feel. It can also add a layer of accountability. The act of tracking influences our choices and in this way might lead to helpful change.

I say “supportive way,” because there are many ways of tracking food—some more helpful than others. What’s more, the particular method that’s supportive will differ from person to person. To be clear: I am not a fan of simply counting calories. If you’re up on the Primal basics, you know that the number of calories we consume is meaningless with considering food choice and the wider context. This goes for weight-loss goals, health goals, or anything else.

But what about more Primal-focused tracking, such as number of carbs? Or cutting numbers out altogether and simply journaling about food consumed and how it made you feel during and after?

Yes—depending on your goals and your individual tendencies when it comes to changing habits and implementing healthy change, those might be helpful. Only YOU will know this, however, and finding out whether it’s helping will likely take some self-experimentation and trial and error.

However, I do have a pretty big, important caveat. For some people (self included), tracking food is not helpful. In fact, it can reinforce stressful food patterns and even disordered eating. I’ve helped over a thousand clients lose fat, gain energy, and fit back into the pants hanging in the back of the closet—all without tracking, weighing, or counting their food.

Why? Well, for starters, if I told MY clients that they had to track, weigh, and count their food, they would bail.

Many coaches, nutritionists, and dietitians DO have their clients track food intake. Their clients are looking for a methodical, tactical way to keep tabs on their consumption, and they are even excited to count and measure their food. It motivates them, and many of them really like knowing the numbers.

But MY clients? No way in hell. My clients and I have already spent most of our lives worrying about every calorie in and every calorie out, undertaking strict dieting and punishing exercise. We are DONE. It’s not that we don’t want to track, or are too lazy to track, or are too undisciplined to track. It’s that we did that already—for decades. We lost most of our lives to food fixation.

We already know how many calories are in a medium-sized apple and how much protein is in a 4-ounce chicken breast. We won’t ever unlearn these random food factoids because we did them so hard. But that information is not helping and has not ever helped us to have a trusting, respectful relationship with our food and body. We are so exhausted from everything that feels like tracking and dieting that we just can’t bring ourselves to look at food that way again: as numbers.

The good news? Your body doesn’t look at it that way either.

Turns out, prior to the late 1970s and early 1980s, when we first started micromanaging our food in earnest, humans walked around generally lean and healthy without any fussy food fixation. They lived their lives in their body, enjoying food without journaling it. It’s your birthright to not have to track, weigh, or measure your food. It’s your birthright to have an effortless relationship with food and your body.

Getting back to this flexible, free, flow state is a process and is not always easy (to put it mildly!). Know what though? It’s also not as complicated as many people tend to make out. Even “just” prioritizing the 10 Primal Blueprint Rules a bit more of the time will already move you in the right direction.

Those “rules” work because they align with our biology. They work because they hark back to times when tracking food would have been not only unnecessary but ridiculous. Follow them (even just most of the time), and you’re already doing great. No tracking required.

If you’re still struggling or want an extra layer of motivation, inspiration, accountability, and support, that’s where a coach can come in. If so, and if you’re someone who does NOT find tracking helpful, just make sure to find a coach who gets that and can meet you where you are, in ways that best support YOU.

Whether or not you’re “Team Tracking,” working with a coach for even a month or two can help you put solid strategies in place for staying Primal and developing a kinder, more intuitive relationship with food and your body. Visit myprimalcoach.com to learn more and get started!

Do you track your food? Find it helpful, or not so much? Let us know and drop other questions for me in the comments!

myPrimalCoach

The post Ask a Health Coach: How Do I Stop Snacking? Do You Believe in Tracking Food? appeared first on Mark’s Daily Apple.

Be Nice and Share!
This post was originally published on this site

Originally Posted At: https://breakingmuscle.com/feed/rss

The biggest obstacle most lifters face has nothing to do with heavy weights, exercise technique, or anything in the gym. Plenty of people tackle their workouts with plenty of focus, discipline, and enthusiasm. The trouble is most don’t run into trouble in the squat rack as often as they do in the fridge.

Let’s be honest: Nutrition is often less glamorous than training. Straining and grinding in the gym is more appealing than deciding whether you should have the double-chicken burrito bowl with half rice and half beans or the double-steak burrito with no rice and extra guac.

muscular person eating food
Credit: ArtOfPhotos / Shutterstock

Plenty of well-designed training plans have been steered off-track because they weren’t supported by an equally well-designed nutrition plan.

Getting enough calories, carbs, protein, and fats can mean the difference between packing on size and hitting PRs or spinning your wheels and burning out. Here’s how to set up a “diet plan” that will help you build muscle and move heavier weights.

Calorie Requirements

Your total calorie intake is the be-all, end-all of gaining muscular body weight. No matter how finely tuned your workout program is, no matter how many grams of protein you’re eating every day, if your total calories are lacking, your body simply won’t have the raw materials to create new muscle tissue. (1)

Fortunately, nudging your body into growth-mode doesn’t have to involve 10-egg omelets, straight olive oil shooters, or gut-busting blender bombs loaded with peanut butter, oats, and whole milk. You can flip the muscle-building switch by adding roughly 300 to 500 calories per day. (2)

muscular person standing near two plates of food
Credit: Skydive Erick / Shutterstock

It could be as simple as eating your standard menu and adding one big glass of milk with an extra scoop of protein powder or having an after-lunch snack of a tuna salad sandwich and an apple. While that might not sound like some people’s idea of a traditional “bulking diet,” it’s a ballpark number that reinforces your ability to tackle the hardest training sessions, lift heavier, recover more completely, and build lean body mass (muscle). (3)

Perhaps more importantly, this surplus intake can also help to avoid potential drawbacks from training with insufficient calories. Too much training on too few calories can affect everything from workout recovery and performance to hormone levels and cardiovascular health. (4)

Just be sure not to tip the scales, literally, too far in your pursuit of size. Research has shown that a caloric surplus can be beneficial for size and strength, but there’s a point of diminishing returns where you gain more body fat than muscle, and strength gains won’t keep pace with your increasing body weight, which reduces your overall power and relative strength. (1)

To stay in the “enough, but not too much” zone, you’ll want to do a little math. Your body weight (in pounds) x 25 is a rough guideline to find your maximum intake. Anything beyond that point is likely going to push you into the red zone of low-quality gains.

Start with a more reasonable and sustainable addition of just a few hundred calories on top of your current daily diet and monitor your progress to adjust weekly or biweekly as needed.

Macros for Muscle and Strength

If calories were a sports car, macronutrients would be the tires, steering wheel, and engine — protein, carbohydrates, and fats are three essential components that determine whether or not you’ll actually get you where you want to go.

Every gram of protein and carbohydrate each contain four calories, while every gram of fat contains nine calories. While you might instinctively think “more fats equals more calories equals more size,” it’s not that simple.

Specific attention to your macronutrient breakdown will determine if your increased body weight comes from gaining lean muscle mass or simply gaining body fat. (5)

Protein

Protein is fundamentally “the muscle macro.” It’s composed of amino acids which are required for creating new muscle tissue. In fact, muscle protein synthesis and muscle protein breakdown are the two primary processes triggered by weight training which will determine whether or not you build muscle. (6)

Because protein plays such a significant role in muscle-building, it’s critical that you take in enough each day. One gram of protein per pound of bodyweight is a long-touted guideline for daily intake. Although an abundance of research suggests a more accurate .74 grams per pound of bodyweight to be the upper limit, beyond which, higher protein intake doesn’t trigger any additional growth.(7)

Sorry carnivores, but triple-bodyweight protein intake won’t lead to triple the gains. However, interestingly, when a calorie surplus includes a very high protein intake, the protein was shown to have what researchers called “a protective effect against fat gain during times of energy surplus.” (5) Translation: high calories with high protein leads to muscle growth and relatively less fat gain.

While animal-based products (meat, poultry, fish, eggs, and dairy) are the most common and most efficiently absorbed sources of protein, vegan and vegetarian foods have shown to be equally effective for supporting performance and recovery, but slightly less efficient for supporting muscle growth. (8)

Carbohydrates

Some nutrition plans manipulate carbohydrates because it can be an efficient way to trigger fat loss, but when it comes to building muscle and fueling weight training workouts, carbs are sometimes not given particular attention.

Having ample carbs throughout the day can support muscle growth by decreasing muscle protein breakdown. Carbs also provide energy and endurance during relatively high volume training (plenty of exercises, sets, and/or reps). (9)

Two muscular people in gym drinking shakes
Credit: MDV Edwards / Shutterstock

Ideally, aim for a total carb intake of two to three grams per pound of bodyweight per day to support performance, growth, and recovery. (10) If you’re weight training five or more days per week, lean towards a higher intake. If you’re training less often or following a low-volume training plan, your needs will be relatively lower.

While the majority of your carbs should come from whole-food sources like grains, legumes, tubers, and fruit, you should monitor the intake of simple carbs (sugar). Particularly when combined with excess calories, relatively high sugar intake is associated with fat gain. Keeping your simple sugar intake to roughly 10% of your daily calories will work towards minimizing this unwanted gain. (11)

Fats

Because they’re the most calorie-dense macronutrient, dietary fats require a keen approach when you’re increasing calories. It’s dangerously easy to overflow your calorie intake from excessively high fats.

Certain types of fats, specifically Omega-3s found in fish, have been shown to support muscle protein synthesis which can lead to more muscle growth. (12) Adequate fat intake is also important for supporting hormone levels, cardiovascular health, and your immune system. (13)

As part of a muscle-building, strength-boosting plan, aim to keep your fat intake 30% to 40% of your total daily calories. For example, if you’re eating 3,000 calories per day, that’s 900 to 1200 calories from fat. Because one gram of fat contains nine calories, it ends up at roughly 100 to 130 grams per day.

For optimal results, stick with natural animal fats (those found in animal-based protein sources), as well as nuts, olives, avocados, and coconuts. Overly processed liquid fats, like many bottled vegetable oils, can be counterproductive for long-term health and performance.

Meal Timing and Frequency

Three big, hearty meals per day has been a time-tested approach for old school bodybuilders, strongmen, and strength athletes. Eating smaller meals more frequently — as often as every two or three hours — is a relatively new approach modern lifters have had some success with.

A higher meal frequency is typically associated with fat loss plans, though it’s debatably effective. (14) The concept can also be applied to lifters wanting to gain muscular body weight.

person taking packed lunch from refrigerator
Credit: Monkey Business Images / Shutterstock

One significant factor is the individual’s habits, mindset, and overall digestion. Some lifters find it more practical to eat three relatively large meals per day, while others may have trouble regaining their appetite for lunch several hours after a big breakfast.

In the latter case, eating fewer calories more often is a way to reach the daily calorie target with minimal discomfort. The compromise with high-frequency meals is the necessity of interrupting your daily routine on a consistent basis to unpack and inhale a small meal.

Both methods can be effective as long as they deliver the target daily nutrition. However, extremely low-frequency eating — one or two meals per day — can make it more challenging to reach the daily calorie and macro goal. This reduced meal approach is also less efficient for stimulating protein synthesis, which makes it less effective for building muscle. (15)

The Anabolic Window Myth

Most experienced lifters have heard about “the anabolic window” — the crucial time period immediately after weight training where your body has been stimulated to such a degree that it will transmogrify any and all calories into heaps of new muscle tissue.

Bodybuilders in the 1950s would drink whole milk during their workouts, hardcore powerlifters have eaten peanut butter and jelly sandwiches between sets, and modern day lifters would sip on half-gallon concoctions of the latest scientific formulas. All in the hopes of catching the crucial window.

While it’s true that your body is in a highly responsive state during and immediately after a training session, it isn’t nearly as narrow as the “90 minutes or less” mantra that echoes through the gym.

muscular person outdoors drinking protein shake
Credit: PintoArt / Shutterstock

Having protein during a workout was shown to decrease muscle protein breakdown (a good thing for growth). (16) However, rather than a slim 60 or 90-minute “window,” a large amount of research supports a more broad approach that’s highly effective. Having a meal (or drink) containing protein and carbs within a six-hour window of your workout can efficiently maximize muscle protein synthesis and support optimal recovery. (17)

In fact, your body remains ready to efficiently put nutrients to use for recovery and growth for up to 24 hours after hard training. You could, in theory, neglect the “anabolic window” entirely, eat your standard meals at your standard times, and use those protein and carb-laden calories for muscle-building.

Many lifters find their appetite stimulated by intense training, and they tend to drink water during their workouts. Both are quick and simple opportunities to add quality calories to your day with minimal effort and maximum benefit.

Serious Training Needs Serious Eating

If want maximum results, you can’t just hit it hard in the gym and slack off when you head to your car. At best, you’ll end up spinning your wheels and struggling unnecessarily for every drop of progress. At worst, you’ll end up going backwards because poor recovery will your workouts harder and harder. If your goals include adding lean muscle and hitting big lifts, you won’t get there until you treat the spice rack as seriously as the squat rack.

Tips to Eat for Muscle and Strength

Still trying to skip the “boring nutrition stuff” and just want some quick takeaway points? No problem. Here are some ‘just do these’ ideas to kickstart new growth and bigger gains.

person sitting at table eating food
Credit: Ground Picture / Shutterstock
  • Building muscle doesn’t mean gorging. Add 300 to 500 calories per day, mostly from protein. Track progress before adding more calories.
  • Know your body and your appetite. Either plan on having “breakfast, lunch, workout shake, and dinner” or eat smaller meals five to seven times per day (having food every two to three hours). Your total calories should remain the same.
  • Aim for one gram of protein per pound of bodyweight. Having slightly less is still effective. Eating a bit more protein won’t build“extra muscle,” but may potentially fight against fat gain.
  • Aim for two to three grams of carbs per pound of bodyweight, primarily from whole-food sources and relatively low sugar. Using soda and candy as caloric filler may only hurt your physique.
  • Set your dietary fat intake at 30% to 40% of your total daily calories, most of which will likely come naturally from your protein sources.
  • For maximum results, have a pre-workout meal within three hours of starting your workout, drink protein and carbohydrates during training, and have a post-workout meal within three hours of ending your workout.

References

  1. Ribeiro, A. S., Nunes, J. P., Schoenfeld, B. J., Aguiar, A. F., & Cyrino, E. S. (2019). Effects of Different Dietary Energy Intake Following Resistance Training on Muscle Mass and Body Fat in Bodybuilders: A Pilot Study. Journal of human kinetics, 70, 125–134. https://doi.org/10.2478/hukin-2019-0038
  2. Slater, G. J., Dieter, B. P., Marsh, D. J., Helms, E. R., Shaw, G., & Iraki, J. (2019). Is an Energy Surplus Required to Maximize Skeletal Muscle Hypertrophy Associated With Resistance Training. Frontiers in nutrition, 6, 131. https://doi.org/10.3389/fnut.2019.00131
  3. Garthe, I., Raastad, T., Refsnes, P. E., & Sundgot-Borgen, J. (2013). Effect of nutritional intervention on body composition and performance in elite athletes. European journal of sport science, 13(3), 295–303. https://doi.org/10.1080/17461391.2011.643923
  4. Melin, A. K., Heikura, I. A., Tenforde, A., & Mountjoy, M. (2019). Energy Availability in Athletics: Health, Performance, and Physique. International journal of sport nutrition and exercise metabolism, 29(2), 152–164. https://doi.org/10.1123/ijsnem.2018-0201
  5. Leaf, A., & Antonio, J. (2017). The Effects of Overfeeding on Body Composition: The Role of Macronutrient Composition – A Narrative Review. International journal of exercise science, 10(8), 1275–1296.
  6. Stokes, T., Hector, A. J., Morton, R. W., McGlory, C., & Phillips, S. M. (2018). Recent Perspectives Regarding the Role of Dietary Protein for the Promotion of Muscle Hypertrophy with Resistance Exercise Training. Nutrients, 10(2), 180. https://doi.org/10.3390/nu10020180
  7. Morton, R. W., Murphy, K. T., McKellar, S. R., Schoenfeld, B. J., Henselmans, M., Helms, E., Aragon, A. A., Devries, M. C., Banfield, L., Krieger, J. W., & Phillips, S. M. (2018). A systematic review, meta-analysis and meta-regression of the effect of protein supplementation on resistance training-induced gains in muscle mass and strength in healthy adults. British journal of sports medicine, 52(6), 376–384. https://doi.org/10.1136/bjsports-2017-097608
  8. Pohl, A., Schünemann, F., Bersiner, K., & Gehlert, S. (2021). The Impact of Vegan and Vegetarian Diets on Physical Performance and Molecular Signaling in Skeletal Muscle. Nutrients, 13(11), 3884. https://doi.org/10.3390/nu13113884
  9. Mata, F., Valenzuela, P. L., Gimenez, J., Tur, C., Ferreria, D., Domínguez, R., Sanchez-Oliver, A. J., & Martínez Sanz, J. M. (2019). Carbohydrate Availability and Physical Performance: Physiological Overview and Practical Recommendations. Nutrients, 11(5), 1084. https://doi.org/10.3390/nu11051084
  10.  Richard B Kreider, Colin D Wilborn, Lem Taylor, Bill Campbell, Anthony L Almada, Rick Collins, Mathew Cooke, Conrad P Earnest, Mike Greenwood, Douglas S Kalman, Chad M Kerksick, Susan M Kleiner, Brian Leutholtz, Hector Lopez, Lonnie M Lowery, Ron Mendel, Abbie Smith, Marie Spano, Robert Wildman, Darryn S Willoughby, Tim N Ziegenfuss & Jose Antonio (2010) ISSN exercise & sport nutrition review: research & recommendations, Journal of the International Society of Sports Nutrition, 7:1, DOI: 10.1186/1550-2783-7-7
  11.  Te Morenga L, Mallard S, Mann J. Dietary sugars and body weight: systematic review and meta-analyses of randomised controlled trials and cohort studies BMJ 2013; 346 :e7492 doi:10.1136/bmj.e7492
  12.  Gordon I. Smith, Philip Atherton, Dominic N. Reeds, B. Selma Mohammed, Debbie Rankin, Michael J. Rennie, Bettina Mittendorfer; Omega-3 polyunsaturated fatty acids augment the muscle protein anabolic response to hyperinsulinaemia–hyperaminoacidaemia in healthy young and middle-aged men and women. Clin Sci (Lond) 1 September 2011; 121 (6): 267–278. doi: https://doi.org/10.1042/CS20100597
  13.  Venkatraman JT, Leddy J, Pendergast D. Dietary fats and immune status in athletes: clinical implications. Medicine and Science in Sports and Exercise. 2000 Jul;32(7 Suppl):S389-95. DOI: 10.1097/00005768-200007001-00003. PMID: 10910295.
  14.  Schoenfeld, B. J., Aragon, A. A., & Krieger, J. W. (2015). Effects of meal frequency on weight loss and body composition: a meta-analysis. Nutrition reviews, 73(2), 69–82. https://doi.org/10.1093/nutrit/nuu017
  15. Schoenfeld, B.J., Aragon, A.A. How much protein can the body use in a single meal for muscle-building? Implications for daily protein distribution. J Int Soc Sports Nutr 15, 10 (2018). https://doi.org/10.1186/s12970-018-0215-1
  16. Greenhaff, P. L., Karagounis, L. G., Peirce, N., Simpson, E. J., Hazell, M., Layfield, R., Wackerhage, H., Smith, K., Atherton, P., Selby, A., & Rennie, M. J. (2008). Disassociation between the effects of amino acids and insulin on signaling, ubiquitin ligases, and protein turnover in human muscle. American journal of physiology. Endocrinology and metabolism, 295(3), E595–E604. https://doi.org/10.1152/ajpendo.90411.2008
  17. Schoenfeld, B. J., & Aragon, A. A. (2018). Is There a Postworkout Anabolic Window of Opportunity for Nutrient Consumption? Clearing up Controversies. The Journal of orthopaedic and sports physical therapy, 48(12), 911–914. https://doi.org/10.2519/jospt.2018.0615

Featured Image: Jacob Lund / Shutterstock

The post How to Eat More for Muscle and Strength Gains appeared first on Breaking Muscle.
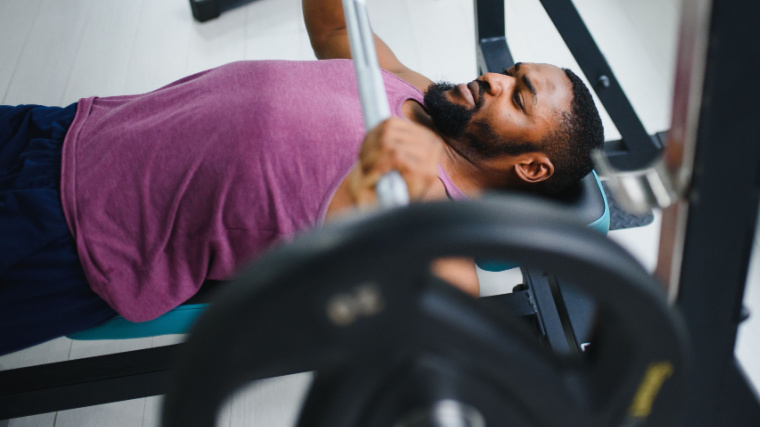
Be Nice and Share!
This post was originally published on this site

Originally Posted At: https://breakingmuscle.com/feed/rss

Picking up two dumbbells and walking around might not appear to be anything special. It looks too easy. No challenge at all, maybe some cardio and working your grip a little bit. But once you start taking the farmer’s walk seriously, you’ll realize there’s so much more to carrying weights than meets the eye.

person in gym walking with dumbbells
Credit: Svitlana Hulko / Shutterstock

Your shoulders, grip, forearms, and lungs soon burn with every step, and any deviations in your walking pattern will be felt twofold while lugging around dumbbells. Besides strengthening your grip to open all the pickle jars, carries can boost your mental toughness, which has a huge carryover to your lifts and daily activities.

As great as the classic farmer’s walk is, there are plenty of effective variations to diversify your game plan. Here are some of the best loaded carry variations, the muscles particularly trained by carrying heavy weights, and the things to watch out for to get the best out of your carries.

Best Loaded Carry Variations

Offset Carry

Offset carries train your body with mismatched weights, requiring your core to work overtime to stabilize your core as you move. Because the load is distributed asymmetrically, your body will want to tilt sideways. The challenge is in not allowing that to happen.

With the offset carry, there is a more significant demand on your core to maintain stability and a neutral spine. The greater difference in the offset, the greater the need for core stability and strength to maintain good posture, even if using the same total load. Holding 60 pounds in one hand and 40 pounds in the other is less challenging than holding 80 pounds in one hand and 20 pounds in the other.

When to Use it

You can program the offset carry at the start of your training session, as part of your warm-up or core work before hitting your main workout. Use can also perform it as a superset and pair it with a press, squat, or any exercise that doesn’t demand too much grip strength. For example performing a landmine press for six to 12 reps, then immediately performing the offset carry for 40 yards per side.

How to Do it

Although you can use dumbbells, kettlebells allow several specific offset carry variations. Hold a heavier load on one side of the body, with your arm hanging straight and your palm facing your leg. Hold a weight roughly 50% lighter in your opposite arm. This can either be locked out overhead or in the “rack position” with your arm bent and your thumb near your shoulder.

With a kettlebell, you can also use a “bottoms-up” position, with your arm bent, elbow pointed forward, and the bottom of the kettlebell aimed at the ceiling. This will require you to squeeze the handle extremely hard to maintain the bell’s vertical position.

Figure-8 Trap Bar Carry

One drawback of any loaded carry is that it requires a lot of space to move and some gyms don’t have 20 or 40 yards of clear space to walk. This is the perfect opportunity to take the trap bar figure-8 carry for a literal spin.

Walking in a figure-8 pattern allows you to get more yards out of a limited space. The trap bar makes turns easier as it places less rotational torque on your lower back than dumbbells do.

When to Use it

The movement brings the opportunity go heavy, as the trap bar allows you to carry more load than dumbbells. Use this carry when training space is limited. Program it at the start of your training when your grip is fresh.

How to Do it

Stand in the center of the trap bar, hinge at your hips and slightly bend your legs to grab the handles. Keep a neutral spine and brace your core as you deadlift weight to a standing position. Walk in a figure-8 pattern — go forward for several steps, turn slowly to one side, continue forward, turn slowly to the other side, and repeat.

Resist the urge to hurry. Walking at a controlled, deliberate pace will make your turns easier and safer, and it extends your time under tension. Keep your shoulders down and your chest up. When you’re finished walking for distance or total time, stabilize the weight before lowering it with control.

Trap Bar Overhead Carry

The overhead carry can be great for shoulder health and upper body strength, but not everyone can carry a barbell locked out overhead due to wrist or elbow issues. Enter the trap bar with the neutral handles to put your joints in a more user-friendly position.

Setting the trap bar in a squat rack at shoulder-height works best. With the weight overhead, watch every step you take due to total-body demand and instability.

When to Use it

Use the trap bar overhead carry if you have any wrist or elbow pain when supporting a barbell in the overhead position. Overhead carries are especially demanding of your upper back and shoulder stabilizers, so the movement is best trained early in your workout before those support muscles are fatigued from other exercises.

How to Do it

Set up the trap bar in a squat rack at shoulder-height with the handles pointed down. Step inside the trap bar, facing the direction you are walking. Perform an overhead press and hold the locked out position. Walk slowly straight ahead for a set distance or time. Stand still and carefully turn around before walking back into the squat rack. Lower the weight to the pins and rest.

Trap Bar Suitcase Carry

The suitcase carry is single-arm farmer’s walk, performed with the load in one arm hanging at your side. The offset load is an way to strengthen your lateral core (abdominals and obliques) while building your grip.

The trap bar suitcase carry takes this movement up a notch as the weight is more off-center, forcing your obliques to work harder. You can also potentially use more weight on a trap bar than any dumbbell variation to further your strength gains.

When to Use it

The trap bar suitcase carry works well to emphasize your oblique muscles and stabilizers on the sides of your core. This is another variation to plug in when you want to challenge yourself with heavier loads, or when your available dumbbells only go so high. Perform the exercise as part of your warm-up or early on in your training before grip strength and core stability are exhausted from other movements.

How to Do it

Stand the trap bar on its side and load plates on both ends. Grab the center of the bar, and with your shoulder down, chest up, and shoulders level, and walk slowly with good posture. Once you have gone your programmed distance, put the trap bar down and rest it on the side of your leg. Then hold it with one hand as you turn around. Swap sides and repeat.

Unilateral Chaos Carry

Adding a band around the handle of kettlebell or through the center of a weight plate creates tremendous instability because of the oscillations or “micro-bounces” created with each step. This will light up your core, grip, and shoulder stabilizers.

Gripping the band places unique demands on your grip strength because it’s tough to hold on to. The single-sided load will also increase the challenge to your oblique muscles.

When to Use it

If you have access to resistance bands, this is an excellent variation to incorporate. It’s ideal for focusing on shoulder stabilizer strength and rotator cuff health. You can do this as part of your warm-up or pair it with an exercise during your workout that doesn’t require too much grip strength, like a squat or a press variation.

How to Do it

Wrap a heavy looped band around the kettlebell handle (sometimes called the “horn”) or slide it through the center hole of a weight plate. Holding the band closer to the load makes this exercise easier because there will be less room to bounce. Sliding your hand farther from the weight will increase the difficulty. Keep your shoulder down away from your ear and your chest up. Don’t let your shoulders tilt to compensate for the weight. Walk for distance or time, place the weight down, and then repeat with the opposite hand.

Barbell Overhead Carry

The barbell overhead carry puts your whole body under tension. Every step will test your single-leg balance, strength, concentration, and mental toughness. It also might be one of the most eye-catching movements you can do.

Because the weight is so far from your center of gravity, a little goes a long way. Start on the lighter side, somewhere around 60% of your barbell overhead press one-repetition maximum. This also makes it less difficult to get the weight into position, so you can focus on holding the lockout as you walk.

When to Use it

This is one of the most challenging loaded carry variations because it works every muscle from head to toe and requires laser-like focus. Perform this early in your training before fatiguing any muscles, after your general warm-up and before your main workout.

How to Do it

Set up the barbell in a squat rack near head-height. A wider-than-shoulder-width grip works well for most people, but adjust to your individual arm length and mobility. Press the barbell overhead and ensure your wrists are neutral, elbows are locked out, and your biceps are even or behind your ears. Walk slowly and with total control. Pause and carefully rotate to return the barbell to the squat rack.

Bottoms-Up Kettlebell Waiter’s Carry

The instability of holding a kettlebell “bottoms-up” forces you to squeeze the squeeze the daylights out of the kettlebell’s handle to maintain its inverted position. This does wonders for your grip strength and carries over to increased recruitment of your shoulder stabilizers. (1)

The bottoms-up kettlebell waiter’s carry helps to build your rotator cuff, shoulder stability, and lateral core strength. Your forearm and grip muscles are also called into action non-stop, so don’t be surprised if your grip burns out before your abs or shoulders.

When to Use it

If you’re coming back from a shoulder injury or if you lack the shoulder mobility needed to maintain an overhead carry, this is a great exercise to strengthen your shoulders, rotator cuff, and upper back. If you dislike side planks, this is a good alternative to work your obliques without laying still for 60 boring seconds.

How to Do it

Grip one kettlebell and bring it to shoulder-height with your thumb toward your face and the bell pointed to the ceiling. Bend your elbow and create a roughly 90-degree angle from your forearm through your elbow to your shoulder. Make sure your wrist is neutral and the kettlebell’s handle sits centered in the meat of your hand. With good upright posture, walk straight ahead, swap hands, and repeat.

Bottoms-Up Kettlebell Overhead Carry

This is a more challenging progression of the bottoms-up waiter’s carry. You’ll get increased intensity with a reduced load because of the extra muscular tension needed to hold the bottoms-up KB overhead.

Because the load is farther from your center of gravity, it’s much harder to balance the weight with each step. Your core, shoulder, and arm will be highly activated for the entire set.

When to Use it

When you feel comfortable with the bottoms-up waiter’s carry, use the same load and progress to this alternative. It’s an efficient way to train your upper back, shoulders, and core, with an emphasis on the obliques and shoulder stabilizers.

How to Do it

Grip a kettlebell firmly with the bottom of the bell facing the ceiling. Use a neutral-grip with your thumb toward your face, and press the weight overhead while maintaining the bottoms-up position. Keep your wrist neutral and your pinky facing forward. Walk with the weight locked out overhead. After a set distance or time, lower the weight, switch hands, and repeat.

Zercher Carry

The front-loaded position of the Zercher carry challenges your upper back, core, arms, and legs while dealing with holding the weight in the crooks of your elbows. This helps build some mental toughness, total-body conditioning, and rock-solid anterior core (abdominal and hip) strength.

If you want to improve your ability to deal with physical and mental discomfort, this exercise is for you. However, if supporting a barbell in the crook of your arms is too much, the movement can be performed with an EZ-bar or even a sandbag or duffel bag filled with random objects for heft.

When to Use it

The Zercher carry is tough, no doubt about it. It works well as part of a conditioning circuit to improve fat loss or as a standalone session for mental toughness.

How to Do it

Set up a loaded barbell around hip-height in the squat rack. Squat down and cradle the barbell in the crooks of your elbows with your palms facing you. Clasp your hands together for added strength and stability, pull your shoulders back, and stand up without rounding your back. Avoiding shrugging your shoulders up as you walk. Pause after a set distance or time, turn around, and return to the squat rack. Try not to collapse when the set is done.

Bear Hug Sandbag Carry

When most people think of loaded carries, they think of fairly traditional exercises using balanced and symmetrical implements that give you convenient handles to hold. But how often does that perfect scenario happen outside of the gym? Not often, and that’s why it pays to get a bit awkward with asymmetrical loads like the sandbag carry. (2)

By manipulating unevenly distributed weight, like a floppy sandbag, your body is challenged to recruit a variety of stabilizers in most joints including your ankles, hips, and shoulders.

When to Use it

Whenever you have access to a sandbag, this exercise is great to include as part of a conditioning or fat-loss circuit. It can also be performed as a finisher, for either time or distance, at the end of your training.

How to Do it

Place the sandbag on a flat bench, or leave it on the floor for even more lower body work. Squat down and slide your hands under the bag to set your grip. Pull the bag close to your body as you stand upright. Hug the bag to your torso and stabilize your upper body. Walk upright, maintaining total body tension for safety and effectiveness. Keep the bag close to your body as you walk. Don’t allow the weight to pull your upper body out of alignment as your arms and shoulders fatigue.

Plate Pinch Carry

The plate pinch tests your “pinch grip” strength, which is different from “support grip” (trained in movements like the suitcase carry) or “crushing grip” (trained with bottoms-up movements). The pinch grip specifically strengthens your fingers and thumbs, as well as your forearms.

This is an excellent exercise for football players, rugby players, and combat sports athletes to improve sport-specific grip strength. Stronger hands and fingers will also carry over to boost any pulling exercises, making your grip less of a weak link.

When to Use it

This movement is best trained at the end of your workout because you don’t want to exhaust your finger strength before other exercise, which will interfere with your strength work. Pairing it with a biceps exercise will give your forearms a nice pump.

How to Do it

In each hand, grab a weight plate by the outer ring using just your fingertips and thumb, not “sinking” your entire hand onto the weight. Pull your chest up and set your shoulders down to maintain good posture. Walk straight ahead, paying careful attention to your finger fatigue as you walk. Be careful not to unexpectedly drop the weight on your feet.

Muscles Worked by Carries

Most carry variations work similar muscles, but certain variations can emphasize your upper back, or core strength, shoulder stability, or more. Generally, loaded carries and their variations train the muscles of your back, core, and arms.

Forearms

Any time you pick up a weight, your forearm flexors (on the bottom of your forearm) and extensors (on the top side) co-contract to grip and to keep your wrists in a neutral position.

person outdoors holding kettlebell
Credit: technomolly / Shutterstock

Your forearm muscles will be more heavily recruited in movements that keep your arms down by your side and relatively less recruited in overhead movements.

Upper Back

Keeping your shoulders down and your chest up  while walking with a load will put your upper back to work overtime. The upper back is composed of several muscles including the trapezius, rhomboids, and rear deltoids (shoulders). These muscles work together to control your shoulder blades, which are held in a static contraction during any walking exercise.

Rotator Cuff

Your small rotator cuff muscles are engaged when you grip anything in your hands. Its primary role is, essentially, to keep your upper arm in its socket. Loaded carries will attempt to push or pull your arm out of position, and the rotator cuff is required to constantly fight to maintain a strong, stable position.

Deltoids

You shoulder muscles (deltoids), along with your rotator cuff, work isometrically to give your shoulders the stability it needs to carry heavy things. Supporting a locked out position overhead or holding your arms in front of your body (as in the sandbag bear hug or Zercher carry) will increase recruitment of the shoulders, specifically the anterior (front) head.

The lateral and posterior heads (side and rear) are more significantly recruited during overhead or “arms-at-your-side” carries.

Core

Your core muscle — the abdominals, obliques, and lower back — work isometrically to keep your spine neutral and to maintain good posture while carrying things. A stronger core can help to reduce your overall risk of injury.(3) Any exercise emphasizing a single-side of the body (like the offset carry) will drastically increase the challenge to your core muscles.

Glutes

When you’re carrying a load, every single step you take will engage your glutes to keep you balanced and to propel you forward through a little thing called hip extension. Hip extension is what drives your leg back behind your body (and, at the same time, pulls your body forward in motion), and it’s a key function of the glutes.

Interestingly, the glutes have been shown to be more heavily recruited in single-arm carries, like the suitcase carry, compared to front-loaded carries like the Zercher carry. (4)

Carry Form Tips

Although you “can” carry some things with less than optimal posture — the sandbag bear hug can be tricky here— it’s more efficient and safer if you don’t let your posture slip. To get all the benefits of carries, it’s best to walk under load with good posture. Keep your shoulders punched back and pulled down away from your ears, keep your chest up, and aim to keep your shoulders and hips level without being pulled sideways.

muscular person outdoors holding kettlebell
Credit: Gerain0812 / Shutterstock

When you’re new to performing loaded carries, start with the by-your-side variety like the suitcase carry or even the plate pinch carry. The further away the load is from your body’s center, like any overhead carry, the more stability and balance demands increase. If you lack the shoulder mobility to press overhead, stick to carries with a lower arm position while working on your shoulder mobility.

Although increasing the load you carry is often the name of the game, it pays to vary your load and distance depending on your specific goals. If you’re after fat loss or improved conditioning, reduce the weight, shorten the rest period between sets, and increase the total distance. If your goal is strength, increase the load and decrease the distance to shift focus.

Carry Away For Gains

Loaded carries are some of the biggest bang for your buck exercises. They can have a huge carryover to your lifts inside the gym and the activities of daily living because they strengthen key muscle groups in your legs, hips, abs, and shoulders. They can improve your strength, mental toughness, posture, and balance. All you have to do is pick up a weight and walk. Work your way though these variations and you’ll soon find out they sound simple, but they’re far from easy.

References

  1. Gontijo, L. B., Pereira, P. D., Neves, C. D., Santos, A. P., Machado, D., & Bastos, V. H. (2012). Evaluation of strength and irradiated movement pattern resulting from trunk motions of the proprioceptive neuromuscular facilitation. Rehabilitation research and practice2012, 281937. https://doi.org/10.1155/2012/281937
  2. Sell, Katie PhD, CSCS1; Taveras, Kurt BS2; Ghigiarelli, Jamie PhD, CSCS1. Sandbag Training: A Sample 4-Week Training Program. Strength and Conditioning Journal: August 2011 – Volume 33 – Issue 4 – p 88-96 doi: 10.1519/SSC.0b013e318216b587
  3. Huxel Bliven, K. C., & Anderson, B. E. (2013). Core stability training for injury prevention. Sports health5(6), 514–522. https://doi.org/10.1177/1941738113481200
  4. Neumann, D. A., & Cook, T. M. (1985). Effect of load and carrying position on the electromyographic activity of the gluteus medius muscle during walking. Physical therapy65(3), 305–311. https://doi.org/10.1093/ptj/65.3.305

Featured Image: lunamarina / Shutterstock

The post 11 Loaded Carry Variations Worth Trying appeared first on Breaking Muscle.
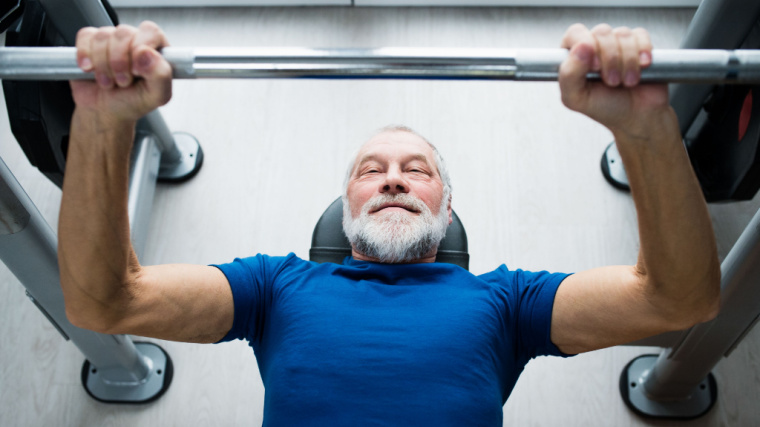
Be Nice and Share!