This post was originally published on this site

Originally Posted At: https://breakingmuscle.com/feed/rss

Ready for an efficient workout to build your upper body by creating a more sculpted chest and a more muscular back? Rethink your training week and step away from the usual workout split.

Training chest and back in the same session lets you use agonist-antagonist supersets — a high-dollar term for exercise pairings that hit opposite sides of your body with zero rest in-between.
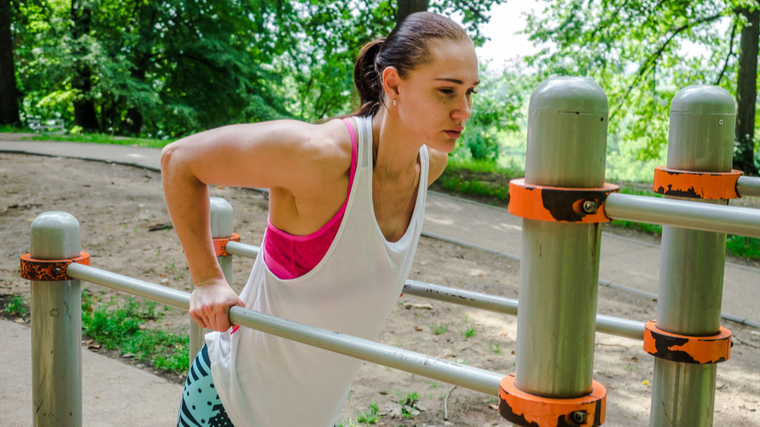
Woman performing chest exercise on bars outdoors
Credit: Anton Romanov / Shutterstock

By deleting the rest interval, these supersets allow you to get lots of training accomplished in less time. Better yet, they’re less likely to impair exercise performance compared to supersets targeting the same muscle groups. (1)

So buckle up, grab the plan, and get to work hitting just about everything above your hips using a handful of high intensity, highly focused movements.

Chest and Back Workout

Meet Your Chest and Back Muscles

In his prime, massive and full pectoral muscles were among Arnold Schwarzenegger’s most impressive attributes. Arnold’s chest had size and symmetry — attributes which are key to a well-developed chest. Not only will lifters with bodybuilding goals need to perform chest exercises with sufficient intensity, but they will also need to ensure all areas of the chest are adequately targeted. 

Pectoralis major, the most prominent chest muscle, has two or three functional “subregions.” The sternocostal head is the largest portion and it is effectively trained during horizontal adduction exercises such as horizontal chest presses and flyes. (2)(3)(4) The upper-most part of the pec major, termed the clavicular head, is emphasized with shoulder flexion exercises and incline presses. (2)(3)(4)(5)

Less often discussed, but relevant to any lifter training for a top physique, is the inferior-most portion of the pecs — the lower costal fibers and abdominal fibers. These fibers pull your arms down from the overhead position, as in pulldowns and pullovers. (2)
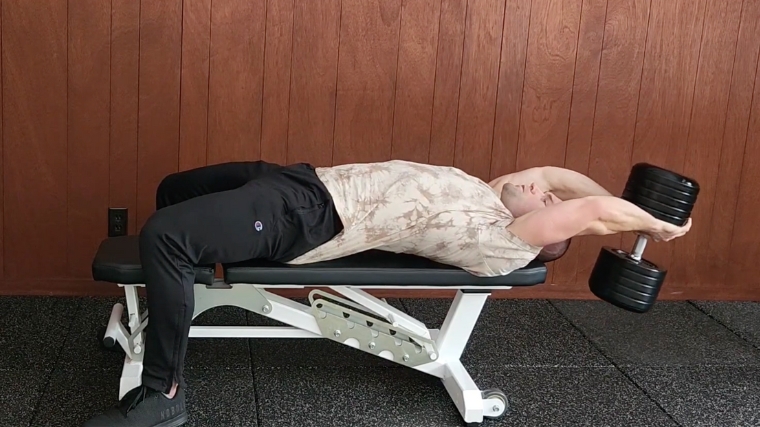
Coach Dr. Merrick Lincoln performing dumbbell pullover on flat bench
Credit: Merrick Lincoln, DPT, CSCS / YouTube

An impressive back has three key qualities: breadth or width, thickness, and definition. While the latter can only be achieved by reaching sufficiently low levels of body fat, developing all qualities depends on robust muscle growth, or “hypertrophy,” of the back muscles. Major aesthetic back muscles include the latissimus dorsi, middle- and lower trapezius, and rhomboids. 

In bodybuilding, the muscles of the back are trained during vertical and horizontal pulling movements, along with a slew of single-joint accessory exercises. Perhaps counterintuitively, narrow-grip pulldowns and rows tend to promote back width, while wide-grip horizontal pulling tends to promote back thickness. (2) This workout builds both.

The Ultimate Chest and Back Workout

This double-duty routine incorporates free weights and machines, programs supersets and traditional sets, and leans into tension and “the pump” to build the ultimate upper body. It fits perfectly into either a chest and back/legs/shoulders and arms split or an upper/lower workout split. It might also be useful in a more classic “one body part per day” split when a missed workout necessitates doubling up.

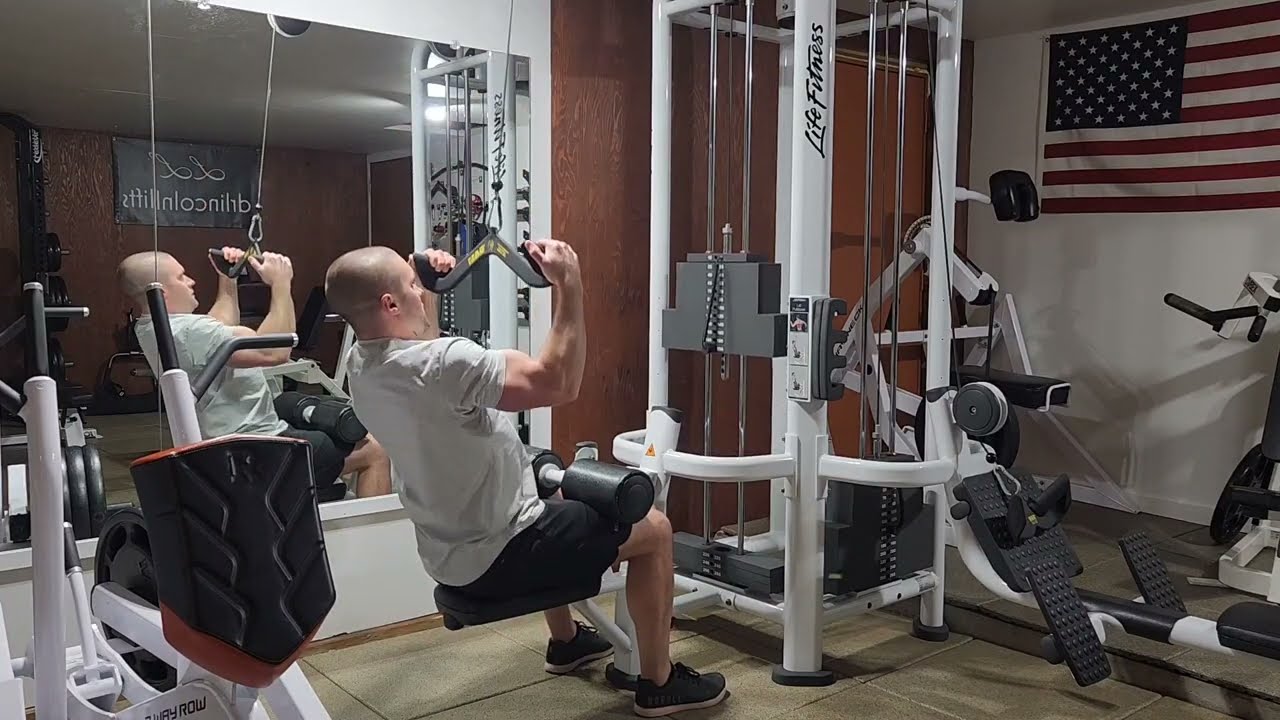
Neutral-Grip Lat Pulldown

The neutral-grip lat pulldown is a joint-friendly back-builder. It principally trains your latissimus dorsi — the muscle responsible for back width. The rhomboids of your mid-back, the muscles behind the shoulders (such your posterior deltoids and teres major), and even the lower portion of your pectoralis major (“costal fibers”) will also contribute to the movement. (2)
YouTube Video

From the deep stretch when your arms are overhead to the peak contraction when your upper arms are pinned against the sides of your ribcage, the neutral-grip lat pulldown trains the target muscles through a range of motion unmatched by most other back exercises. Since your lower body is locked into the machine, the exercise can also be loaded heavily. Starting the workout with a heavy, full range of motion exercise sets the tone for the workout.

  • How to Do it: Sit at a lat pulldown station using a grip attachment with parallel handles. Secure your thighs under the roller pads and slightly lean back at your hips. Initiate the pulldown by drawing your shoulder blades downward as you bring your elbows toward the sides of your ribcage. Return to the starting position with arms outstretched overhead.
  • Sets and Reps: 3 x 8-12
  • Rest Time: No rest before moving to the next exercise.

Benefits of the Neutral-Grip Lat Pulldown

  • The exercise trains the back through large arcs of motion at the shoulder joint proper (glenohumeral joint) and shoulder girdle (scapulothoracic joint). Importantly, pulldowns train the latissimus dorsi at long muscle lengths, which may enhance muscle gain. (6)
  • The neutral grip tends to be well-tolerated by lifters with banged-up shoulders or elbows. 
  • This multi-joint back exercise largely spares the muscles that will be trained in the chest press, the second exercise of this superset.

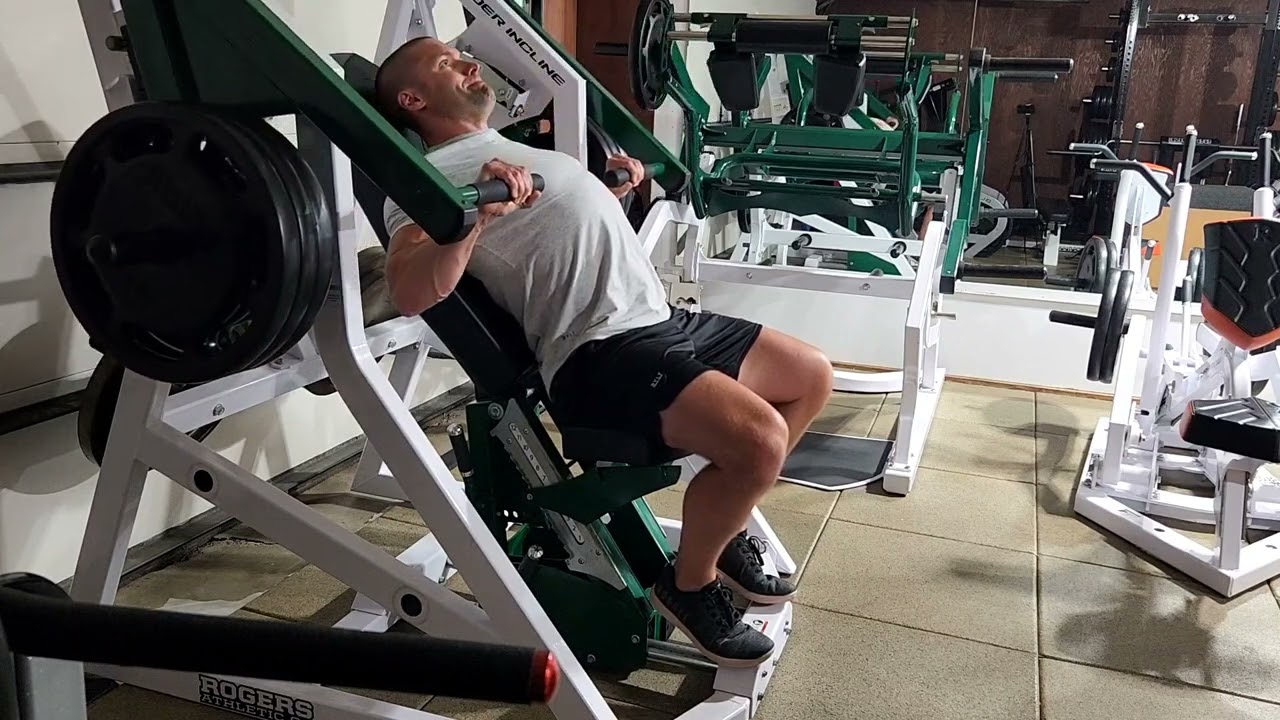
Machine Chest Press

Provided your gym is not too busy and the lat pulldown station and chest press machines aren’t on opposite sides of the facility, plan to superset pulldowns with machine chest presses. If you’re training in a public gym and are concerned about occupying two machines at once, give the machine you are departing a quick wipe down and carry your things with you instead of leaving them to “claim” he equipment. This will give a non-verbal cue to anyone waiting to “work in.”

Sure, if someone does work in, it’ll slow your workout, but it’s the decent thing to do in a shared public space. Nine times out of ten, the machine will be empty when you return. 
YouTube Video

Machine chest presses come in many designs — seated, lying, plate-loaded, cable stack-loaded, etc. Ideally, locate one that feels comfortable and provides a stretch across your shoulders in the bottom position. Although it may be acceptable to substitute the barbell bench press for the machine movement, you’ll need a trained spotter for the free weight version. Moreover, most lifters are more comfortable pushing high-effort sets — sets that approach or even reach failure — on a “self-spotting” chest press machine. 

  • How to Do it: Adjust the seat and starting handle position so that your elbows and hands naturally track at approximately nipple-height at the bottom position. If the seat is too high (or if you are positioned too high up the bench on a lying chest press machine), it will feel like a decline press. If the seat is too low (or you are positioned too far down the bench on a lying version), your elbows will be flared out at or near shoulder-height. Even though you’re not performing a competition-style barbell bench press, you should still establish an arched mid-back position to facilitate greater chest tension. Lift your sternum and pull your shoulder blades together and toward your glutes. Press the handles until your elbows reach lockout. Lower with control to a tolerable stretch across your chest and the fronts of your shoulders.
  • Sets and Reps: 3 x 8-12
  • Rest Time: Rest two to three minutes before repeating the previous exercise.

Benefits of the Machine Chest Press

  • Machine chest press may offer more targeted chest training compared to free-weight variations. This is likely due to the stability offered by the equipment, as the machine bench press has shown reduced lateral deltoid and triceps muscle activity and equivalent pectoralis major activity compared to the barbell bench press. (4) However, these findings were not replicated in a recent similar study. (7)
  • It’s a machine-based exercise, which enables relatively heavy loading and high-effort sets without requiring a spotter. (7)

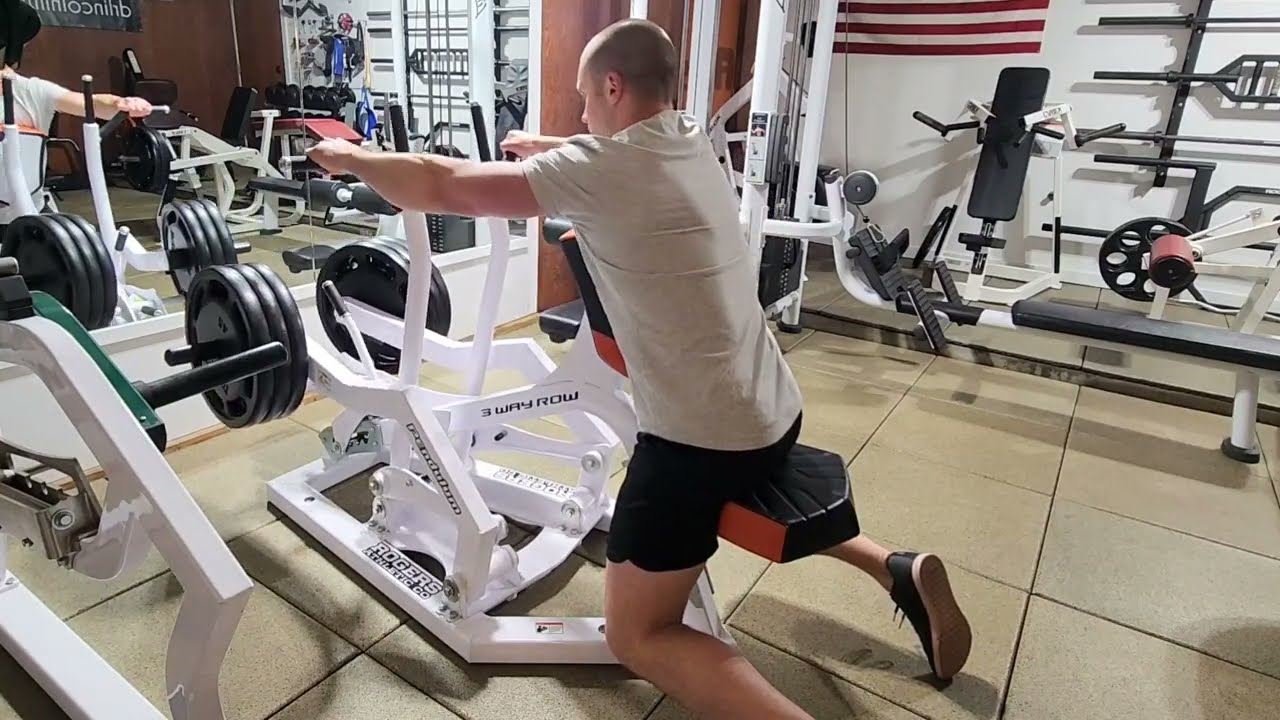
Machine Wide Row

Wide rows, traditionally performed with an overhand grip spaced wider than the shoulders, target the mid-back and back of the shoulders. As such, wide rows are a great exercise for back “thickness.”
YouTube Video

Chest-supported machines, in particular, allow for greater focus on the target muscles and reduced systemic demand (i.e. less fatigue), because the lifter is not required to maintain an unsupported forward-bent posture. (8) Wide rows may also be performed on a chest-supported T-bar row machine or using free weights with your trunk supported on an incline bench.

  • How to Do it: Set the seat height so the support pad makes contact with your lower chest and the handles are just below shoulder-height. Lean into the pad to ensure your hips are slightly behind your chest. Grab the handles with an overhand grip. You should have to stretch to reach the handles — if not, adjust the chest support or start position of the handles. Initiate the row by drawing your shoulder blades together and driving your elbows to the sides. Your elbows should track slightly below shoulder height, not tuck toward your body or flare above shoulder-height. Return to the starting position, allowing the machine to pull your arms forward and stretch your mid back.
  • Sets and Reps: 3 x 12-16
  • Rest Time: No rest before moving to the next exercise.

Benefits of the Machine Wide Row

  • This rowing variation has a favorable stimulus-to-fatigue, meaning support from the machine reduces the need for activity in non-target musculature. (8)
  • When appropriately set up, the machine wide row applies a profound stretch to the mid-back and shoulders, increasing range of motion of the exercise and potentially enhancing hypertrophy.

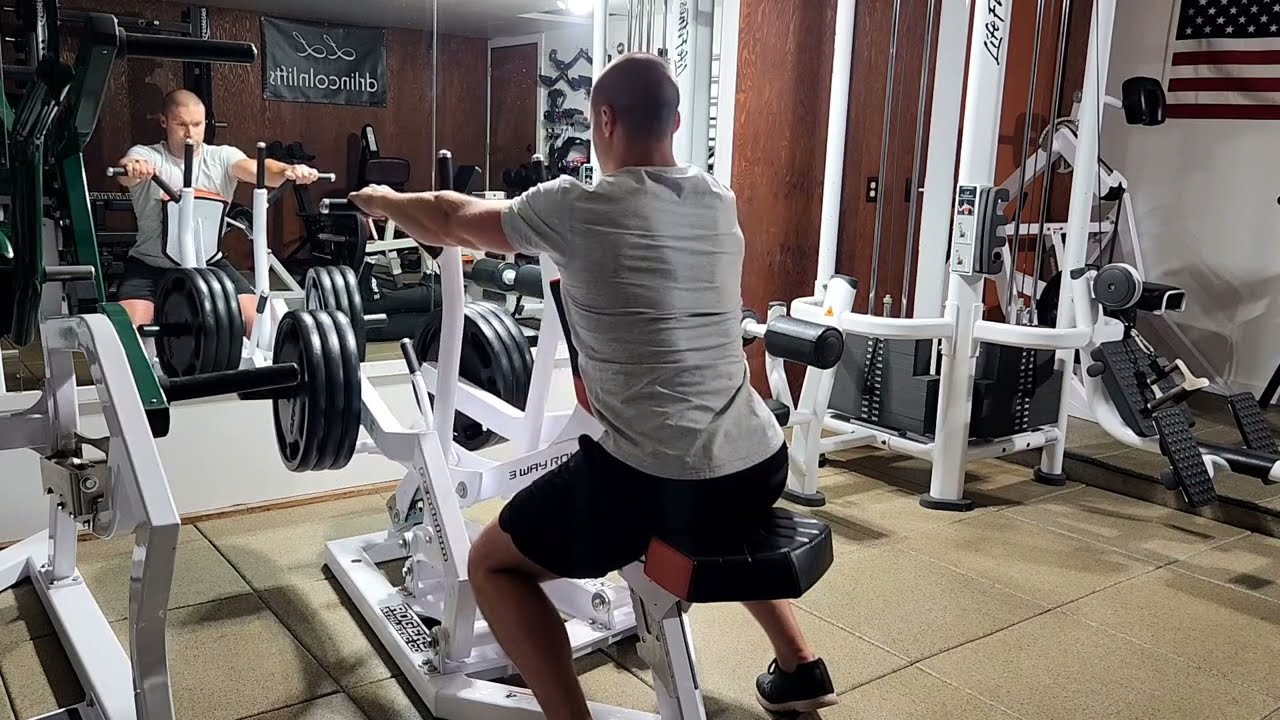
Machine Kelso Shrug

Not all muscle groups targeted by multi-joint (compound) exercises are trained equally. Some muscles are hammered, while others are left relatively unscathed. For example, when using rows to target your mid-back, your shoulder muscles (e.g. posterior deltoid) may fatigue during wide rows, while muscles of the mid-back (e.g. middle trapezius and rhomboids) may not be trained to their potential. 

Advanced training techniques such as pre- and post- exhaustion may be useful to address inequitable training stimuli among agonist muscles during multi-joint exercise. Pre-exhaustion places an isolation exercise immediately before a compound exercise with no rest. Although bodybuilding pioneers like Arthur Jones tended to promote pre-exhaustion methods, the research on this strategy is somewhat lackluster. (9) At best, lifters accomplish equivalent training volume and experience similar strength gain compared to performing the isolation exercise and compound exercise as traditional straight sets. (10) At worst, trainees may lose repetitions during the compound exercise due to fatigue. (11

Fortunately, a related technique called post-exhaustion avoids the major downside of pre-exhaustion. Post-exhaustion uses compound supersets in a specific way. A multi-joint exercise is immediately followed by an isolation exercise for the same target muscle(s). 
YouTube Video

Paul Kelso, an author and powerlifting analyst, promoted post-exhaustion training for thickening the upper back by using a sequence of rows and Kelso shrugs, his namesake exercise. Kelso shrugs may also be performed on a chest-supported T-bar row machine or using free-weights with trunk supported on an incline bench.

  • How to Do it: Kelso shrugs involve isolated retracting (“drawing together”) the shoulder blades. While they may be performed with free weights while bent over or supported on an incline bench, performing Kelso Shrugs on a row machine with chest support allows you to better isolate the target muscles — your middle trapezius and rhomboids. Using a wide, overhand grips on the row machine, begin with your arms outstretched in front of you. You should feel a profound stretch as the machine draws your arms and shoulder blades forward. With little to no elbow bend and absolutely no rowing, squeeze your shoulder blades together, drawing the handles slightly closer to your body. Although your mid-back may arch or extend slightly as you draw your shoulder blades together, do not drive this motion by pushing your chest into the pad. Focus on using your middle trapezius and rhomboids. Pause momentarily, then allow the machine to slowly draw your shoulder blades apart.
  • Sets and Reps: 3 x 8-12
  • Rest Time: Rest two to two and a half minutes before repeating the previous exercise.

Benefits of the Machine Kelso Shrug

  • This unique shrug variation hits the mid-back in relative isolation, allowing for additional training volume, especially when performed as a post-exhaustion technique following a rowing exercise.
  • Kelso shrugs have a relatively easy exercise setup and minimal systemic fatigue.
  • The exercise builds strength and control of the shoulder blades, which may promote overall shoulder health. (12)

Incline Dumbbell Flye Press

Muscles are stronger during eccentric contractions, which typically occur during the lowering phase of an exercise. One technique that exploits this phenomenon by increasing the intensity of the exercise during the eccentric phase is called eccentric accentuated training. (13) The flye press is a straightforward eccentric accentuated exercise, easily set up using an adjustable bench and a pair of dumbbells. 
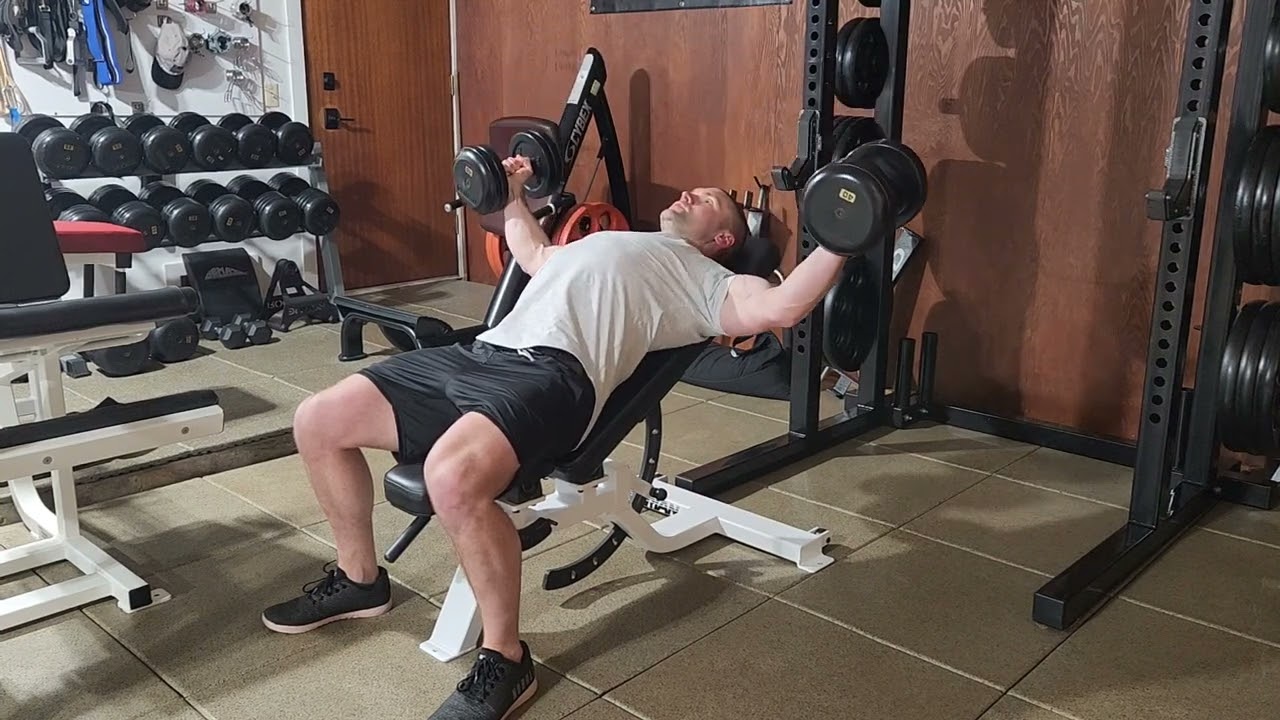
YouTube Video

While any incline press biases the upper chest, the incline dumbbell flye press packs an extra punch by accentuating the eccentric contraction of the clavicular head of pectoralis major. (3)(4)(5)(13) Therefore, this exercise serves to complement other chest exercises found in this workout, which tend to bias the lower muscle fibers of the chest.

  • How to Do it: Set an adjustable bench to the 45-degree incline position. Lay on the bench and set your shoulder blades together so they lie flat against the pad. Begin with the dumbbells just outside the front of your chest and press them vertically until your elbows are nearly straight. Keeping slight elbow flexion, allow the dumbbells to drift apart. Continue to lower the dumbbells until you feel a strong stretch across the front of your chest. Bend your elbows to return the dumbbells to the start position before pressing to the top to repeat the sequence for additional repetitions.
  • Sets and Reps: 3 x 8 to 12
  • Rest Time: Rest one and a half to two minutes between sets.

Benefits of the Incline Dumbbell Flye Press

  • The exercise is eccentric accentuated, meaning demand on chest is greater during the lowering phase, which may enhance strength development and hypertrophy. (13)(14)
  • Using an incline bench promotes upper chest — pectoralis major clavicular head — activity and development. (3)(4)(5)

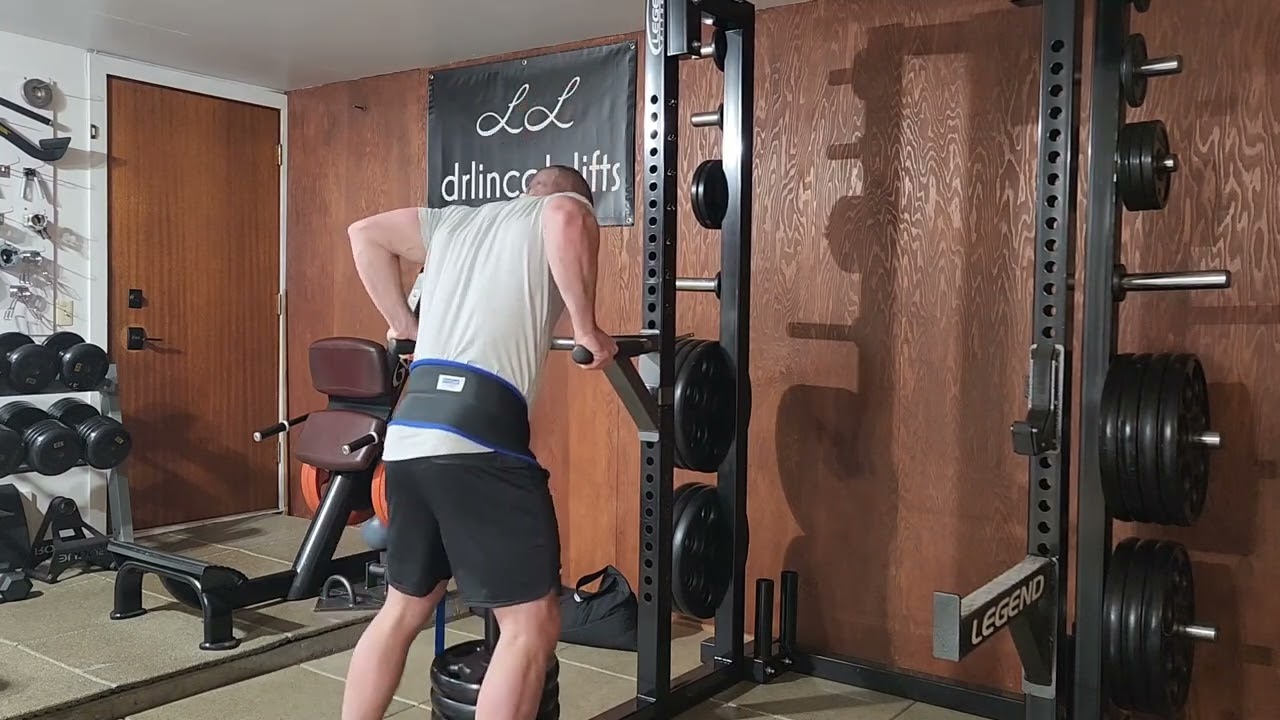
Bar Dip

Dips are typically performed using a dedicated dip station or a sturdy dip attachment on a power rack. The handles of the dip station or dip attachment are often parallel or diverge slightly from parallel — a feature that results in different training stimulus and exercise technique compared to traditional bodyweight bench dips. (15

YouTube Video

Compared to triceps-focused bench dips, which are performed with the heels of hands supported by the long edge of a bench, bar dips show greater pectoralis major muscle activity. (15) Also compared to bench dips, bar dips require less shoulder hyperextension. (15) Since loaded shoulder hyperextension can be hard on the shoulders, dips may be better tolerated by lifters with known shoulder issues. (15)(16)

Bar dips are easy adapt to beginner strength-levels via the use of the lower body or an elastic band for assistance. They can be made more challenging by adding weight to a dip belt. Effective and versatile, the bar dip is a great exercise for building the mid- and lower chest.

  • How to Do it: If your dip station or attachment has diverging handles, select a grip width comfortable for your shoulders. Begin in the top position with your elbows locked out and your hands on the bars under your shoulders supporting your weight. Your hips should drift slightly backward as you lower your body, allowing your elbows to flex and your upper arms to extend slightly behind you. In the bottom position, achieve a stretch across the front of your chest. Pause momentarily before pushing back to the top.
  • Sets and Reps: 2 x 8-12
  • Rest Time: No rest before moving to the next exercise.

Benefits of the Bar Dip

  • The dip trains your pectoralis major, pectoralis minor, triceps brachii, and lower trapezius. Your latissimus dorsi, serratus anterior, and the posterior rotator cuff may also be active, serving as stabilizing roles. (15)
  • Your chest experiences a “loaded stretch” in the bottom of the bar dip, which may promote accelerated muscle growth. (14)
  • High-effort sets of dips may further bias your pectoralis major, as increased muscle activity has been shown when sets are taken toward failure. (17)

Standing Cable Pullover

As the name implies, pullovers involve drawing a resistance over the body from high-to-low. Although typically thought of as back exercises, pullover variations such as the dumbbell pullover and cable pullover train your back and chest. (2)(18)

The cable pullover has a slightly different resistance curve than free weight versions, as the lifter experiences maximum resistance when their arms are perpendicular to the cable rather than perpendicular to the vertical line of gravity. (19) This feature makes the cable pullover more conducive to high repetition, “pump work” style sets. 
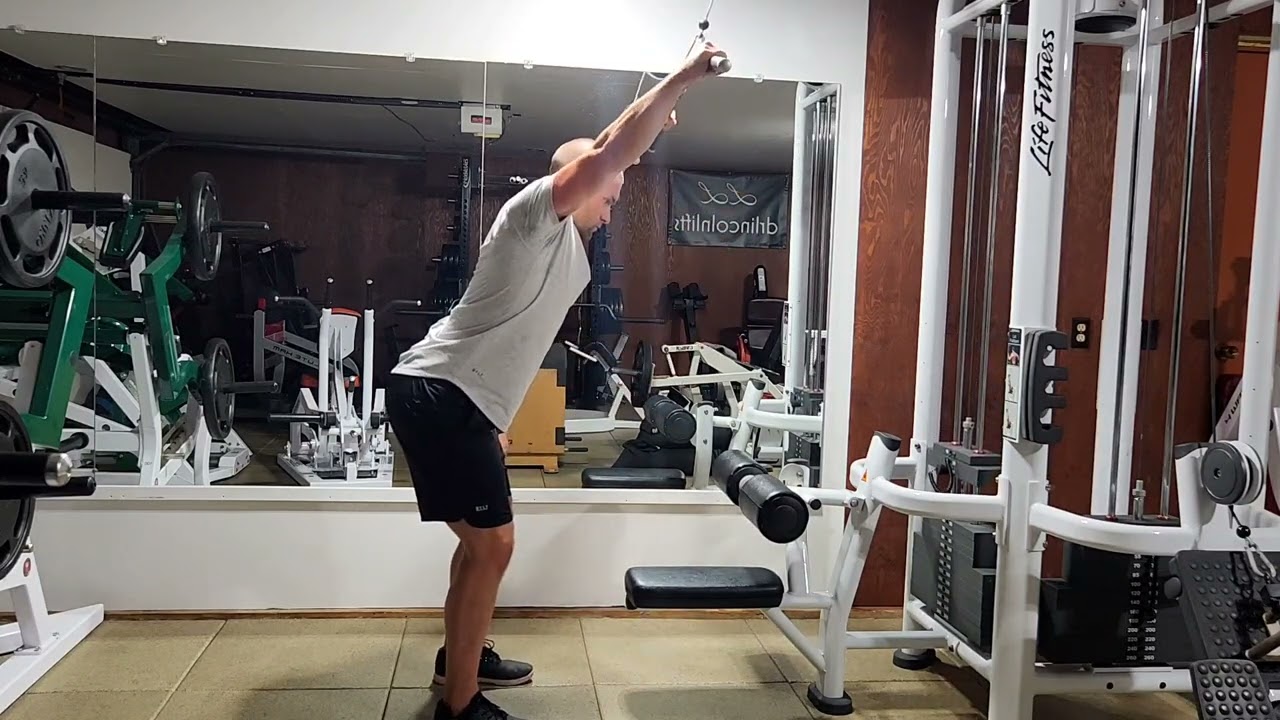
YouTube Video

Cable resistance also enables the exercise to be performed standing, a variation sometimes called a straight-arm pushdown or pulldown. If you’re looking for a high-tension solution to polish off your upper body workout, don’t skip the standing cable pullover.

  • How to Do it: Grab a straight bar cable attachment with a double-overhand grip, with hands placed wider than your shoulders. Hinge slightly forward at the hips and lift your chest. With your arms outstretched overhead, pull the bar toward your thighs. Once the bar contacts your thighs, control the movement back to the start position. Keep your elbows straight but not locked throughout the movement.
  • Sets and Reps: 2 x 16-20
  • Rest Time: Rest two to three minutes before repeating the previous exercise.

Benefits of the Standing Cable Pullover

  • Pullovers train the back and chest together. (18)
  • The resistance profile of the cable pullover applies substantial resistance when the latissimus dorsi is stretched, which may enhance muscle gain. (6)(19)
  • The focused tension of the exercise tends to promote a great lat pump sensation.

How to Warm-up for Your Chest and Back Workout

Traditional warm-ups begin with a short bout of cardiovascular activity to raise body temperature, increase breathing rate, and improve overall circulation, followed by more specific movements and mobilizations to prepare the body for the workout ahead. With a substantial chest and back workout ahead of you, cardio followed by a multi-exercise specific warm-up may feel daunting. 

Rather than skip the warm-up altogether, try a high-volume warm-up instead. High-volume warm-ups include long sets of high repetition, light resistance and/or bodyweight exercises performed in circuit fashion.
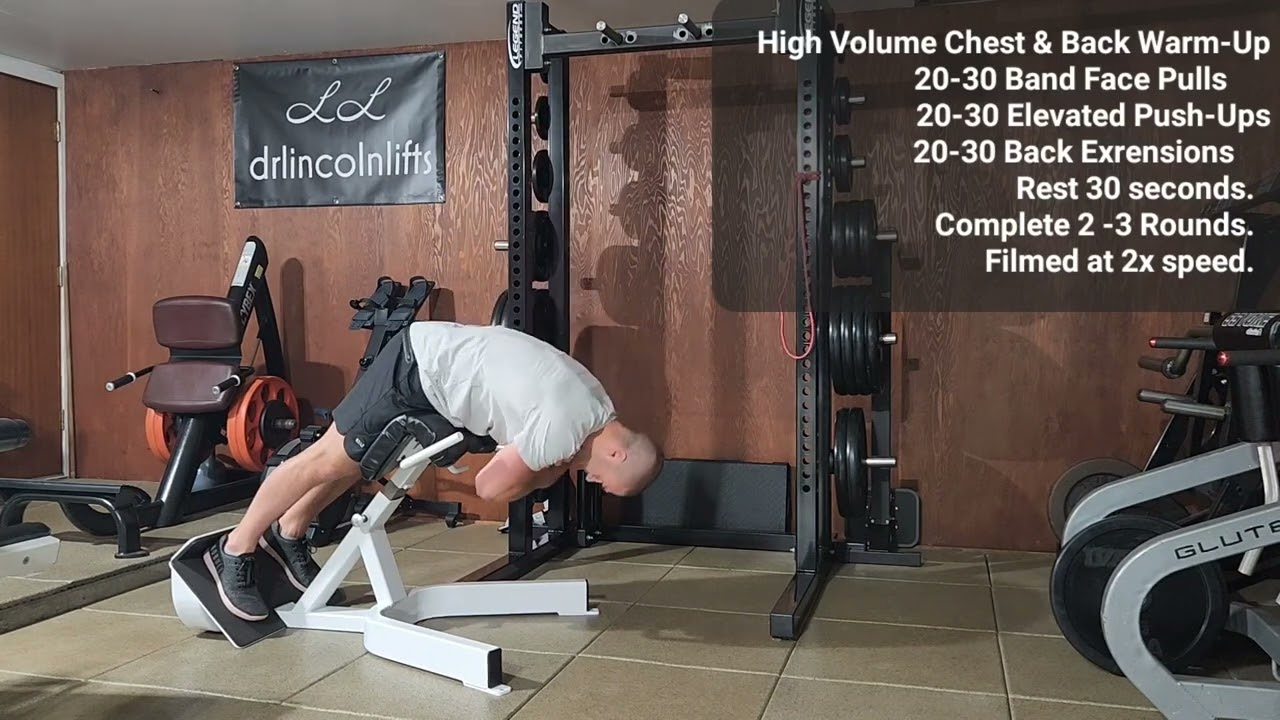
YouTube Video

The benefits of high-volume warm-ups are similar to traditional warm-ups. They physiologically and mentally prepare your body for the workout, but they have the added benefit of extra reps for muscle groups that will be targeted in the upcoming workout and for muscle groups that could benefit from additional training volume (including specific weaknesses you may need to address). 

Perform 20 to 30 repetitions of each of the following exercises as a circuit — take no rest between each exercise set. Rest 30 seconds between circuits. Repeat the entire circuit two or three times.

  • Band Face Pull: Stand facing a light resistance loop anchored at chin-height. With arms outstretched in front of your body, grasp the loop leaving a length of resistance band slightly wider than your neck between your hands. Keeping your chest up and your body stationary, draw the resistance band toward your forehead by simultaneously performing a high row with shoulder external rotation — Your elbows should track at or above shoulder-height, and your wrists should travel higher than your elbows. When the band reaches or nearly reaches your forehead, reverse the movement and return to the starting position. 
  • Elevated Push-up: Begin with your hands elevated on a bench or Roman chair/back extension and your feet on the floor. Perform a push-up by pressing your body up and away from the support surface until your elbows are straight. Your push-up should resemble a “moving plank,” with your trunk and legs moving together as a unit. Lower until your chest touches or nearly touches the support surface.
  • Dynamic 45-Degree Back Extension: Set up a 45-degree Roman chair so the top of the pad is just below your beltline. Lay with your thighs supported by the pad and your feet on the footplate of the machine. As you lower your torso toward the floor, intentionally allow your spine to round. As you raise your torso toward the ceiling, intentionally extend (“arch”) your spine throughout the movement. This movement requires minimal movement from the hip joints.

Here’s the deal: Some lifters train their back extensor muscles (the “fins” of muscle that lie on either side of the spine) on leg day with exercises like deadlifts, good mornings, and hyperextensions. Other lifters place these exercises with their back training. The jury is out on which practice is “best,” but one thing is clear — most lifters will benefit from more low back training. 

Outside of powerlifters who’ve adopted the reverse hyper machine, and those who still use old school back extension machines, few lifters intentionally perform dynamic back extensor training — exercises that intentionally train the back extensors through an appreciable range of motion. If you are new to flexion- and extension-based low back exercises, the dynamic 45-degree back extension is a good place to start, but you may need to reduce the repetition target until you’re accustomed to the direct work.

Jacked from Front to Back

Nineteen sets in total, this formidable workout hits all major parts of your chest and back. Remember to take two or three “work-up sets” per exercise to groove your technique and identify a challenging weight for the target repetition range (“work-up sets” do not count toward set total). Altogether, plan to be in the gym a little over an hour accomplishing more than most do in two separate workouts. 

References

  1. Weakley, J. J., et al. (2020). The effects of superset configuration on kinetic, kinematic, and perceived exertion in the barbell bench press. The Journal of Strength & Conditioning Research34(1), 65-72.
  2. Ackland, D. C., Pak, P., Richardson, M., & Pandy, M. G. (2008). Moment arms of the muscles crossing the anatomical shoulder. Journal of Anatomy213(4), 383-390.
  3. dos Santos Albarello, et al. (2022). Non-uniform excitation of pectoralis major induced by changes in bench press inclination leads to uneven variations in the cross-sectional area measured by panoramic ultrasonography. Journal of Electromyography and Kinesiology67, 102722.
  4. Coratella, G., et al. (2020). Specific prime movers’ excitation during free-weight bench press variations and chest press machine in competitive bodybuilders. European Journal of Sport Science20(5), 571-579.
  5. Lee, H. M. (2019). Force direction and arm position affect contribution of clavicular and sternal parts of pectoralis major muscle during muscle strength testing. Journal of Hand Therapy32(1), 71-79.
  6. Ottinger, C. R., et al. (2022). Muscle hypertrophy response to range of motion in strength training: a novel approach to understanding the findings. Strength & Conditioning Journal, 10-1519.
  7. Muyor, J. M., Rodríguez-Ridao, D., & Oliva-Lozano, J. M. (2023). Comparison of Muscle Activity between the Horizontal Bench Press and the Seated Chest Press Exercises Using Several Grips. Journal of Human Kinetics87, 23.
  8. García-Jaén, M., et al. (2021). Electromyographical responses of the lumbar, dorsal and shoulder musculature during the bent-over row exercise: a comparison between standing and bench postures (a preliminary study). Journal of Physical Education and Sport, 21(4), 1871-1877.
  9. Trindade, T. B., et al. (2022). Pre-exhaustion training, a narrative review of the acute responses and chronic adaptations. International Journal of Exercise Science15(3), 507.
  10. Fisher, J. P., et al. (2014). The effects of pre-exhaustion, exercise order, and rest intervals in a full-body resistance training intervention. Applied Physiology, Nutrition, and Metabolism39(11), 1265-1270.
  11. Vilaça-Alves, et al. (2014). Effects of pre-exhausting the biceps brachii muscle on the performance of the front lat pull-down exercise using different handgrip positions. Journal of Human Kinetics42(1), 157-163.
  12. Sciascia, A., & Kibler, W. B. (2022). Current views of scapular dyskinesis and its possible clinical relevance. International Journal of Sports Physical Therapy17(2), 117.
  13. Walker, S., et al. (2016). Greater strength gains after training with accentuated eccentric than traditional isoinertial loads in already strength-trained men. Frontiers in Physiology7, 149.
  14. Wackerhage, H., et al. (2019). Stimuli and sensors that initiate skeletal muscle hypertrophy following resistance exercise. Journal of Applied Physiology, 136, 30-43.
  15. McKenzie, A., et al. (2022). Bench, Bar, and Ring Dips: Do Kinematics and Muscle Activity Differ?. International Journal of Environmental Research and Public Health19(20), 13211.
  16. McKenzie, A. K., et al. (2021). Glenohumeral Extension and the Dip: Considerations for the Strength and Conditioning Professional. Strength & Conditioning Journal43(1), 93-100.
  17. McKenzie, A., et al. (2022). Fatigue increases muscle activations but does not change maximal joint angles during the bar dip. International Journal of Environmental Research and Public Health19(21), 14390.
  18. Muyor, J. M., López-Miñarro, P. A., & Alacid, F. (2022). Comparison of electromyographic activity during barbell pullover and straight arm pulldown exercises. Applied Sciences12(21), 11138.
  19. Schütz, P., et al. (2022). Chest exercises: movement and loading of shoulder, elbow and wrist joints. Sports10(2), 19.

Featured Image: Ground Picture / Shutterstock

The post The Ultimate Chest and Back Workout for Upper Body Muscle appeared first on Breaking Muscle.

Be Nice and Share!
This post was originally published on this site

http://www.marksdailyapple.com/

Couple cooking together with a variety of fresh bell peppers, cabbage, and other vegetables, drizzling olive oil.The words “keto diet” may conjure up visions of bacon, butter, and heavy cream, but that’s just the tip of the iceberg when it comes to the delectable food options available to keto dieters. 

Most people build their meal plans around main dishes, which makes sense. Main dishes usually provide the bulk of the protein in a given meal, and we all know how critical protein is for maintaining strength and staying healthy now and well into old age. But sides are how you add color, pizzazz, texture, and even more flavor. Steak—delicious. Steak served with a big-ass side salad and crispy roasted broccoli—out of this world. 

Without further ado, here are 20 of our favorite side dishes to complete your fabulous, low-carb keto meals.

20 Keto Side Dishes You’ll Love

Warm Vegetable Side Dishes

1. Balsamic Roasted Brussels Sprouts

Brussels sprouts have experienced a major popularity boost since everyone discovered that they’re actually quite delicious roasted and served with bacon. This recipe adds tangy and sweet balsamic vinaigrette to take the flavor to another level.

Plate of roasted Brussels sprouts and bacon alongside a fork and a bottle of Primal Kitchen Balsamic Vinaigrette.

Get the Recipe


2. Grilled Greek Veggies

Customize this easy, flavorful recipe with whatever vegetables you have on hand. It’s great for summer when your garden is producing bounties.

White serving bowl loaded with colorful mixed grilled vegetables.

Get the Recipe


3. Mushroom and Bacon Risotto

Plain cauliflower rice might not be very exciting, but this flavorful mushroom and bacon dish is a total crowd-pleaser.

Black bowl filled with cauliflower bacon mushroom risotto. Wooden serving spoon.

Get the Recipe


4. Sesame Ginger Broccoli

This recipe will tempt even those folks who aren’t the biggest fans of broccoli. The trick is to roast it long enough to develop some lightly browned crispy bits around the edges.

Overhead view of a bowl of roasted broccoli with garlic.

Get the Recipe


5. Creamed Spinach

Creamed spinach might seem old-fashioned and, let’s face it, not that appealing, but give this one a try. You’ll be pleasantly surprised. Bonus: it’s dairy-free!

Creamed spinach in white bowl with spoon on wooden background, blue checked napkin.

Get the Recipe


6. Mashed Vegetables (That Aren’t Potatoes) 

Mashed potatoes contain too many carbs to enjoy on a keto diet (unless you’re willing to stop at a spoonful or two). Luckily, there are lower-carb vegetables that are just as delicious mashed.

Mashing cauliflower in a blue enamel pot with a potato masher.

Get the Recipe


7. Air Fryer Green Beans

Perhaps you’ve had fried green beans off the menu at your favorite pub, but those were probably battered and fried. These are equally delicious and much more keto-friendly.

Plate of air fried green beans, Primal Kitchen Ranch Dip, white kitchen towel, fresh flowers.

Get the Recipe


8. Fajita Veggies

These make a yummy topping for a burrito bowl or big-ass steak salad, but you can also enjoy them with some simple grilled chicken or scrambled eggs.

Green, yellow, and red bell peppers and onions in a cast iron pan

Get the Recipe


9. Cauliflower Steaks

If you’ve only ever had cauliflower mashed or roasted, you must try these cauliflower steaks. Chimichurri is the real star of this show, though.

Spoon drizzling bright green chimichurri sauce over a roasted cauliflower steak on a sheet pan lined with parchment paper.

Get the Recipe


10. Cacio e Pepe

A keto version of the classic pasta dish of cheese and pepper made with zucchini noodles.

A fork swirling zucchini noodles with shredded cheese out of a white bowl.

Get the Recipe


11. Summer Ratatouille

Ratatouille isn’t just a friendly talking rat, it’s a very beautiful layered baked vegetable side dish. It takes a bit of prep work to chop the veggies and assemble the casserole, but the final product is well worth it.

White casserole dish of ratatouille on a wooden background with white towel and fork.

Get the Recipe


Salads and Vegetable Side Dishes Served Cold

12. Summer Broccoli Salad

The best parts of this salad are the texture and the dressing. Chopping all the ingredients finely and tossing them with homemade tahini dressing makes for a unique side that pairs nicely with any grilled meat.

Pouring tahini dressing over finely chopped broccoli salad in a glass bowl.

Get the Recipe


13. Shaved Brussels Sprouts Salad

A new way to combine Brussels sprouts and bacon—into a raw salad with gorgonzola cheese and pecans that’s out of this world.

Overhead shot of shaved Brussels sprouts salad in large white serving bowl with two lemon halves.

Get the Recipe


14. Keto Cole Slaw

Cole slaw, made with a creamy avocado oil mayo-based dressing, is the perfect combination of nutritious vegetables and healthy fats for a keto diet.

Cole slaw in a yellow ceramic bowl with a silver spoon on a white background adorned with green onions and purple cabbage.

Get the Recipe


15. Citrus Slaw

A citrusy take on a classic slaw. Serve this with crispy pork carnitas or lettuce-wrapped fish tacos.

Overhead shot citrus cole slaw in a white bowl with wooden spoons, sliced limes, and a jar of Primal Kitchen Mayo.

Get the Recipe


16. Wedge Salad with Blue Cheese Ranch Dressing

A crisp, cold wedge salad plus a perfectly grilled steak equals a meal you could eat every night and be totally happy.

White serving platter with wedge salad garnished with bright red diced pepper and a bottle of Primal Kitchen Ranch Dressing.

Get the Recipe


17. Homemade Sauerkraut

Fermented foods deliver probiotics that are fantastic for gut health. If you’ve only ever eaten store-bought sauerkraut, you’ll be surprised how simple it is to make your own sauerkraut at home. Eat it with sausages or on top of eggs. (Yes, really, sauerkraut is delicious on eggs.)

Large, open jar of sauerkraut in front of a head of cabbage and whole carrots.

Get the Recipe


18. Pickled Giardiniera

Giardiniera is dish of pickled vegetables with Italian spices. This one contains cauliflower, carrots, green beans and other vegetables. Serve it with any meat or seafood. It’s also a nice addition to a charcuterie board.

Large jar of giardiniera against a white tile background.

Get the Recipe

Sides That Aren’t Vegetables

19. Cheesy Keto Biscuits

Thought you couldn’t have biscuits on keto? Wrong! These are only 5 grams of carbs each.

Close-up shot of keto biscuits slathered with butter.

Get the Recipe


20. Keto Bacon Cheddar Muffins 

Another use for bacon! These savory cheesy muffins are awesome at breakfast, lunch, or dinner.

Plate with bacon cheddar muffins and several strips of bacon.

Get the Recipe

Primal Kitchen 7 Days, 7 Salads Challenge

The post Keto Side Dishes appeared first on Mark’s Daily Apple.

Be Nice and Share!
This post was originally published on this site

http://www.marksdailyapple.com/

Research of the Week

Income inequality in the Aztec Empire.

Thinking positive about the future reduces stress and anxiety if the thinking is relative to your current task.

Risk taking in humans and chimps is quite similar.

People are spending more money than ever, but the money is spread across a broader swathe of brands. More niche products.

Cannabis legalization doesn’t seem to have reduced opioid usage, unfortunately.

New Primal Kitchen Podcasts

Primal Health Coach Radio: Christina Frei

Primal Kitchen Podcast: Obesity Expert Dr. Spencer Nadolsky Weighs in on Ozempic

Media, Schmedia

Antihistamines may reduce the effects of exercise.

Interesting Blog Posts

It’s been over ten years and they still can’t emulate a worm’s brain.

How long does it take to lose muscle on a break?

Social Notes

Family is everything.

Everything Else

Women gain muscle quicker in the lower body than upper body.

Things I’m Up to and Interested In

Not surprised: Female athletes suffer more negative effects from overtraining.

Could all be avoided: Diets high in linoleic acid increase colitis risk in mice.

That’s a shame: Plant-based protein is often rich in acrylamide.

Interesting: Personality profiles of the rich.

Worth a try: Slow eccentrics for growth hormone boosts.

Question I’m Asking

Do you think positive about the future?

Recipe Corner

Time Capsule

One year ago (Jul 1 – Jul 7)

Comment of the Week

“How do you eat vegetables?”

Ideally, I feed them to young cattle, then enjoy the veal.

-Efficient.

The post New and Noteworthy: What I Read This Week—Edition 229 appeared first on Mark’s Daily Apple.

Be Nice and Share!
This post was originally published on this site

Originally Posted At: https://breakingmuscle.com/feed/rss

If you’re lifting heavy at the gym, consuming a high-protein diet, and eating regularly throughout the day but still struggling to gain weight and muscle, you may benefit from supplementing with a mass gainer. Mass gainers provide a calorie-dense source of nutrients for athletes, bodybuilders, and hardgainers who struggle to consume the energy they need from food alone. They provide a convenient and efficient way to nourish your body with the nutrients it needs so you can finally bulk up.

Since every product offers something a little different, choosing the best mass gainer can be challenging. You may wonder what to look for when searching for a mass gainer to help you reach your goals. We help you answer this question and more in this detailed review. Keep reading for insight into eight of the best mass gainers on the market to help you narrow it down to the right one.

Medical disclaimer: This article is intended for educational and informational purposes only. It is not intended as a substitute for medical advice. For health advice, contact a licensed healthcare provider.

Our Top Picks for the Best Mass Gainers

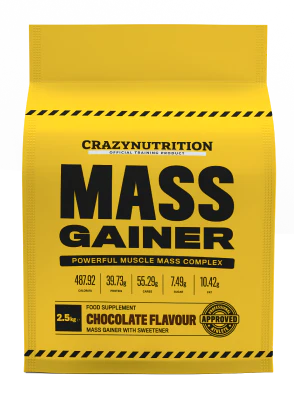
Best Mass Gainer Overall: Crazy Nutrition Mass Gainer


Crazy Nutrition Mass Gainer

  • Number of servings: 20 
  • Price per serving: $4.50
  • Calories per serving: 488 
  • Protein per serving: 39 to 40 grams
  • Fat per serving: 10 grams
  • Carbohydrates per serving: 55 to 56 grams


Check Price

Pros

  • The main ingredient is oat flour, a whole grain that provides long-lasting energy
  • Includes six grams of fiber, which reduces cholesterol and helps regulate blood sugar
  • Made with digestive enzymes that aid in digestion and improve the absorption of nutrients from food

Cons

  • Seven grams of saturated fat per serving
  • Only two flavors available 
  • Includes artificial sweeteners

Crazy Nutrition’s Mass Gainer is formulated to help you pack on muscle mass, increase size, and recover faster. Each four-scoop serving contains 488 calories and 40 grams of protein. Drink this in a shake, and you’re consuming an entire meal’s worth of extra nutrients.

Unlike most other mass gainers that use maltodextrin as their main ingredient, Crazy Nutrition’s mass gainer uses oat flour. Oat flour is a whole grain and complex carbohydrate that provides a long-lasting energy source to help you push through your workouts without crashing later. Packed with fiber, oat flour will keep you feeling full and satisfied.

With only 55 grams of carbs, you’re not consuming extra calories that could result in gaining more body fat. Mass gainers typically include anywhere from 50 to 250 grams of carbs per serving. Compared to other options, Crazy Nutrition is a low-carb mass gainer. 

Following carbs, protein is the next main ingredient. Whey and milk protein are combined to offer you the greatest muscle-gaining benefits. Whey protein is high in leucine, an amino acid that helps activate muscle protein synthesis, making it ideal for building mass. (1)

Medium-chain triglyceride (MCT) oil powder provides a source of fat and is easily digested, absorbed, and transported throughout the body for a quick source of energy.

Even more, customers who left reviews on the Crazy Nutrition website love the taste. With only chocolate and vanilla flavors to choose from, you can’t make a wrong choice because these flavors pair well with various liquids and foods.

Crazy Nutrition’s Mass Gainer offers a valuable product at a reasonable price. Compared to other mass gainer supplements with as little as 11 servings per container, you get 20 to 40 servings and truly get your money’s worth. Its high-quality ingredients, great taste, and affordability make it the best mass gainer overall. We also think it’s the best mass gainer for skinny guys due to its ideal macronutrient profile.

RELATED: Best Protein Powders for Weight Loss, Muscle Gain, and More

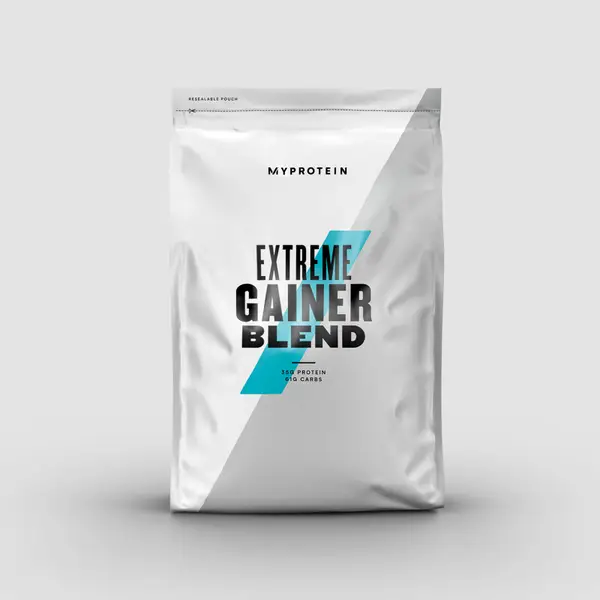
Best Mass Gainer for Bulking: MyProtein Extreme Gainer Blend


MyProtein Extreme Gainer Blend

  • Number of servings: 20 to 40
  • Price per serving: $2.28
  • Calories per serving: 460 
  • Protein per serving: 40 grams
  • Fat per serving: Six grams
  • Carbohydrates per serving: 63 grams


Check Price

Pros

  • Added creatine monohydrate for enhanced muscle strength and size
  • Most affordable per serving on our list
  • Includes glutamine, an amino acid that supports muscle repair and recovery

Cons

  • Includes artificial flavoring
  • Mixed reviews on the taste
  • Could be too low in calories depending on your energy needs

Each 3.5-scoop serving of MyProtein Extreme Gainer Blend is crammed with protein and carbohydrates to help you bulk up. Ingredients like creatine monohydrate, glutamine, digestive enzymes, and flaxseed flour are included to enhance exercise performance, aid in recovery, and improve digestive health. 

Protein is king when it comes to packing on muscle. Forty grams of whey protein after a workout will likely help you achieve the positive net protein balance needed to activate muscle protein synthesis (the process of producing new muscle) and build muscle mass.

You don’t get high-quality creatine in every mass gainer, but if you’re looking to bulk up, it’s something you’ll want to have. Extreme Gainer includes creatine, which has been shown to improve muscle strength and power so you can push more weight and increase your one-rep max. (2)

Glutamine is another ingredient in this mass gainer that you won’t find in just any product. Glutamine is an amino acid that helps your muscles rebuild and repair themselves. It can reduce muscle soreness and aid in recovery. (3)

The main ingredient, maltodextrin, will provide energy before your workout so you can crush your goals at the gym. Oat flour is also included for longer-lasting energy and fiber. Furthermore, the flaxseed flour in this product provides additional fiber that may help improve digestive health, especially if your gut is sensitive to supplements.

Regarding taste, customers on the MyProtein website have left mixed reviews. One customer thinks the vanilla is tolerable and writes, “The taste of vanilla is good but has also not a very good aftertaste.” Another customer says, “Chocolate tastes ‘fine’ and Cookies and cream tastes like sugar and cream with some coffee mixed in.” We’ll let you decide for yourself.

MyProtein Extreme Gainer Blend’s high-protein formula with creatine and glutamine could offer the calories and nutrients you need to bulk up. Not only that, but it’s also the most affordable mass gainer in terms of cost per serving on our best mass gainers list.

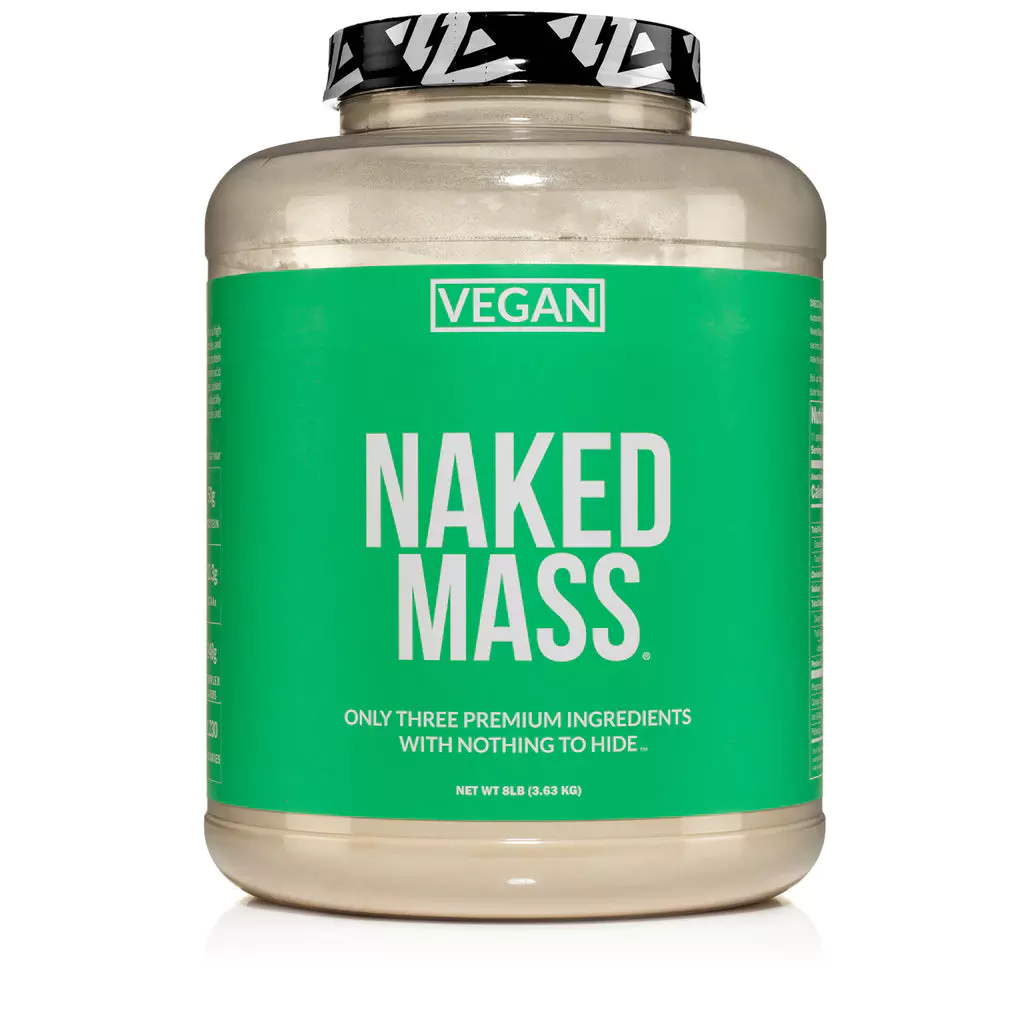
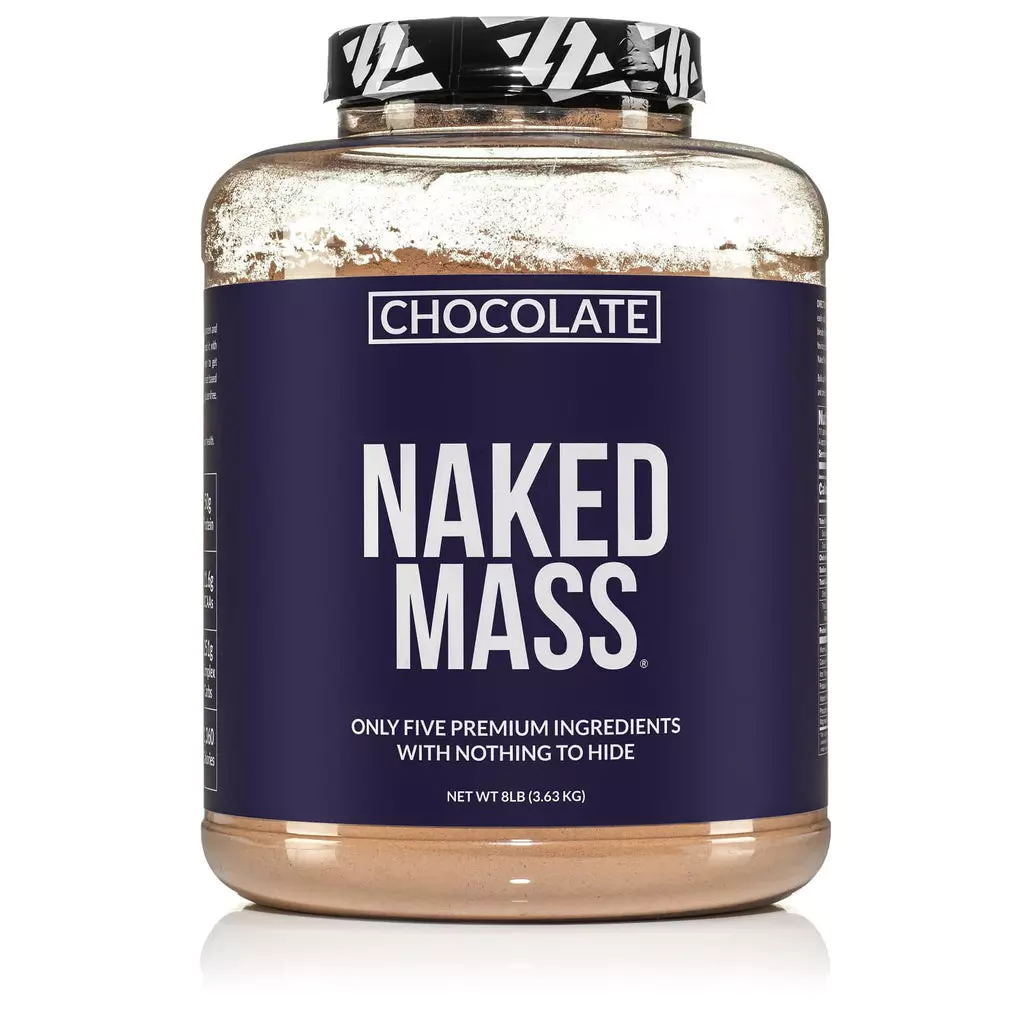
Best Vegan Mass Gainer: Naked Nutrition Vegan Weight Gainer


Naked Nutrition Vegan Weight Gainer

  • Number of servings: 11
  • Price per serving: $5.91
  • Calories per serving: 1,230 to 1,280
  • Protein per serving: 50 grams
  • Fat per serving: Four to 15 grams
  • Carbohydrates per serving: 237 to 248 grams


Check Price

Pros

  • Whopping 50 grams of vegan protein with a complete essential amino acid profile
  • Only three ingredients without any unnecessary fillers and additives 
  • Only four grams of total fat and very low in saturated fat

Cons

  • Only 11 servings per container
  • Very high in carbohydrates from maltodextrin 
  • Expensive price per serving

Naked Nutrition’s Vegan Weight Gainer is energy-dense, protein-packed, and made with minimal ingredients. Tapioca maltodextrin, pea protein, and brown rice protein — that’s all there is to it! The product is certified vegan, gluten-free, soy-free, and isn’t made with GMOs. Each serving is four scoops and contains a whopping 1,230 to 1,280 calories, depending on the flavor.

The organic tapioca maltodextrin accounts for 237 grams of carbs per serving. Even for someone who requires more calories than the usual standard diet, that is a lot of carbs packed into one serving.

Technically, maltodextrin is a complex carb, which typically takes longer to digest. But it acts more like a simple carb, which digests more quickly, because it is low in fiber and has a high glycemic index (GI) value, meaning it can spike blood sugar. Nevertheless, it provides a quick energy source that could give you an extra boost to power through your workout.

Pea protein and brown rice protein provide 50 grams of protein per serving. Although these protein sources are plant-based, this weight gainer supplement contains all nine essential amino acids, making it a complete protein, which is ideal for packing on muscle.

Customers on the Naked Nutrition website approve of the taste. One customer writes, “I love the taste and the ease with which the powder dissolves in liquid.” Another customer says, “Best tasting vegan powder I’ve ever had! Easy on the stomach and mixes great in a blender.” As you can see, this mass gainer checks the boxes for both solubility and taste.

Naked Mass offers a simple blend of complete plant-based proteins and complex carbohydrates to aid muscle growth and weight gain. Although it’s one of the pricier options, customers love the taste and quality.

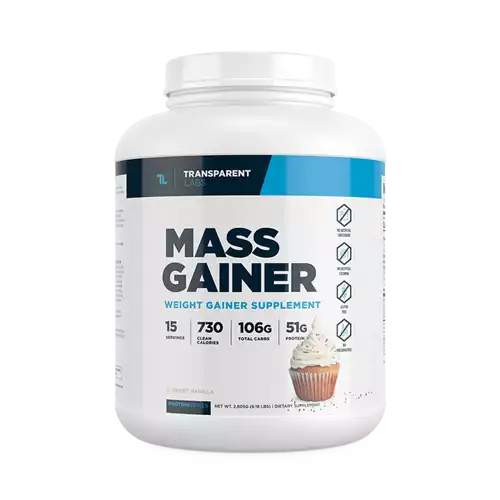
Best Mass Gainer Protein Powder: Transparent Labs Mass Gainer


Transparent Labs Mass Gainer

  • Number of servings: 15
  • Price per serving: $5.33
  • Calories per serving: 730 to 750
  • Protein per serving: 51 to 53 grams
  • Fat per serving: 13 to 14 grams
  • Carbohydrates per serving: 106 to 110 grams


Check Price

Pros

  • Includes three grams of creatine monohydrate
  • Good source of dietary fiber 
  • 53 grams of high-quality whey protein concentrate

Cons

  • Contains 12 grams of saturated fat
  • Over $5.00 per serving 
  • Only two flavors available

Transparent Labs is a reputable supplement company known for high-quality products, including the Mass Gainer product. It comes in two flavors: Chocolate Glaze Donut and Sweet Vanilla. Each serving is two scoops and contains 750 calories from carbs, protein, and fat. It’s free of artificial coloring and sweeteners, GMOs, and gluten. 

The calorie content provides a nice middle ground compared to others in this review, which range from just under 500 to more than 1,200 calories. At 750 calories per serving, you’re consuming the equivalent of a large meal with the Transparent Labs Mass Gainer.

The main ingredient in this product, which accounts for most of its calorie content, is tapioca maltodextrin, a common food additive that provides quick energy.

Whey protein concentrate is the main source of protein. Whey protein provides the full essential amino acid profile, including all branched-chain amino acids (BCAAs). Because whey protein digests rapidly, it increases blood amino acid concentrations quickly after consumption, which is ideal after a workout to maximize gains.

MCT oil powder accounts for most of the fat content. Although there are potential benefits to consuming MCT oil, including helping the body burn fat for energy, it’s still classified as saturated fat and should be consumed in moderation. If you take this mass gainer daily, aim to make the rest of your food intake low in saturated fat. Choose lean meats and low-fat dairy options, and limit fried foods.

As if quality protein and complex carbohydrates weren’t enough, this product includes three grams of creatine monohydrate to support enhanced muscle size, strength, and endurance. (2)

According to customer reviews on the Transparent Labs website, the Mass Gainer product doesn’t fall short on taste. One customer writes, “Great taste. Easy to mix.” Another customer states, “Seriously the best protein by taste and the cleanest.” Clearly, Transparent Labs knows how to create a great-tasting product that’s customer-approved.

RELATED: 13 Best Collagen Supplements

Best Tasting Mass Gainer: Crazy Nutrition Mass Gainer


Crazy Nutrition Mass Gainer

  • Number of servings: 20 
  • Price per serving: $4.50
  • Calories per serving: 488 
  • Protein per serving: 39 to 40 grams
  • Fat per serving: 10 grams
  • Carbohydrates per serving: 55 to 56 grams


Check Price

Pros

  • The main ingredient is oat flour, a whole grain that provides long-lasting energy
  • Includes six grams of fiber, which reduces cholesterol and helps regulate blood sugar
  • Made with digestive enzymes that aid in digestion and improve the absorption of nutrients from food

Cons

  • Seven grams of saturated fat per serving
  • Only two flavors available 
  • Includes artificial sweeteners

Crazy Nutrition Mass Gainer is known for its quality ingredients and delicious taste. Every four-scoop serving contains 488 calories and around 40 grams of protein. It’s available in two flavors (Chocolate and Vanilla) and can be mixed with water or milk or added to a smoothie. 

Oat flour, whey protein, and milk protein are the main ingredients. The oat flour makes this mass gainer supplement unique to most others that use maltodextrin as their source of carbs. Oat flour is a complex carb that provides extra fiber and keeps you energized for longer.

The oat flour combined with cocoa or vanilla gives the Crazy Nutrition Mass Gainer a creamy texture. Maltodextrin and sucralose are used as sweeteners to appease your sweet tooth. Sucralose is a low-calorie artificial sweetener often used in products to replace sugar. It’s generally considered safe to consume in moderate amounts. (4)

Check out the reviews left by customers who purchased this product from the Crazy Nutrition website, and you’ll notice a common thread — they love the taste. One customer wrote, “Great taste and steady gains.” Another commented, “Easy to mix. I add bananas and peanut butter to mine and it’s awesome.”

Overall, Crazy Nutrition’s Mass Gainer is a solid option for hardgainers looking to pack on solid muscle. It delivers on nutritional content, taste, and price.

RELATED: Best Pre-Workouts for Building Muscle, Running, Taste, and More

Best Lean Mass Gainer: Transparent Labs Mass Gainer


Transparent Labs Mass Gainer

  • Number of servings: 15
  • Price per serving: $5.33
  • Calories per serving: 730 to 750
  • Protein per serving: 51 to 53 grams
  • Fat per serving: 13 to 14 grams
  • Carbohydrates per serving: 106 to 110 grams


Check Price

Pros

  • Includes three grams of creatine monohydrate
  • Good source of dietary fiber 
  • 53 grams of high-quality whey protein concentrate

Cons

  • Contains 12 grams of saturated fat
  • Over $5.00 per serving 
  • Only two flavors available

Transparent Labs takes the cake when it comes to offering a mass gainer that won’t leave you feeling uncomfortably full and bloated. Made with an optimal balance of protein, carbs, and fat, it has everything you need to increase lean muscle mass

This product doesn’t overdo it on the carbs, which we commonly see with other mass gainers. You get just the right amount — 106 to 110 grams, depending on the flavor — to help you reach your calorie needs without unnecessary fat gain, spiked blood sugar, and fatigue that can come with overconsuming carbs.

Aside from its 53 grams of whey protein concentrate and 110 grams of organic carbohydrates, Transparent Labs’ mass gainer includes other beneficial ingredients.

For example, the Chocolate Glaze Donut flavor includes six grams of soluble fiber, making this a high-fiber supplement. Soluble fiber helps lower cholesterol, control blood sugar, and keep you feeling fuller for longer. It may also help reduce bloating, gas, constipation, and diarrhea that some experience when taking supplements. (5)

Additionally, this product includes creatine monohydrate, which is known to enhance exercise performance. Studies indicate that a daily dosage of three to five grams of creatine improves muscle performance, builds muscle, and supports muscle recovery. (2) You could be more likely to gain the lean mass you desire when taking a mass gainer with creatine. 

What’s more, customers love the taste and see results from this weight gainer supplement. Consider this product if you’re looking for a quality mass gainer with just the right amount of carbs, protein, and fat to help you achieve your goals.

Best Clean Mass Gainer: Naked Nutrition Weight Gainer Protein Supplement


Naked Nutrition Weight Gainer Protein Supplement

  • Number of servings: 11
  • Price per serving: $6.36
  • Calories per serving: 1,250 to 1,360
  • Protein per serving: 50 grams
  • Fat per serving: 2.5 to 15 grams
  • Carbohydrates per serving: 251 to 252 grams


Check Price

Pros

  • Made with only three ingredients 
  • No artificial additives 
  • Tested by Informed Choice for banned substances

Cons

  • 21 grams of sugar 
  • Very high in carbohydrates
  • Expensive price per serving

Naked Nutrition strategically combines whey, casein, and organic maltodextrin in the Weight Gainer Protein Supplement to help you build muscle and increase body weight. Choose from Unflavored, Vanilla, or Chocolate to satisfy your tastebuds. Each four-scoop serving contains an impressive 1,250 calories and 50 grams of protein.

Naked Nutrition strives to create effective supplements with minimal, clean ingredients. The Weight Gainer Protein Supplement‘s primary ingredient is tapioca maltodextrin, a readily absorbed source of carbohydrates that will energize and sustain you through a strenuous workout.

The protein blend of whey and casein provides a solid amino acid profile ideal for muscle growth and recovery. Whey protein is digested and absorbed rapidly, providing your body with readily available amino acids for rapid muscle building and repair. On the other hand, casein is slowly digested, feeding your muscle cells with amino acids over a longer period of time, which helps reduce muscle breakdown. (6)

When it comes to putting on size, it’s essential to meet your energy needs. With 1,250 to 1,360 calories per serving, this mass gainer provides a substantial boost to help you meet your elevated calorie needs.

Naked Nutrition doesn’t believe in using artificial sweeteners, flavors, or colors in its products, including the Weight Gainer Protein Supplement. Not only that, but this product is third-party tested for banned substances by Informed Choice. You can rest assured that you’re getting a product without harmful or toxic contaminants.

Sometimes high quality comes with a higher price tag, as is the case with Naked Nutrition’s Weight Gainer Protein Supplement. Consider the product’s clean formulation and the company’s commitment to transparency when deciding whether to invest in it. This mass gainer may be right for you if you’re looking for a product free of artificial ingredients and cheap fillers.

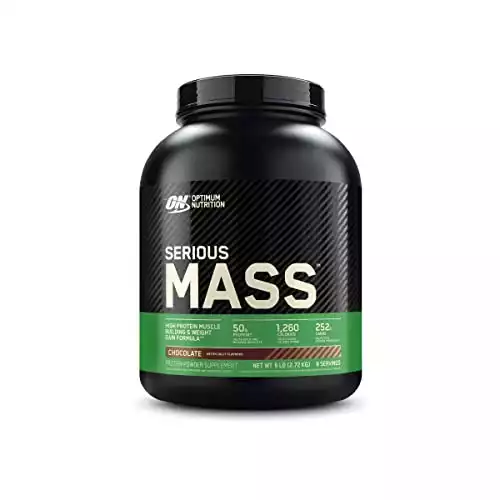
Best Mass Gainer With Creatine: Optimum Nutrition Serious Mass


Optimum Nutrition Serious Mass Weight Gainer

  • Number of servings: 16
  • Price per serving: $4.75 to $5.95
  • Calories per serving: 1,260
  • Protein per serving: 50 grams
  • Fat per serving: Five to six grams
  • Carbohydrates per serving: 251 to 254 grams


Check Price

Pros

  • Includes three grams of creatine monohydrate 
  • Available in five different flavors
  • Tested by Informed Choice for banned substances

Cons

  • Eight grams of added sugar per serving 
  • Very high in carbohydrates
  • Artificially flavored

Optimum Nutrition is known for offering delicious supplements, and Serious Mass is no exception. Serious Mass provides the calorie surplus and creatine helpful for muscle growth. This mass weight gainer comes in several mouth-watering flavors including Chocolate, Vanilla, Strawberry, Banana, and Chocolate Peanut Butter.

Each two-scoop serving contains 1,260 calories and 50 grams of protein to support muscle building. Optimum Nutrition recommends that new users start with a half serving (one scoop), as the full serving may be difficult to digest and could cause gastrointestinal discomfort. 

Optimum Nutrition Serious Mass contains a mix of carbs, protein, and fat for a complete macronutrient profile. The carbs come from maltodextrin, a fast-digesting source of carbs commonly used in mass gainers. The protein comes from a blend of whey protein concentrate, calcium caseinate, and egg albumin. MCT oil contributes to the fat content, which is relatively low compared to other mass gainers — Serious Mass has just five to six grams of fat while other weight gain supplements have 15.

Serious Mass includes three grams of creatine monohydrate per serving. Creatine has been shown to help build muscle, aid ATP synthesis (energy), and enhance exercise performance when taken in a three to five-gram daily dosage. (2

Customers who have reviewed the product on Amazon generally prefer the taste when they mix it with milk. One customer recommends mixing it into a smoothie and writes, “The vanilla goes really well in a shake with strawberries, bananas, and milk.” Another customer appreciates its solubility and writes, “Good for putting on size. Tastes great and is easy to blend.”

Serious Mass has been tested by Informed Choice for banned substances, giving you more assurance that you aren’t subjecting your body to harmful contaminants. It’s reasonably priced compared to other options on the market, which can cost more than $6.00 per serving. When combined with heavy lifting and additional food intake, it may be the mass-gaining supplement with creatine you’ve been looking for to help you fill out and gain muscle.

How We Chose the Best Mass Gainers

Choosing the best mass gainers required careful consideration of various factors. We understand that everyone has different goals, budgets, calorie needs, and dietary preferences, so we intentionally included a variety of mass gainers in this review to offer something for everyone.

We strived to include mass gainers with quality ingredients that are limited in unnecessary fillers, artificial additives, and excessive added sugars. This means we sought out products with high-quality protein, complex carbohydrates, and additional ingredients like creatine that support muscle building and recovery. Ultimately, it’s our mission to guide you to top-notch products so you can achieve your goals without the hassle of wasting money on multiple supplements.

How Do Mass Gainers Work?

Putting on size and packing on muscle requires a caloric surplus and lots of protein. If you have a high metabolism or adhere to a strenuous exercise routine, it may be difficult to meet your energy needs through food alone. That’s why some endurance athletes, bodybuilders, and hardgainers (individuals who have difficulty gaining muscle mass) turn to mass gainers. 

Mass gainers offer individuals a convenient and efficient way to increase their calorie intake. Instead of trying to uncomfortably scarf down another meal, they can simply mix a mass gainer into water or milk and consume it as a beverage. Mass gain supplements provide a blend of protein, carbs, and fat to support muscle growth and increased size.

Mass gainers often provide anywhere from 400 to 1,300 calories per serving. These calories can help consumers achieve a caloric surplus.

The majority of calories in mass gainers come from carbs. Carbs are the body’s preferred source of energy and provide readily available fuel for intense workouts. Additionally, mass gainers are full of protein, which is required for muscle repair, recovery, and growth. The protein usually comes in the form of whey, casein, soy, or pea protein. 

Lastly, some mass gainers include other performance-boosting ingredients like creatine and glutamine to support optimal muscle growth and recovery. 

Mass gainers are not meal replacements and should be consumed in addition to regularly scheduled meals. For the best results, they should be used alongside a balanced diet and regular exercise.

RELATED: How to Eat More for Muscle and Strength Gains

Benefits of Mass Gainers

By this point you know mass gainers help increase size, but there are several other benefits these supplements may offer to improve your health and performance in the gym:

  • Allow you to achieve a calorie surplus
  • Promotes muscle growth and repair
  • Improved energy
  • Improved recovery
  • Nutrient support
  • Ease and convenience

When Is the Best Time to Take Mass Gainer?

When you choose to take a mass gainer is entirely up to you. Ideally, you can work it into your schedule at the same time(s) each day. Some common times to take a mass gainer include pre-workout, post-workout, between meals, and right before bedtime.

Consistency is more important than timing when it comes to taking a mass gainer. Gaining size and lean mass is largely dependent on your ability to regularly consume enough calories and protein. Ultimately, consistency over time is what will yield the greatest results.

What Are the Side Effects of Mass Gainer?

The possible side effects of mass gainers will vary among individuals. Some tolerate them better than others. Here are a few more common side effects you could experience.

Digestive Issues

Mass gainers contain a lot of calories, which some may find difficult to digest all in one serving. Bloating, gas, upset stomach, and/or diarrhea may occur if you attempt to consume more than your body can comfortably handle. You may need to start with a half-serving size to avoid these symptoms. You can also choose to split a serving size up into smaller portions throughout the day.

Allergies

Many mass gainers include allergens such as milk, soy, and wheat. If you have an allergy, always check the label and ingredients list. Choose a product that fits your dietary needs to avoid potentially dangerous allergic reactions.

Increased Blood Sugar

Mass gainers are generally high in carbohydrates, which can make it difficult to manage blood sugar. 

Maltodextrin is a common main ingredient in mass gainers. Maltodextrin is a highly processed source of carbohydrates typically made from corn, rice, tapioca, or potato starch. This ingredient is fast-digesting and can cause a spike in blood sugar. If you have diabetes or are monitoring your blood sugar, speak with your doctor before starting a mass gainer.

Nutrient Imbalances

Mass gainers are intended to be consumed in addition to a balanced diet containing plenty of whole foods. To avoid nutrient deficiencies or imbalances, eat a variety of whole grains, beans, vegetables, fruits, nuts, and protein.

Remember, not everyone will experience these side effects. However, if you have a medical condition or are taking medication, I recommend speaking with your doctor before starting a new supplement.

What To Look For When Buying Mass Gainer

Every mass gainer on the market is a little different, so it’s important to know what to look for when shopping around. Nutrients, ingredients, and protein sources can make a difference in the quality and effectiveness of the product you purchase. Here’s what to look for to ensure you’re getting a solid supplement.

Macronutrients

Mass gainers usually include all three macronutrients and are highest in carbs. Look for products with complex carbohydrates from oat flour or maltodextrin. Oat flour is ideal because it provides long-lasting energy and won’t spike blood sugar, whereas maltodextrin is quickly absorbed and can spike blood sugar. Also, aim to choose mass gainers without added sugar. 

Most mass gainers will include anywhere from 50 to 250 grams of carbohydrates. Those that are very high in carbohydrates will also be very high in calories and may result in more weight gain from fat for some consumers. 

Mass gainers often include 30 to 60 grams of protein per serving. If your goal is to gain lean mass, choose a mass gainer higher in protein.

The fat content in mass gainers varies, but most include 10 to 20 grams per serving. Aim for a product on the lower end of this range with less than five percent daily value (DV) from saturated fat. Mass gainers commonly include MCT oil. Although MCT oil may help the body burn fat for energy, it’s saturated fat and should be consumed in moderation. To reduce overall saturated fat intake, aim to consume the rest of your calories from food low in saturated fat by choosing lean meats and low-fat dairy foods and limiting fried foods.

Ingredients List

You may want to look for products with additional ingredients that boost muscle-building potential, aid in recovery, and improve digestion. 

Look for products that include three to five grams of creatine monohydrate to gain strength, increase muscle mass, and improve muscle endurance. 

Consider mass gainers with glutamine, an amino acid that may help your muscles recover more quickly after a workout and result in less muscle soreness. (3)

Soluble fiber is another ingredient you might see included on the ingredients list. Soluble fiber helps reduce cholesterol, control blood sugar, and keep you feeling full and satisfied. It may also help reduce uncomfortable side effects like gas and bloating that some experience when taking a mass gainer. 

Furthermore, some mass gainers include digestive enzymes, which help break down food during digestion, allowing for better absorption.

Protein Source

Non-vegans should look for mass gainers made with whey protein, casein, and/or milk protein (casein and whey). These are complete protein sources containing all essential amino acids. Many consider whey protein to be the gold standard for muscle building because it is high in leucine, an amino acid that helps activate muscle protein synthesis. (1)

Casein protein is more slowly digested, making it a popular choice for supporting muscle growth overnight. The International Society of Sports Nutrition advises that drinking 30 to 40 grams of casein protein before bed can increase muscle protein synthesis. (7)

Soy and pea protein are also complete proteins and are good options for vegans. However, they have a lower density of essential amino acids compared to whey. Even so, a meta-analysis involving nine long-term studies saw no significant differences between whey and soy protein in terms of strength gains and lean muscle mass. (8)

Price

Mass gainers tend to be more pricey than even the best whey protein powders because they include more protein and calories. Since they all come in different-sized containers, look for products with affordable costs per serving. Mass gainers typically range from $3.00 to $6.00 per serving. Consider the quality of the product when determining your budget. For example, a mass gainer without artificial flavorings or sweeteners will be cheaper than one with all-natural ingredients.

Final Thoughts

Mass gainers are high-calorie supplements that provide a mix of macronutrients to help individuals consume more calories to support muscle and weight gain. If you have a high metabolism or burn a significant number of calories each day, they may help you meet your energy needs and build mass. Whether you’re looking for the best clean mass gainer or a mass gainer with creatine, there is a supplement out there for you.

When choosing the best mass gainer, consider the macronutrients, protein source, taste, and cost. Look for supplements that include high-quality ingredients such as creatine and glutamine that support your health and fitness goals. Mass gainers are most effective when used consistently and in combination with a well-rounded lifestyle. For the best results, continue to eat a nutrient-dense diet and engage in regular exercise.

FAQs

Which mass gainer is most effective?

The most effective mass gainer will vary from person to person. Choose a mass gainer that aligns with your goals, dietary needs, and training plan for the best results and effectiveness. We like Crazy Nutrition’s Mass Gainer because it contains high-quality ingredients, tastes great, and comes at a reasonable price point.

Does weight gainer really work?

Mass gainers help some individuals with weight and muscle growth, but their effectiveness varies depending on diet, training regimen, and energy needs. If used alongside a balanced diet and consistent training program, mass gainers can help provide the calories and protein necessary for muscle growth.

Is a mass gainer better than a protein shake?

The choice between a mass gainer and a protein shake depends on what goals you are trying to achieve. Mass gainers are for those who struggle to meet their energy needs from food to gain weight and muscle. Protein shakes are for athletes who want to gain muscle but don’t need a surplus of calories and other nutrients.

Which gainer is best for weight gain?

The best mass gainer for weight gain will depend on your dietary needs and individual preferences. A high-calorie mass gainer like Naked Nutrition’s Weight Gainer Protein Supplement is ideal for weight gain because it offers more than 1,200 calories per serving. However, consider ingredients, formulation, nutrition, flavor, and cost when choosing the best mass gainer for weight gain that fits your needs.

Research

  1. Jäger, R., Kerksick, CM., Campbell, BI., et al. National Society of Sports Nutrition Position Stand: protein and exercise. J Int Soc Sports Nutr. 2017;14:20. doi:10.1186/s12970-017-0177-8 
  2. Wax, B., Kerksick, C. M., Jagim, A. R., Mayo, J. J., Lyons, B. C., & Kreider, R. B. (2021). Creatine for Exercise and Sports Performance, with Recovery Considerations for Healthy Populations. Nutrients, 13(6). https://doi.org/10.3390/nu13061915
  3. Legault Z, Bagnall N, Kimmerly DS. The Influence of Oral L-Glutamine Supplementation on Muscle Strength Recovery and Soreness Following Unilateral Knee Extension Eccentric Exercise. Int J Sport Nutr Exerc Metab. 2015;25(5):417-426. doi:10.1123/ijsnem.2014-0209
  4. Magnuson BA, Roberts A, Nestmann ER. Critical review of the current literature on the safety of sucralose. Food Chem Toxicol. 2017;106(Pt A):324-355. doi:10.1016/j.fct.2017.05.047
  5. Anderson JW, Baird P, Davis RH Jr, et al. Health benefits of dietary fiber. Nutr Rev. 2009;67(4):188-205. doi:10.1111/j.1753-4887.2009.00189.x
  6. Kanda A, Nakayama K, Sanbongi C, Nagata M, Ikegami S, Itoh H. Effects of Whey, Caseinate, or Milk Protein Ingestion on Muscle Protein Synthesis after Exercise. Nutrients. 2016;8(6):339. Published 2016 Jun 3. doi:10.3390/nu8060339
  7. Kerksick CM, Arent S, Schoenfeld BJ, Stout JR, Campbell B, Wilborn CD, Taylor L, Kalman D, Smith-Ryan AE, Kreider RB, Willoughby D, Arciero PJ, VanDusseldorp TA, Ormsbee MJ, Wildman R, Greenwood M, Ziegenfuss TN, Aragon AA, Antonio J. International society of sports nutrition position stand: nutrient timing. J Int Soc Sports Nutr. 2017 Aug 29;14:33. doi: 10.1186/s12970-017-0189-4. PMID: 28919842; PMCID: PMC5596471.
  8. Messina M, Lynch H, Dickinson JM, Reed KE. No Difference Between the Effects of Supplementing With Soy Protein Versus Animal Protein on Gains in Muscle Mass and Strength in Response to Resistance Exercise. Int J Sport Nutr Exerc Metab. 2018;28(6):674-685. doi:10.1123/ijsnem.2018-0071

The post 8 Best Mass Gainers for Bulking Up Fast appeared first on Breaking Muscle.

Be Nice and Share!
This post was originally published on this site

Originally Posted At: https://breakingmuscle.com/feed/rss

2021 and 2022 CrossFit Games Adaptive Division winner Casey Acree will look to win his third championship as a Men’s Upper Extremity competitor when he competes in the 2023 Games on Aug. 1-6 in Madison, WI. On June 27, 2023, Acree shared one of his workouts in an Instagram reel as he prepares for the upcoming Games.

In what he described as a “fun little gymnastic session,” Acree’s 9,500 followers saw him working through the circuit-style training session. Exercises were modified when needed to accommodate the absence of Acree’s left arm below the elbow, but he was was able to execute the workout with intensity.

  • SkiErg — 24 calories
  • Rope Climb — 4.6 meters (15 feet) x 4 reps
  • Strict Handstand Push-up — 8 reps
  • Bar Muscle-up — 8 reps
  • Overhead dumbbell walking lunge — 15.2 meters (50 feet) with one 70-pound dumbbell

Acree rested for three minutes before proceeding to the second circuit.

Acree rested another three minutes before repeating each circuit for a second set. He posted his times for each section of the workout, respectively: 4 minutes, 30 seconds / 4 minutes, 21 seconds for the first set and 4 minutes, 25 seconds / 4 minutes, 4 seconds for the second round.

In the post caption, he acknowledged that he’s not likely to encounter all of the movements included in the workout when he competes at the Games, but he still feels they can be beneficial.

“I know I’ll never do about 80% of these things in competition, but competition has never been my only purpose for training. I do this ’cause I enjoy challenging myself and expressing myself physically. That will last me longer than any competition ever will.”

As for his competitive success, he started off 2023 as best as possible when he placed first in the 2023 CrossFit Open out of the 120-plus Men’s Upper Extremity competitors. He is considered a favorite to win his division in the Games for a third straight year.

Acree won the 2022 CrossFit Games by 280 points over runner-up Josue Maldonado. In doing so, Acree became the second-ever competitor to sweep the Games, winning first place in every event. Acree also won straight through the entire season by winning the Adaptive Men’s Upper Extremity division in the Open and Semifinal.

Featured Image: @coachcaseyacree on Instagram

The post Two-Time CrossFit Games Adaptive Division Champ Casey Acree is Working Hard to Earn a Third Title appeared first on Breaking Muscle.

Be Nice and Share!
This post was originally published on this site

Originally Posted At: https://breakingmuscle.com/feed/rss

You can count the number of athletes who have verifiably deadlifted 500 kilograms (1,102.3 pounds) with one hand and you’d still have a finger free. Jamal Browner is one member of this highly exclusive strength club. He has lifted that massive amount with his signature sumo deadlift, but he’s recently been working with a conventional stance to prepare for his first strongman appearance.

Browner will compete for the first time in the 2023 World Deadlift Championships, which is part of the Giants Live 2023 Strongman World Open on Sept. 2, 2023 in Cardiff, Wales, and he’s been showing signs of steady progress. He offered evidence of his steady strength gains by sharing a recent conventional deadlift of four reps with 410 kilograms (903.8 pounds), which you can see in the Instagram post posted on June 29, 2023.

Browner arrived at the barbell with a relatively close stance and his feet pointed straight ahead and grabbed the bar with the support of “figure-8” lifting straps. As per the rules of strongman competitions, a sumo stance is not permitted, while lifting straps are allowed. This is a significant difference from the powerlifting Browner is more familiar with. The only other supportive equipment he wore was a basic weightlifting belt.

Browner performed the first rep with ease, and followed quickly the second. The third was slightly slower, but he showed no major signs of struggling. He took an extra breath before beginning the fourth repetitions, but when it was completed, he held the lockout for a few seconds before returning the barbell to the floor.

With roughly nine weeks to go before the contest, Browner said in the post caption that he’s feeling good about his training and even felt that he could’ve added up to 10 kilograms to the bar and still performed the same reps with similar effort.

“Strength is trending in the right direction. I think I was good for another 7.5-10kg [16.5 to 22 pounds]. ”

Browner has pulled 435 kilograms (959 pounds) for a single in training as he familiarizes himself with the conventional stance. He has a long history of heavy lifts under his belt, but the recent challenge has been converting to the required conventional stance.

Browner is only the second-ever powerlifter to successfully complete a 455-kilogram (1,003-pound) deadlift at the 2022 United States Powerlifting Association (USPA) Raw Pro in September. Just a few months later, he pulled the same weight for two reps in training without the aid of lifting straps. Both of these were completed with a sumo stance.

The upcoming deadlift contest will also serve as the opening event for the Strongman World Open contest. The 2022 World Deadlift Championship (WDC) was won by Rauno Heinla, who deadlifted 476 kilograms (1,049.4 pounds) to also set a Masters world record. Heinla will be in the contest to defend that title as well as try to win the overall contest.

2021 WDC champion Ivan Makarov will also be looking for another title. Makarov, himself, recently shared an impressive training update deadlifting the current record — 476 kilograms(1,049 pounds) — for two repetitions.

Even though Browner will be required to use the conventional foot placement, he will also be allowed to use lifting straps as well as a deadlift suit, which could help him greatly in this contest. 

Featured Image: @jamal_b15 on Instagram

The post Jamal Browner Pulls 410 Kilograms (903.8 Pounds) for 4 Reps While Preparing for World Deadlift Championships appeared first on Breaking Muscle.

Be Nice and Share!
This post was originally published on this site

Originally Posted At: https://breakingmuscle.com/feed/rss

When it’s time to target your posterior chain — glutes, hamstrings, and lower back — many lifters can be spoiled for choice when it comes to choosing effective exercises. Two of the most popular movements that end up in the spotlight are the classic deadlift and its slightly more focused twin, the Romanian deadlift (RDL).

Both of these exercises use a “hip hinge” movement to build muscle while developing the kind of practical, real-world strength that makes you the go-to person when your friends need help moving. Both exercises also have unique characteristics that could make each one an effective choice under certain conditions and training contexts.

person in gym bending forward with barbell in hands
Credit: YAKOBCHUK VIACHESLAV / Shutterstock

There is no “right” or “wrong” answer when it’s time to choose your deadlift. You simply need a better understanding of what these two hinging movements can offer. So if you’re in a certain “one deadlift rules the world” camp, your eyes are about to be opened to a new way of thinking about these powerful pulls.

Deadlift and Romanian Deadlift

Exercise Differences

For consistency’s sake throughout the article, “the deadlift” refers to the conventional deadlift, while the Romanian deadlift refers, clearly, to the Romanian deadlift variation. If you’re curious about sumo deadlifts, sorry, but they’re not part of this conversation. However, they do share many of the same characteristics as the conventional deadlift.

Muscle Activation

Both the deadlift and Romanian deadlift involve hip extension, your glutes and hamstrings are activated and trained effectively. However, the deadlift starts from the floor and involves a more significant knee bend aka knee flexion.

This factor alone makes a huge difference because it’s what gives you more leverage to lift more weight with the classic deadlift. This is also why it’s a preferred stance for competitive powerlifters.

Powerlifter performing deadlift in contest
Credit: Real Sports Photos / Shutterstock

The improved leverage increases quadriceps activation, making the deadlift one of the most comprehensive lower body exercises by involving the glutes, hamstrings, and quads as one unit. The relatively heavy load and overall stability requirements also increase the demands on your core and back muscles.

Contrastingly, the Romanian deadlift is performed without significant knee flexion. This limits your leverage while involving many of the same muscles — except for the quadriceps. This is why the RDL is often considered a primary hamstring exercise. (1)

Eccentric Emphasis

The Romanian deadlift starts from the top, while you are standing upright, and it focuses on controlling the lowering phase (eccentric). This controlled eccentric emphasis is what gives you relatively more control over the movement.

Generally speaking, many people do not control their eccentrics during conventional deadlifts. They typically lift the weight explosively before dropping the weight nearly as quickly. This drop is often (and unfortunately) accompanied by a celebratory scream after each successful lift regardless of gym etiquette.

This difference in the eccentric emphasis, or lack of, can make the cadence and overall effect of the exercises quite distinct. With the higher degree of eccentric control, Romanian deadlifts may be better for training muscular deceleration (crucial for athleticism) as well as hip and hamstring flexibility-related adaptations.

Range of Motion

In a deadlift, the added knee flexion reduces the necessary range of motion at hip extension — because you’re bending at your knees, you can lift the weight without bending significantly at your waist. This also limits the range of motion for your glutes and hamstrings, especially in their stretched position (at the bottom of the exercise).

The goal of a Romanian deadlift is to push your hips back and not perform any large degree of knee flexion. Combine this with the eccentric control mentioned earlier and you get a much longer range of motion with your glutes and hamstrings, especially in the stretched position which recent research is finding to be incredibly anabolic. (2)

Strength Potential

Between the two movements, the deadlift is often more popular because its nature and overall technique allow you to lift relatively heavier weights. That’s why it made the list as one of the three movements performed in competitive powerlifting.

For non-powerlifters, conventional deadlifts can simply feel invigorating and motivating because of the sheer strength-building potential they offer.

Long-haired person in gym holding barbell
Credit: BigBlueStudio / Shutterstock

Romanian deadlifts allow for less absolute load because of their mechanics. No knee flexion means fewer muscles involved and less loading potential. They’re still a potentially heavy exercise, but Romanian deadlift PRs are not bragged about nearly as often. When people ask how much you deadlift, it’s safe to assume they’re talking about conventional deadlifts from the floor.

Fatigue

This is one of the main differences that many people overlook. Not only is the level of fatigue different, but the type of fatigue is different between the two movements.

Because deadlifts involve more muscles and are often performed heavier, they’re generally more fatiguing. Whether you train with relatively higher reps or low reps, you can often count on feeling pretty beat up after doing deadlifts.

Especially as you get more advanced, one or two sets of deadlifts with a challenging weight or significant volume can leave you fried. This is often described as “systemic fatigue,” where your whole body is affected. Anecdotally, some people also tend to feel more joint stress with deadlifts.

Romanian deadlifts are typically performed with relatively lighter weights, so they trigger less joint stress and are less systemically fatiguing. This makes Romanian deadlifts generally easier to recover from. However, they can produce more fatigue and muscle soreness in the local muscles specifically involved in the exercise.

Romanian deadlifts also involve lots of eccentric stretching. This type of stress through a longer range of motion inflicts a higher degree of muscle damage. After you’ve pushed yourself with Romanian deadlifts, you can feel a clear difference where your glutes and hamstrings may even feel like they’re tearing. This causes your glutes and hamstrings to be more sore.

Exercise Similarities

Both exercises have differences that can be a factor, depending on your goal. However, they also share fundamental similarities and crossover. Most people in the gym, aside from competitive powerlifters, would likely not notice a drastic difference in long-term progress if they were to substitute one for the other.

Hip Hinges

The deadlift and Romanian deadlift are both “hip hinges” — your body primarily moves by bending at the hips. This action trains many muscles throughout your body by coordinating strength, force transfer, and stability from your lower to upper body.

Bald person in gym doing barbell deadlift
Credit: UfaBiaPhoto / Shutterstock

This comprehensive effect allows you to build strength, muscle, and athleticism. Fulfilling these roles is often more important than some of their unique differences.

Posterior Chain Development

Your glutes and hamstrings, along with your low back, are all targeted with both the deadlift and Romanian deadlift. In other words, these exercises develop that backside many people are after.

You need some sort of basic hip hinge in your training program to efficiently target those eye-catching glute and hamstring muscles, while also strengthening your low back.

Building a powerful posterior chain has also been shown to help maintain strength and potentially decrease the general risk of injury and incidence of back pain. (3)

How to Do the Deadlift

The deadlift is often considered one of the foundational lifts that every beginner in the gym should learn. While that may or may not be true, the deadlift (as a hip hinge) remains a fundamental movement pattern that targets a variety of muscles from your hamstrings to your upper back.

This makes it an efficient and effective exercise for several goals, and mastering this exercise should likely be on the to-do list for the majority of gym-goers.

YouTube Video

  • Stand before a bar with your feet hip-width apart and the bar lined up over the middle of your feet. Grab the bar with your hands slightly wider than shoulder-width apart. Adjust slightly to get your shins close to the bar.
  • Bend at your hips and knees, lowering yourself down while maintaining a neutral spine. Your shoulders should be slightly in front of the bar and your gaze should be focused on a spot on the floor a few feet in front of the bar.
  • Engage your core and lat muscles to stabilize your spine. Grip the bar hard, take a deep breath, and brace your core. Drive through your legs, while extending (straightening) your hips and knees simultaneously.
  • Keep your chest up. The barbell should move in a vertical path, staying in contact with your legs as you stand up.
  • Drive through your heels until you reach a fully upright position. At the top of the movement, squeeze your glutes to achieve a strong lockout. Your hips and knees should be fully extended.
  • To lower the bar, hinge at your hips, push your hips back, and bend your knees slightly. Avoid rounding your back or letting the barbell drift away from your legs. Lower with control — don’t simply drop the bar.
  • Once the barbell is back on the ground, take a moment to reset your starting position before beginning the next repetition.

How to Do the Romanian Deadlift

The Romanian deadlift may have a reputation as being more “for muscle” rather than “for strength,” but that’s not really accurate. The increased glute and hamstring recruitment can definitely benefit muscle-building, but you can still gradually work up to relatively heavy weights in the lift if you choose to train for strength.

Alternatively, some lifters focus on the longer range of motion and increased stretching offered by the Romanian deadlift. In any case, it’s a versatile exercise that can be a key player in any workout routine.

YouTube Video

  • Grasp a barbell using an overhand grip, with your hands slightly wider than shoulder-width apart. Stand with your feet hip-width apart, allowing the bar to rest against your upper thighs. Either begin with the bar in a rack or deadlift the bar into position.
  • Engage your core. Push your glutes backward and hinge at your hips to begin the movement. Keep a slight bend in your knees but avoid excessive knee flexion. Maintain a straight back as you move.
  • Lower the barbell along the front of your thighs. Continue descending until you feel a stretch in your hamstrings. Avoid rounding your back during the descent.
  • To find the bottom position, if mobility allows, aim for your torso to reach almost parallel to the ground with the barbell somewhere between your knees and ankles.
  • To return upright, drive your hips forward and squeeze your glutes. Keep your back straight and focus on feeling your hamstrings and glutes lift the weight. As you stand up, maintain control and avoid any jerking motions.

When to Program the Deadlift vs. Romanian Deadlift

For most people, the most effective way to program these exercises is to simply switch from using the conventional deadlift to the Romanian deadlift. The Romanian deadlift is superior for building lean muscle on your glutes and hamstrings, which is often a higher priority than lifting heavy weights.

In general, if you’re looking to build the highest level of strength and you want a more comprehensive exercise that recruits the maximum number of muscles, consider programming the deadlift.

However, the Romanian deadlift is the better choice for a posterior chain hypertrophy exercise. It takes the glutes and hamstrings through a longer range of motion with a muscle-building stretch.

Both are demanding compound exercises that should be programmed early in your leg day, ideally as your first or second exercise. To reduce cumulative stress and fatigue on supporting muscles, avoid programming anything too demanding on the lower back in the next workout, like back squats or direct back extensions.

Pick Your Heavy Hinges

The deadlift and Romanian deadlift are both highly effective hip hinges that will get you strong and build plenty muscle. While this might sound oversimplified, it’s not entirely wrong to think of the deadlift as a “high leverage lift that cuts range of motion to move big weights” while the Romanian deadlift is a “more controlled, long range of motion muscle-builder for the glutes and hamstrings.” You can’t go wrong with either, but one might edge forward depending on your specific needs.

References

  1. Martín-Fuentes, I., Oliva-Lozano, J. M., & Muyor, J. M. (2020). Electromyographic activity in deadlift exercise and its variants. A systematic review. PloS one, 15(2), e0229507. https://doi.org/10.1371/journal.pone.0229507
  2. Nunes, J. P., Schoenfeld, B. J., Nakamura, M., Ribeiro, A. S., Cunha, P. M., & Cyrino, E. S. (2020). Does stretch training induce muscle hypertrophy in humans? A review of the literature. Clinical physiology and functional imaging, 40(3), 148–156. https://doi.org/10.1111/cpf.12622
  3. Tataryn, N., Simas, V., Catterall, T., Furness, J., & Keogh, J. W. L. (2021). Posterior-Chain Resistance Training Compared to General Exercise and Walking Programmes for the Treatment of Chronic Low Back Pain in the General Population: A Systematic Review and Meta-Analysis. Sports medicine – open7(1), 17. https://doi.org/10.1186/s40798-021-00306-w

Featured Image: 4 PM production / Shutterstock

The post Deadlift vs. Romanian Deadlift: Learn the Best Way to Hit Your Posterior Chain appeared first on Breaking Muscle.

Be Nice and Share!
This post was originally published on this site

Originally Posted At: https://breakingmuscle.com/feed/rss

If you’re looking for a way to get in shape at home, kettlebells are some of the best pieces of fitness equipment you can buy. They’re great for cardio or strength training and, due to their shape and how the weight is distributed, provide a different stimulus on your muscles than dumbbells. Plus, they’re suitable for every fitness level since most kettlebell exercises are easy to learn.

In this article, I’ll review our picks for the best kettlebells and discuss the benefits of training with kettlebells, the differences between kettlebells and dumbbells, and the best exercises to do with kettlebells. I’ll also provide a guide on what to look for when buying kettlebells, so you can easily narrow down your search and find the right option for you.

Our Top Picks for the Best Kettlebells

Best Overall Kettlebell: REP Fitness Matte Kettlebells (KG)


REP Fitness Matte Kettlebells (kg)

  • Weight range: One kilogram to 48 kilograms (2.2 to about 106 pounds)
  • Materials: Cast iron
  • Handle diameter: 30 to 40 millimeters


Check Price

Pros

  • Color-coded handles allow you to identify the weight easily
  • Matte coating helps prevent chips
  • Gravity-cast construction offers enhanced durability
  • Comes with a lifetime limited warranty

Cons

  • Not rust-resistant

The REP Fitness Matte Kettlebells get the award for best kettlebells overall because their gravity-cast construction offers superior durability, the matte finish makes them easy to grip with or without chalk, and they come in a wide weight range (one kilogram to 48 kilograms, or 2.2 to about 106 pounds).

Each kettlebell is made by pouring iron into a single mold using the force of gravity. There are no multiple parts welded or molded together, so you get a sturdy product that’s less susceptible to breaking. However, on the off chance that your kettlebell does get damaged when used in a home gym setting, you can take advantage of REP’s limited lifetime warranty to replace it.

The kettlebells have a completely flat bottom, which prevents them from wobbling when you store them or set them on the ground during your kettlebell workout. The handles are color-coded for easy weight identification, and the bell displays the weight in both pounds and kilograms, so you don’t have to worry about doing manual conversions during your workouts.

While the matte coating offers a non-slip grip and helps prevent chips or scratches, it doesn’t make the kettlebells completely rust-resistant. You’ll need to be careful about wiping sweat off them and not leaving them exposed to moisture if you don’t want them to develop rust.

Best Adjustable Kettlebell: REP Fitness Adjustable Kettlebells


REP Fitness Adjustable Kettlebells

  • Weight range: Eight to 16 kilograms (17.6 to 35 pounds); 16 to 24 kilograms (35 to 53 pounds); 20 to 40 pounds
  • Materials: Cast iron, nylon thermoplastic
  • Handle diameter: 33 millimeters


Check Price

Pros

  • Quick and easy adjustment mechanism
  • Matte powder coating for a strong grip
  • Rubber bottom protects your floors from damage

Cons

  • May not be heavy enough for advanced athletes

If you’ve done any research on the best products for small home gyms, you may already be aware of the top adjustable dumbbells available on the market. Adjustable kettlebells like the REP Fitness Adjustable Kettlebells offer the same space-saving benefits for anyone who wants access to a wide range of weights but doesn’t have room for multiple kettlebells.

What I like about the REP Fitness Adjustable Kettlebells is that the size of the bell stays the same even as you go up in weight. With other adjustable kettlebells, the base can become bulky because you add small weight discs to the bottom to increase the weight. With the adjustable kettlebell from REP, the weight inserts go inside the bell. This ensures the base stays the same size regardless of how much weight you add, making it easier to handle the bell for swings, snatches, and other kettlebell exercises.

I also like that this adjustable kettlebell feels like a traditional kettlebell, thanks to its cast iron exterior and matte powder coat. The powder coat allows you to get an excellent grip, even when your hands get sweaty, and holds chalk well to prevent your hands from slipping.

The REP Adjustable Kettlebell comes in three sizes: eight to 16 kilograms (17.6 to 35 pounds), 16 to 24 kilograms (35 to 53 pounds), and 20 to 40 pounds. The kilogram kettlebells go up in weight in two-kilogram increments, while the 20- to 40-pound kettlebell increases in weight in five-pound increments. A plastic dial lets you adjust the weight quickly, so you won’t waste precious time fiddling around with the inserts during your workouts.

Best Kettlebell for CrossFit: Rogue Fitness Kettlebells (LB)


Rogue Fitness Kettlebells

  • Weight range: Nine to 203 pounds
  • Materials: Cast iron
  • Handle diameter: 1.2 to 1.58 inches


Check Price

Pros

  • Large weight range
  • Matte finish offers a strong grip and rust protection
  • Holds chalk well
  • Single-cast process ensures there are no small parts that can break easily

Cons

  • Expensive

I’ve used the Rogue Kettlebells in both commercial and home gym settings, and I’ve been impressed with their durability and performance. The one I own now shows no signs of damage or rust despite being stored in my humid garage, and the ones I used at the CrossFit gym I used to belong to withstood heavy, near-daily use for years.

Made with cast iron using a single mold, the Rogue Kettlebells feature a matte black powder coat finish and a flat base. The manufacturing and finishing process results in reliable kettlebells that hold chalk well and don’t wobble when resting on the floor or a storage rack. I use my Rogue kettlebell without chalk frequently and never have to worry about my hands slipping.

The kettlebells start at nine pounds and go all the way up to 203 pounds, so they’re suitable for any experience level. The bell displays the weight in pounds and kilograms, but the handles are also color-coded for easy identification. Starting at around $1.58 per pound, they’re not the cheapest kettlebells available, but the price is worth it if you want a kettlebell that will last for years in a home or commercial gym.

RELATED: Best Home Gym Machines

Best Kettlebells for Beginners: Onnit Kettlebells


Onnit Kettlebells

  • Weight range: 13 to 70 pounds
  • Materials: Cast iron
  • Handle diameter: Not listed


Check Price

Pros

  • Gravity-cast manufacturing process ensures durability
  • Powder coated finish allows you to maintain a good grip with or without chalk
  • Free workouts available on Onnit’s website
  • Color-coded handles

Cons

  • Expensive

Onnit is known primarily for its nutrition products and produces some of the best creatine supplements and best whey protein powders we’ve tried. The company also makes a small amount of fitness equipment, including kettlebells, and publishes free workouts to help beginners get started with a kettlebell routine.

The kettlebells are available in weight options from 13 to 70 pounds, a smaller range than other brands offer but still sufficient for most newbies. They feature color-coded handles, so if you buy more than one, you can quickly determine the weight you want to use. The bright colors also make it easier to grab the same weight if you’re using two kettlebells in your workouts.

They’re more expensive than other kettlebells on the market, but not by much. Their quality rivals that of the kettlebells made by more popular brands like Rogue, so the price is justified. They’re made using a gravity-cast molding process, which ensures a durable finish and a smooth texture that feels comfortable in the hands. The only reason you may need to replace them is if you want to go heavier than 70 pounds.

Best Kettlebells on Amazon: Amazon Basics Cast Iron Kettlebell


Amazon Basics Cast Iron Kettlebell

  • Weight range: 15 to 40 pounds
  • Materials: Cast iron
  • Handle diameter: Not listed


Check Price

Pros

  • Affordably priced
  • Textured handle to help improve grip
  • Free shipping for Prime members

Cons

  • The handle can be slippery
  • Enamel coating can chip easily

If you’re shopping for kettlebells on Amazon, the Amazon Basics Cast Iron Kettlebells are an excellent choice. They’re not quite as high-quality as the kettlebells from premium brands like Rogue or Kettlebell Kings, but they get the job done and are suitable for most full-body workouts you want to do at home.

The kettlebells are made with solid cast iron and coated with enamel. The enamel gives the kettlebells a shiny, glossy appearance, but it can feel slippery once your hands start to sweat. There is some texture to the handle to help mitigate this, but your grip won’t feel as secure as it would on a powder-coated kettlebell. And even though the enamel offers protection against corrosion, it can chip easily.

One of the most attractive features of the Amazon Basics Cast Iron Kettlebells is the price. Starting at around $1.00 per pound, they are some of the most affordable kettlebells we’ve seen. If you’re an Amazon Prime member, you also get the benefit of free shipping, which is a big deal since shipping charges from other brands can cost $20 or more.

Best Competition Kettlebells: Kettlebell Kings Competition Kettlebell


Kettlebell Kings Competition Kettlebell

  • Weight range: Eight to 48 kilograms (18 to 106 pounds)
  • Materials: Steel
  • Handle diameter: 35 millimeters


Check Price

Pros

  • Single-cast construction produces a stronger, sturdier bell
  • Bright colors allow you to quickly identify the weights
  • Made with steel, which is more durable than cast iron
  • Porous handle for better chalk absorption
  • Lifetime warranty

Cons

  • Expensive

As I’ll discuss below, competition kettlebells differ from standard kettlebells in several ways. If you’re a kettlebell sport athlete, a competition kettlebell will allow you to train with the same piece of equipment you’d use in a competition. Kettlebell Kings is the brand to go with because its kettlebells are durable and meet international competition specifications. 

Kettlebell Kings Competition Kettlebells are available in weights from eight kilograms (18 pounds) to 48 kilograms (106 pounds). Regardless of the weight, each kettlebell has a 35-millimeter handle and is the same size. The uniformity enables you to utilize the same technique whether you use a heavy or light kettlebell. The only thing that differs as the weight increases is the color of the bell, which is dictated by a universal color coding system.

Like standard kettlebells, the Kettlebell Kings Competition Kettlebells have a flat base to ensure stability when you store them or place them on the ground. They also have a porous handle that absorbs chalk more effectively and offers a secure grip whether you perform single- or double-handed kettlebell movements.

If you have a tight budget and don’t compete in kettlebell sport, you may want to consider a different kettlebell. The Kettlebell Kings Competition Kettlebells cost more than most other options because they have to be manufactured to competition standards. They’re also made with steel, which is more expensive than cast iron. For recreational use or at-home workouts, any of the other kettlebells on this list is sufficient.

How We Chose the Best Kettlebells

We researched and analyzed dozens of kettlebells to create the list above and also included kettlebells we’ve used ourselves in home or commercial gyms. To ensure we covered as many scenarios as possible, we selected options for both recreational and competitive kettlebell athletes and chose products with wide weight ranges. We also selected kettlebells with varying price points, so you can find an option that works for you regardless of your budget.

Benefits of Training With Kettlebells

Kettlebells are some of my favorite implements to train with because they’re effective at improving both strength and cardio, and they provide a unique challenge that you can’t replicate with barbells or dumbbells.

Below are some of the most significant benefits of kettlebell training:

  • Kettlebells are versatile. You can use kettlebells for full-body strength or cardio routines. They are interchangeable with dumbbells for most exercises (some of which I’ll cover below) and are great for high-intensity interval training (HIIT) workouts.
  • They can help you develop explosive power. Exercises like kettlebell swings and snatches are fantastic for building power because they require you to move heavy weights quickly.
  • They can help you improve your grip strength. Kettlebells often have a thicker handle than dumbbells, which is more challenging on your grip and forearm muscles.
  • Kettlebells can strengthen your stabilizer muscles. Because a kettlebell’s weight is centered below the handle, you have to exhibit a lot more control when performing kettlebell exercises. Your smaller stabilizer muscles work harder to keep the bell from flopping around, so they’re exposed to a training stimulus you don’t get from dumbbells or barbells.
  • Kettlebells allow you to perform unilateral movements. Unilateral movements are those that train one side of the body at a time. Some kettlebell exercises, like swings, can be performed with two hands, but many are done with just one hand. Even if you hold a kettlebell in each hand, you still train each side of the body independently of the other. This helps prevent strength imbalances and physique asymmetries.

What To Look For When Buying Kettlebells

While cost is almost always the first thing that comes to mind when shopping for fitness equipment, there are several other important factors to consider when buying kettlebells. The available weight range will dictate how much you can progress with a particular set of kettlebells. The handle diameter and coating will dictate how well you can grip the bell, and the coating will also affect its durability. You also have to consider whether an adjustable or fixed-weight kettlebell will suit your needs better.

Price

How much you should pay for a kettlebell comes down to how much you’re willing to spend. Kettlebells cost anywhere from $1.00 to $4.00 or more per pound, depending on their materials, where they’re made, whether they’re intended for kettlebell competitions or general workouts, and how durable they are. They also go up in price the more they weigh.

You don’t have to pay top dollar for a kettlebell if you have a tight budget, but you should be aware that a cheap kettlebell may break quickly. There’s also a chance that the listed weights won’t be accurate. It might be worth it to choose a more expensive kettlebell if you want one that will last for years and weighs what the brand says it weighs.

Adjustable vs. Fixed Weights

Much like dumbbells, you can buy fixed or adjustable kettlebells. Fixed kettlebells have a set weight, while adjustable kettlebells can go up or down in weight.

Adjustable kettlebells are great for small spaces because one unit gives you access to multiple weights. While they’re not cheap, they’re more cost-effective than buying several individual kettlebells. However, the weight range is more limited. Most adjustable kettlebells only go up to 40 pounds, though some go up to 100 pounds. On the other hand, fixed kettlebells can up to 200 pounds or more.

Whether you choose adjustable or fixed kettlebells will depend on how much space you have available and your strength levels.

Competition vs. Standard Kettlebells

A subset of kettlebells referred to as competition kettlebells are used for kettlebell sport. There are several distinct differences between competition and standard kettlebells:

  • The handle on a competition kettlebell must be 33 or 35 millimeters in diameter and must be in line with the length of the base. On standard kettlebells, the handle diameter goes up as the weight increases and extends past the base slightly.
  • Competition kettlebells must all be the same size, regardless of weight. They have the same-sized shell and are loaded with fillers like ball bearings to achieve the desired weight. Standard kettlebells tend to increase in size the heavier they are because more material is needed to make them.
  • The window on competition kettlebells is more square, while the window on standard kettlebells is more dome-shaped.
  • Competition kettlebells are more expensive because they must meet certain specifications.
  • Competition kettlebells are made of steel, and standard kettlebells are made with cast iron.

Unless you plan on competing in kettlebell sport, a standard kettlebell will be just fine for your workouts.

Available Weights

You can find kettlebells as light as three pounds or as heavy as 200 pounds (or more). In general, I recommend that women look for 18- to 26-pound kettlebells while men look for 26- to 44-pound kettlebells. However, the weight you choose will depend on your experience level and training style.

In CrossFit, for example, the commonly prescribed weights for kettlebell movements are 35 pounds for women and 53 pounds for men. In kettlebell sport competitions, women start with around eight kilograms (about 17.6 pounds or 0.5 pood, the Russian unit of measurement for kettlebells), while men start with 16 kilograms (about 35 pounds or one pood).

If you’re buying kettlebells for strength training and are not new to exercise, you may wish to buy heavier weights. If you’re buying them for cardio workouts or you’re a beginner, lighter weights may be better.

Coating

A kettlebell’s coating affects its durability and how it feels in your hands. Most of the kettlebells on our list above have a powder or enamel coating.

A powder coating gives the kettlebell a matte finish and offers some rust resistance, though it isn’t entirely rust-proof. You can usually get a better grip on a powder-coated kettlebell because it isn’t as slippery and holds chalk well.

An enamel finish gives kettlebells a smooth, glossy appearance. It makes the kettlebells look aesthetically pleasing but is more slippery than a powder coating. The enamel can also chip easily. However, in my experience, enamel-coated kettlebells are cheaper than powder-coated ones.

For most people, powder-coated kettlebells are better because they’re more durable and there’s less risk of them slipping out of your hands. Enamel kettlebells are solid choices for those on a budget who want their gym equipment to look nice.

Handle Diameter

As mentioned, the handle diameter on competition kettlebells is always the same. It increases on standard kettlebells as the weight goes up, though there is no uniform diameter amongst brands. Whether you train with a competition or standard kettlebell, you should be able to wrap your fingers all the way around the handle. Otherwise, your forearms will fatigue quickly.

Best Kettlebell Exercises for Home Workouts

For the most part, you can replace a dumbbell (and sometimes even a barbell) with a kettlebell in any workout. There is a lot of variety in how you approach your kettlebell training, too. If you want to focus on strength, you can use heavier kettlebells for fewer sets and reps. If you want to get your heart pumping and burn calories, you can use lighter weights for higher reps or do circuits without taking a break in between each movement.

Some of my favorite kettlebell exercises include:

How To Hold a Kettlebell

How you hold a kettlebell will vary based on the movements you do. For exercises like farmer’s carries or single-handed kettlebell swings, you’ll hold the handle like you’d hold a dumbbell handle, with your hand wrapped around the middle of the handle. When performing exercises like kettlebell cleans and snatches, you’ll place your hands closer to the curve of the handle. This will prevent the bell from smacking painfully against your shoulders, wrists, or forearms.

To hold the kettlebell for two-handed kettlebell swings, grip the handle with both hands spaced slightly apart, allowing the pinky to grip the side of the handle if needed.

You can also adopt a bottoms-up grip with the bottom of the bell facing the ceiling to work on your shoulder stability or hold the base in both hands with the handle pointing to the floor to emphasize your shoulders more during goblet squats.

Regardless of how you hold a kettlebell, you should have a tight enough grip that it doesn’t fly out of your hands without squeezing it so tightly that your forearms burn. This will allow you to complete more unbroken reps before grip fatigue starts setting in.

RELATED: This Kettlebell Grip Cue May Change Your Training for the Better

Kettlebells vs. Dumbbells

If space or budget is a concern when building your home gym, you may struggle to choose between kettlebells or dumbbells. Both are fantastic tools to have, but there are a few things to keep in mind when deciding between the two:

  • Kettlebells have different incremental weight increases than dumbbells. They go up in weight by four to nine pounds, while dumbbells often go up in weight in 2.5- to 5-pound increments. You may find it easier to progress with dumbbells because you can make smaller jumps in weight.
  • Kettlebells are more versatile than dumbbells. As mentioned earlier, you can do almost any dumbbell exercise with kettlebells. But there are some exercises you can really only do with kettlebells. For example, you can do swings with a dumbbell, but the training stimulus isn’t exactly the same because you have to hold the dumbbell differently than you’d hold a kettlebell. As such, you can get more training variety with kettlebells.
  • Kettlebells are better for strengthening your stabilizer muscles. Since the weight of a kettlebell is further away from your hand, your smaller stabilizer muscles have to work harder to keep the bell balanced. This makes kettlebells more challenging to train with.
  • Kettlebells are more effective for training your grip strength. Because you have to stabilize an offset load and keep the weighted portion of a kettlebell under control, the muscles responsible for your grip are put through more stress. Some kettlebell handles are also thicker than dumbbell handles, further challenging your grip.

Final Thoughts

Kettlebells can be an excellent addition to any home gym. You can use them for strength or cardio workouts, and since they generally have flat bottoms, you can store them in a corner of your gym if you don’t have room for a large storage rack. They can also be more durable than dumbbells, especially if you buy ones that are made with a single mold, since there aren’t multiple parts holding them together.

Kettlebells are also affordable, with some costing around $1.00 per pound. If you want to get the most bang for your buck, I recommend them over dumbbells due to their versatility. Any option from the list above is a solid choice, but before you start shopping, consider which type of kettlebell will best suit your needs. Your budget, training style, and experience level will all dictate which kettlebell will be right for you.

FAQs

What is the best kettlebell for beginners?

The best kettlebells for beginners are the Onnit kettlebells. They come in weights from 13 to 70 pounds, which is neither too heavy nor too light for most beginners. They’re also sturdy due to their gravity-cast construction, which results in a more reliable product with a durable finish.

What is a good set of kettlebells?

A good set of kettlebells is the REP Fitness Matte Kettlebells. They’re made using a single cast mold, so there are no small parts holding them together that can break easily. They have a matte powder coat finish to enhance your grip and protect them from chips or scratches. They’re also reasonably priced and come with a limited lifetime warranty for home gym use.

What brand of kettlebell does Joe Rogan use?

Joe Rogan uses kettlebells from Onnit, the fitness and supplement company he co-founded. They are cast iron kettlebells available in weights from six kilograms (13 pounds) to 32 kilograms (70 pounds).

What is the best kettlebell weight for toning?

Good kettlebell weights for toning are around 18 to 26 pounds for women and 26 to 44 pounds for men. However, if you already have a good base level of fitness and want to get stronger and build muscle, you may need to use heavier weights — around 35 pounds for women and 53 pounds for men.

How can I find the best kettlebell for my budget?

To find the best kettlebell for your budget, you should first research how much kettlebells cost. Prices can range from $1.00 to upwards of $4.00 per pound, depending on the brand, materials used, and other factors. Kettlebells that cost between $1.50 and $2.00 per pound typically offer a good blend of affordability and quality.

Once you’ve decided how much you’re willing to spend, consider the material and coating. A cast iron kettlebell with a powder coating is generally economical and performs well during various kettlebell exercises. It won’t be totally rust-resistant but will still be durable enough to withstand home gym workouts.

The post 6 Best Kettlebells for CrossFit, Beginners, and More appeared first on Breaking Muscle.

Be Nice and Share!
This post was originally published on this site

Originally Posted At: https://breakingmuscle.com/feed/rss

With a resume that features four Mr. Olympia titles (2006-2007, 2009-2010), bodybuilding legend Jay Cutler is well-equipped to offer comprehensive fitness advice. One of Cutler’s signature traits — which he still diligently keeps up with in retirement — was his large arms. Given that he doesn’t pose on stage anymore, these days, Cutler is more about sharing his training secrets rather than keeping them to himself.

On June 27, 2023, Cutler shared a video to his YouTube channel where he ran through a high-volume arm workout. Based on how he chose to title the video, the routine is helping the former champion build an impressive pair of 20-inch arms. Usually, such a claim might be hyperbolic. Coming from Cutler, the goal is entirely believable and worth diving more into.

YouTube Video

Here’s an overview of Cutler’s workout, which features nine different exercises to address both the triceps and biceps. Note: The precise working and warm-up weights for each movement were not disclosed. The same holds true for the exact number of repetitions on occasion.

Jay Cutler | “20-Inch Arm” Workout

  • Straight-bar triceps pushdown: Two warm-up sets, three working sets (increase weight each set)
  • Kneeling rope pressdown: 3-4 x 10-12
  • Overhead dumbbell extension: Three sets
  • Seated dip machine: Three sets (increase weight each set)
  • Two-arm dumbbell kickback: 3 x 10-12 
  • Nautilus biceps curl machine: Three sets
  • Alternate dumbbell curl: 3 x 8-10
  • Barbell spider curl: 3 x 10-12
  • Machine preacher curl: Three sets

Some of the more notable tidbits featured in this video include Cutler revealing that his current body weight was 243 pounds. When discussing some of his closing exercises, Cutler said he wants to weigh at least 250 pounds within two months of the video’s filming. The icon explained he’s been doing two-a-day cardio sessions as part of his ongoing “Fit for 50” transformation. These additional workouts, including a 25-minute session the morning of the arm workout with a bike session planned for later that same evening, seemingly haven’t hampered his mass-gaining progress.

Cutler maintained that he chose to do an arm workout on camera after noticing the preference of his fans and social media channel subscribers. For someone nearing 50 years old, the legend’s ease in this arm workout made it seem as if he had a lot left in the tank on a competitive level. However, this fit luminary has said he will not be returning to the stage any time soon.

With no plans to compete again in the near future, Cutler is free to build his fitness-influencing empire and simultaneously leave the ladder behind for those who want to make a climb up. It’s arm workouts like this that are emblematic of everything Cutler has to teach when it comes to the gym.

Featured Image: JayCutlerTV on YouTube

The post Jay Cutler Breaks Down His Workout to Build 20-Inch Arms appeared first on Breaking Muscle.

Be Nice and Share!
This post was originally published on this site

Originally Posted At: https://breakingmuscle.com/feed/rss

Whether you train in a garage gym with the best home gym equipment or in a commercial lifting gym, a weightlifting belt can be a useful tool to add to your arsenal. It increases your stability by giving you something to push against as you brace your core, reinforces proper lifting technique, and can give you a boost of confidence if you begin to doubt your abilities.

When shopping for the best weightlifting belt, you need to consider whether leather or nylon is better for your needs and how much support you want your belt to provide. To help you narrow down your selection, I’ve compiled a list of the top eight lifting belts. Whether you’re a powerlifter, CrossFitter, Olympic weightlifter, or someone who trains for overall health and wellness, you can find the right belt for you.

Our Top Picks for the Best Weightlifting Belts

Best Weightlifting Belt for CrossFit: Gymreapers Quick Locking Weightlifting Belt


Gymreapers Quick Locking Weightlifting Belt

  • Material: Velcro
  • Width: Four inches
  • Thickness: One inch (approximate)
  • Locking type: Velcro, hook-and-loop steel buckle
  • Size range: XS to XXL


Check Price

Pros

  • Available in lots of color options
  • Comes with a lifetime replacement guarantee
  • Affordable
  • Double-stitched for durability

Cons

  • Not approved for powerlifting competitions
  • Runs small

When you’re transitioning from heavy lifts to handstand push-ups, box jumps, or other dynamic exercises that come up in CrossFit WODs (workouts of the day), you need a belt that is easy to tighten and loosen and doesn’t limit your movement. The Gymreapers Quick Lock Weightlifting Belt is ideal for these scenarios because the nylon material molds to your body and is comfortable to wear. Plus, you can adjust the Velcro strap in just a couple of seconds.

It’s not as supportive as a leather powerlifting belt, but you’ll still feel stable and secure when lifting, thanks to the four-inch width. The belt is double-stitched to ensure it can handle tons of abuse, and the Velcro will maintain its stickiness as long as you keep it clean.

The affordable price of around $35 makes it one of the more budget-friendly belts on this list. You can choose from a wide array of colors and prints, including gray, pink, red, or black camo. There’s even an option with large Velcro areas where you can add patches to show off your personality and support your favorite brands.

The Gymreapers Quick Lock Weightlifting Belt is also available in sizes from XS to XXL to fit a large range of body types. However, it runs small, so you may want to size up for a more comfortable fit.

RELATED: Best Home Gym Machines

Best Budget Weightlifting Belt: Element 26 Hybrid Leather Weightlifting Belt


Element 26 Hybrid Leather Weightlifting Belt

  • Material: Leather
  • Width: Four inches
  • Thickness: Six millimeters
  • Locking type: Velcro
  • Size range: XS to XL


Check Price

Pros

  • Comes with a lifetime warranty
  • Reinforced, heavy-duty stitching
  • Self-locking buckle

Cons

  • Too rigid for CrossFit or functional fitness workouts
  • Only available in black

If you’re a recreational lifter who doesn’t compete in a strength sport, you may not want to drop hundreds of bucks on a leather lifting belt. At the same time, you may need a belt that offers more support than a nylon belt can provide. In that case, the Element 26 Hybrid Leather Weightlifting Belt is a solid choice that is more than half the price of some traditional leather belts.

Besides being budget-friendly, this belt is unique in that it’s made of leather but features a nylon strap with a heavy-duty Velcro closure, unlike traditional leather belts with prong or lever closures. The Velcro fastening system makes the belt suitable for workouts where you need to adjust the tightness or put the belt on and take it off quickly. There’s also a self-locking buckle to keep the strap secured to your body in case the Velcro comes undone.

However, the leather isn’t flexible and can restrict your movement. If you want a belt that will move more seamlessly with your body as you transition from one exercise to the next, a nylon belt will be better.

Another thing to note is that the Element 26 Hybrid Leather Weightlifting Belt is only six millimeters thick, so it may not be supportive enough for very heavy weight training workouts. It’s also only available in black, so if you want something that will stand out more, you’ll need to look elsewhere.

Best Nylon Weightlifting Belt: Rogue Fitness USA Nylon Lifting Belt


Rogue USA Nylon Lifting Belt

Material: Nylon

Width: Five inches on the back, four inches on the front and sides

Thickness: 6.35 millimeters

Locking type: Velcro

Size range: XS to XXXL


Check Price

Pros

  • Available in five different colors
  • Ripstop exterior and antimicrobial interior
  • Tapered design allows for more back support without the belt digging into your hips
  • Can add patches for more customization
  • Affordably priced

Cons

  • Not approved for powerlifting or Olympic weightlifting competitions
  • Velcro may become less sticky over time

The Rogue Fitness USA Nylon Lifting Belt is supportive yet comfortable due to the nylon material and five-inch width along the back. But it also tapers to four inches along the sides and in the front to keep it from digging into your hips and stomach. It’s great for those who need more stability than a four-inch belt can provide but want something that is also flexible, lightweight, and won’t dig into the stomach.

The belt is available in five colors: black and gray, blue and gray, black and pink, black and camo, and gray and red. There’s also a small Velcro area on the webbing where you can add patches to rep another brand.

The belt itself is durable, as it features a ripstop exterior that’s resistant to fraying and tearing. It also has an antimicrobial interior to prevent bacteria from sweat and germs from accumulating on it. However, the Velcro can lose stickiness after about a year, especially if it gets dirty often.

RELATED: 9 Best Adjustable Dumbbells

Best Velcro Weightlifting Belt: 2POOD Weightlifting Belt


2POOD Weightlifting Belts

  • Material: Nylon
  • Width: Three, four, or six inches
  • Thickness: 20 centimeters
  • Locking type: Velcro, hook-and-loop WODClamp
  • Size range: XXXS to XXL


Check Price

Pros

  • Large size range
  • Available in lots of prints
  • Sticky Velcro

Cons

  • Not approved for powerlifting competitions

With a Velcro belt, there’s always a chance it can pop off in the middle of a lift, increasing your risk of a severe injury. 2POOD weightlifting belts reduce the likelihood of that happening because they have a hook-and-loop WODClamp locking mechanism in addition to a Velcro strap. If the Velcro comes undone, the WODClamp will keep the strap in place and allow the belt to remain tight around your midsection. The Velcro is pretty sticky, though, so it’s unlikely that it would come unfastened unless you’re moving some serious weight or dirt, chalk, or lint has accumulated on it.

The 2POOD lift belt features a sturdy nylon exterior with a foam core and comes in dozens of fun prints, such as sunflowers and donuts. If you’re willing to pay for it, you can even work with 2POOD’s design team to get a custom belt.

I used a 2POOD lifting belt for my strength training sessions and CrossFit workouts for over two years and loved how supportive yet flexible it was. I would often leave it on throughout an entire CrossFit WOD because it was so easy to loosen or tighten it based on whatever exercise I was doing. I never felt like it limited my movement, and if I did take it all the way off in the middle of a WOD, it only took a few seconds to put it back on.

My only complaint is that the four-inch belt was too wide for my torso. It didn’t bother me much during squats, but I could feel it digging into my ribcage during deadlifts. When I still used a 2POOD belt, the company only had four-inch belts available, but it now offers three-inch belts as well. The narrower belt is worth considering if you have a short torso, though it’s only available in sizes XXXS to medium.

2POOD also sells six-inch belts, called the Metcon belt, for those who need extra support on their lower backs during heavy lifts.

Best Lever Weightlifting Belt: SBD 13mm Lever Belt


SBD 13mm Lever Belt

  • Material: Leather
  • Width: Four inches
  • Thickness: 13 millimeters
  • Locking type: Lever
  • Size range: S to 5XL


Check Price

Pros

  • Inclusive sizing
  • Gliding lever is easy to adjust
  • Compliant with numerous powerlifting federations’ standards for belts

Cons

  • Expensive
  • Red suede may bleed onto clothing
  • Can take several weeks to break in

Lever belts, in general, are easier to adjust than prong belts. But for a belt with a smoother, more seamless lever than much of its competition, you can’t go wrong with the SBD 13mm Lever Belt. Due to how easy it is to adjust the lever, you can keep the belt on between all of your sets and adjust its tightness when you lift or when you rest. Once you tighten the belt, the lever stays in place and won’t pop open — lifters who can squat over 1,000 pounds have worn this belt with no issues!

The belt is available in sizes ranging from small to 5XL, making it suitable for a wide range of body types. It’s double-stitched for extra durability, and SBD treats the leather over five months to ensure maximum stiffness and stability. Note, though, that the leather can take several weeks to break in, so this isn’t a belt you can start wearing the second you receive it.

The suede interior helps prevent the belt from sliding around your torso, but the red dye can bleed onto your clothes if you get sweaty. It’s best to wear dark clothing for the first few months of using this belt to prevent ruining your light-colored shirts.

The SBD belt is four inches wide all the way around to offer as much support as possible, but the extra width and lack of tapering mean it may dig into the ribs if you have a short torso. It’s also the most expensive leather belt on this list. However, the quality of the leather, the belt’s durability, and the fact that it’s approved by various powerlifting federations make it a solid choice for competitive powerlifters.

Best Olympic Weightlifting Belt: Eleiko Weightlifting Leather Belt


Eleiko Weightlifting Leather Belt

  • Material: Leather
  • Width: Four inches (tapers to three in the front)
  • Thickness: Eight millimeters
  • Locking type: Double metal prongs
  • Size range: S to XXL


Check Price

Pros

  • Treated with a coating to help prevent scratches
  • Not as expensive as other leather belts
  • Tapers along the sides and in the front for more comfort

Cons

  • May not offer enough support for powerlifting

This leather belt is the latest iteration of Eleiko’s premium leather Olympic weightlifting belts. It’s four inches wide in the back but tapers in the front so that it won’t dig into your torso when you hinge at the hips for deadlifts or cleans. The soft leather also offers your body more freedom of movement when you perform the dynamic Olympic lifts.

The belt has a suede interior to make it more comfortable and help keep it in place on your torso, and the exterior is coated with a treatment to prevent scratches and scuff marks — a huge plus if you want your belt to look like new even after years of use.

It’s only eight millimeters thick, so it may not be supportive enough for elite powerlifters. But it’s a great pick for casual lifters or even competitive Olympic weightlifters who need more support than a nylon belt provides but less rigidity than a 10- or 13-millimeter leather belt.

Best Leather Weightlifting Belt: REP Fitness Lifting Belt


REP Fitness Lifting Belt

  • Material: Leather
  • Width: Four inches
  • Thickness: 13 millimeters
  • Locking type: Single metal prong
  • Size range: S to XXL


Check Price

Pros

  • Short break-in period
  • Sealed and burnished edges help prevent moisture damage from sweat
  • Single-prong belt is easier to adjust than double-prong belts

Cons

  • Not IPF-approved
  • One-inch hole spacing may be too big of a jump for small adjustments

The REP Fitness Lifting Belt is an affordable but supportive and attractive option for those who want a leather belt but can’t afford to spend hundreds of dollars on one. It’s four inches wide and 13 millimeters thick, so you’ll get optimal support when lifting maximal or near-maximal weights. The leather gets softened as it undergoes a vegetable tanning process, meaning the belt is comfortable to wear and doesn’t require a long break-in period.

This belt has a single-prong fastening system, allowing for quicker adjustments than you’d find in a belt with a double-prong buckle. The edges are sealed and burnished to prevent moisture from sweat from damaging the material, and the holes are spaced one inch apart. This spacing may be too much if you only need a slight adjustment, though it’s common amongst leather lifting belts.

REP suggests sizing down if you’re in between sizes, but based on customer reviews, it’s better to size up instead. Otherwise, the belt may be too snug, and you won’t have much room to adjust it further if your waist circumference changes in the future.

Best Weightlifting Belt for Squats: Dominion Three-Inch Leather Lifting Belt


Dominion Strength Training Leather Weight Lifting Belt

  • Material: Leather
  • Width: Three inches
  • Thickness: 10 millimeters
  • Locking type: Single metal prong
  • Size range: XS to XL


Check Price

Pros

  • 11 holes allow you to get a more custom fit
  • Comes with a lifetime warranty
  • Quicker break-in time than 13-millimeter belts
  • Rounded edges for more comfort

Cons

  • Not approved for powerlifting competitions

While four-inch belts are some of the most common you’ll see in the gym, three-inch belts like the Dominion Leather Lifting Belt are better suited for certain lifters, such as those with short torsos. They don’t dig into the ribs or pinch your torso when squatting, so you can focus more on your lifts instead of how uncomfortable your belt is. The three-inch width also makes the belt good for deadlifts because you can more easily get into an optimal starting position.

The Dominion Leather Lifting Belt has 11 holes that are spaced one inch apart, allowing you to get a snug and customized fit even if your size changes over time. It’s 10 millimeters thick and won’t be as supportive as a 13-millimeter belt, but it will still provide more stability for heavy lifts than a nylon belt. Plus, it has a shorter break-in period than the thicker belts, so you can start using it sooner.

The interior is lined with gray suede that helps keep it in place and prevents the belt from moving during your lifts. The roller buckle is another nice touch, as it makes adjusting the belt a more effortless process. The belt isn’t approved for powerlifting competitions, but because it’s more affordable than other leather belts, it’s a great choice for casual lifters who want a supportive but basic belt for strength training.

How We Chose the Best Weightlifting Belts

We selected an extensive array of leather and nylon belts to suit all types of athletes, whether you’re a powerlifter, Olympic weightlifter, CrossFitter, or casual gym-goer. Our list includes products with different widths and thicknesses to offer varying levels of support, and we also included options that come in multiple colors so you can show off your style at the gym.

All of the belts above are ones our staff has personally used for their own training or are from brands we know and trust, so we’re confident that their belts are high-quality.

Different Types of Weightlifting Belts

The two main types of weightlifting belts are leather and nylon. Within those categories, different thicknesses and widths are available. For leather belts, there are also multiple closure types to choose from. Understanding the differences between leather and nylon belts and their fastening mechanisms will ensure you pick the right one for your needs.

Leather Belts

Leather belts like the REP Fitness Lifting Belt come in various widths and thicknesses and come with lever or prong fastening systems.

Lever Belts

Lever belts are easier to put on and take off because you just have to slip the teeth into the holes you want and fasten the buckle. The downside of a lever belt is that when you get it, you fasten the buckle to the holes on the belt with a screwdriver and keep it there.

For this reason, it’s harder to ensure a proper fit if your waist size changes from day to day — for example, if you are bloated from a large meal you ate before training or wear a thick shirt one day and a thin shirt the next. Lifters who use lever belts often carry a screwdriver in their gym bags so they can change the buckle’s positioning on the belt when needed.

Prong Belts

Prong belts function similarly to the types of belts you’d wear with a pair of pants. You pull the strap through a buckle until it’s at your desired tightness, then push the prong through a hole in the belt and slip the strap through a loop to secure the excess material.

Prong belts are available as single-prong or double-prong. Single-prong belts are more affordable and easier to adjust because you don’t have to line up two prongs. But double-prong belts may offer more support and last longer because the pressure is more evenly distributed through the two prongs.

Some prong belts feature a roller buckle to help the leather slide through it more seamlessly. When using belts that don’t have a roller buckle, some lifters find that they need a friend to help them pull the strap through the buckle to get the desired level of tightness.

Width and Thickness

Leather belts are generally three or four inches wide and 10 to 13 millimeters thick. The narrower and thinner belts are easier to break in and more comfortable to wear, especially for those with short torsos. However, the wider and thicker belts offer more support, which is helpful when lifting heavier weights that are close to your one-rep max or attempting new PRs. You can also find leather belts that are wider in the back and narrower in the front, so you get a mix of support and comfort.

Nylon Belts

Nylon belts are more versatile because they’re flexible and mold to your body. They have a Velcro fastening system that allows for quick and easy adjustments. They’re ideal for Olympic weightlifting, where you perform fast and explosive lifts, or CrossFit, where you quickly transition from heavy lifts to cardio or gymnastics movements. They’re also good for high-rep sets because they’re more comfortable to wear for longer periods.

Nylon belts aren’t the best for powerlifting because the Velcro can come undone when you’re lifting heavy loads. However, belts like the 2POOD Weightlifting Belt feature additional clamps to keep the belt in place if the Velcro comes loose.

Like leather belts, nylon belts are often three or four inches wide. Some are as wide as eight inches. Many nylon belts are the same width all the way around, but others are tapered so that the back of the belt is wider and the front and sides are narrower. You’ll typically only find nylon belts with thicknesses up to 10 millimeters, though some, like the Gymreapers Quick Locking Weightlifting Belt, are closer to an inch thick.

Benefits of Weightlifting Belts

Wearing a weightlifting or powerlifting belt has many benefits, including reducing stress on the lumbar spine, helping prevent lower back injuries, and putting your mind at ease as you prepare to lift a heavy barbell. A lifting belt can also encourage proper lifting mechanics and may even help you add a few more pounds to your lifts.

Reduces Stress on the Lumbar Spine

Weightlifting belts increase intra-abdominal pressure and give you something to brace your core muscles against, which helps increase core stability and places less stress on the spine. As a result, you’re less likely to suffer from a severe back injury.

That said, a lifting belt won’t totally prevent injuries, so you shouldn’t throw one on and assume it will protect you from getting hurt. Lifting injuries are rare, but they can happen whether you wear a belt or not.

It’s also important to note that you shouldn’t use a lifting belt to push through severe back pain. It’s better to work through the root cause of your pain and take some time off, if necessary, rather than relying on a belt to mask your injury.

Encourages Proper Form and May Prevent Injuries

Having something to breathe into and brace your core against encourages you to remain tight and maintain stability when lifting weights. For example, it can serve as a reminder to keep your spine neutral during deadlifts or help prevent you from excessively arching your back during overhead presses.

Gives You More Confidence

It’s common to experience mental blocks when attempting a new one-rep max or performing large sets of squats or deadlifts. A lifting belt can help you overcome that by making you feel more secure and offering reassurance that your spine is more protected when you’re lifting heavy loads.

Helps You Lift More Weight

Wearing a weightlifting belt will not automatically add hundreds of pounds to your lifts. Perfecting your technique, improving your core strength, and adding more volume are some of the most important things you can do if you want to lift heavier weights. But because a lifting belt increases your core stability, you can usually lift a few more pounds with a belt than without one.

What To Look For When Buying a Weightlifting Belt

Price is always an essential component to look at when buying any gym equipment or gear. Beyond that, the material, fastening mechanism, width, and thickness of your weightlifting belt are also important features to evaluate. If you compete in powerlifting or Olympic weightlifting, you also need to ensure you buy a belt that meets your federation’s specifications.

Price

A weightlifting belt can cost around $30 or more than $200, depending on the materials, how thick it is, and whether or not it’s approved for powerlifting or weightlifting competitions (more on that below). Nylon belts are generally cheaper, while leather belts are more expensive. If you don’t specialize in a strength sport and aren’t lifting more than 400-500 pounds multiple days a week, you likely don’t need to spend more than $100 on a belt.

Material and Fastening Mechanism

The type of workouts you do will dictate the best belt material for your needs. For CrossFitters or functional fitness enthusiasts, a Velcro nylon belt that’s easy to fasten and unfasten is best. It will move with your body better as you transition from one movement to the next, and you won’t waste precious time fiddling around with prongs and buckles. For powerlifting, stiffer leather belts are better because they offer more stability for heavy lifts.

You can use either a leather or nylon belt for Olympic weightlifting, as long as it has enough mobility to move with you through the more dynamic lifts. Any metal components should be small enough that they don’t get in the way as you perform cleans and snatches.

Lifters who don’t specialize in any sport can choose leather or nylon, depending on budget and personal preference.

Another factor to consider when choosing between a nylon or leather belt is that a leather belt can have a long break-in period. It may take several weeks to get it to mold to your body. If you’re looking for something you can start using comfortably right away, a nylon belt may be better.

Competition Approval

If you compete in powerlifting or Olympic weightlifting, you’ll need a belt that’s approved for competition. Most national and international-level meets will have specifications your belt must meet to be considered legal for competition use. For example, the IWF states that lifters can only wear belts with a maximum width of 12 centimeters in competition. 

In powerlifting, nylon belts aren’t allowed because there is a risk that the Velcro can come undone during a heavy lift and cause serious injuries. Furthermore, different federations have unique rules regarding the types of belts you can wear during meets. In many cases, you are also limited to a few select brands. One brand’s belt may technically meet your federation’s specifications, but you can’t use it in competition if it’s not on the approved belt list.

Width

The width of a weightlifting belt refers to how high it is from the bottom to the top. Most lifting belts are three or four inches wide, though some are six inches or wider.

The thicker belts will offer more back support, which is helpful if you have a history of back injuries. However, if you compete in powerlifting, you can’t use a belt wider than four inches during meets (though some sanctioned meets will allow six-inch wide belts). Similarly, belts wider than 12 centimeters (about 4.7 inches) are not allowed in Olympic weightlifting competitions.

If you don’t compete in powerlifting or weightlifting or have issues with back pain, the size of your torso is the most important factor regarding which belt width is best for you. Lifters with short torsos should consider a three-inch belt because it will be less likely to dig into your rib cage. Those with longer torsos should be able to use a four-inch belt comfortably.

Thickness

The thickness of a lifting belt refers to how thick it is from the interior that lays against your body to the outside that faces away from your body. Nylon belts can range from about six to 10 millimeters. As you can probably imagine, the thicker belts are more supportive. Either thickness is allowed in Olympic weightlifting competitions.
Leather belts are generally 10 or 13 millimeters thick. The thinner ones break in faster and are more affordable. The 10-millimeter belts are also better for beginners because they have less rigidity, making it easier to get accustomed to lifting while wearing a belt. On the other hand, the thicker belts offer more stability for heavy lifting.
Ten-millimeter and 13-millimeter leather belts are both allowed in powerlifting and Olympic weightlifting competitions. For non-competitive lifters, the thickness you get depends on how much you lift and how much support you want.

How To Use a Weightlifting Belt

Before getting into how to use a weightlifting belt, you should first understand how it works. It’s not something you just slap on before setting up for a lift or pull as tight as you possibly can. To get the most out of it, you need to ensure it fits well and you breathe properly while wearing it.

The belt should sit right above your hip bones, and you should be able to comfortably fit one of your fingers between it and your body. This will ensure a snug fit but leave some room for you to take a deep breath and brace properly before you begin your lift. If you feel any pinching or can’t breathe with the belt on, you need to readjust the tightness.

As for when you should wear a weightlifting belt, you should save it for when you’re lifting at around 80 percent or more of your one-rep max or doing lifts that load the spine, like squats, deadlifts, or the Olympic lifts. You shouldn’t put it on for every set or even every exercise. There’s no need to wear a lifting belt for warm-up sets (except your last warm-up set on heavy days) or when doing bicep curls, tricep extensions, or other isolation lifts.

RELATED: 5 Mistakes You Might Be Making With Your Weightlifting Belt

Final Thoughts

A high-quality weightlifting belt can make a huge difference in your strength training journey — not because it will add hundreds of pounds to your lifts but because it can help encourage proper lifting mechanics, protect your spine, and give you a mental boost when self-doubt starts creeping in.

Lifting belts are either nylon or leather, and which one you pick will depend on your sport and how much support you need. You can also choose between various widths, thicknesses, and closure types. If you’re confused about how to find the best weightlifting belt for you, use our reviews and buying guide above as a resource to ensure you find the right one for your needs.

FAQs

What type of weightlifting belt is best?

For powerlifting or workouts where you’re lifting several hundred pounds, a leather weightlifting belt is best because it offers the most core stability. For Olympic weightlifting or workouts where you transition from heavy lifting to other exercises quickly, a nylon belt is best because it’s more flexible and is easier to fasten and unfasten.

At what weight should I use a belt for deadlifts?

A general rule of thumb is to start using a belt for deadlifts when you can lift one to 1.5 times your body weight. Some people recommend using a belt whenever you lift 80 percent or more of your one-rep max. You may also choose to use a belt when doing sets of 10 or more reps so that your lower back doesn’t fatigue before the rest of your muscles do.

What is the best squat belt?

The best squat belt is the Dominion Three-Inch Leather Lifting Belt. It’s made of soft leather that doesn’t take long to break in, and the three-inch width provides stability without digging into your ribs as you move through the squat.

What belt do bodybuilders use?

Most bodybuilders use leather lifting belts like the SBD 13mm Lever Belt because leather offers maximum stability for heavy compound lifts. Leather belts are typically 10 or 13 millimeters thick and three or four inches wide, but the thickness and width bodybuilders choose will depend on how much support they need.

The post Best Weightlifting Belts for CrossFit, Powerlifting, Olympic Weightlifting, and More appeared first on Breaking Muscle.

Be Nice and Share!