This post was originally published on this site

Originally Posted At: https://breakingmuscle.com/feed/rss

When most lifters make the decision to commit to the gym, the barbell bench press is often one of the first exercises selected for building a stronger and bigger chest. However, despite its reputation as a “must-do” movement, the barbell bench alone is not going to produce the type of well-developed chest most hope for. That requires an introduction to the dumbbell bench press.

The exercises are similar in setup and execution, with a few key differences. The dumbbell bench press allows a longer range of motion and more freedom of movement at the shoulder joint. These can elicit a greater muscle-building response, build upper body strength unilaterally (one side at a time), improve core stability, and increase your barbell bench pressing strength.

Here’s everything you need to know about the overlooked dumbbell version of one of the most popular barbell exercises.

How to Do the Dumbbell Bench Press

Using dumbbells instead of a barbell provides a different shoulder and elbow position, which in turn increases the range of motion and makes the muscle-building stimulus of this exercise even greater.

Step 1 — Get into Pressing Position
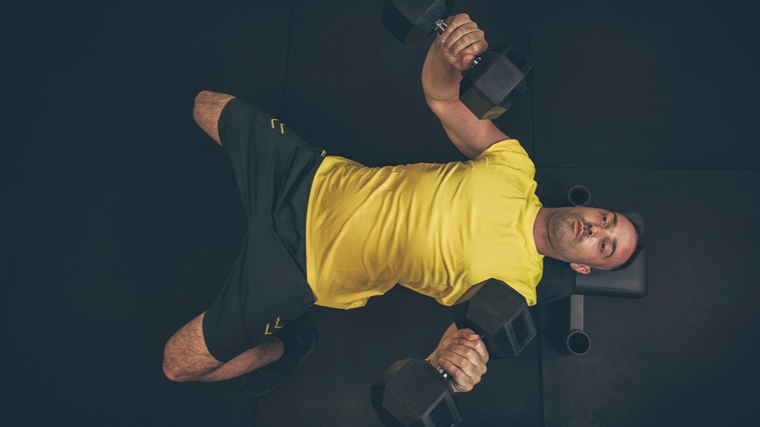
man on flat bench in gym stretching chest with dumbbells
Credit: charmedlightph / Shutterstock

As you lie back on a flat bench, bring a pair of dumbbells to the outsides of your chest with your hands facing each other. Pull your shoulder blades back into the bench. Make sure that both of your feet are placed firmly on the ground, with your feet directly under your knees.

Your hips, your head, and both of your shoulders should be firmly touching the bench. Rotate your arms to point your elbows at an angle slightly away from your feet and allow your hands to point towards your knees.

Form Tip: For total stability, feel for six points of contact  — two feet on the ground plus your tailbone, two shoulders, and your head on the bench. This will mean you are in a good position to start the exercise

Step 2 — Drive the Weights Up
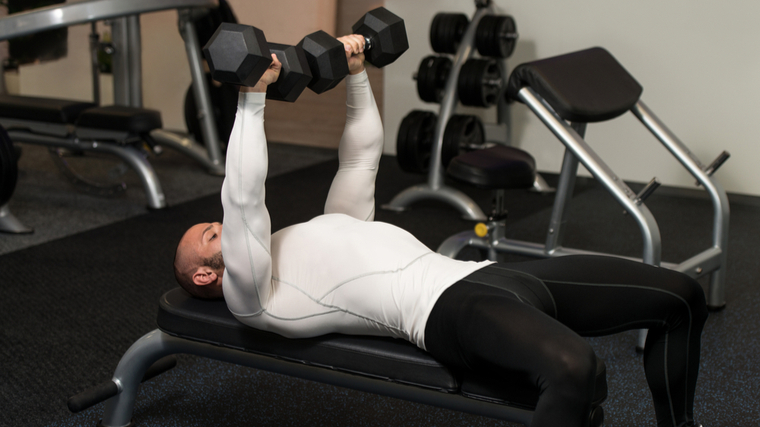
man in gym pressing dumbbells during chest exercise
Credit: Jasminko Ibrakovic / Shutterstock

Hold the dumbbells firmly in a pronated (palms facing your feet) position with your wrists directly above your elbows. Drive your elbows up to the ceiling in a straight line until the dumbbells are positioned directly above of your pecs. Do not allow the dumbbells to touch at the top of each rep.

Form Tip: Make sure your elbows are stacked directly under your wrists before you drive up. Allowing your wrists, and the weights, to break the plane of your elbow will increase joint strain and increase the potential risk of injury.

Step 3 — Lower into a Stretch
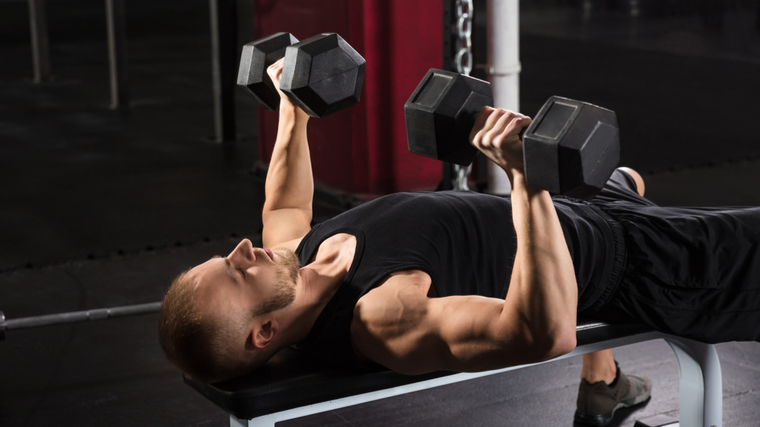
Man in gym lying on flat bench lowering dumbbells
Credit: Andrey_Popov / Shutterstock

Slowly lower the dumbbells down while squeezing your shoulder blades into the bench. Keep your elbows pointed at an angle between your feet and your shoulders. Emphasize feeling your pecs stretch as the dumbbells come to a position resting just outside your chest.

Form Tip: Think about pulling the dumbbells toward you while reaching your chest to the ceiling.

Dumbbell Bench Press Mistakes to Avoid

When using dumbbells, increased freedom at the shoulder joint also means the exercise requires increased control and coordination. There are a few errors to avoid when performing the dumbbell bench press. 

Having an Unstable Body

It is very common to see lifters place their feet in the air and cross their ankles or haphazardly sprawl their legs away from the bench during the exercise.
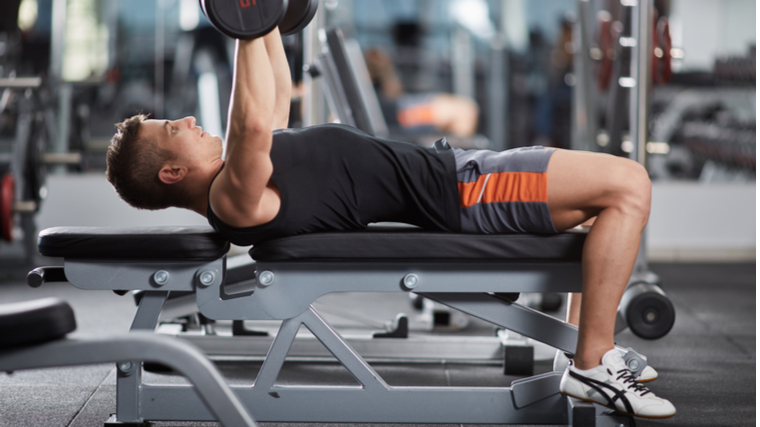
man in gym performing flat bench dumbbell press lifting head
Credit: Slatan / Shutterstock

This creates an environment of instability and prevents you from being able to produce the most force, which compromises strength production because the lower body is an essential contact point and base of support.

Avoid It: Driving your legs into the ground will help maintain balance with the torso and allow you to create more force with the upper body. Your feet, calves, hamstrings, glutes, and quadriceps should all be tense and fully engaged.

Ego Lifting

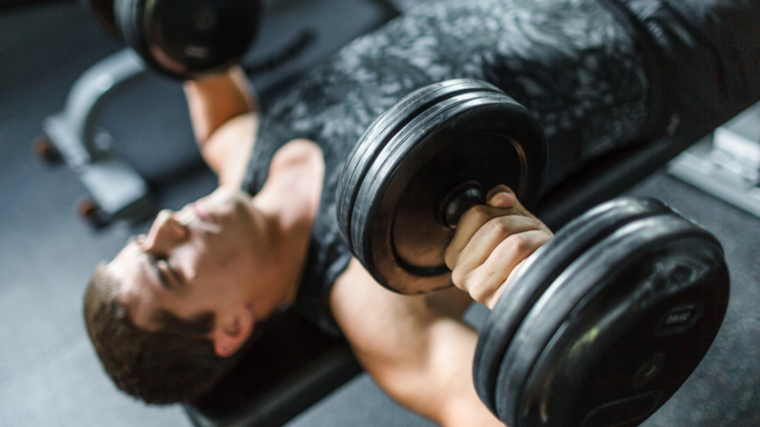
Some lifters think that just because they can bench impressive weights with a barbell, they’re “supposed to” bench with heavy dumbbells, too.
man in gym lying on bench lifting heavy dumbbells
Credit: Pressmaster / Shutterstock

What they fail to realize is that dumbbells involve the smaller stabilizer muscles of the shoulder more than a barbell, which means excessively heavy weights can strain the shoulder joint and decrease chest muscle recruitment.

Avoid it: Lean the ego at home when it’s time to use dumbbells. Whatever you barbell bench press, cut that weight in half and then take off another 5-10kg (10-20 pounds). This will give you a good starting point for the total weight (both dumbbells combined) when learning the exercise.

Benefits of the Dumbbell Bench Press

The bench press is be a staple movement in nearly every lifter’s repertoire.
Man in gym performing chest press with dumbbells
Credit: wavebreakmedia / Shutterstock

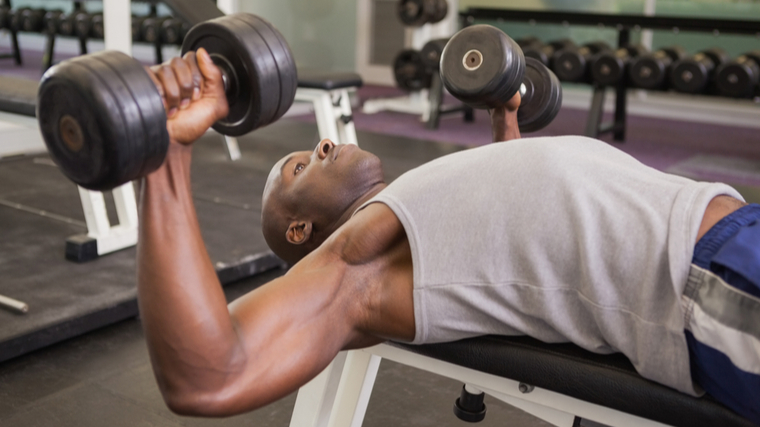
Here are two big advantages that dumbbells have over the barbell.

Greater Range of Motion

With a barbell, your hands and arms are set into fixed angles with relatively limited range of motion. Dumbbells allow the weights to move in an arcing path, relatively wider in the bottom position and nearly touching at the top.

This provides a longer range of motion as you lengthen the muscle with a deeper stretch which can increase your muscle building potential compared to a barbell. (1) Dumbbells also allow your hands to rotate, which can individualize pressing angles to reduce joint strain.

Unilateral Strength

Overemphasizing barbell training can create muscular discrepancies, since most lifters naturally favor one side more than the other. Because a barbell doesn’t allow each side to focus its own share of work, you may not notice the subtle differences in your unilateral strength.

Using  dumbbells will allow you to build that unilateral strength and reduce any muscular imbalances from occurring while still strengthening your pecs, triceps, and shoulders.

Muscles Worked by the Dumbbell Bench Press

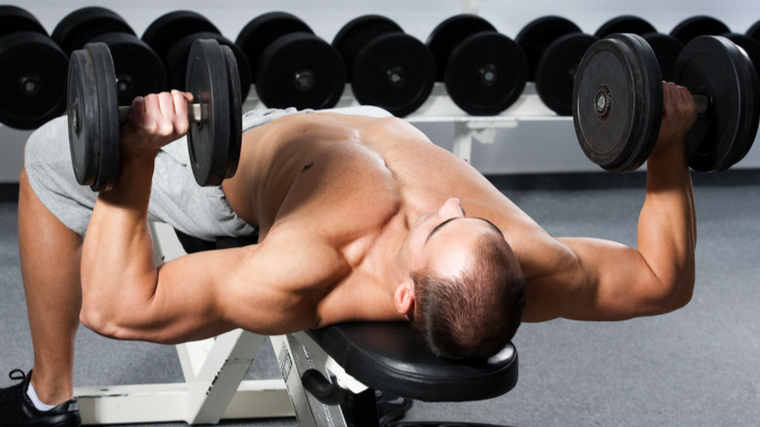
All chest presses focus the work, appropriately, on the chest. However, several muscle groups work together to perform the exercise.
muscular man in gym performing dumbbell chest press
Credit: Skydive Erick / Shutterstock

The dumbbell bench press allows lifters to train their pressing muscles (chest shoulders, and triceps) without excessively heavy weights.

Pectoralis Major 

The pec major is the big, basic chest muscle. It includes two separate heads: the clavicular (upper chest) and the sternocostal (mid-chest). Both heads of the pecs function to pull the upper arms across the chest toward the midline of the body.

Anterior Deltoid

The shoulder muscles is composed of three separate heads — the posterior (rear), the lateral (side), and the anterior (front). Each head contributes to moving the arm in its respective plan, so the anterior deltoid is heavily recruited during the dumbbell bench press because the arm is moving in front of the body.

Triceps

The triceps consist of the long, medial, and lateral heads, each playing a role in extending the elbows and raising the arms. The medial and lateral heads, in particular, are emphasized during the dumbbell bench press to move the weight and straighten (lock out) the elbows.

Pectoralis Minor and Serratus Anterior

These relatively smaller muscles are both found near the pec major. They share similar functions, helping to control shoulder blade movement and stability during pressing (and chest flye) movements.

Who Should Do the Dumbbell Bench Press

Much like the barbell bench press, the dumbbell bench press can offer benefits to strength athletes, physique-focused lifters, and general fitness enthusiasts.

Bodybuilders and Physique Enthusiasts

Whether it’s a 220-pound bodybuilding monster, a lean Men’s Physique competitor, or a typical lifter wanting to improve their pec size and shape, the dumbbell bench press can be a key player in any chest workout.

The dumbbell bench press puts the pecs through a long time under tension with maximum muscle activation, leading to more muscle growth.

Strength Athletes

With the barbell bench press being a sport-specific lift for competitive powerlifters, using the dumbbell bench press as an accessory exercise allows the same pressing muscles to be trained without wear and tear on the joints from the barbell’s repetitive use.

Overhead strength athletes, like Olympic weightlifters and CrossFitters, can also benefit from the dumbbell bench presses ability to train more unilaterally and reduce muscle discrepancies, which leads to improvements in strength overall.

How to Program the Dumbbell Bench Press

The dumbbell bench press can be programmed using a variety of set and rep schemes. It can be performed as a primary exercise at the start of your workout or as a supplemental exercise to maximize muscle fiber recruitment during a session.

Heavy Weight, Low Repetition

To maximize strength, three to five sets in the four to eight rep range is a good place to start. Because of the dumbbell’s stability requirements, lifting excessively heavy with extremely low reps to failure isn’t safe or effective. You should be using a weight that has you finish each set with at least one to two reps left “in the tank” to avoid reaching muscular failure. A rest period of three to five minutes between each set will ensure you lift with maximum effort.

Moderate Weight, Moderate Repetition

For muscle building purposes, working for three to four sets in the six to 12 rep range will bump up your overall training volume of the pecs, which is beneficial for building muscle. (2) The multiple sets and reps also allow you to develop your bench press technique without excessive fatigue from heavier weights.

Low Weight, High Repetition

It could better to use a machine or cable-based machine when working with a higher rep target and being in a closer proximity to failure, because shoulder stabilizers can fatigue before the chest muscles. However, working for two to three sets in the 13-20 rep range is a great way to improve your technique without impacting any extra stress on your joints that may come about from using heavier weights.

Dumbbell Bench Press Variations

Below are several effective variations that can be used by coaches and athletes to keep training varied, progressive, and more finely tuned to a lifter’s needs.

Dumbbell Floor Press

As you may have guessed, the dumbbell floor press is a dumbbell bench press performed on the floor, without a bench. This deliberately limits your range of motion to prevent the weights from traveling down past your chest. This is ideal if you experience shoulder discomfort due to restricted mobility.

It can also helps to train the triceps and improve lockout strength because top-half of the range of motion, where the triceps are most engaged, is emphasized.

Dumbbell Foam Roller Press

Using a foam roller instead of a flat bench allows the scapulae (shoulder blades) to move more freely throughout each rep, which improves upper back and shoulder health.


The mechanics of this is surprisingly similar to that of a push-up and optimizes your natural scapulohumeral rhythm — the way your shoulder muscles and shoulder blades coordinate during movement. This improvement can lead to improved shoulder joint health and increased muscular engagement.

Single-Arm Dumbbell Bench Press

This exercise variation is great for improving total-body stability and unilateral strength while also improving core engagement. You simply use one dumbbell and perform the exercise with one arm for your target number of reps before switching sides.

Your core musculature is going to be targeted to a much higher degree due to the fact that you’re preventing your torso from rotating to far to one side. It is best to use comfortable weight when first taking on this variation and build your confidence remaining stable before increasing weight.

Dumbbell Bench Press Alternatives

If you’re looking for options beyond the dumbbell bench press, there are several effective exercises that work that upper body in a similar fashion.

Barbell Bench Press

While the dumbbell bench has many specific benefits, sometimes it’s appropriate to just load some weight and bench. The key difference with this exercise is its bilateral component, moving both arms together, which exactly what makes it a great way to load up the weight and focus on building strength.

However, the barbell bench press is not limited to purely a strength focus. It can be used to provide a significant amount of volume which triggers a greater muscle-building response. Performing it later in the workout, when the chest is fatigued from other exercises, is one very effective approach.

Seated Cable Chest Press

This may appear to be an unconventional exercise, but it’s very effective when executed correctly. Much like the dumbbell bench press, there is a unilateral factor involved which allows the shoulders freedom to move with reduced joint strain.

The adjustable height of the cable pulleys allows you to train at angles (simulating an incline or decline press) while remaining seated upright. Many gyms have a dedicated seated cable machine, but an identical movement can be performed placing a seated bench in the center of a two-pulley cable station.

FAQs

Can I perform the dumbbell bench press and barbell bench press in the same workout?

Yes, absolutely. Use the barbell bench press as a primary strength lift, performed with heavy weight and low reps, and use the dumbbell bench press as a hypertrophy-specific lift with light to moderate weight and moderate to higher reps. This will let you fully exhaust the muscle fibers with the increases range of motion that the dumbbell bench press offers.

How far should I lower the dumbbells?

Ideally, you’d lower the weights to the level of your chest, with your elbows slightly below the bench. However, you should focus on using your active range of motion, not the maximum range of motion regardless of pain or mobility.

If you cannot lower the dumbbells to achieve the deepest stretch of your pecs, or if you feel any discomfort that takes the emphasis off your pecs, then only move where you can maintain tension without pain. Regardless, always take your time to warm-up and physically prepare the muscles being used. Sometimes a thorough warm-up of your back, chest, and shoulders allows you to use a larger range of motion.

Rethink “Bench Day”

You wouldn’t solely rely on the dumbbell bench press to build a bigger and stronger chest, just like you wouldn’t (or shouldn’t) over-focus on the barbell bench. But when you take into consideration its benefits and versatility, it’s time to include this central exercise in your chest or “upper body pushing” workouts, with or without its barbell cousin.

References

  1. Farias, D. A., Willardson, J. M., Paz, G. A., Bezerra, E. S., & Miranda, H. (2017). Maximal Strength Performance and Muscle Activation for the Bench Press and Triceps Extension Exercises Adopting Dumbbell, Barbell, and Machine Modalities Over Multiple Sets. Journal of strength and conditioning research31(7), 1879–1887. https://doi.org/10.1519/JSC.0000000000001651
  2. Schoenfeld, B. J., Contreras, B., Krieger, J., Grgic, J., Delcastillo, K., Belliard, R., & Alto, A. (2019). Resistance Training Volume Enhances Muscle Hypertrophy but Not Strength in Trained Men. Medicine and science in sports and exercise, 51(1), 94–103. https://doi.org/10.1249/MSS.0000000000001764

Featured Image: Jasminko Ibrakovic

The post How to Do the Dumbbell Bench Press for a Bigger, Stronger Chest appeared first on Breaking Muscle.

Be Nice and Share!
This post was originally published on this site

http://www.marksdailyapple.com/

Air fried pickles with Primal Kitchen Ketchup and Ranch DipLast week we gave you a recipe for air fried green beans, and today we’re back again with another fun and oh-so-easy way to use your air fryer: fried pickles!

That’s right, you can “fry” pickles for a crunchy, salty snack in minutes. This particular fried pickle recipe skips the questionable fry oil and batter in favor of a breading made with Primal-friendly ingredients. Whip up a batch of these, get out the Trivial Pursuit, and host an at-home pub quiz with gluten-free beer or these Primal mocktails for the abstainers.

Here’s the recipe:

How to Make Fried Pickles in the Air Fryer

Serves: 4

Time in the Kitchen: 20 minutes

Ingredients

  • 1 cup sliced pickles (see Tips below)
  • 1 egg
  • 1/4 cup almond flour
  • 2 Tbsp tapioca starch
  • 3/4 tsp onion powder
  • 1/2 tsp garlic powder
  • 1/2 tsp paprika
  • 1/2 tsp black pepper
  • 1/4 tsp salt
  • 1/4 tsp turmeric
  • Avocado oil spray
  • Dipping ideas: Primal Kitchen Ketchup, Mayo, Ranch Dip, Buffalo Ranch Dip

Ingredients for fried pickles, Primal Kitchen Avocado Oil Spray, Mayo, Ranch Dip, Buffalo Ranch Dip, Ketchup.

Directions

In a small bowl, mix together the tapioca starch and spices. Add half of this mixture to the almond flour in another bowl. In a third bowl or dish, whisk together the egg.

Dry the pickles well on a towel to remove any excess moisture. Spray your air fryer basket with avocado oil.

Toss the pickles in the tapioca starch mixture. One at a time, use a fork to dip each pickle slice into the beaten egg, then dredge the slice in the almond flour mixture. Place the breaded pickle in the basket.

Sliced pickles in a bowl with tapioca starch and spices.

Repeat with the remaining pickles. Lightly mist the tops of the pickles with avocado oil spray.

Place the basket into an air fryer set to 375 degrees Fahrenheit (190 degrees Celsius) for about 10 minutes, or until the outside is golden brown. If needed, air fry for an additional 1 to 2 minutes more to achieve a nice golden brown exterior. Allow them to cool slightly before removing them from the basket.

Air fried pickle slices on a rack.
Serve with your favorite Primal Kitchen dips and condiments!

Tips

  • Every air fryer is different and therefore cooks slightly differently. Refer to your manual for details.
  • Use savory vinegar-based pickles for this recipe. Avoid pickles with sugar in the brine as it will negatively affect their overall taste.

Cocktail_and_Tartar_Sauces_640x80

Print

Air fried pickles with Primal Kitchen Ketchup and Ranch Dip

Air Fryer Pickles Recipe (Primal, Paleo, and Keto)


Description

Air fried pickles are a crunchy, salty snack or side dish. This version skips the questionable fry oil and batter in favor of a breading made with paleo- and Primal-friendly ingredients.


Ingredients

1 cup sliced pickles (see Notes)

1 egg

1/4 cup almond flour

2 Tbsp tapioca starch

3/4 tsp onion powder

1/2 tsp garlic powder

1/2 tsp paprika

1/2 tsp black pepper

1/4 teaspoon salt

1/4 teaspoon turmeric

Avocado oil spray

Dipping ideas: Primal Kitchen Ketchup, Mayo, Ranch Dip, Buffalo Ranch Dip


Instructions

In a small bowl, mix together the tapioca starch and spices. Add half of this mixture to the almond flour in another bowl. In a third bowl or dish, whisk together the egg.

Dry the pickles well on a towel to remove any excess moisture. Spray your air fryer basket with avocado oil.

Toss the pickles in the tapioca starch mixture. One at a time, use a fork to dip each pickle slice into the beaten egg, then dredge the slice in the almond flour mixture. Place the breaded pickle in the basket. Repeat with the remaining pickles. Lightly mist the tops of the pickles with avocado oil spray.

Place the basket into an air fryer set to 375 degrees Fahrenheit (190 degrees Celsius) for about 10 minutes, or until the outside is golden brown. If needed, air fry for an additional 1 to 2 minutes more to achieve a nice golden brown exterior. Allow them to cool slightly before removing them from the basket.

Serve with your favorite Primal Kitchen dips and condiments!

Notes

Every air fryer is different and therefore cooks slightly differently. Refer to your manual for details.

Use savory vinegar-based pickles for this recipe. Avoid pickles with sugar in the brine as it will negatively affect their overall taste.

  • Prep Time: 10 minutes
  • Cook Time: 10 minutes
  • Category: Side dish
  • Method: Air fryer

Nutrition

  • Serving Size: 1/4 of recipe
  • Calories: 84
  • Sugar: <1g
  • Sodium: 389mg
  • Fat: 4g
  • Saturated Fat: <1g
  • Trans Fat: 0g
  • Carbohydrates: 7g
  • Fiber: 1g
  • Protein: 4g
  • Cholesterol: 47mg
  • Net Carbs: 6g

Keywords: Air fryer, Air fried pickles

The post Air Fryer Pickles Recipe (Primal, Paleo, and Keto) appeared first on Mark’s Daily Apple.

Be Nice and Share!
This post was originally published on this site

Originally Posted At: https://breakingmuscle.com/feed/rss

It wouldn’t be a stretch to say bodybuilder Derek Lunsford is in a critical period of his career. As the reigning 212 Olympia Champion, Lunsford has his sights on a repeat performance at the 2022 Mr. Olympia. While his off-season ramps up, he has to fuel that potential repeat with the proper nutrition. 

On June 1, 2022, Lunsford shared a full day of eating on his YouTube channel. The protein-packed, carbohydrate-loaded schedule is a glimpse into preparing one of modern bodybuilding’s elite competitors. 

[Related: Why You Should Be Greasing The Groove During Your Workouts]

It’s a busy day of nutrition for Lunsford and he wastes no time diving right in. 

Meal 1

For breakfast, Lunsford wastes no time packing on the protein and carbs. He eats 200 grams of egg whites, three ounces of Icon Meals™ steak, and some mushrooms and potatoes (quantity unspecified)

In total, his breakfast comes out to 50 grams of protein and 60 grams of carbs. Lunsford notes that he generally aims to eat something similar at each meal. After he finishes breakfast, Lunsford takes a couple of scoops of supplements from Evolog™ and Evovite™. He does this a few times a day and maintains the supplements help with any potential nausea since he’s consuming so much food. 

Meal 2

At mid-morning, Lunsford combines eight ounces of some Icon Meals™ shredded chicken and eight ounces of white rice into a bowl. He also generously lathers buffalo wing sauce and light ranch all over the chicken. Lunsford explains that it’s the off-season, and he’s giving himself some breathing room. If he were in prep mode, he would not be as generous with things like sauces. 

I like consistency when I eat. I like each bite to be about the same.

Lunsford’s second meal comes out to 50 grams of protein and 75 grams of carbs

Meal 3

For his third meal of the day, Lunsford leans on a pre-workout shake with an unspecified amount of cream of rice. He also includes almond milk and a scoop of Evogen’s™ chocolate protein powder. This adds up to 50 grams of protein and 75 grams of carbs. Lunsford notes that drinking a protein shake at this moment is a bit from the norm for his diet. 

“Normally, I like to eat most of my meals, and a protein shake is like post-workout,” Lunsford says. “Sometimes I’ll even have a second shake of the day, but I like to eat whole food. I like to eat chicken, beef, salmon, eggs, whatever.”


View this post on Instagram


A post shared by Derek Lunsford (@dereklunsford_)

[Related: Deloading 101: What Is A Deload And How Do You Do It?]

Meal 4

Lunsford says he still does cheat meals where he treats himself in the full throes of his off-season. His fourth meal of the day is a reflection of that. After waking up from a late nap, the bodybuilder eats eight ounces of ground chicken with taco seasoning and eight ounces of rice. It’s another 50 grams of protein and 60 grams of carbs

Lunsford insists that the day he filmed the video was a rest day, so he’s again giving himself more leeway. 

“Today, I’m not training. I’m resting.” Lunsford says. “So, I’ll eat five meals for sure, and late tonight I’ll eat a sixth meal. I do have cheat meals sometimes, like twice a week I’m having cheat meals.”

Meal 5

For his (usual) fifth meal of the day, Lunsford goes to one of his tried-and-true staples: An unspecified amount of steak and white rice. This meal tops out at 50 grams of protein and 80 grams of carbs.

As Lunsford explains, he believes that a bodybuilder should consume red meat at least once a day during their off-season. 

“I think you need to eat at least one red meat meal a day in the off-season, maybe two,” Lunsford says. “I wouldn’t eat too much, but one to two meals a day is good. You’ll probably notice your strength goes up, your volume will increase, so this is important to get at least a little red meat into your diet consistently.”

Meal 6

Lunsford has one more protein shake to close out his day of eating before sleeping. It has the same almond milk structure, except this time he puts in two scoops of Evogen’s™ protein. The final shake gives Lunsford another 50 grams of protein and 75 grams of carbs

On the whole, Lunsford’s entire day’s total of protein comes out to 300 grams. His carb total is 425 grams


View this post on Instagram


A post shared by Derek Lunsford (@dereklunsford_)

[Related: Everything You Need To Know About How To Burn Fat]

Mr. Olympia Is Next

Lunsford will assuredly continue to plug away in his off-season as he prepares for December’s Mr. Olympia. His nutrition should undoubtedly play a huge role in his performance on stage. The bodybuilder will try to become a repeat 212 Olympia Champion on December 15-18, 2022, in Las Vegas, NV. 

Featured image: @dereklunsford_ on Instagram

The post Check out Derek Lunsford’s ‘Full Day of Eating’ Ahead of the 2022 Mr. Olympia appeared first on Breaking Muscle.

Be Nice and Share!
This post was originally published on this site

Originally Posted At: https://breakingmuscle.com/feed/rss

The 2022 European Weightlifting Championships (EWC) are taking place from May 28-June 5, 2022, in Tirana, Albania.

There, for the first time in his career, Bulgarian weightlifter Karlos Nasar competed in the 89-kilogram weight class. That didn’t prove to be much of an obstacle for Nasar, the reigning International Weightlifting Federation (IWF) World Champion in the 81-kilogram weight class. The 18-year-old athlete went on to have a weekend to remember as he showed off his strength by setting three separate Junior World Records. They are as follows:

Karlos Nasar (89KG) | 2022 European Weightlifting Championships Junior World Records

  • Snatch — 171 kilograms (377 pounds) — Junior World Record
  • Clean & Jerk — 211 kilograms (465.2 pounds) — Junior World Record
  • Total — 382 kilograms (842.2 pounds) — Junior World Record


View this post on Instagram


A post shared by karlosnasar (@karlosnasar)

[Related: Weightlifter Eishiro Murakami (+109KG) Sets 3 National Records During 2022 All-Japan Championships]

Nasar’s snatch record officially surpasses Karen Avaygan’s previous Junior World Record mark by a kilogram (2.2 pounds). His clean & jerk eclipses Keydomar Giovanni Vallenilla Sanchez’s Junior World Record by seven kilograms (15.4 pounds). Finally, Nasar’s new Junior World Record total exceeds Revaz Davitadze’s previous record by 11 kilograms (24.2 pounds)

2022 European Weightlifting Championships Results

Nasar’s three Junior World Records were not enough for him to take home the gold. The athlete ended up finishing in second place with a silver medal. Senior 89-kilogram weightlifter Antonino Pizzolato was the only competitor to outdo Nasar’s performance with two separate feats. Pizzolato notched a World Record clean & jerk of 217 kilograms (478.4 pounds) along with a World Record total of 392 kilograms (864.2 pounds). These achievements helped the Italian weightlifter finish with the eventual gold medal.

Here are the top three finishers in the 2022 EWC for the Men:

2022 European Weightlifting Championships | Top Totals

  1. Antonino Pizzolato (Italy) — 392 kilograms (864.2 pounds)
  2. Karlos Nasar (Bulgaria) — 382 kilograms (842.2 pounds)
  3. Revaz Davitadze (Georgia) — 369-kilograms (813.5 pounds)


View this post on Instagram


A post shared by Karlos shturi (@shturi)

[Related: Olympic Weightlifter Katherine Nye Squats 186 Kilograms (410 Pounds) For A New PR]

Nasar at a Glance

These results don’t appear to be anything new for Nasar if his career trajectory indicates anything. In addition to his 2021 IWF World title, he has previously featured well in several youth competitions to start his competitive life.

Perhaps among the more notable, Nasar took first place in the 2019 World Youth Weightlifting Championships in Las Vegas, NV. He also finished in second place in the 81-kilogram weight class in the 2021 EWC that took place in Moscow, Russia. 

In the lead-up to the 2022 EWC, Nasar frequently alluded to a potential record-breaking performance. His social media is rife with footage of the weightlifter breaking unofficial records in training. A 210-kilogram (463-pound) clean & jerk from an April 2022 session might be one of the more noteworthy overhead feats Nasar had beforehand. He even previously locked out a 175-kilogram (385.8 pounds) snatch in November 2021. That is the same snatch weight that Pizzolato captured at the 2022 EWC. 

While Nasar’s competition is over, the 2022 EWC will finish on June 5, 2022. 

Featured image: @karlosnasar on Instagram

The post Weightlifter Karlos Nasar (89KG) Captures 3 Junior World Records at 2022 European Weightlifting Championships appeared first on Breaking Muscle.

Be Nice and Share!
This post was originally published on this site

http://www.marksdailyapple.com/

Research of the Week

Controlling glucotoxicity might not be enough in diabetes.

To spike brain derived neurotrophic factor, intense exercise wins.

Imagine this prehistoric giraffe relative with a helmet for a skull and a neck joint morphology explicitly adapted to high velocity movement swinging its thirty pound bowling ball of a head at you.

Resveratrol has no effect on metabolic health in overweight type 2 diabetics.

The difference between exogenous and endogenous ketosis.

Seems that masks didn’t do much good in schools.

Fear impairs immunity.

Sweat protects against Lyme disease.

New Primal Kitchen Podcasts

Primal Health Coach Radio: Kathleen Trotter

Media, Schmedia

I support moccasins’ status as formal wear.

Wait, are people not doing this to identify their friends?

Interesting Blog Posts

A double-edged sword? As a society increases focus on equality and individual self-determination, it suffers from higher rates of mental illness.

Best meat grinders.

Social Notes

Great crow story.

I appeared on the Health Coach Conversations podcast.

Roll with the contradictions.

Everything Else

Urine beer.

Nice little symbiotic relationship.

Things I’m Up to and Interested In

Uncharted territory: The labor situation at US ports might get a little interesting next month.

A true classic: The Oiling of America.

Interesting news: Spanish celebrities, business leaders (and even a pharma exec) in trouble for buying fake vaccine cards.

More of this, please: Luring predatory birds to farms to take care of pests.

Great potential here: Personalized diet based on insulin phenotype.

Question I’m Asking

How are you getting ahead of potential food price hikes?

Recipe Corner

Time Capsule

One year ago (May 28 – Jun 3)

Comment of the Week

“Mark,
Thank you for you latest Sunday Post. This post hit close to home.
I have always been a bit of an empath and years ago after another major tragedy, I found myself physically and chronically ill after I was unable to separate myself from this event. After years of therapy and alternative medical intervention I realized I needed to find ways to distance myself from what what going on around me.

While my husband can listen to and read the news all day, every day without any ill effects, I cannot, and I am now able to advocate for myself acknowledging this difference.

Disconnecting has been incredibly healing. I now have more time to spend with my family and do things that help improve my resilience, mentally and physically, which is what I need in order to continue my career as an educator to young children, and as a mother.”

-Glad to hear you’ve figured out what works for and helps you, Katie.

Oil_&_Vinegar_640x80

The post New and Noteworthy: What I Read This Week—Edition 180 appeared first on Mark’s Daily Apple.

Be Nice and Share!
This post was originally published on this site

Originally Posted At: https://breakingmuscle.com/feed/rss

When most people talk about building an impressive physique, they often envision capped delts the size of bowling balls, a massive chest, and chiseled abs. But what about the muscles you don’t see from the front?

Having an impressive back is paramount when trying to develop an aesthetic physique. A V-shaped torso with a well-built back is an athletic and eye-catching look. And what about overall performance? The lower back, glutes, and hamstrings — collectively known as the posterior chain — provide a strong support and power base.

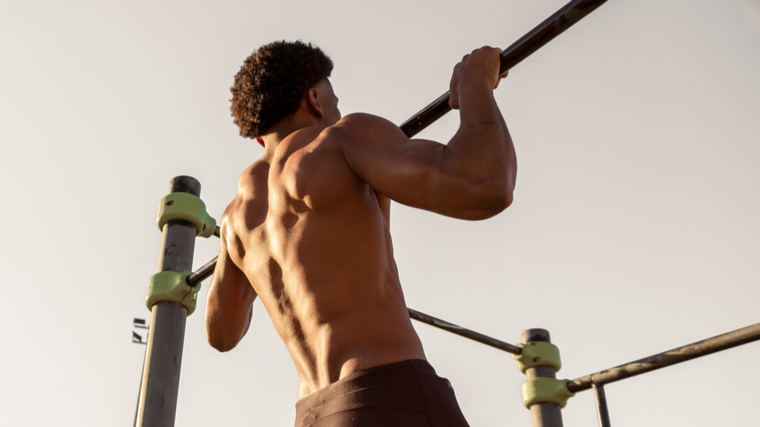
man outdoors performing pull-ups
Credit: Maxim Morales Lopez / Shutterstock

This is why most people should spend more time pulling. These different muscles of the back have different roles which respond better to diverse stimuli., so you’ll miss certain parts if you only do one or two pulling exercises.  Here are the eight best upper body pulling exercises for a complete back.

Best Upper Body Pulling Exercises

Seated Cable Row

When most people think about targeting the lats, they usually picture a vertical pulling motion, like pull-ups or pulldowns. Yet, a properly executed seated cable row is one of the best exercises to emphasize the lats while minimizing involvement from other back muscles. Plus, you can eventually use a ton of weight.

Use a low pulley station and a neutral (thumbs-up), close-grip handle for this movement. The neutral grip combined with keeping your elbows close to your body helps focus on the lats and increase muscle recruitment. (1) Compared to a barbell row, the arms, lower back, and legs are less involved, allowing you to focus even more on the target muscle(s).

How to Do the Seated Cable Row

Sit at the low pulley station and grab the handle with a thumbs-up grip. Push your legs into the support platform while keeping a neutral spine. In the starting position, your knees should be slightly bent, and your chest puffed out (this helps to engage your upper back muscles for stability).

Imagine your hands are mere meaty hooks and pull hard with your elbows, without rounding your spine. The handle should nearly reach your abs in the peak contraction, and your elbows should be slightly behind your body.

Lower the weight slowly and let it stretch your back as far as possible, even letting the scapulae (shoulder blades) come forward. This extreme stretch is one way to hit the lats, trapezius, and rhomboids. (2) When lifting and lowering the weight, be mindful not to let the lower back round and not swing your upper body to cheat the weight with momentum.

Benefits of the Seated Cable Row

  • The seated cable row allows potentially heavy loading, encouraging long-term progress.
  • It reinforces strong posture by requiring upper-body control and spinal stabilization, while strengthening the upper back.

Meadows Row

This exercise is named after the late bodybuilding coach John Meadows, who popularized the movement. It uses a barbell landmine rather than a dumbbell and focuses on the upper back muscles — the lower traps, rhomboids, and even the rear delts. But don’t worry, it still works the lats as well.

The leverage of the landmine and the angle of movement allow for a unique stretch of the recruited muscles, which develops muscle mass.

How to Do the Meadows Row

Stand on one side of a landmine station in a staggered stance with slightly bent knees. Use your front leg as a support for the same-side arm. Keep your spine flat and remain bent at the waist. Use lifting straps to grab the barbell sleeve with a pronated (palm-down) grip. Because the sleeve is smooth and thick, the lifting straps will prevent grip strength from being a limiting factor.

Lift the weight by driving hard with your elbow. To emphasize the upper back, allow your elbow to flare out, rather than staying pinned to your ribs. Keep your torso flat, not rotated. Maximize the range of motion by using smaller 25-pound or 10-pound plates instead of 45-pound plates.

Benefits of the Meadows Row

  • This unique row trains the upper back and lats with minimal lower back strain.
  • As a unilateral exercise, it corrects strength imbalances and improves overall muscle development.

Inverted Row

This simple bodyweight exercise being “underestimated” is an understatement. Some hardcore gym-goers refuse to engage in bodyweight exercises once they get a taste of iron, but the inverted row is a fantastic exercise for any lifter.

Not only does it work the whole upper back and arms, but it also gives your lower back a rest. (3) It’s simple, effective, and can be easily adapted to any strength level or goal. Too hard? Set the bar higher or bend your knees. Too easy? Slip on a weighted vest and/or elevate your feet on a bench.

How to Do the Inverted Row

Position a stable bar (often a Smith machine) around waist height. The lower the bar, the harder the exercise will be because the more bodyweight you’ll be lifting. Lie under the bar and grab it using a slightly wider than shoulder-width grip, either pronated (palm-down) or supinated (palm-up). Squeeze your shoulder blades together and pull yourself up until your chest touches the bar.

Lower yourself with control. To reap the most benefits, keep your body as tight as possible. Contract your glutes and abs, and keep your entire body straight throughout each rep. Don’t let your scapulas move around as you stretch at the bottom. Let’s stay tight and work on core stability.

Benefits of the Inverted Row

  • The inverted row will build total-body strength and stability because the body must be stabilized during the exercise.
  • It improves scapular strength and health, which benefits posture.
  • It’s relatively easier than a pull-up, so it’s an excellent place to start with bodyweight pulling exercises.
  • For a bodyweight exercise, it targets the upper back more than the pull-up.

Chest-Supported Row

If you’re an older lifter or anyone who’s suffered injuries over the years, chances are you’ve tweaked your lower back at some point, and the mere reading of this article is making your spine itch. Well, do not fret. There’s a heavy-duty exercise that won’t bug your lower back.

Even if you don’t have back problems, the chest-supported row is valuable. It prevents any form of cheating and won’t tax your spinal erectors, which leaves them fresh for your squats and deadlifts. There’s minimal chance of shifting the stress of the exercise onto the wrong muscles.

How to Do the Chest-Supported Row

Some gyms are equipped with a machine specially designed for this exercise. Otherwise, use an incline bench and set it at around a 45-degree angle. Lie against the bench with your chest at the very top and your head above.

Assume a stable position with your feet and brace your core. You won’t be moving your body during the lift, apart from your arms and shoulder blades. Grab a pair of dumbbells or kettlebells and start rowing, driving your elbows up hard. Squeeze as hard and high as you can, then slowly lower the weight to a full stretch.

To emphasize the lats, use a neutral-grip (palms facing each other) and keep your elbows close to your body. For more upper back involvement, assume a pronated grip (palms down) and let your elbows go to the sides.

Benefits of the Chest-Supported Row

  • This chest-supported row has no lower back involvement, which prevents back pain and fatigue.
  • The strict movement prevents momentum and cheating. You only work the desired muscles and the perfect technique is reinforced.
  • It works the lats, lower traps, and rhomboids.

Face Pull

Do you know what can put a roadblock between you and your goals? Injuries. The body needs a strong, balanced foundation to perform and be healthy, but many people spend more time performing pushing exercises than pulling. This can open the shoulder joint to an increased risk of injury when the body’s internal rotators (chest, anterior deltoids, and lats) overpower the external rotators (rotator cuff and posterior deltoids).

Coupled with a lack of development of the shoulder blade stabilizers (like the trapezius and rhomboids), this can create muscular imbalances and persistent injuries. Enter the face pull. A favorite in performance-based strength circles, this exercise works all the neglected little muscles contributing to shoulder health. (4) It’s also a nice rear delt builder and targets the traps and rhomboids in a unique way.

How to Do the Face Pull

Clip a rope attachment to a pulley set around chest-level. Grab the rope with your thumbs facing you and pinkies facing away. Extend your arms, keeping a slight bend in your elbows, and step back until the weight plates are slightly lifted.

Bending your knees for stability, flatten your spine, and puff out your chest. Pull the weights to your forehead-level. Each hand should end up on the side of your face (hence the name). Pause for a second in the contracted position, then slowly lower the weight back to its initial position.

Avoid flexing your arms using your biceps, but instead pack your shoulder blades together and pull with your elbows. Your arms will bend naturally. If you’re a bodybuilding enthusiast, think about performing a “back double biceps” pose. 

Benefits of the Face Pull

  • This cable movement works the upper back, rear delts, and rotator cuff.
  • It’s very efficient at improving shoulder health and promoting joint longevity.
  • It’s equally useful at improving posture, especially kyphosis in the thoracic spine (being slouched over).

Banded Dumbbell Pullover

The pullover is a classic exercise, older than the sport of bodybuilding itself. However, its main target muscle has been the subject of debate for just as long. Is it an exercise for the chest or the back? It actually works both, according to science and experience. (5)

Biomechanically, the lats are main arm extensors of the arms and shoulders, but the chest (and long head of the triceps) also contribute to that movement in certain ranges of motion. If you perform the exercise in a back workout, especially with your lats already pumped and fatigued, you’ll certainly feel them working.

The added band compensates for the lack of gravity-induced tension in the top position of the exercise. This allows more time under tension and muscle growth because the exercise now delivers both a great stretch and a hard contraction.

How to Do the Banded Dumbbell Pullover

Lie on a flat bench with the top of your head at one end, your upper body fully supported, and your feet planted on the ground. Do not lie sideways across the bench like some lifters perform the movement. Place a dumbbell on the ground behind your head. Attach one end of a resistance band to the dumbbell and the other end of the band to a stable rack, extremely heavy dumbbell, or have a partner hold it in place.

Grab the dumbbell with the palms of your hands on the underside of the weights around the handle. Place the dumbbell over your head with slightly bent arms. Don’t let your glutes leave the bench as lower the weight behind your head into a deep stretch.

Pull it back to the starting position against the band tension. Do not actively bend your elbows because it will shift the workload off the back and onto the triceps.

Benefits of the Banded Dumbbell Pullover

  • The pullover targets the lats, chest, and shoulders.
  • The movement can help to build your mind-muscle connection for the lats.
  • The deep range of motion provides a great stretch upper body which improves thoracic (upper back) and shoulder mobility.

Banded Pull-Up

The pull-up might be a staple exercise for back development, but can you do more than a few? And can you do enough of them with perfect form? Enter the resistance band.

A light resistance band allows you to squeeze your muscles harder, because it offers slight help, and it allows you to really focus on feeling the lats. It’s easier on the joints as well because shoulder joint stress is reduced in the bottom position, where the band offers the most help.

For the muscle-focused lifter, it has another advantage. Compared to a lat pulldown, the pull-up involves movement at your lower body, which recruits a lot of core work for stability. (6) Now, unless you’re freakishly strong, an experienced gymnast, or a calisthenics aficionado, chances are you lack some control over your lower body during the pull-up.

This can make it less efficient for back development. The band takes care of this and guides you upwards like you’re on a rail. This provides more control and improves the mind-muscle connection with your back.

How to Perform the Banded Pull-Up

Secure a resistance band on top of a rack and stretch it down so you can step into it. The resistance of the band should allow you to complete 10-15 reps before muscle fatigue. Grip the bar palms-down, slightly wider than your shoulders. Keep your elbows in front of your body and start pulling yourself up.

It’s crucial that you keep an arched chest and not let it collapse by rolling your shoulders forward — this would shift the stress of the movement from the back muscles to the shoulder joints, possibly causing injuries. Think about leading with your chest to the ceiling. Lower yourself to a dead-stop hang for maximum stretch.

Benefits of the Banded Pull-Up

  • The pull-up is one of the most efficient back-building exercises that activates multiple muscles in the back. 
  • The resistance band allows the lifter to focus more on the back involvement and less on total body rigidity.
  • The band’s assistance allows beginners to perform pull-ups and experienced lifters to perform high-rep pull-ups in a fatigued state.

Barbell Back Extension

We’re keeping the best for last. At least, the most underrated back exercise there is. Every gym bro is eager to pummel their lats and traps. But the vast majority discard lower back training. It’s treated as an afterthought, a muscle group sufficiently stimulated by lower body exercises, or it’s simply avoided because of an already aching spine.

But what many fail to understand is that the lower back is arguably the most important muscle group in the body, along with the other core muscles. It supports our spine — the center of our entire musculoskeletal system. Having a weak spinal region is like having a tree with a soft trunk.

Research has shown that people with back problems simply had less spinal muscle mass and strength. (7) Having a strong lower back will make you stronger, healthier and more resilient overall. (8)

Also, a muscular lower back (called a “Christmas tree” in bodybuilding circles) is just impressive-looking and aesthetic. The back extension also strengthens your glutes and hamstrings, and can drive up your deadlift and squat to unprecedented levels.

How to Do the Barbell Back Extension

Be sure to warm-up thoroughly and practice proper form at all times. Adjust a 45-degree back extension bench so that the top of the pad is just below your waist. Secure your ankles in the ankle pads and place your thighs on the upper pads, while keeping the legs straight.

Hinge forward at the hips and grab a barbell with a palms-down grip. Keep your arms straight and your spine neutral from your tailbone to your neck. Flex your abs and pinch your shoulder blades together. Lift the weight by squeezing your glutes until your entire body is in a straight line.

Don’t allow the weight to rest on the ground in the bottom position. Perform controlled reps and do not jerk the weight. If the position hurts the back of your knees, set the waist pad a bit higher and point your toes slightly out.

Benefits of the Barbell Back Extension

  • The back extension builds the entire posterior chain: your lower back, glutes, hamstrings, as well as working the lats and upper back statically as stabilizers.
  • The movement is one of the best exercises for building and maintaining a healthy and strong spine.
  • It has tremendous carryover to squats, deadlifts, and strength in general.

The Back Muscles

The back is a complex array of several muscles, and one should know their purposes and apply different strategies for each part as they respond better to certain stimuli. Unfortunately, some muscles of the back are unknown or neglected by many lifters, which can lead to imbalances or suboptimal performance. Here are the most important back muscles.

Latissimus Dorsi

This is the largest muscle in the upper body, and one of the strongest. Commonly known as “the lats”, they play a key role in spine and arm movements. They help extend and stabilize the spine and, with the help of their little brother, the teres major, they move the arm downward. They also help to move and rotate the shoulders.

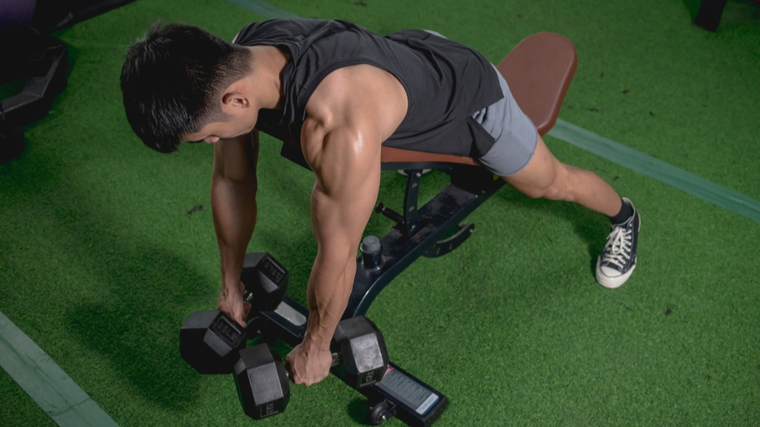
Man in gym performing two-dumbbell row on bench
Credit: MDV Edwards / Shutterstock

The lats are “the” pulling muscle. Whenever you’re pulling with your arms — during pull-ups, pulldowns, or rows — they are involved in some way, but humerus depression (when your upper arms are brought towards your ribs) is what will really hit them. This is why the cue of “pulling with your elbows” is so efficient to target the lats.

Trapezius

The trapezius is another one of the strongest muscles in the body. It goes from the middle of the spine to the bottom of the cranium, and laterally across both scapulae (shoulder blades).

It is made of three distinct parts with each serving a different function on the scapulae: the upper fibers are used for elevation, the middle fibers retract the scapulae, and the lower fibers depress it. Whenever your shoulder blades are engaged, the traps are, too.

When most people say that they are working their “traps,” they usually mean working the upper section while performing shrugs (scapular elevation). For overall back aesthetics and strength, you should also address the medium and lower fibers.

Posterior Deltoids

This relatively small muscle, one-third part of the larger shoulder muscle, the posterior (or rear) deltoids run from the upper side of the scapula to the humerus bone on the back of the arm.

Their main functions are to rotate the arm externally, extend the arm, and bring it down alongside the body. Neglecting this muscle will result in “sloped,” hunched-over shoulders. But more importantly, the rear deltoids are important for shoulder health and stability.

Rhomboids

Along with the teres, trapezius, and posterior deltoids, the rhomboids create “the upper back.” These muscles work together in an overlapping function to control scapular movement. The rhomboids particularly work to rotate, elevate, and retract the scapulae.

Erector Spinae

The erector spinae, or spinal erectors, are a paired column of muscles running from the sacrum up to the base of the skull. It is possibly the most important muscle in your body (after the heart, of course) because it supports the base upon which all other bones, organs, and muscles are attached.

Along with the abdominal muscles, the diaphragm, and the pelvic floor, they form the “core muscles.” Any movement that engages the core or the spine in any way recruits the spinal erectors.

How Often Should You Train the Back

Your back is large and can handle a lot of work. Unfortunately, many people have an unbalanced workout routine and insufficient pulling work can result in postural problems and strength plateaus.

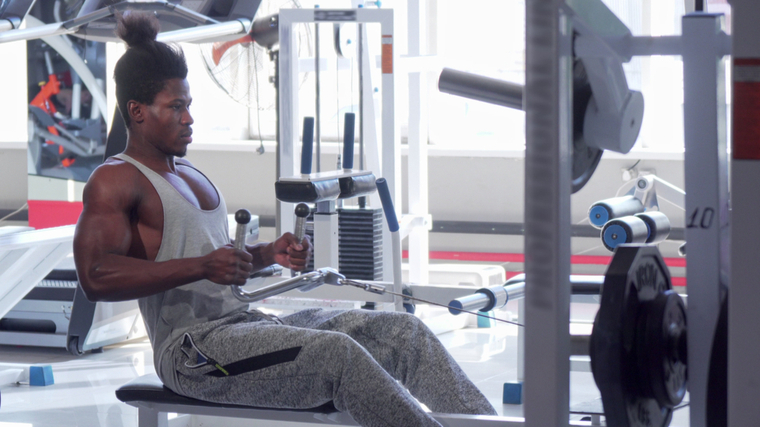
Man in gym performing seated cable row
Credit: nkotlyar / Shutterstock

While you can hit the back, in some way, every day for health or performance goals, a proven hypertrophy (muscle-building) plan is to hit the back one to three times a week for a total of 12 to 20 working sets. For muscle growth, include the back in a pulling workout with the biceps, as part of an upper body session, or in a full-body workout.

Total volume-per-session should be adjusted depending on your split. If you target the back once a week, 10 to 12 sets should be enough, but if you hit it twice or thrice, the total work done each week can increase as you reduce the volume in each workout.

For instance you could do six or seven sets for the back, followed by other upper body muscles (chest, shoulders, triceps, and biceps) for two upper-body workouts per week. With a full-body approach done three times per week, six sets for the back in each session would work well.

How to Progress Your Back Training

The back is composed of many different muscles with different purposes, so you will have to adopt different strategies depending on your objectives. Larger muscles, like the lats, can progress faster than others. A prime mover is guaranteed to elicit more force than a more postural muscle.

Track your progress on the big compound exercises, and add weight (and/or reps) from week to week. The quality of execution is paramount, so keep the weekly weight jumps conservative, around five to 10 pounds.

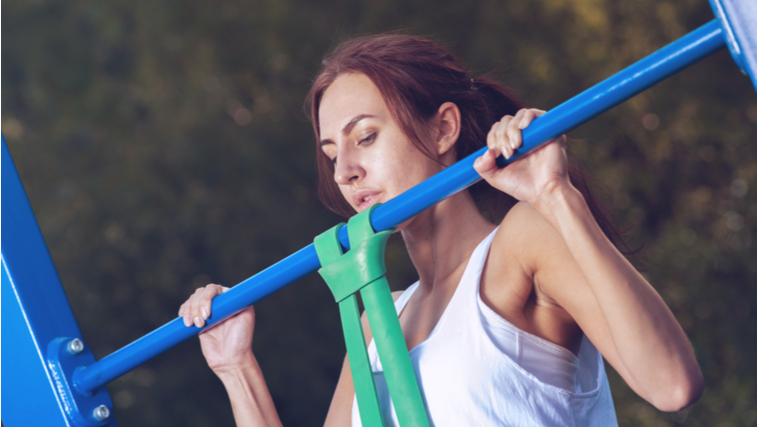
woman outdoors performing pull-up with resistance band
Credit: Paul Biryukov / Shutterstock

Certain muscles will respond better to different rep schemes and techniques. The lats and the erectors grow well with pretty basic work with heavy weights and low to moderate reps. The rear delts and upper back muscles often respond better to a higher rep range (15-30 reps). The upper back muscles also benefit from increased time under tension with the use of mid-rep pauses, for instance.

The back as a whole can be a pretty difficult area to feel, so do not hesitate to use the “isolation sandwich technique” — doing a compound (multi-joint) exercise, followed by an isolation (single-joint) exercise, then another compound movement. This can be an efficient way to improve the mind-muscle connection.

How to Warm-Up Your Back

Warming-up both your upper back and lower back is a good way to minimize any potential injury risk. It’s also a good idea to warm-up your triceps, because many lat exercises put the triceps under a stretch and you want to avoid strains and tears. Grab a light resistance band and try this circuit:

  • Band Pull-Apart: Take a resistance band with a palms-down grip, holding the band at arms-length in front of your body. Keep a slight bend in your arms while pulling both hands back in line with your shoulders. Pause when the band touches your chest before returning to the starting position. Perform 10 reps before moving to the next exercise.
  • Scapular Pull-Up: Hang from a pull-up bar with an overhand grip and your arms straight, as if you were ready to perform a pull-up. Without bending your arms, pull your shoulder blades down and back. Your body will raise slightly. Think of doing a “reverse shrug”. Slowly let your scapulae come back up to a stretch. Perform 10 reps before moving to the next exercise.
  • Iso-Hold Row: Loop the resistance band around a stable rack at chest-level. Grab it using a neutral (thumbs up) grip and step back from the rack. Pull the band with your elbows close to your body, until your hands are just under your chest. Don’t allow your shoulders to rise up. Once you reach the peak contraction, hold it for 15 seconds before moving to the next exercise.
  • Band Triceps Pushdown: Attach the resistance band to a point over your head. Grab the band with a thumbs-up grip using both hands. Keep your elbows fixed at the sides of your body and bring your hands down by extending your arms until fully locked out. Return to the starting position, resisting the band tension. Only your forearms should move. Perform 20 reps before repeating the first exercise. Do this circuit a total of three times.

Building a Complete Back

You can’t just do one back exercise and call it a day. You have to use different angles and techniques to cover all the muscles of this complex region. These exercise options will allow you to create a workout that will ensure each back muscle is properly addressed, for a complete development without wasting your time by pummeling the same muscle group or ignoring others.

References

  1. Leslie, Kelly. L. M. BSc (Hons); Comfort, Paul MSc, CSCS*D The Effect of Grip Width and Hand Orientation on Muscle Activity During Pull-ups and the Lat Pull-down, Strength and Conditioning Journal: February 2013 – Volume 35 – Issue 1 – p 75-78 doi: 10.1519/SSC.0b013e318282120e
  2. Paine R, Voight ML. The role of the scapula. Int J Sports Phys Ther. 2013 Oct;8(5):617-29. PMID: 24175141; PMCID: PMC3811730.
  3. Fenwick CM, Brown SH, McGill SM. Comparison of different rowing exercises: trunk muscle activation and lumbar spine motion, load, and stiffness. J Strength Cond Res. 2009 Mar;23(2):350-8. doi: 10.1519/JSC.0b013e3181942019. PMID: 19197209.
  4. Niederbracht, Yvonne; Shim, Andrew; Sloniger, Mark; Paternostro-Bayles, Madeline; Short, Thomas. Effects of a Shoulder Injury Prevention Strength Training Program on Eccentric External Rotator Muscle Strength and Glenohumeral Joint Imbalance in Female Overhead Activity Athletes, Journal of Strength and Conditioning Research: January 2008 – Volume 22 – Issue 1 – p140 – 145. doi:10.1519/JSC.0b013e31815f5634
  5. Eduardo Borges, Bruno Mezêncio, Rafael Soncin. Resistance training acute session: pectoralis major, latissimus dorsi and triceps brachii electromyographic activity. Journal of Physical Education and Sport. Published June 2018. doi:10.7752/jpes.2018.02095.
  6. Hewit, Jennifer. A Comparison of Muscle Activation during the Pull-up and Three Alternative Pulling Exercises. Published 2018/11/02. Journal of Physical Fitness, Medicine & Treatment in Sports. doi:10.19080/JPFMTS.2018.05.555669
  7. Yaprak Y. The effects of back extension training on back muscle strength and spinal range of motion in young females. Biol Sport. 2013 Sep;30(3):201-6. doi: 10.5604/20831862.1047500. Epub 2013 Jul 22. PMID: 24744489; PMCID: PMC3944566.
  8. María Moreno Catalá, Arno Schroll, Gunnar Laube and Adamantios Arampatzis. Muscle Strength and Neuromuscular Control in Low-Back Pain: Elite Athletes Versus General Population. Frontiers in neuroscience. Published 03 July 2018. doi:10.3389/fnins.2018.00436

Featured Image: Paul Biryukov

The post The 8 Best Upper Body Pulling Exercises appeared first on Breaking Muscle.

Be Nice and Share!
This post was originally published on this site

Originally Posted At: https://breakingmuscle.com/feed/rss

It’s been two months since Hafthor Björnsson defeated his rival Eddie Hall in the “Heaviest Boxing Match in History.” Both men have continued to stray along different paths in their respective retirements from strongman. Björnsson recently had some eye-opening news as he continues to figure out what he now wants to achieve athletically. 

On June 1, 2022, Björnsson shared an update about where his physique stands after his fight with Hall. The 2018 World’s Strongest Man (WSM) Champion says his body weight is now 146 kilograms (322 pounds). Since Björnsson weighed 152 kilograms (335 pounds) for his match with Hall, that means he lost 13 pounds in roughly eight weeks. For additional context, Björnsson weighed 205 kilograms (452 pounds) when he won his 2018 WSM title. 


View this post on Instagram


A post shared by Hafþór Júlíus Björnsson (@thorbjornsson)

[Related: Eddie Hall Honored Boxing Bet With Hafthor Björnsson And Got A Tattoo Of His Full Name]

The radical shift in Björnsson’s physique is apparently part of an ongoing athletic experiment after strongman. After a decade-plus of pushing himself to be one of the planet’s strongest people, it’s understandable the 33-year-old Björnsson wants to figure some things out before taking another step forward. 

“I’m human like everyone else, and I’m going through a period in my life where I’m not 100 percent focused or dedicated all the time,” Björnsson wrote in the caption of his Instagram post. “It’s weird because, for the last 10-plus years of my life, I’ve been super focused and driven because I’ve always had a goal to strive towards.”

What Björnsson describes might be relatable to a lot of strength sports athletes. It can take some time to adjust to a new life after being so dead-set on one singular goal for so long. In Björnsson’s case, he at least certainly understands that his current struggle is normal and human and won’t last forever. 

“Being in the unknown now has my motivation lacking a bit,” Björnsson writes. “If you are lacking motivation at this moment, know that it’s normal, and we all go through that.”

The Road Ahead

At the time of this writing, Björnsson maintains that he’s looking for another boxing fight. While still early, it seems boxing is the next professional athletic endeavor he wants to dive into fully. 

Some had surmised that Björnsson would take Hall up on a rematch offer on that front. However, in a YouTube response to Hall’s offer in early April 2022, Björnsson said he doesn’t think the timing lines up for an immediate rematch. 

Whoever Björnsson ultimately does line up for a fight, it should be another fascinating matchup of skill-sets for the former strongman great. 

About Björnsson

If his strongman career is any indication, Björnsson might be in a quality position to excel at whatever he puts his mind to.

In addition to his 2018 WSM title, Björnsson is a three-time winner of the Arnold Strongman Classic (2018-2020) and a five-time winner of Europe’s Strongest Man (2014-2015, 2017-2019). He’s also the current official deadlift World Record holder with a pull of 501 kilograms (1,105 pounds) from the 2020 World’s Ultimate Strongman Feats of Strength series. 

In essence, the strength sports world knows what Björnsson’s capable of with motivation. Be it in boxing or another avenue, it might not be long before we see Björnsson thriving as a professional competitor again. 

Featured image: @thorbjornsson on Instagram

The post Strongman Legend Hafthor Björnsson Has Lost 13 Pounds Since Fight With Eddie Hall, Continues New Athletic Pursuits appeared first on Breaking Muscle.

Be Nice and Share!
This post was originally published on this site

http://www.marksdailyapple.com/

Hey folks, Board-Certified Health Coach Erin Power is here to answer your questions about comfort eating and eating when stressed. If you’re struggling with this, you’re not alone! We’re here with tips and support for cultivating a healthy relationship with food during stressful times. Have a question you’d like to ask our health coaches? Leave it below in the comments or over in the Mark’s Daily Apple Facebook group.

Michele asked:
“I always end up comfort eating when worried or stressed, and I’m always worried or stressed! After a hard day, I overeat pizza or other food that makes me feel like crap and gain weight. Then I feel guilty, can’t sleep, and worry more! How do I stop doing this?”

Woman eating fried chicken holding stomach as if in pain.The pull towards soothing ourselves with food during stressful times is real. So, unfortunately, are the consequences of eating food that makes us feel worse rather than better.

Chronic stress itself can contribute to cravings and unwanted weight gain because it deregulates and taxes the nervous and endocrine systems, including through overstimulation of stress hormones such as cortisol and adrenaline. To make matters worse, people who are chronically stressed are more likely to reach for foods high in sugar, carbs, and saturated fat.1

To be clear, high-quality, whole-food-based saturated fat is not unhealthy! But combining it with sugar, a large carb load, and excess caloric intake overall can lead to unwanted weight gain, overburden the digestive system, and promote systemic inflammation.

What’s more, food that makes us “feel like crap” is generally not high quality or whole-food-based. It’s far more common for people struggling with comfort eating or emotional eating to reach for highly processed food or fast food full of unhealthy trans fats and highly refined, inflammatory seed oils.

And, as you noted, overeating and eating food that makes us feel physically and emotionally unwell absolutely causes additional stress and interferes with sound sleep. This exacerbates chronic stress, systemic inflammation, and unwanted weight gain. Ironically, it also makes us far more likely to engage in more emotional eating the next day—literally feeding an unhelpful cycle.

Asking for Help

First, take a deep breath and to know that you’re not alone. Increasing numbers of people are suffering from stress, anxiety, depression, and other forms of mental-emotional challenges. In an effort to cope, many turn to foods and emotional eating habits that make them feel worse.2 People with a history of disordered eating are even more vulnerable to falling into this sort of pattern during periods of anxiety and uncertainty.3

I do want to mention here—for anyone reading—that when eating patterns start to feel out of control to the point of a potential eating disorder, you may want to meet with a licensed therapist or other mental health professional. Same goes for anyone suffering from clinical depression, anxiety, or other serious mental health concerns.

That said, as a Primal Health Coach, I work with many clients who struggle with emotional eating. As a coach, I can assure you that there is hope for stepping out of unhelpful cycles and changing your relationship with food.

By recognizing your pattern around eating and asking for help, you’ve already taken a huge, courageous first step. I’ll share a few others below!

Strategies and Tips for Emotional Eating

1. Reframe comfort eating.
One of the first things I suggest is reframing “comfort eating.” Rather than making it synonymous with “emotional eating,” or what some call “eating their feelings,” let’s put a new and improved definition in place.

What if comfort eating means eating food that makes you feel better after eating it? In other words, choosing foods and eating in a way that brings you true comfort!

Part of this is food choice. For that, I recommend stocking your home with healthy, Primal options. It just makes it easier when your environment is set up to help you. And, on the flip side, an easy way to avoid food that makes you feel bad is to not keep it around.

2. Pause and play the tape forward.
This is a great one to do in the moment—either before you’ve “gone too far” or when you catch yourself in the midst of it. This moves the emotional eating moment into the “present tense.” Many times we reflect back on our diet “indiscretions” afterward, awash in disappointment and guilt, which… isn’t often productive.

In these situations, picture yourself overdoing it—whatever that means for you—and notice what happens after. See yourself 10 minutes from now, later as you’re trying to fall asleep, and tomorrow morning. Really take in how your present actions will impact your future self. How do you feel physically, emotionally?

Now picture an alternate scenario—one in which you choose differently and perhaps set food aside for now. Where will that choice lead?

Practice making choices in the moment that you know your future self will feel better about.

3. Breathe and move!
Rather than telling yourself that you can’t have a thing, try saying: “Maybe later, after 10 deep breaths or a 10-minute walk.”

In themselves, walking and deep, slow breathing are excellent strategies for regulating the nervous system and reducing stress and anxiety. You’ll be distracting yourself with calming, grounding activities that connect you to how you feel in your body and mind. This is an excellent way to ride out urges and help cravings move along.

4. Write it out.
Numerous studies have shown the beneficial impact of journaling or “expressive writing” for alleviating physical and mental-emotional symptoms.4 Some people also find it helpful to keep a food log as form of personal accountability and adhering to eating goals.

This is more of a long-term strategy, since journaling is most effective when done consistently over a period of weeks or months. Don’t let that dissuade you! Set aside time each morning or evening (even 10 minutes) to put pen to paper or fingers to keyboard.

You can write about how you want to feel and about eating specifically… or just see what wants to come out onto the page. The key thing is to (1) not censor or judge yourself, and (2) offer yourself an outlet to reflect on where you are and where you want to be.

The very act of writing things down can help you shift your relationship with eating over time.

5. Cultivate excitement.
Rather than focus solely on what you want to change or avoid, identify something you can look forward to and even get excited about!

This doesn’t have to be a big thing, and ideally it should be something you can turn to regularly—especially whenever you tend to engage in emotional eating. Perhaps there’s an activity or project you enjoy, a book you’d like to read, or a television show you like to watch. Choose something that you can look forward to AND that will make you feel a sense of comfort and relaxation—both in the moment and afterwards.

6. Get support.
While the above steps offer a solid starting point, I can’t emphasize enough the value of getting support and working with a mental health professional or coach one-on-one.

External accountability truly is a game changer, and we can help you navigate your specific circumstances and challenges. As part of this, we can provide “tough love” when needed but will also answer questions, offer individualized guidance, and above all empower you to take on the most supportive actions for your health and happiness goals. Working with a coach for even a month or two can help you recalibrate, reset, and put a framework for success in place. Visit myprimalcoach.com to learn more and get started.

Do you struggle with emotional eating? Have any tips to share? Drop them and other questions for me in the comments!

myPrimalCoach

Primal Kitchen Frozen Bowls

The post Ask a Health Coach: Emotional Eating and Food Guilt appeared first on Mark’s Daily Apple.

Be Nice and Share!
This post was originally published on this site

Originally Posted At: https://breakingmuscle.com/feed/rss

Jay Cutler retired from competitive bodybuilding in 2013, but he stays active. The four-time Mr. Olympia winner (2006-2007, 2009-2010) keeps after it in the gym. A recent day of back exercises exemplifies that continued dedication.

On May 29, 2022, Cutler worked out at the Fit Club, a gym in Las Vegas, intending to strengthen his back. He shared footage of this training session on his YouTube channel.

Even in retirement, it appears Cutler still has a lot to give to his supporters. That includes the greater bodybuilding community, which likely won’t ever say no to commentary from one of the sport’s greats. 

Another day in paradise. The weather is great, right? Training has been going A+.

Whenever Cutler can share some of the apparent secrets that helped make his career so successful, he doesn’t hesitate. 

Cutler’s ‘Day in Paradise’ Back Workout

Cutler lays out his back day with six separate exercises that can help round out his back muscles. 

Reverse-Grip RealLeader Machine 

Sets and Reps: 5 “feel” sets

Cutler starts the session with several reverse-grip sets on a RealLeader machine. He says that he wants to get a “feel” of the exercise to ease into his day. He also maintains that he used to do this specific movement with a barbell, but it ended up being too strenuous on his wrists. The machine, in essence, allows him to achieve the same goals while lessening any unnecessary pain. 

Single-Arm Dumbbell Row

Sets and Reps: 3 x 8-12

Cutler next does a few working sets of Single-arm dumbbell rows in a slight but straightforward shift. He uses an 80-pound dumbbell for each arm with more focus on form rather than a concrete cap on repetitions. Cutler seems to allude that this exercise could be foundational in his training.

Lat Pulldown

Sets and Reps: 3 “feel” sets

It makes sense that Cutler leans on lat pulldowns as a segment of this routine. They’re a compound movement that can help athletes develop stronger backs by isolating their lat muscles. Cutler uses a neutral grip — where an athlete rotates their palms so that they’re facing — and again noted that he wanted a “feel” of the lift first. 

“I talked about these ‘feel’ sets. I only do these on the first exercise,” Cutler says. “For me, I just want to get a feel of the exercise. I call them ‘feel sets,’ but they’re kind of like so-so warmups. It’s hard to say you’re warmed up in [Las] Vegas.”


View this post on Instagram


A post shared by Mr Olympia Jay Cutler (@jaycutler)

[Related: Bodybuilder Chris Bumstead Shares His Arms Workout For Size]

T-Bar Row

Sets and Reps: 4 x 12

In a change of pace from his competitive career, Cutler says he only started regularly doing T-bar rows once he was in retirement. The exercise itself is a reliable way for athletes to train their back despite any lower back or hamstring soreness. The machine’s pad offers inherent stability in contrast to traditional bent-over rows. After finishing his fourth set, Cutler notes that he still makes it a point to deadlift fairly regularly. 

RealLeader Pullover Machine

Sets and Reps: 4 x 10-12

Cutler once again implements an alternative, using the RealLeader pullover machine instead of traditional dumbbell pullovers. Pullovers can be a quality way for athletes to work and isolate their chest and lat muscles. After powering through a few high-rep sets, Cutler says there are about 225 pounds on each side. 

Before moving on to his final back exercise, Cutler notes that he had planned to do seated cable rows, but they slipped his mind. 

Hyperextension

Sets and Reps: 3 sets

Cutler closes with some hyperextensions in the cap to his workout, which target the erector spinae (or the group of long muscles that run up the back). While starting from a flexed position, this movement has athletes engage their lower back muscles with an extension while keeping their head and neck static. 

Cutler does three sets of hyperextensions with a 25-pound plate in his hands. 


View this post on Instagram


A post shared by Mr Olympia Jay Cutler (@jaycutler)

[Related: Bodybuilder Breon Ansley Shares A Killer, High-Volume Legs Workout]

Cutler at a Glance

Thanks to his many career achievements, Cutler has undoubtedly earned his platform. 

From 2006 to 2010,  Cutler won four of five Mr. Olympia titles (2006-2007, 2009-2010). He was also a Mr. Olympia runner-up on six occasions (2001, 2003, 2004-2005, 2008, 2011), often finishing second to his then-rival and fellow bodybuilding legend, Ronnie Coleman. 

At 48-years-old, Cutler continues to be active in the strength sports sphere. In addition to an Instagram full of updates from his day-to-day life, he regularly shares different taxing workouts on his YouTube channel. That channel has 544,000 subscribers and counting. For this bodybuilding great, even away from the stage, it seems some of his greatest joys come from training. 

Featured image: JayCutlerTV on YouTube

The post 4-Time Mr. Olympia Winner Jay Cutler Shares ‘A Day in Paradise’ Back Routine appeared first on Breaking Muscle.

Be Nice and Share!
This post was originally published on this site

http://www.marksdailyapple.com/

Man and woman hiking applying first aid to ankle.There are different degrees of hiking. There’s the kind of “hiking” you do through Golden Gate Park in San Francisco, Central Park in NYC, or Runyon Canyon in Hollywood. You’re outdoors and amidst the trees and foliage and physically active, but it’s not quite roughin’ in. You still have cell coverage and you can procure an iced coffee within twenty minutes if you have to. For those hikes, you don’t need first aid. You don’t need any special skills other than the ability to ambulate across the landscape.

But there’s real hiking. Hiking more than five miles. Multi-day hiking. Overnight hiking. Backpacking. Hiking in a place where the trail might not be so well-maintained, where you might run into an aggressive animal, where you have to keep your wits about you. For this type of hiking, which is what most people imagine when they think of “hiking,” it’s a good idea to come prepared with first aid: with physical medical supplies and skills and knowledge that will help you enjoy the great outdoors without staying helpless. Because the true allure of hiking is getting out into the wilderness where the niceties and comforts of the modern world no longer apply. We all want a bit of adventure, but we also want to make it back in one piece.

So let’s dig into hiking first aid. I won’t tell you to “bring water” or “snacks” because, well, you’re an intelligent adult who doesn’t need to be told the absolute basics.

Hiking First Aid

Tweezers

Tweezers are a godsend, but you need both needle tip and broad tip. Needle tip tweezers are excellent for removing ticks—just get as close to the skin as possible and pull straight out—while broad tips are good for removing splinters and thorns.

These fit the description.

Adhesive bandages of all sizes

Adhesive bandages (or bandaids) of varying sizes are essential for covering up cuts and wounds. Butterfly bandages are also nice for binding wounds that would otherwise need stitches.

Betadine

Betadine is an iodine-based antiseptic that cleans wounds and kills germs. A little bottle is great to have on hand so you can spray your cuts and wounds.

Antiseptic wipes

Clean wounds, sterilize skin and hands and tools. These are just handy to have around.

Medical scissors

In case you need to cut a bandage or some fabric/clothing, these are indispensable.

This is a good pair.

Surgical tape

You never know what you’ll need to tape to your skin.

This is a good one.

Gauze

Used to stop bleeding, protect wounds, improve healing, and all that good stuff that helps you overcome bad luck on the trail.

Multitool

Gives you just about everything you might need to handle the occurrences that you can’t quite anticipate.

Here’s one.

Good knife

A good sturdy knife is always a wise choice on the trail, even if you only use it to whittle a stick to pass the time. You’ll never regret having a knife. This one has a firestarter attached.

Voodoo floss bands

Voodoo floss bands can be used to compress injured limbs, like ankles, wrists, or knees. They provide stability and keep down swelling. Normally used in training, they can be quite handy on the trail as well.

Link to buy them.

Magnesium oil

In my experience, topical magnesium chloride oil is great for reducing joint pain and inhibiting inflammation. Very helpful in a pinch. Great for cramps.

Make your own by filling a spray bottle with magnesium chloride flakes and adding water, or buy it.

Electrolytes

Staying hydrated requires more than just water. You also need electrolytes, especially if you’re hiking. LMNT is a great powdered electrolyte supplement to keep on hand. Just add to water, shake, and drink to stay hydrated. Snake Juice is another option.

Mustard packets

Cramps are debilitating on hikes. They can even be deadly. One of the best cures for cramps is pickle juice, which works but not because of electrolyte repletion.1 It actually has no real impact on hydration or electrolyte status, and drinking it resolves muscle cramps faster than the gut can absorb it. TRP ion channels in the oropharyngeal region (tongue/mouth/throat) react to something in the pickle juice—probably the vinegar—and short-circuit the excitation of the muscle, blocking the cramp immediately.

Other TRP ion channel activators are found in cayenne pepper, ginger, and cinnamon, and researchers have created a blend of extracts from all three plants that shows efficacy against muscle cramps.2 It’s called Hot Shot.

Basic yellow mustard also works. To really kick it up a notch you can add cayenne pepper and ginger to the mustard. The combo of mustard and spicy/gingery can be an instant fix for muscle cramps.

Skills and Best Practices

Have a map.

Most places I find aren’t giving out paper maps anymore of the hiking area. If they’re not, you can buy maps of the area or take a picture of the map at the trailhead with your phone before starting so you always have something to refer to.

Take a compass (or have a compass on your phone) and know how to read a map.

A compass and a map go very well together. If you need it, this is a comprehensive explanation of how to use the two together to orient yourself.

Charge your phone.

Go into the hike with a fully-charged phone. Keep it charged by keeping the phone on airplane mode.

Walking downhill correctly.

Don’t walk downhill with your pelvis tucked and all the weight on the balls of your feet, knees and quads. Instead, keep the weight on your entire foot/heel. Break at the hips slightly to accept the bulk of the load on your glutes, hamstrings, and hips.

Walking uphill correctly.

Take shorter strides and, again, accept the load onto your glutes and hamstrings. The posterior chain is far stronger than the quads and lasts longer without cramping.

Most hikers don’t need to carry a big first aid kit with them all the time. Going for a few miles? You don’t need much of anything. Going for a few hours? Take some bandaids and betadine. Doing a half day hike? Throw in some tweezers and mustard packets. Going overnight? Add some more from the list. This isn’t a definitive list of things you must have on your person at all times once you leave city limits. It represents as complete a list as I could muster for serious hiking.

And remember: this is all “just in case” stuff. For most of your hikes, even the long, intense ones, you won’t dip into the kit at all. It’s just good to be prepared.

Primal Kitchen Hollandaise

The post Hiking First Aid: What to Bring, Do, and Know to Stay Safe on the Trail appeared first on Mark’s Daily Apple.

Be Nice and Share!