This post was originally published on this site

Originally Posted At: https://breakingmuscle.com/feed/rss

There are no shortage of World Records falling at the 2023 International Powerlifting Federation (IPF) World Classic Powerlifting Championships. In fact, it almost appears as if the contest has multiple new stars every day during the week of June 11-18. Singaporean powerlifter Farhanna Farid is the latest to throw her hat into the ring. During the tentpole competition occurring in Valetta, Malta, Farid successfully captured a 203-kilogram (447.5-pound) raw deadlift. The achievement is an IPF World Record in the organization’s 52-kilogram (114-pound) weight class.

Farid’s record pull helped the athlete secure an eighth-place result in her second career IPF World Championships appearance. Evie Corrigan was the eventual 52-kilogram champion, but Farid’s record did surpass the previous World Record, held by Corrigan — a lift of 202.5 kilograms (446.4 pounds) during the 2023 Sheffield Powerlifting Championships. Farid appeared to complete her deadlift completely raw from a sumo stance while using a mixed grip. Uniquely, the competitor did not wear a lifting belt during her record-setting performance.

As for Farid’s overall performance, the athlete fared quite well in the context of her career, all things considered. According to Farid’s page on Open Powerlifting, the powerlifter is a three-time Asian Powerlifting Federation (AsianPF) raw World Champion (2018-2019, 2022) in the 52-kilogram division. Technically, Farid did not improve upon her seventh-place IPF Worlds debut in 2022. Still, bringing home a World Record while moving a placing down is likely a result most athletes would stomach.

Here’s an overview of Farid’s top stats from the 2023 IPF Worlds:

Farhanna Farid (52KG) | 2023 IPF Worlds Top Stats

  • Squat — 127.5 kilograms (281 pounds)
  • Bench Press — 70 kilograms (154.3 pounds)
  • Deadlift — 203 kilograms (447.5 pounds) | IPF World Record
  • Total — 400.5 kilograms (882.9 pounds)

Farid’s top bench press matches her best ever from the 2022 AsianPF Powerlifting Championships. The athlete had scored her latest lift on her third attempt, potentially leaving room for significant improvement in another competitive appearance.

Farid has kept it steady since her official powerlifting debut in December 2018. Making ventures on the IPF Worlds stage still seems relatively new. From that respect, to leave with a World Record is no small feat.

Featured image: @theipf on Instagram

The post Farhanna Farid (52KG) Scores Raw IPF Deadlift World Record of 203 Kilograms (447.5 Pounds) appeared first on Breaking Muscle.

Be Nice and Share!
This post was originally published on this site

Originally Posted At: https://breakingmuscle.com/feed/rss

The 2023 International Powerlifting Federation (IPF) World Classic Powerlifting Championships have featured a variety of jaw-dropping performances from a few household names like Chapon and Connor. The latest record stunner in Valletta, Malta, belongs to young star powerlifter Brian Le. During the global contest taking place on June 11-18, 2023, Le successfully deadlifted 300.5 kilograms (662.5 pounds) raw while competing in the 66-kilogram category.

The massive pull is an IPF World Record in the 66-kilogram class and helped Le capture second place in that same division. Panagiotis Tarinidis was the 66-kilogram champion, just above Le. His mark eclipses Kasemsand Senumong’s past 66-kilogram deadlift World Record of 300 kilograms (661.4 pounds) from the 2022 AsianPF Asian Classic Powerlifting Championships. Le wore a lifting belt to help assist him with the milestone lift while utilizing a mixed grip and sumo pulling stance.

Per his page on Open Powerlifting, Le’s silver medal at the 2023 IPF World Classic Powerlifting Championships was just the second time he’s lost a contest in his last 10 competitive appearances. Notably, Le is the defending Powerlifting America (AMP) Classic National Champion after winning that competition in late February 2023.

Even without a victory, the 2023 IPF Worlds were Le’s sanctioned international debut. He seemed to maximize the opportunity with a new deadlift achievement in the IPF World Record books. Here’s an overview of Le’s complete performance from his first appearance in an international setting:

Brian Le (66KG) | 2023 IPF Worlds Top Stats

  • Squat — 242.5 kilograms (534.6 pounds)
  • Bench Press — 152.5 kilograms (336.2 pounds)
  • Deadlift — 300.5 kilograms (662.5 pounds) | IPF World Record
  • Total — 695.5 kilograms (1,533.1 pounds)

At the minimum, Le could’ve been in a position for all-time raw competition personal records (PRs) on his other staple lifts. However, the athlete missed one bench press attempt, one squat attempt, and two of his three deadlift tries, even while setting the World Record on his first pull. While this performance remains something to marvel at, Le could have something to build on in the future.

Even in his mid-20s, Le has established himself as a powerlifter to watch, both domestically and abroad. At the time of this writing, it is unclear when Le will take his strength and talents to an international place again. Whenever the time does come around, the powerlifter seems sure to put on a show.

Featured image: @theipf on Instagram

The post Brian Le (66KG) Sets IPF World Record, Deadlifts 300.5 Kilograms (662.5 Pounds) appeared first on Breaking Muscle.

Be Nice and Share!
This post was originally published on this site

Originally Posted At: https://breakingmuscle.com/feed/rss

On June 11, 2023, teenage powerlifter Morgan Nicholls shared an Instagram clip of himself scoring a raw 238.1-kilogram (525-pound) bench press during a training session. According to the caption of the 16-year-old athlete’s post, the upper body feat marked a personal record (PR) for the competitor. Nicholls wore wrist wraps for his press — which would be considered raw in a sanctioned powerlifting context. At the time of this writing, it is unclear if Nicholls wore a lifting belt under his shirt.

To help him with this new milestone, the younger Nicholls was spotted by his father, Chad. The senior Nicholls is a renowned bodybuilding trainer and nutritionist, perhaps most famous for his diligent work with eight-time Mr. Olympia (1998-2005) Ronnie Coleman and former two-time Mr. Olympia (2020-2021) Mamdouh “Big Ramy” Elssbiay. It appears his son is continuing to live up to an illustrious family name in strength sports — his mother, Kim Chizevsky-Nicholls, is a four-time Ms. Olympia (1996-1999).

Based on the tenor of Nicholls’ lift, an achievement like this might have almost been inevitable. In fact, a general perusal of Nicholls’ Instagram page will provide evidence that the athlete has been steadily but surely working on his bench press in recent months. For example, in late November 2022, Nicholls achieved his first 226.8-kilogram (500-pound) bench press. Fast-forward to early May 2023, where Nicholls shared a video of himself finishing off a 224.5-kilogram (495-pound) paused bench press for two sets of one.

In that same post, Nicholls revealed he underwent ACL surgery in early January 2023. The athlete had apparently suffered the injury sometime at the end of his high school football season in late Fall 2022, but it was initially “misdiagnosed.” Nicholls did not provide precise details on the extent of his tear, on which leg it occurred, or any specific rehabilitation methods and subsequent recovery timelines.

What’s apparent is that the ACL injury may have slowed some of his progress to start the year 2023. The video of his 495-pound bench press was Nicholls’ first post in roughly five months, which would align with his surgery and recovery timeline. At the time of this article’s publication, Nicholls understandably does not appear to have attempted any staple leg exercises like the back squat or deadlift since his surgery. Based on his social media presence, the last he left off with both lifts were a raw 288-kilogram (635-pound) deadlift PR from early December 2022 and a 247.2-kilogram (545-pound) squat with wraps PR in April 2022.

At the time of this writing, it is unclear when Nicholls plans to dive head-first into some of his lower body movements. Given his youth, the athlete is likely taking his recovery time slow, easing his way back into his entire training routine with a safe process.

That said, if Nicholls is already logging massive bench PRs in his comeback, a return to being an all-around powerhouse seems inevitable.

Featured image: @raising_mayhem on Instagram

The post 16-Year-Old Morgan Nicholls Scores a 238.1-Kilogram (525-Pound) Bench Press PR appeared first on Breaking Muscle.

Be Nice and Share!
This post was originally published on this site

Originally Posted At: https://breakingmuscle.com/feed/rss

While squats are the king choice for leg day, they’re also the bane of many lifters’ existence. Some people simply don’t squat due to negligent programming while they bias toward relatively easier upper body training. Others might not squat because they’ve never learned proper technique and they can’t get comfortable with the movement. 

person in gym doing partial rep squats
Credit: Bojan656 / Shutterstock

If you’re in either of these categories, you’re in luck. Sometimes it helps to consider similar alternatives to the basic squat, so you can get all the benefits of the exercise using a variation that better suits your individual needs.

Plus, it can break up the monotony of a potentially stale workout program if you’ve hit a plateau. Changing things up to find what works for you is half the battle for long-term results and one or more of these may be the game changer you need.

Best Squat Variations

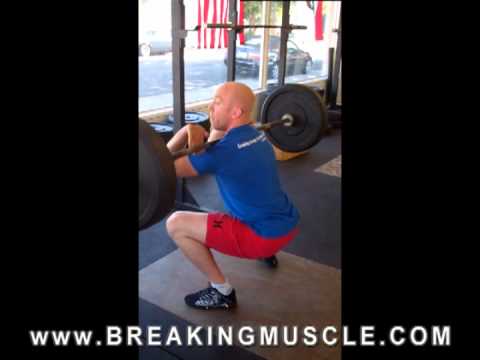
Front Squat

The front squat is a classic alternative to the more common and ubiquitous back squat. As a whole, the front squat can allow similar loading, as long as your mobility is on point. It can also promote a longer range of motion with less potential for lumbar spine injury.

YouTube Video

Because the front squat is a more “athletic” variation compared to many other squats, it relies on coordinating strength from both your upper and lower body. In certain fitness worlds, like Olympic lifting or CrossFit, it’s considered the go-to squat variation. 

When to Do it 

If you’re looking to hit the quads a bit harder or achieve a deeper squat with a long range of motion (either by choice or due to immobility in your back squat), the front squat is for you.  Many lifters’ anthropometry and leverages don’t suit the back squat, but are better suited to the front squat due to its counterbalancing attributes. If you’ve got very long femurs or long legs overall, you owe it to your lower body development to give these a shot.  

How to Do it

There are two classic grips to hold the barbell on the front of the body while squatting. The relatively easier way is to use a cross-armed grip, also known also as the “California” style. Set a barbell in a squat rack and step up with your throat close to the bar. Cross your arms over one another — place the fingers of each hand on top of the bar near the opposite shoulder.

Keep your elbows high and hold the bar place with the thumb and first finger of each hand. This will also help to block the bar from rolling forward down the shoulders. Step out of the rack with your upper body in a strong position, set a comfortable-width stance, and proceed to squat. 

The second option is using a clean-grip rack position — holding the barbell across the fronts of your shoulders with a fully closed grip. This is a more stable and relatively safer variation but requires a lot more mobility and flexibility, especially in your thoracic region (upper back), wrists, and shoulders.

To determine if you can comfortably use the clean-grip, try to touch each shoulder with the same-side hand while standing. If you can, you likely have the mobility to do these, maybe with some practice mixed in. When using a clean-grip, aim to keep your elbows high at all times, especially during the lowering phase.

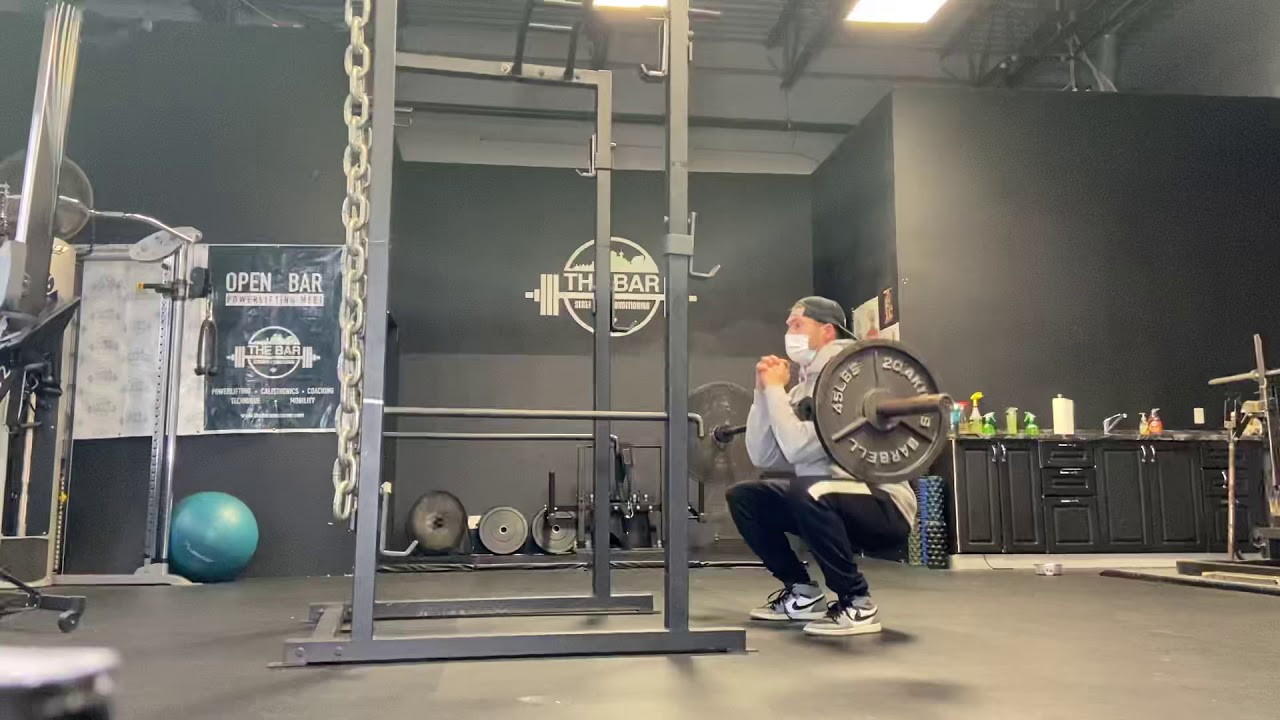
Zercher Squat

The Zercher squat moves the barbell from being supported via an axial load (on your spine) and places the onus on your arms instead. That means huge accountability for your core —  both from the front (your abs) and the back (particularly your lower back) — to brace and stabilize your spine as the movement progresses.

YouTube Video

The Zercher squat isn’t for the faint of heart. It’s a challenging squat movement that can even be simply uncomfortable to perform. It’s best done early in the workout when you’re fresh, compared to later on when your shoulders, arms, and core are fatigued.

When to Do it 

Because the Zercher squat uses an appendicular load (supporting the weight with your arms), the movement is a great way to begin a core-focused workout. Moreover, lifters who have issues getting their arms and shoulders into position for standard barbell squats  — think about how some shoulder injuries can prevent holding the bar during a back squat — the Zercher squat can be a suitable alternative. Aside from these stipulations, these can be added to any training session as a worthy challenge for any lifter up for the task. 

How to Do it 

Performing Zercher squats requires placing the barbell in the crook of your arms, so it’s being carried and supported by your elbows. Set up a barbell at waist-level. When placing your elbows under the bar to unrack it, avoid an arm width that’s too narrow. That will lead to limited stability, likely causing the bar to tip one way or the other. Aim to keep your knuckles facing the ceiling at all times. This way, the bar will be positioned squarely between your upper and lower arm, rather than falling toward your forearms. 

Holding your hands together while performing the movement may be helpful to fulfill the above cues. As you squat, keep the weight relatively close to your body. In the bottom position, let your elbows rest between your thighs and maintain as vertical a torso as possible. Drive up to the top, and repeat.

For added comfort, try using “fat grips” or thick padding on the bar where your forearms will go. The added surface area will disperse some of the loading, which should take some pressure off your elbow joint. 

Overhead Squat

Of all the squat variations of this list, the overhead squat requires the most prerequisite mobility and stability. The movement simply cannot be done without proper joint integrity at your shoulders, hips, knees, and ankles. You also need good extension through your thoracic and lumbar spine.

YouTube Video

Doing this exercise forces a lifter to be highly accountable to factors like tempo and technique, while respecting physics, the weight lifted, and the multitude of muscles involved. There’s no arguing with the laws of the universe. Anything out of sorts will cause the barbell to come down. With all of this said, this movement should be reserved for those who have uninhibited ranges of motion in their load bearing joints.

When to Do it

Especially if you’re an Olympic weightlifter performing the snatch or the clean & jerk, the overhead squat can improve strength in the catch or push jerk phases of those lifts. The overhead squat should be done without the presence of any muscular fatigue, so programming it first in the daily order of exercises is a wise choice. 

How to Do it

An overhead squat requires a snatch-grip to secure the bar. To find your snatch grip, stand tall while holding the barbell with a palms-down grip. Gradually adjust your grip wider and wider until the bar naturally sits in your hip fold. Next, raise the bar overhead to full extension, maintaining that hand width.

Get into your ideal squat stance and squeeze “outward” on the bar with both hands to create tension through your entire back. As you descend into a squat, aim to never let the bar fall outside of your footprint — either forward or backward. The bar should descend and ascend in a generally straight line. Move slowly and keep reps on the lower end.

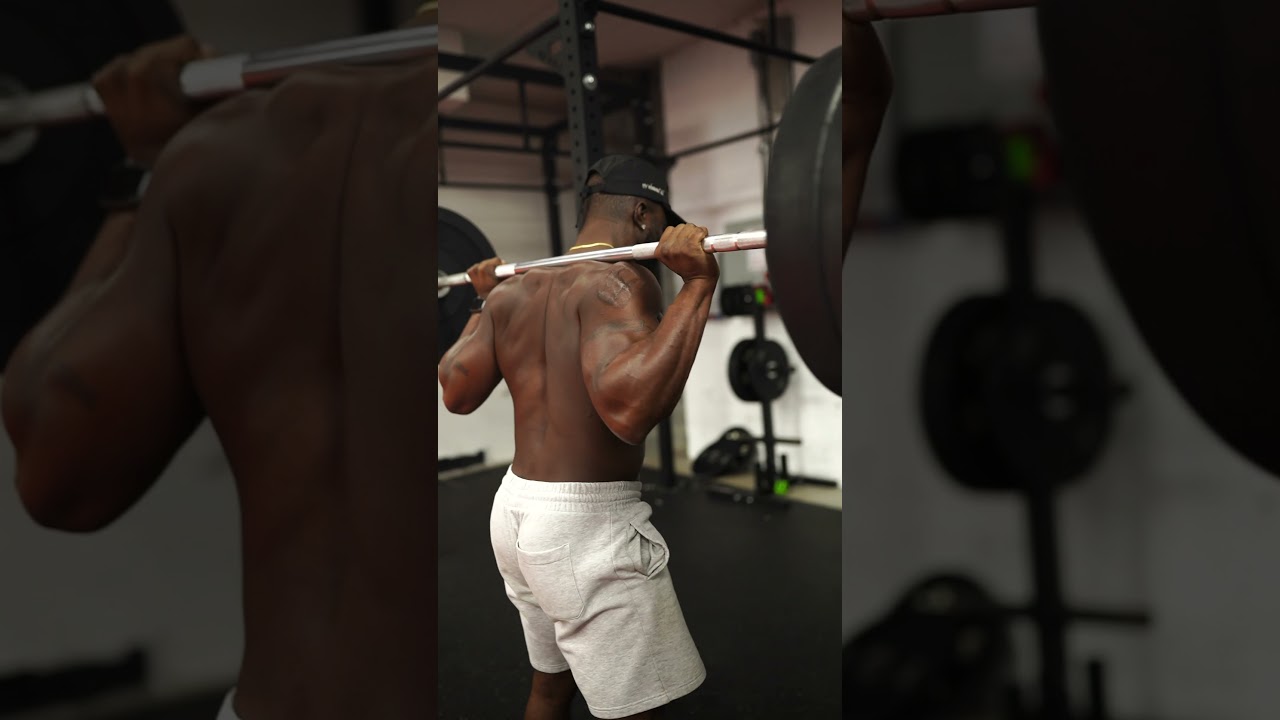
Kang Squat 

The Kang squat can be used as its own exercise or as a premier mobilization drill, warm-up, and pattern developer. Its biggest benefit is that it uniquely segments the squat into a more posterior chain-biased movement pattern. This emphasizes a good range of motion and bottom-end stability.

YouTube Video

Another great thing about the Kang squat is the fact that it places the hamstrings in a loaded stretch, which can allow them to release tension in the pelvis due to eccentric lengthening. That can mean a deeper and more comfortable squat that also helps cranky knees, due to improved activation of the hamstrings.

When to Do it

Use the Kang squat in the first half of a squat-focused workout. This approach will torch your posterior chain (hamstrings and glutes) and make those muscles more available for activation during squats later in the session. Starting your leg workout with Kang squats can also act as a good CNS primer for any larger compound (multi-joint) movement.

How to Do it

The Kang squat begins similar to a good morning — performing a deep hip hinge with slightly bent legs, holding the bar on your upper traps. It’s essential to place tension across the bar by “pulling it apart” to keep the barbell in place.

After your hinge reaches its limit, it’s time for the knees to enter the picture by allowing a full knee bend, enabling your glutes to descend into a deep squat. Next, come out of the hole by raising your hips back into the good morning position. Your glutes and lower back extend your body back to its upright starting point. Try to pause in each phase to make the movement concise and segmented. Focus on sets of four to six reps.  

Heels-Elevated Dumbbell Squat 

Whenever mobility is lacking, or if your goal is to really hammer your quads, it may not be in the cards to simply rely on dorsiflexion (ankle mobility) or a front-positioned load to get the job done.

YouTube Video

If you’re a lifter with stiff ankles, or if you have great mobility but want to really make your knees and quads bionically super-strong, elevating your heels and holding dumbbells at your sides is the squat variation for you.

When to Do it

This movement is less of a “big lift” compared to other large movements like barbell-loaded exercises, leg presses, or deadlifts, so it can actually happen second or later in your workout. Doing so will also make your quadriceps more targeted, especially if other leg muscles are fatigued. Using dumbbells rather than a barbell also keeps the movement more focused on your lower body with relatively less involvement from your upper body. 

How to Do it

If possible, use a dedicated slant board rather than simply elevating your heels on the edges of weight plates. Having your entire foot on a slope makes a major difference due to the angle of your metatarsals, which affect your arches and weight distribution.

This movement will definitely promote a rock-bottom range of motion, which means maximal knee flexion for a massive hit to your quads. The quads generally respond well to high reps, so that should be the aim for this movement. Pump out sets of 10-15 reps and try to enjoy the burn. Make sure not to rush the tempo — more time under tension can mean more muscle growth. (1)

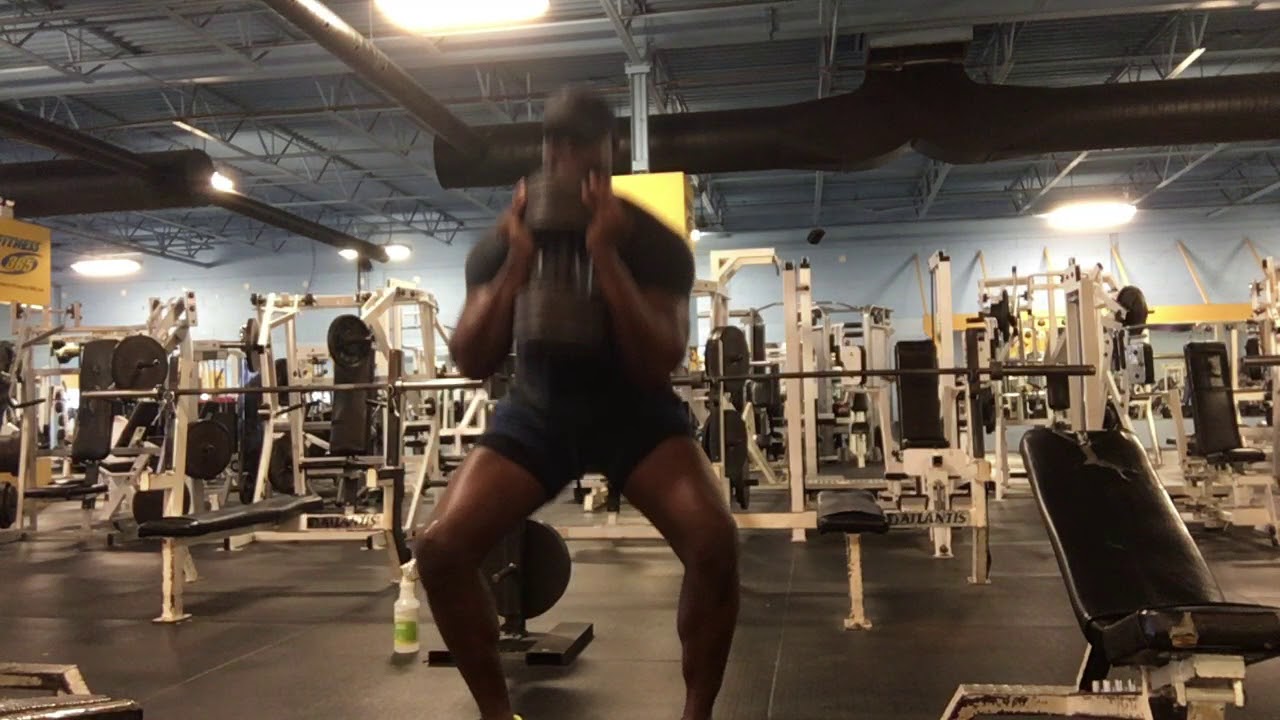
Goblet Squat 

Goblet squats are a go-to movement for anyone, especially beginners, looking to improve their squatting technique. Not only is the exercise accessible for every lifter, but it’s front loaded, making counterbalancing and stability easier. Since your elbows are positioned downward and the weight’s position near your torso is slightly adjustable, it usually promotes a great depth with minimal modifications necessary.

YouTube Video

In general, lifters should aim to become competent enough to perform relatively heavy goblet squats to start out and build a foundation, and then transition to a barbell back squat.

When to Do it

Novice lifters can use this as their bread and butter squat to really nail down the patterning and get a great lower body hit. Using this exercise on its own, or as part of a superset with another leg exercise, is effective.

It’s unlikely you’ll be able to use maximum weights, as most gyms don’t have extremely heavy dumbbells (and your strength will eventually exceed the limit). For that reason, using the goblet squat as a muscle-building tool for moderate to higher repetitions is the right call.

How to Do it

Hold a kettlebell or dumbbell in front of you at shoulder-height using both hands. Keep the weight in this position, set your feet for your ideal squat stance, and sit down.

To get deep and feel comfortable, you may feel better pushing the weight a couple of inches away from your torso as you descend. This is especially useful if you’re lacking mobility at the ankle or hip joints. Focus on using a slower speed on the way down and a stronger, powerful speed coming up. Focus on sets of eight to 10 reps.

Box Squat 

Squatting to a box does a few unique things. First, it keeps you accountable to a consistent target so there’s no margin for error or questionable depth. Secondly, it encourages a dead stop for no transfer of energy or use of the stretch reflex to “sling” your way out of the bottom position using momentum or elastic forces rather than muscular control.

YouTube Video

Lastly, the box squat can hit your posterior chain a bit harder and salvage your knees from unwanted joint pain. Using the box helps to eliminate forward migration of the shin and prevents you from reaching too deep a position which could require more knee extension.

When to Do it 

The box squat is typically treated as strength-focused movement. Perform them heavy, with standard principles of progressive overload applying — adding repetitions or increasing the weight each workout. Box squats can also occupy a high-volume role in your workout, using relatively low rep ranges, plenty of sets, and focusing on hip drive and overall technique. In either case, perform the box squat as the first movement of the workout.

How to Do it

When box squatting, it’s typical to use a sturdy box that puts your upper thigh parallel to the ground, not lower, when you’re in the bottom of the squat. This becomes even more important since your body’s geometry needs to slightly change from that of a typical back squat.

Use a low-bar squat position, to accommodate for keeping your shins much more vertical, which will force your torso to lean forward more than usual. Your foot width will be a bit wider — at least one extra step to the side — to allow for the low-bar position and to suit the box width.

Focus on remaining tight while gently, but fully, sitting down on the box. After sitting down, drive hard with your hips — upward and then forward— to create the posterior chain tension necessary to get out of the hole. Sets of three to five reps is ideal for this exercise. 

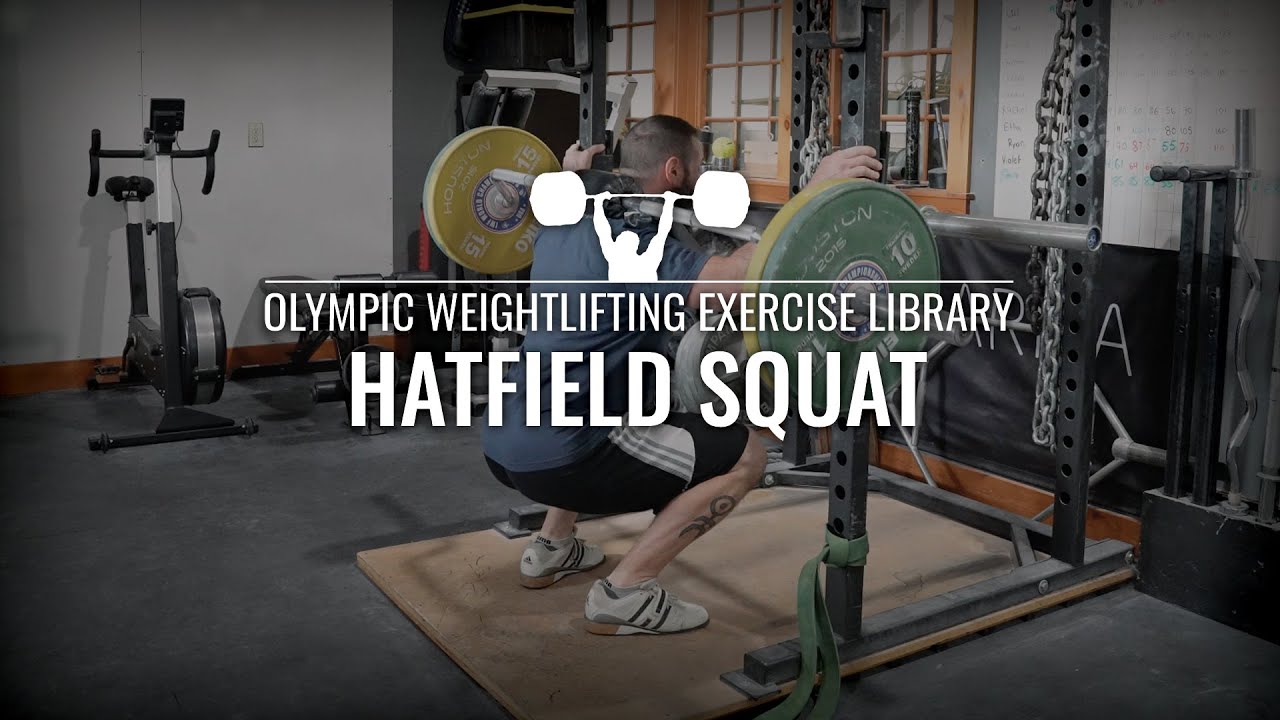
Hatfield Squat 

The Hatfield squat makes use of a safety bar and the squat cage in a unique way.  The squat is actually performed “hands free” while using the rack itself as a guide to encourage more repetitions with heavier weights.

YouTube Video

The support of the rack will also take some of the focus away from your upper body to shift attention to your lower body. The results is better technique, a stronger pump, and deep range of motion. Note: You cannot perform this exercise with a standard barbell.

When to Do it 

This is more of a hypertrophy training tool and they can be added to a lower body workout geared toward building muscle. This movement is most conducive to higher reps, while giving your muscles a chance to push themselves a bit further than normal with heavier weight. 

How to Do it 

The one non-negotiable piece of equipment needed for a Hatfield squat is a safety bar. Place the loaded bar on the rack, get into the pads, and carefully step out from the rack. Place both hands on either support beam around waist height. The safety bar will be balancing on your upper back, but it should be secure due to its handles and offset center of gravity.

Squat down using the support beams for assistance. Keep your torso upright, but really use your hands to guide your way up and down. It’s okay if you don’t come to an absolute full extension — the name of the game is getting a few more reps in. You can use a slightly faster pace as long as you remain in control of the weight. Focus on sets of 10-15 reps, and don’t shy away from heavier than normal weight for said rep range. You should be able to do it with the hand-supported assistance. 

Skater Squat 

A list of squat variations wouldn’t be complete without highlighting a unilateral exercise, and one of the most important ones that doesn’t lend itself to cheating is the skater squat. This enforces stability through your hip and knee joint and makes your glutes, quads, and ankles work overtime to stabilize the leg, making this exercise possible.

Especially if you’re suffering from bilateral imbalances or joint issues in your hips, knees, or ankles, this variation belongs in your program. It likely won’t take much more than bodyweight to get a major training effect from them, so they can be performed nearly anywhere or anytime.

When to Do it 

Positioning this exercise as an accessory movement in a squat workout, as a primer and warm-up before a lower body workout, or as its own prioritized exercise on a “weak link” training day is all fair game. What matters the most is that it gets done. A good skater squat is an indicator of lower body health and strength. 

How to Do it 

Stand with on one foot planted on the ground and the opposite leg bent roughly 90-degrees with the foot in the air. Lean forward slightly and extend your arms in front of you as a natural counterbalance. Making fists can also help with stability. Descend slowly, aiming to gently touch the back knee to the ground. On contact, drive with your front leg — don’t push off with the knee, shin, or foot of the back leg — and return to a standing position.

You can adjust the depth of movement by placing a short platform or stacked mats where your back knee contacts the ground. This will create a shorter range of motion so you can build strength and stability. Focus on sets of anywhere from six to 12 reps per leg, depending on your lower body health, strength, and conditioning.

Back Squat Form Tips 

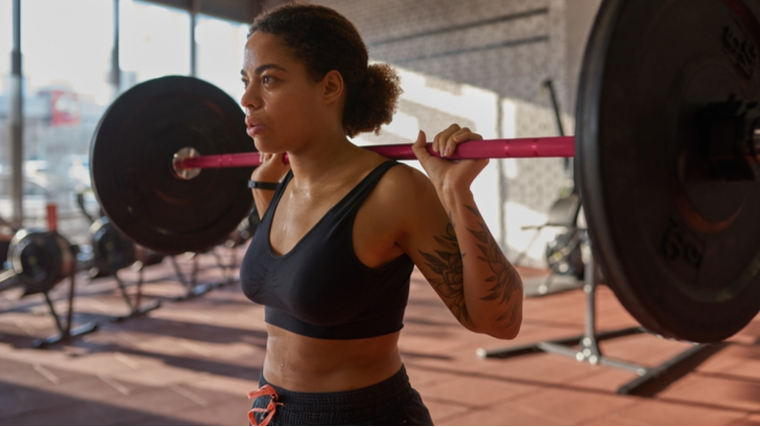
Of course, it’s worthwhile to go over the old classic. As far as squats go, the barbell back squat is the most ubiquitous “squat” you’ll ever see, but it’s also the most butchered. Let’s go over the checklist for an exercise that’s effective at training your quads, glutes, core, and total body mobility.

person in gym holding barbell on back
Credit: BAZA Production / Shutterstock

Let’s break things down step by step. 

  • Set the loaded bar in the rack at shoulder level and step underneath it. Position your hands just outside shoulder-width.
  • Pull your shoulder blades back and bring your elbows slightly behind your body to create a perfect “shelf” to rest the bar on. Stand up under the bar so it’s comfortably positioned on that muscular shelf.
  • Unrack the bark, take two steps backward, and even out your stance. You should be far enough away from the rack supports that you don’t crash into them on your descent or ascent. 
  • Try to pull the barbell apart. This will help you brace your entire upper body. Maintain this tension for the duration of your set. Get your feet ready in a comfortable, stable width and turn feet slightly out. 
  • Take a big breath in and brace your core — if your six-pack looks selfie-ready when you’re squatting, you’re doing it wrong. Get a big belly full of air and hold it for most of the repetition. Try to only let the breath out near the top of each rep.
  • Descend slowly and under control. This will allow you to focus on tension, bracing, and alignment. Your knees should not cave inward. Instead, ensure they track in the same direction as your toes (slightly outward).
  • Once you’ve descended with your thighs just below parallel, drive up strongly by squeezing your glutes. Aim for your shoulders to lead the way up, not your hips. The bar should travel in a straight line up and down, and your heels should remain planted.

Plenty of Squats, Plenty of Gains

Some lifters think a leg workout is incomplete without squats. That may or may not be true, but the bottomline is that some type of squat — whether it’s the classic back squat or any of the unique variations listed above — can be just the answer when you’re looking for a stronger lower body, more muscular legs, or improved mobility. Time to get some wheels.

References

  1. Burd, N. A., Andrews, R. J., West, D. W., Little, J. P., Cochran, A. J., Hector, A. J., Cashaback, J. G., Gibala, M. J., Potvin, J. R., Baker, S. K., & Phillips, S. M. (2012). Muscle time under tension during resistance exercise stimulates differential muscle protein sub-fractional synthetic responses in men. The Journal of physiology, 590(2), 351–362. https://doi.org/10.1113/jphysiol.2011.221200

Featured Image: Photology1971 / Shutterstock

The post The 9 Best Squat Variations for Size, Strength, and More appeared first on Breaking Muscle.

Be Nice and Share!
This post was originally published on this site

Originally Posted At: https://breakingmuscle.com/feed/rss

When it comes to “pulling” off the seemingly impossible on monstrous deadlifts, Heather Connor is unmatched. During the 2023 International Powerlifting Federation (IPF) World Classic Powerlifting Championships in Valletta, Malta, the superstar pulled another heavy rabbit out of her black top hat when she deadlifted 200 kilograms (440.9 pounds) raw. The milestone is an IPF World Record in the 47-kilogram weight class and helped Connor finish in third place, with rival Tiffany Chapon taking the top spot once again.

Connor’s raw IPF World Record deadlift eclipses her own previous massive pulling feat of 185 kilograms (407.8 pounds). The athlete captured that accomplishment during the 2022 IPF World Classic Powerlifting Championships. Approximately a calendar year later, Connor has rewritten the record books by herself, adding an astonishing 15 kilograms (33.1 pounds) to the 47-kilogram class’s raw deadlift record. Connor wore a lifting belt while utilizing a sumo stance and a mixed grip on her loaded barbell for the historic pull.

A former two-time IPF world champion (2017, 2019), the 2023 IPF Worlds was, officially, Connor’s second attempt at regaining the top mantle in the 47-kilogram division. Unfortunately for the athlete, Connor’s efforts have aligned with the rise of the now three-time 47-kilogram world champion in Chapon. Nevertheless, taking home a record on a signature lift is never a bad consolation prize.

Here’s an overview of Connor’s top stats from the 2023 IPF World Classic Powerlifting Championships:

Heather Connor (47KG) | 2023 IPF Worlds Top Stats

  • Squat — 132.5 kilograms (292.1 pounds)
  • Bench Press — 75 kilograms (165.3 pounds)
  • Deadlift — 200 kilograms (440.9 pounds) | IPF World Record
  • Total — 407.5 kilograms (898.4 pounds)

Notably, per a reflective post on Connor’s Instagram profile, the powerlifter almost had to overcome a measure of health adversity to score her latest World Record deadlift. The athlete wrote that she heard “popping sounds” while performing a back squat and that the prospect of competing while injured was “terrifying.” At the time of this writing, Connor has not provided more specifics on the extent of her ailment or clarified if there was anything even wrong.

It appears to have merely been a minor scare in the latest chapter of a powerlifting great.

“This is the happiest and healthiest I’ve been in a long while,” Connor started. “Being able to go back and forth with attempts to pull a massive World Record to get on the podium was unreal. It was exciting and what I believe makes the sport [of powerlifting] so much more fun to watch.”

Based on her previous competitive precedent, Connor will likely compete in at least one more sanctioned contest before the end of 2023. For one, the athlete is the defending Fédération Française de Force (FFForce) Girl Power champion. Plus, further appearances are just more golden opportunities for a famous deadlifter to break more of her own records.

Featured image: @theipf on Instagram

The post Heather Connor (47KG) Deadlifts 200 Kilograms (440.9 Pounds) For New IPF World Record appeared first on Breaking Muscle.

Be Nice and Share!
This post was originally published on this site

Originally Posted At: https://breakingmuscle.com/feed/rss

Tiffany Chapon has done it again, not that anyone in strength sports is likely surprised. During the 2023 International Powerlifting Federation (IPF) World Classic Powerlifting Championships, the French superstar powerlifter scored a raw 99.5-kilogram (219.3-pound) bench press on her top lift. The mark is an IPF World Record in the 47-kilogram weight class. The athlete wore just a lifting belt and wrist wraps to help with her accomplishment.

Chapon’s bench press IPF World Record surpasses Nataliya Cheremenko’s previous mark of 99 kilograms (218.2 pounds). Cheremenko achieved that milestone at the 2022 European Powerlifting Federation (EPF) European Classic Powerlifting Championships in November 2022. Chapon has now officially eclipsed her peer by half a kilogram (1.1 pounds). Thanks in part to her bench press record in the raw 47-kilogram class, Chapon successfully scored her third consecutive IPF World title (2021-2023) and an iconic “three-peat” in the same category. The 2023 IPF Worlds are taking place on June 11-18, 2023, in Valletta, Malta.

At just 21 years old, French powerlifter Tiffany Chapon might already be one of the biggest names in powerlifting. Beyond her IPF World titles, the powerlifter holds various World Records outside of her bench press to offer credence to that elite standing as a competitor.

Per the official IPF database, Chapon currently owns the 47-kilogram division’s IPF raw squat World Record (161 kilograms/354.9 pounds), the IPF raw bench press World Record (99.5 kilograms/219.3 pounds), and the IPF raw total World Record (428.5 kilograms/944.6 pounds). Chapon is just missing out on the IPF raw deadlift World Record in the 47-kilogram class due to the elite pulling power of her friendly rival, Heather Connor.

Here’s an overview of the top stats from Chapon’s latest marvelous performance on a sanctioned lifting platform:

Tiffany Chapon (47KG) | 2023 IPF Worlds Top Raw Stats

  • Squat — 157.5 kilograms (347.2 pounds)
  • Bench Press — 99.5 kilograms (219.3 pounds) | IPF Raw World Record
  • Deadlift — 167.5 kilograms (369.3 pounds)
  • Total — 424.5 kilograms (935.9 pounds)

The 2023 IPF Worlds are Chapon’s first victory of the 2023 competitive season after the athlete finished in seventh place in the 47-kilogram category at the 2023 Sheffield Powerlifting Championships in late March.

At this point, even if Chapon has reached one of powerlifting’s pinnacles, there still seems to be so much to achieve. The French star might be an elite talent with the requisite youth and prowess to eventually turn in an all-time strength career.

Featured image: @theipf on Instagram

The post Tiffany Chapon Sets Bench Press IPF World Record En Route to Dominant Three-Peat appeared first on Breaking Muscle.

Be Nice and Share!
This post was originally published on this site

Originally Posted At: https://breakingmuscle.com/feed/rss

Owning a home gym is beneficial because it offers more flexibility and convenience regarding how and when you can work out. It eliminates the need for lengthy commutes to a commercial gym, and you don’t have to feel self-conscious about working out in front of others. You also don’t have to share the equipment with anyone else, except maybe a spouse or roommate.

Because there is a large variety of workouts you can do and everyone has different goals, it’s hard to narrow down the best home gym equipment into one short list. That’s why we’ve selected 20 different products covering a wide range of categories, from cardio to strength to all-in-one machines. Building a home gym requires some careful planning and can feel like a daunting process, but if you’re ready to ditch your gym membership, the list below can help get you started.

Our Top Picks for the Best Home Gym Equipment

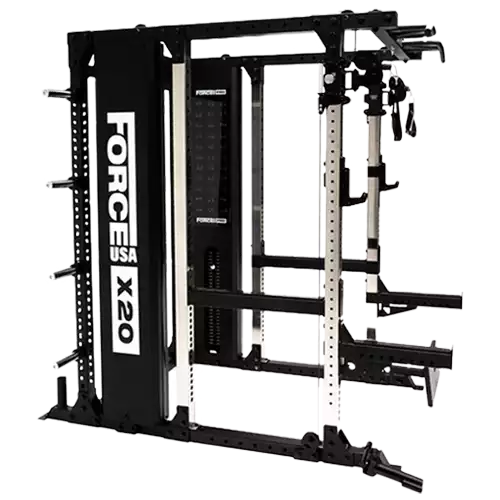
Best Overall Home Gym: Force USA X20 Pro Multi Trainer


Force USA X20 Pro Multi Trainer

  • Exterior dimensions: 70” W x 88.5” D x 91” H
  • Interior dimensions: 39.5” W x 72” D x 86” H
  • 11-gauge, 3×3 stainless steel uprights
  • Two 289-pound weight stacks
  • 990-pound weight capacity
  • Limited lifetime structural warranty


Check Price

Pros

  • Westside hole spacing on the uprights
  • Can bolt it into the ground if desired
  • Combines six machines into one

Cons

  • Takes a long time to assemble (I recommend paying for Force USA’s assembly service if you can afford it)

The Force USA X20 Pro Multi Trainer gets my pick for the best home gym overall because of how much you can do with it. It’s a beast of a machine that combines a power rack, pull-up station, functional trainer, suspension trainer, low row station, and landmine station into one unit. Even though it’s large, it’s a space-efficient option because it eliminates the need for separate pieces of equipment. However, being about 7.5 feet tall, it might not fit in rooms with low ceilings, especially since you’ll need enough clearance at the top to do pull-ups.

It has two 289-pound weight stacks that have a two-to-one ratio. A two-to-one ratio means 100 pounds of resistance, for example, feels more like 50 pounds because the cable travels twice as far as the weight stack when you pull on it. This may seem like a disadvantage, but it’s a good thing — the cable travels faster and is more responsive, so you can use the machine for quicker movements and functional training.

The frame is made with 11-gauge steel, the same type of steel you’d find in many commercial gym products. In a home setting, the unit should last a lifetime. It can support up to 992 pounds, which includes the weight of your barbell and any weight plates you store on it, but the weight capacity should still be more than enough for most lifters. You can bolt the unit into the ground if you want, but it’s solid and stable on its own.

The uprights have Westside hole spacing, meaning the holes are spaced about one inch apart from about shoulder to shin level and two inches apart everywhere else. With Westside hole spacing, you can get a more precise positioning of the barbell and have better control over it when racking and unracking it for bench presses.

The Force USA X20 Pro Multi Trainer comes with a hefty price tag of about $4,300, but in addition to everything mentioned above, it also comes with several accessories and attachments. Some of the most notable ones include storage pegs for weight plates, J-hooks, spotter arms, band pegs, ankle cuffs, and various cable attachments.

Plus, if you were to buy six machines and all the accessories the Force USA X20 Pro Multi Trainer comes with separately, you’d likely spend the same amount of money (if not more). For this reason, it’s worth considering if you have the budget and want an all-in-one machine for your home gym.

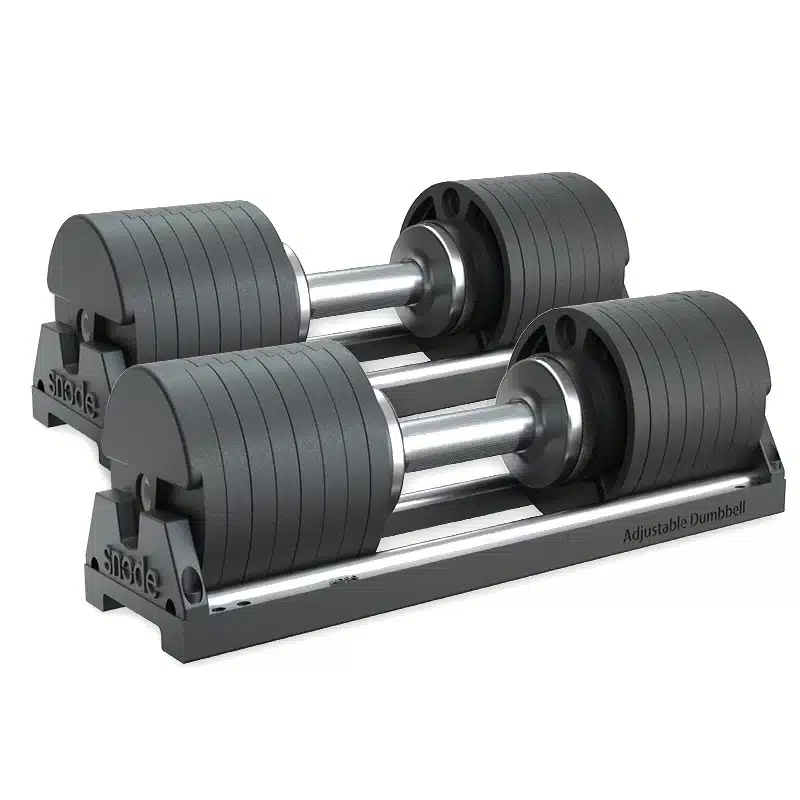
Best Adjustable Dumbbells: Snode AD80 Adjustable Dumbbells


Snode AD80 Adjustable Dumbbells

  • Weight range: 10 to 80 pounds
  • Weight increments: 10 pounds
  • Adjustment type: Dial
  • Dimensions: 19.29” L x 7.48” W x 7.87” H with base; 18.11” L x 6.68” W x 6.68” H without base
  • Materials: Cast iron, plastic, aluminum
  • Warranty: Two years


Check Price

Pros

  • Knurled chrome handle allows you to maintain a good grip
  • Dials on each handle enable you to adjust the weights in just a couple of seconds
  • Weight indicator is easy to read
  • Comfortable to rest on your thighs when getting ready for seated dumbbell exercises

Cons

  • Can only adjust the weights in 10-pound increments
  • May make noise when dropped
  • Expensive

Adjustable dumbbells like the Snode AD80s are an ideal space-saving solution for those who want to train with free weights at home but don’t have room for an entire set of dumbbells. They get my pick for the best adjustable dumbbells because you can adjust the weight in seconds with a quick turn of the dial, they take up less than two feet of space when on their base, and they’re extremely durable — you can drop them from heights of up to 32 inches without breaking them.

The handles are 1.4 inches in diameter, slightly larger than most dumbbell handles, which often have a diameter of one to 1.25 inches. The extra thickness may be an issue if you have small hands or a weak grip, but if you use them consistently, you’ll likely find that your grip strength improves over time.

The Snode AD80s range in weight from 10 to 80 pounds and go up or down in 10-pound increments. I wish the increments were smaller for those who may struggle to make 10-pound jumps in weight on certain lifts, but Snode sells magnet plates that enable you to make 2.5- or five-pound weight adjustments if you want to make smaller increases in weight.

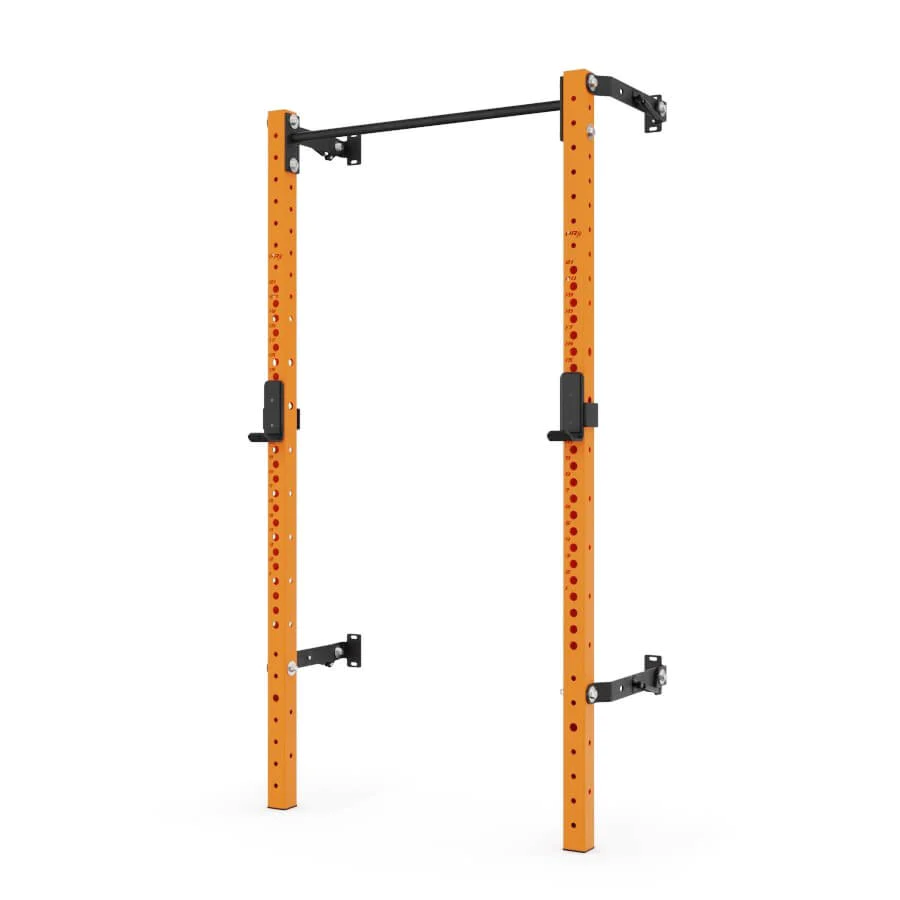
Best Squat Rack: PRx Profile® PRO Squat Rack


PRx Profile® PRO Squat Rack

  • 90” rack dimensions: 52” W x 90” H x 26.75” D when folded down; 52” W x 108” H x 9” D when folded up
  • 96” rack dimensions: 52” W x 96” H x 26.75” D when folded down; 52” W x 114” H x 9” D when folded up
  • Available in 10 colors (black onyx, blue, clear Cerakote, neon green, orange, pink, purple, red, sky blue, white)
  • 1,000-pound weight capacity


Check Price

Pros

  • Can fold it up when not in use to save space
  • Uprights have laser-cut numbers
  • Made with heavy-duty 11-gauge steel

Cons

  • Requires a ceiling height of at least 108 inches

The PRx Profile® PRO Squat Rack is my pick for the best squat rack because it can handle a large amount of weight, has a space-saving design, and comes in 10 colors, so you can customize it to match your decor and style. It also has a 1,000-pound weight capacity, so everyone from casual to competitive athletes can safely use it.

This foldable squat rack attaches directly to the wall. You can leave it folded down for convenience so you can start your workouts right away, or you can fold it up when you finish training if you need more floor space. I also love that the numbered holes allow you to align the J-cups on each side quickly.

The PRx Profile® PRO Squat Rack comes in either a 90-inch or 96-inch height. However, to fold it up, you need a ceiling height of 108 inches (for the 90-inch rack) or 114 inches (for the 96-inch one). The 90-inch rack is likely sufficient for most home gym owners, but those who are 6’2 or taller should opt for the 96-inch rack if your ceiling is high enough. On the taller rack, you can install the pull-up bar higher, making it easier to do pull-ups without your feet hitting the floor as you hang from the bar.

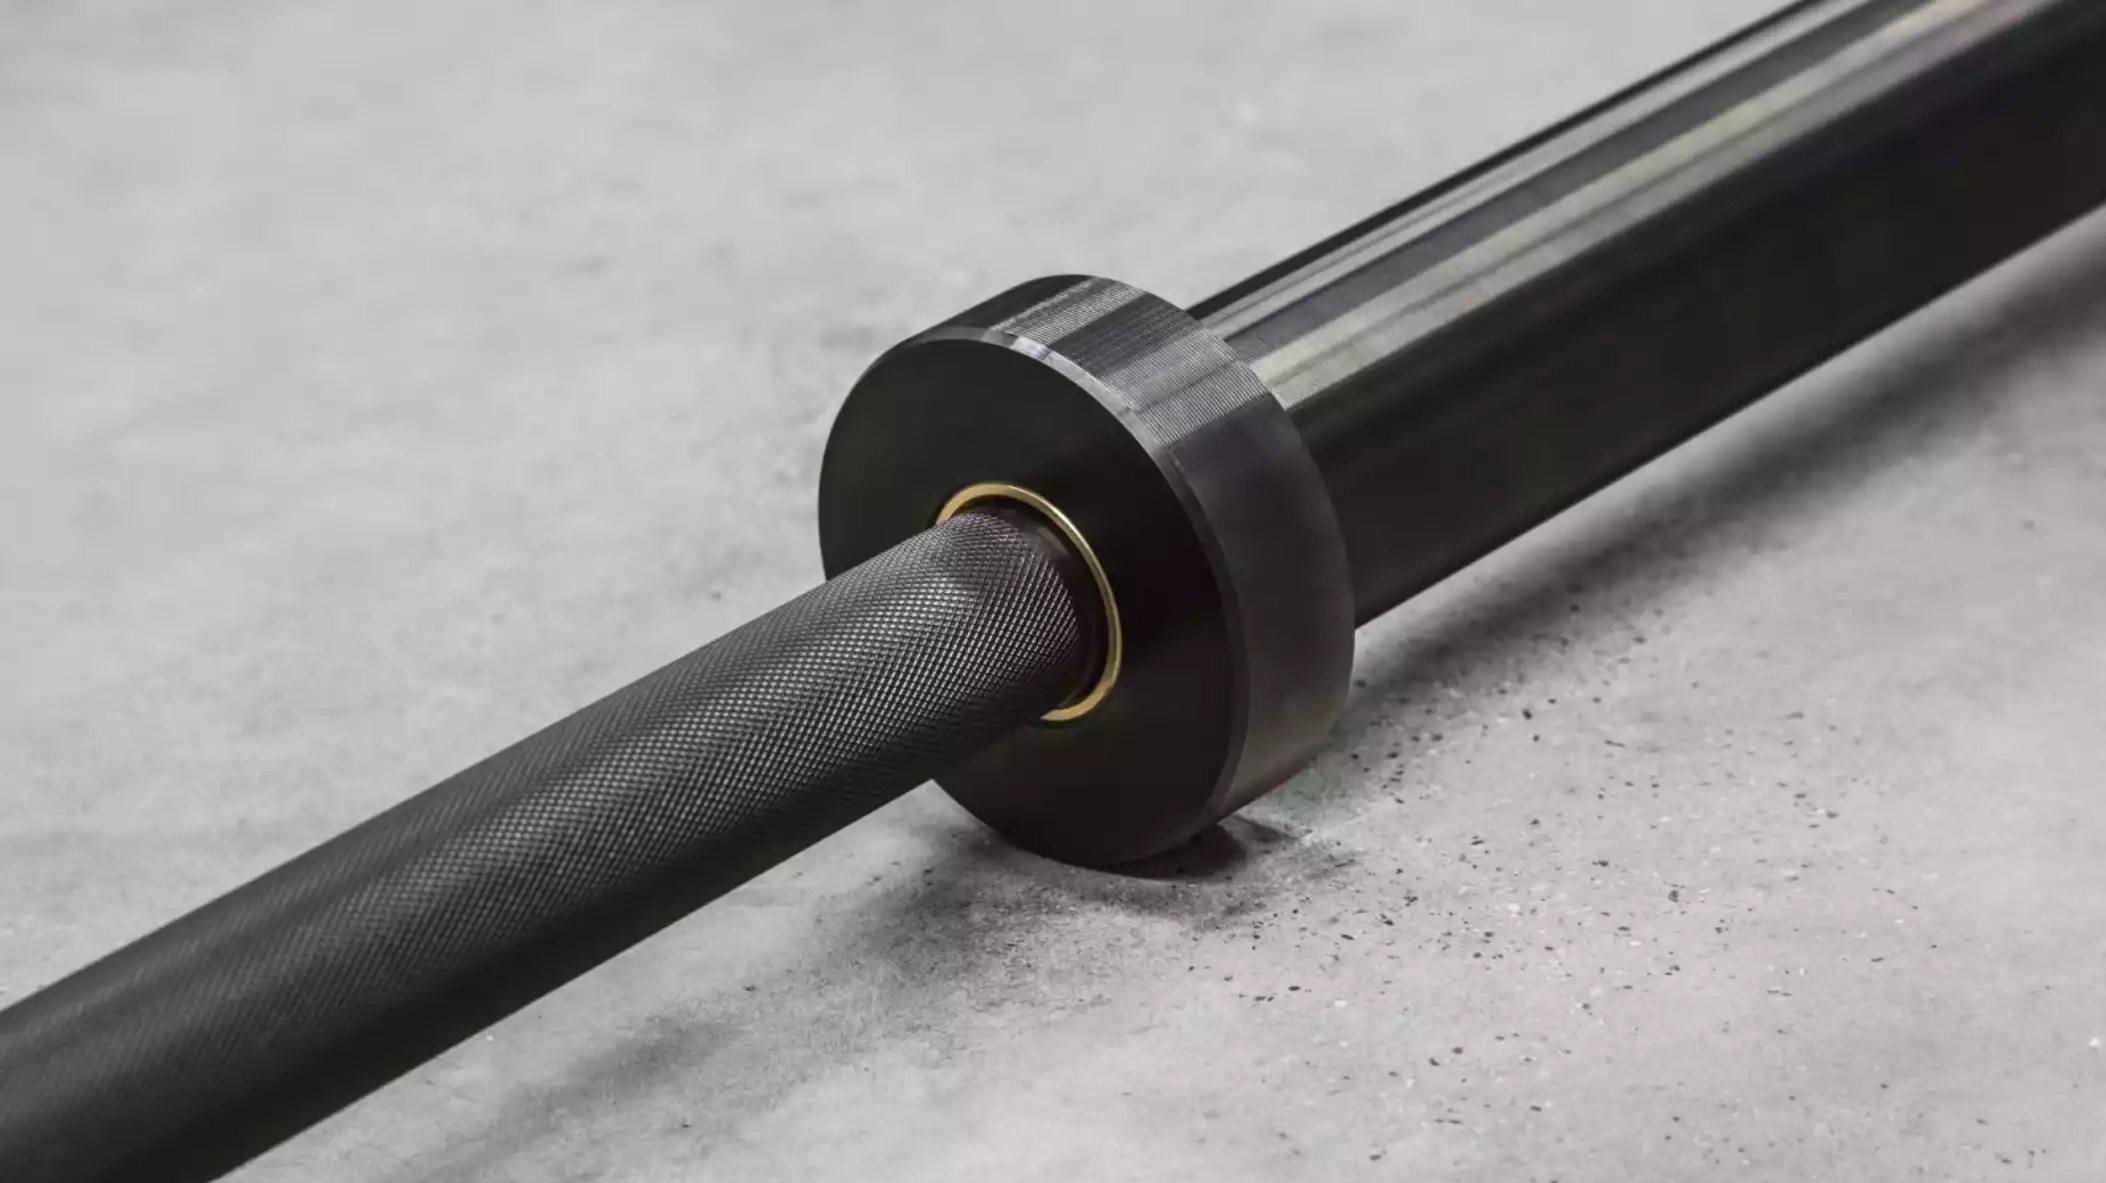
Best Barbell: Rogue Fitness Ohio Bar


Rogue Fitness Ohio Bar

  • Comes with a lifetime guarantee against bending
  • Weighs 20 kilograms (about 44 pounds) and has a 28.5-millimeter diameter
  • 16.4-inch loadable sleeve length
  • Dual knurl rings and no center knurl


Check Price

Pros

  • Can be used for CrossFit or general strength training
  • Reasonably priced for a barbell of its caliber
  • Can choose between a variety of finishes, including stainless steel and Cerakote
  • Manufactured in the USA

Cons

  • Bushing rotation system isn’t ideal for those who specialize in Olympic weightlifting

The Ohio bar from Rogue Fitness is an all-purpose barbell that’s suitable for men and women as well as athletes of all experience levels. With a 190,000 PSI tensile strength, it can hold a serious amount of weight — much more than non-elite lifters will ever be able to lift. You’ll probably never run out of room to load plates on the 16.4-inch long sleeves, and the moderate knurling lets you get a good grip without digging into your hands too much.

The barbell’s shaft has dual knurl rings that provide a visual guide for where to place your hands on lifts like the bench press, but there is no center knurl. The lack of a center knurl makes the Ohio bar less than ideal for powerlifting, as you may have difficulty keeping it from slipping when doing heavy back squats.

Another thing to note is that the Ohio bar uses bushings instead of bearings. Bushings and bearings refer to a barbell’s rotation system that allows the sleeves to spin. Bushings don’t rotate as smoothly or quickly as bearings, which is beneficial for slower static lifts like squats or bench presses because too much spin can make the weight feel off balance. Bearing barbells spin much more freely and are ideal for dynamic movements like snatches and clean and jerks, where the barbell changes directions quickly.

Bushing barbells like the Ohio bar are suitable for general strength training or even CrossFit, which combines static and dynamic movements. But anyone who wants to specialize in Olympic weightlifting should consider a bearing barbell instead. Similarly, those who wish to compete in powerlifting should look for a true powerlifting barbell with a center knurl to help keep the barbell in place when squatting heavy weights.

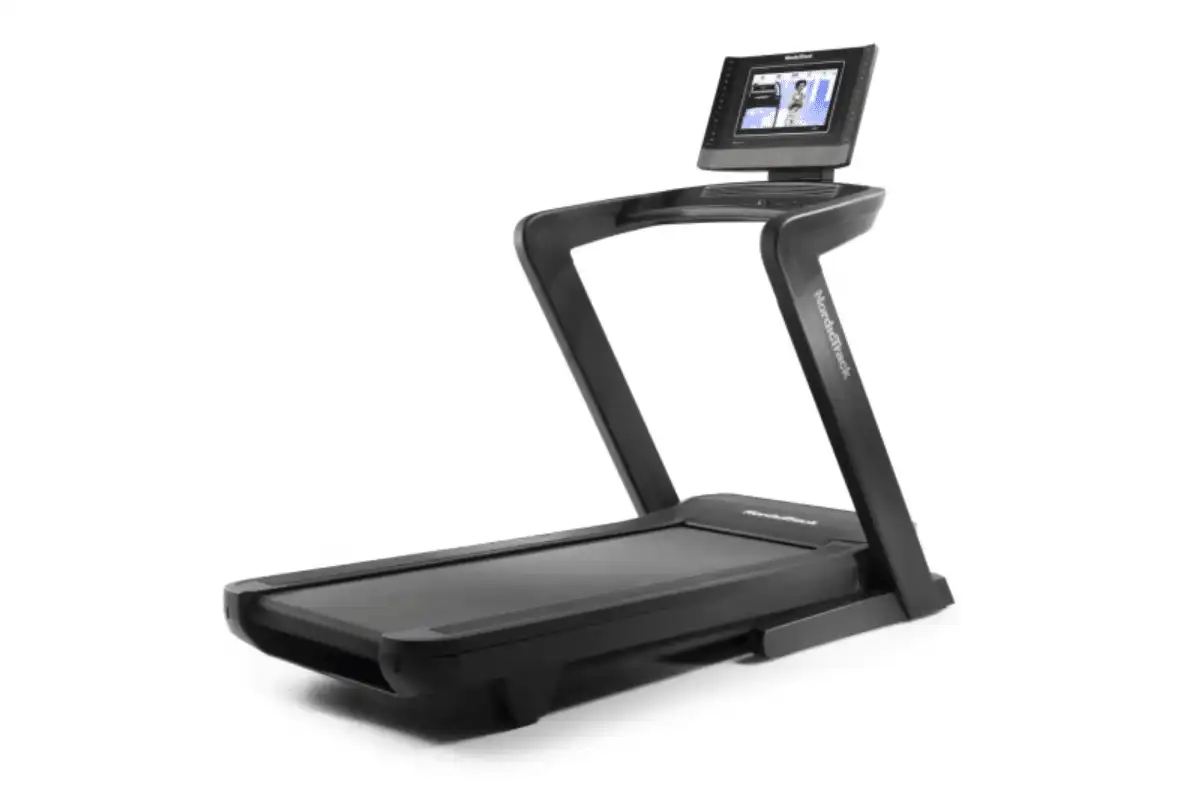
Best Treadmill: NordicTrack Commercial 1750


NordicTrack Commercial 1750 Treadmill

  • Dimensions: 80” L x 38” W x 65” H
  • 14-inch rotating HD touchscreen
  • -3 percent decline and 15 percent incline
  • 10-year frame warranty, two-year parts warranty, and one-year labor warranty
  • Includes a 30-day trial to iFIT


Check Price

Pros

  • Can fold it up to save space
  • Cooling fans to help keep you comfortable during your workout
  • Autoadjust technology automatically changes your speed, incline, and decline during instructor-led classes

Cons

  • Storing it in a garage will void the warranty

A treadmill is one of the best pieces of cardio equipment to have in a home gym for those times when the weather is bad or you can’t leave your kids home alone. The NordicTrack Commercial 1750 treadmill is an excellent choice for runners of all levels thanks to its sturdy build, high-tech features, and interactive workout programs.

Unlike other treadmills that only incline, the Commercial 1750 also declines, so it feels more like running on uneven terrain outdoors. The 14-inch touchscreen monitor offers hundreds of virtual classes through iFIT, to which you get a 30-day free trial when you purchase the treadmill through NordicTrack. The monitor displays stats such as time and distance, and it rotates, allowing you to follow along with floor-based classes easily.

The deck is 22 inches wide and 60 inches long, large enough to suit runners of nearly any height and those with long strides. Other notable features include two cooling fans, amplified speakers, and Easy Lift™ Assist technology, which helps make storage easier despite the treadmill’s hefty 340-pound weight.

The Commercial 1750 comes with an impressive 10-year warranty on the frame, plus a two-year parts warranty and a one-year labor warranty. However, the warranties are voided if you store it in a garage.

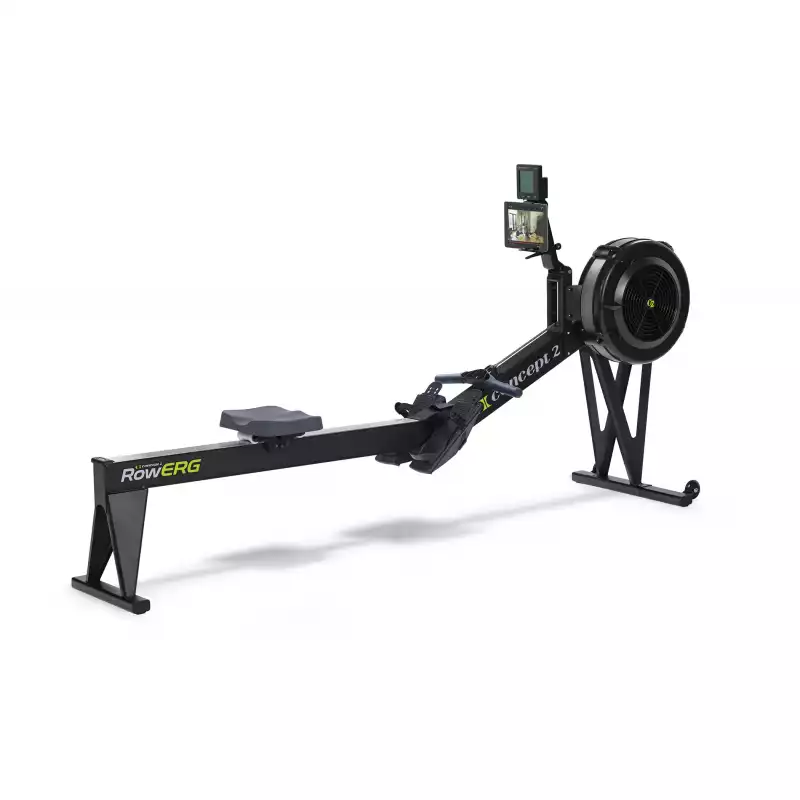
Best Rowing Machine: Concept2 RowErg


Concept2 RowErg

  • Frame is made of heavy-duty aluminum
  • Ergonomic handlebar and seat
  • PM5 monitor comes with Bluetooth capabilities
  • Accomodates users up to 6’6 and 500 pounds
  • Comes with a limited five-year warranty


Check Price

Pros

  • Can be assembled in just a few minutes
  • Battery-powered operation, so you don’t need to keep it close to an outlet
  • Breaks down into two parts for easy storage
  • Seat glides smoothly along the monorail
  • Minimal maintenance required

Cons

  • Monitor doesn’t offer instructor-led classes

Few rowing machine brands can beat the reputation of Concept2. Its row ergs are known for their exquisite craftsmanship and durability — I’ve heard of people who bought Concept2 rowing machines in the 1990s and are still using them today!

I was first introduced to the Concept2 rower when I started CrossFit in 2015. When I was finally ready to pull the trigger and get a rowing machine for my home gym several years later, I didn’t even consider another option. It is built like a tank with a solid aluminum frame, and the monitor offers reliable and accurate stats tracking, displaying metrics such as distance, calories, watts, total time, 500-meter splits, and stroke rate.

Based on conversations I’ve had with CrossFitters and other home gym owners, many people think of the Concept2 rowing machine as a premium purchase. At around $1,000, it’s certainly not cheap. But when you compare it to other options like the Hydrow, which starts at about $1,900, the cost of a Concept2 rower isn’t that bad. It should last a lifetime if you maintain it properly.

Fortunately, maintenance is easy. You just need to oil the chain with 3-in-1 or mineral oil after every 50 hours of use, vacuum the flywheel if it gets dusty, and check the bolts and screws for any looseness after 250 hours of use.

The Concept2 rower doesn’t have instructor-led classes. If that’s what you’re looking for, you may want to consider another machine like the Peloton rower instead. It does, however, have several built-in workout programs. And with the ErgData mobile app, you can sync custom workouts to your rower or follow along with Concept2’s workout of the day.

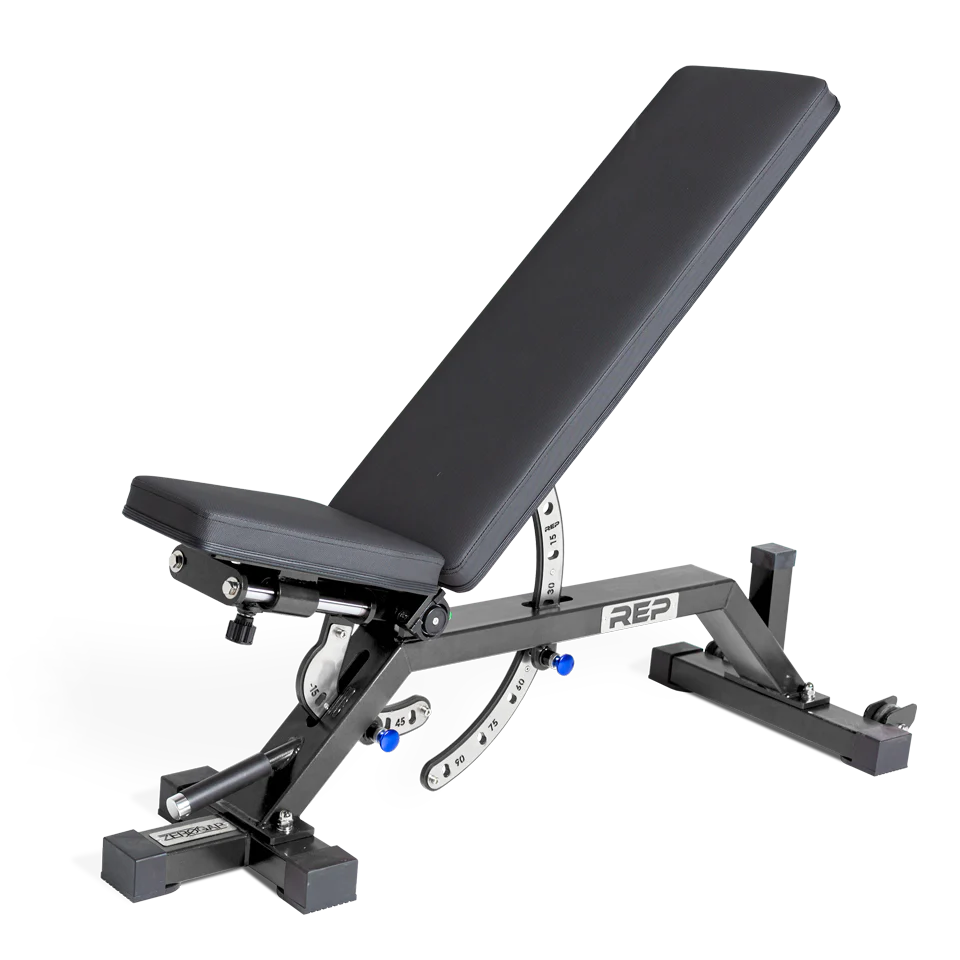
Best Weight Bench: REP Fitness AB-5000 ZeroGap Adjustable Weight Bench


REP Fitness AB-5000 ZeroGap Adjustable Weight Bench

  • Dimensions: 57” L x 21” W by 17.5” H
  • 1,000-pound weight capacity
  • 11-gauge steel frame
  • Seven back angles (flat to 90 degrees) and five seat angles (-15 to 45 degrees)
  • 12.25-inch thick, non-slip vinyl pads


Check Price

Pros

  • Has a handle and wheels for easy maneuverability
  • Rubber feet help protect your floors and keep the bench in place
  • Can slide the seat forward and back to eliminate a gap between it and the back pad

Cons

  • Leg roller attachment sold separately

When it comes to buying a weight bench for a home gym, I believe an adjustable bench is the way to go. It allows you to perform flat and incline bench presses, and if it also declines, you can do decline bench presses or decline sit-ups. Although there are plenty of adjustable benches on the market, none come close to REP Fitness’s AB-5000 ZeroGap bench.

Many adjustable benches have a gap between the seat and the back pad, which can be uncomfortable on the back or buttocks when doing flat bench presses. But the AB-5000 has a sliding seat that sits flush against the back pad when the bench is in a flat position, eliminating the gap.

The AB-5000 has several other impressive features, too. The frame is made with heavy-duty, professional-grade 11-gauge steel. The back and seat pads are made with non-compressible foam and covered with non-slip vinyl to help keep your upper back in place during bench presses. And while competitive powerlifters may prefer to train with a flat bench, those who do want to use an adjustable bench will appreciate that the AB-5000 is 17.5 inches high and meets the standards set forth by the International Powerlifting Federation (IPF).

The bench has a 1,000-pound weight capacity, which is more than sufficient for most lifters. The numbered pop-pin mechanisms make the seat and back pad easy to adjust up or down. When you want to move the seat pad to remove or widen the gap, it slides smoothly along guide rods, and a separate pop-pin helps keep it in place.

You can use the AB-5000 on a decline angle, but it doesn’t come with a leg roller attachment that can help keep your legs secure. REP Fitness sells the attachment separately, and even though it’s an added cost, I do recommend getting it so you can anchor your feet when using the bench in the decline position.

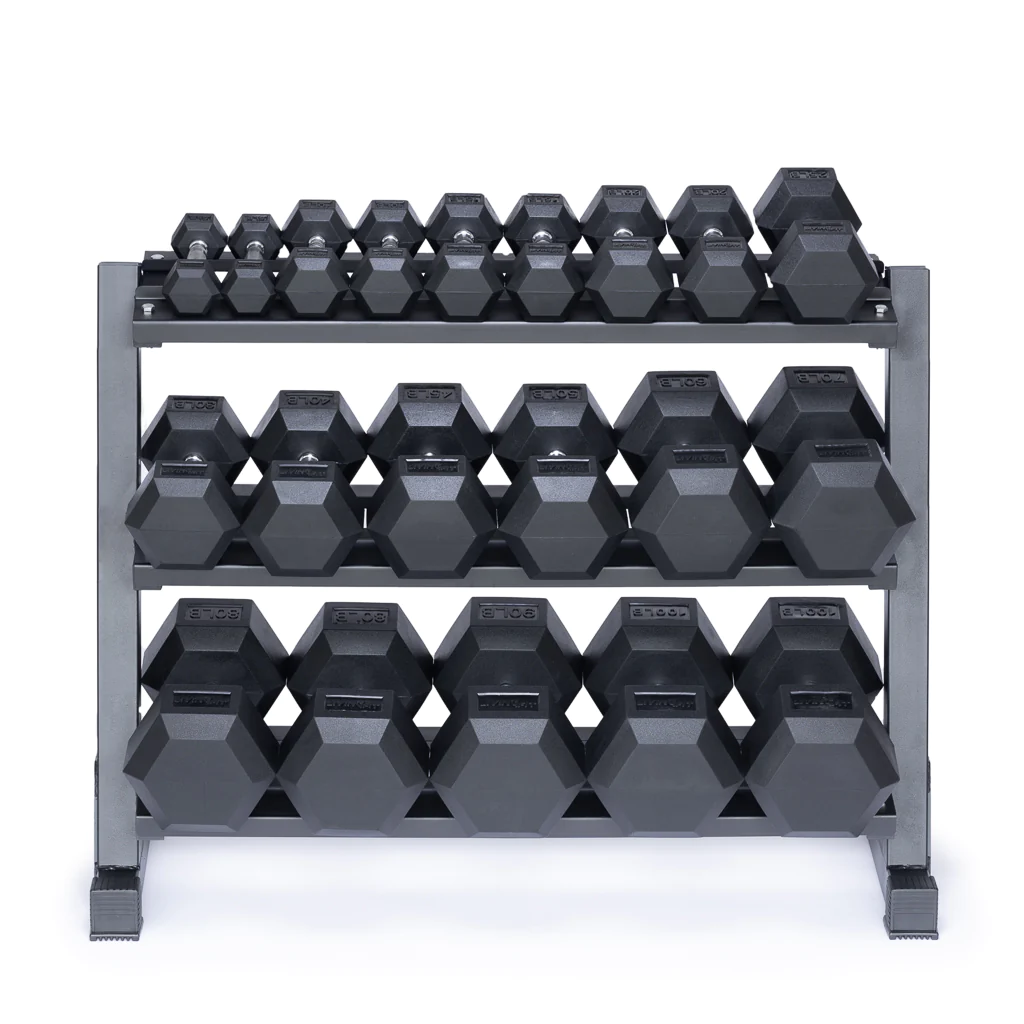
Best Dumbbells: Living.Fit Dumbbell Set


Living.Fit Dumbbell Set

  • Available in multiple sets with weights ranging from five to 100 pounds
  • Ergonomic handle for a more comfortable grip
  • Comes with a lifetime warranty for home gym use


Check Price

Pros

  • Handles are plated in chrome for corrosion resistance
  • Hexagonal shape prevents them from rolling
  • Split knurling offers a visual guide for optimal hand placement

Cons

  • The rubber may have a strong odor when you first get them

Dumbbell sets aren’t always ideal for home gyms because they can be expensive and take up a lot of room. But for those who do have the space and budget for a full set of dumbbells, I recommend Living.Fit.

The hexagonal shape allows you to stay stable when performing exercises like renegade rows or dumbbell push-ups and prevents the dumbbells from rolling around when you store them. The rubber helps prevent damage to your floor and dampens noise when you set them down, so you won’t disturb other people when you work out. The chrome-plated handle is corrosion-resistant, so durability shouldn’t be an issue.

You have six sets to choose from:

  • Five to 25 pounds
  • Five to 50 pounds
  • Five to 75 pounds
  • Five to 100 pounds
  • 55 to 75 pounds
  • 80 to 100 pounds

Each set comes with a pair of dumbbells in each weight, and the weights go up in five-pound increments. Every dumbbell has the same 1.3-inch diameter handle, which is standard for fixed dumbbells. The knurling is moderate and is split into three parts that align with where your palm, index finger, and pinky will sit when you hold the dumbbells. The split knurling also provides a reference for where to place your hands if you want to keep them centered on the handle.

While the Living.Fit dumbbell sets aren’t the cheapest on the market, they’re not the most expensive. But considering their high quality and the fact that you get multiple weights in each set, the price is fair.

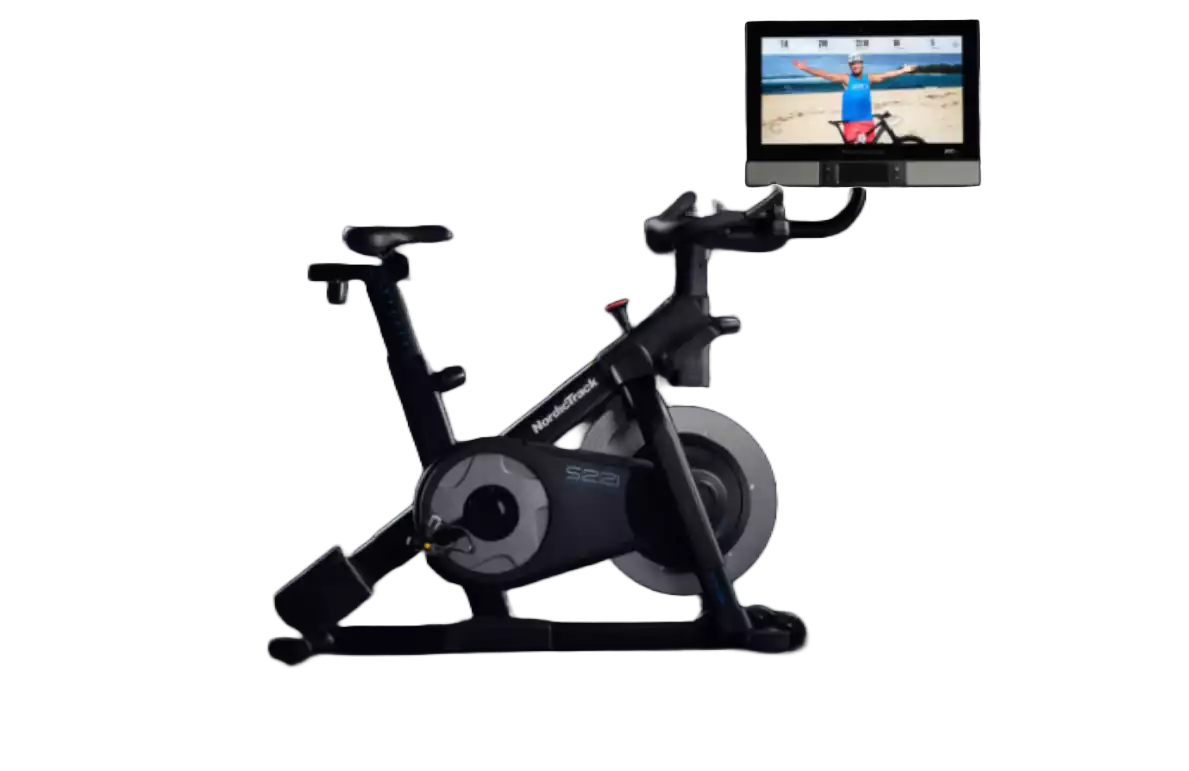
Best Exercise Bike: NordicTrack S22i Studio Bike


NordicTrack S22i Studio Bike

  • Dimensions: 61” L x 22” W x 58” H
  • 22-inch rotating HD touchscreen
  • Includes a pair of three-pound dumbbells
  • 20-percent incline and 10-percent decline
  • Includes a 30-day free trial to iFIT


Check Price

Pros

  • Automatically adjusts the resistance, incline, and decline during instructor-led classes
  • Inertia-enhanced flywheel is quiet and offers a smooth ride
  • 24 resistance levels
  • Lift Assist handlebars makes it easy to move them up and down
  • Ergonomic padded seat

Cons

  • Storing it in a garage will void the warranty
  • Difficult to move by yourself

For those who want to do low-impact workouts at home, a stationary bike like the NordicTrack S22i Studio Bike is a solid choice. It offers 24 levels of digital resistance, a 20-percent incline, and a 10-percent decline, all of which help mimic the uneven terrain you’d encounter when cycling out on the road. It also has a quiet, inertia-enhanced flywheel that doesn’t feel jerky as it rotates.

The S22i Studio Bike has a built-in AutoBreeze fan to help keep you cool during your workouts. The ergonomic padded seat is comfortable to sit on, even during long rides, and you can adjust it both vertically and horizontally to fit your body proportions. The bike can support users who weigh up to 350 pounds, making it suitable for a wide range of individuals.

Your purchase comes with a 30-day free trial to iFIT, through which you can access hundreds of cycling classes in addition to yoga, HIIT, and strength classes. The bike’s 22-inch HD touchscreen rotates, so you can use the monitor if you want to take classes off the bike. You also get a pair of three-pound dumbbells with the bike, though you may wish to purchase a heavier pair if you plan on taking the strength classes through iFIT.

This sturdy bike weighs 200 pounds, so it’s difficult to move by yourself, and you’ll need to think carefully about where to put it before you get it. And while it comes with a 10-year frame warranty, a two-year parts warranty, and a one-year warranty, the warranties are voided if you store it in a garage.

RELATED: Everyone’s Bike: The NordicTrack S22i Review

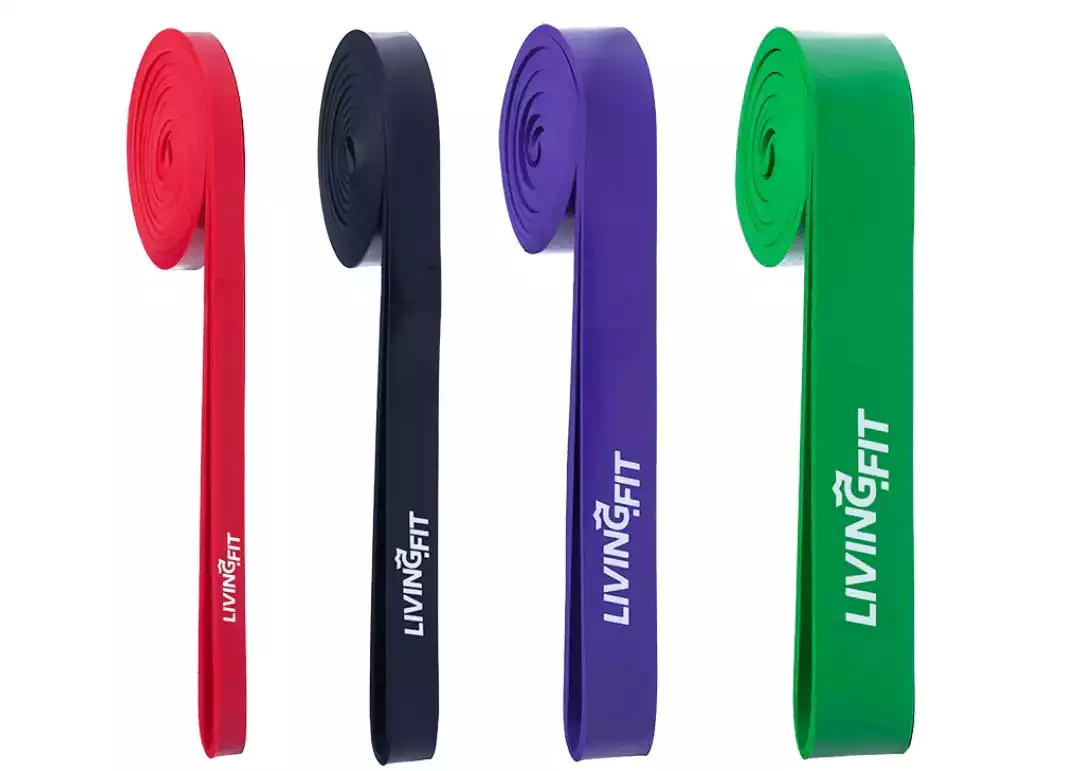
Best Resistance Bands: Living.Fit Resistance Bands


Living.Fit Resistance Bands

  • Can buy a set of four, a set of six, or individual bands
  • Loop-style design and 41-inch length
  • Resistance levels range from five to 200 pounds
  • Lifetime warranty


Check Price

Pros

  • Color-coded for easy identification
  • Sets of four and six bands include a door anchor
  • No powdery feeling
  • Durable

Cons

  • Those with latex allergies can’t use them
  • Doesn’t come with handles

Resistance bands like the Living.Fit Resistance Bands can provide a challenging resistance training workout when you can’t lift heavy weights. They’re also good for warming up before a workout, working on mobility, or addressing weak points in your lifts, such as a poor deadlift lockout. Plus, they don’t take up any space, so they’re ideal for small home gyms.

The Living.Fit bands are made of latex, which is more elastic and durable than rubber. They should last for a long time without tearing or losing their original shape. However, those with latex allergies won’t be able to use them.

The bands don’t have amount of resistance printed on them, but each one is a different color, so you can easily pick out the one you want to use for your workout. They’re 41 inches long and feature a loop-style design, which differs from tubed resistance bands that come with handles. However, you can still use the Living.Fit resistance bands for exercises like banded bicep curls and banded bent-over rows. They also come with a door anchor, making it easy to do banded face pulls or banded tricep pushdowns.

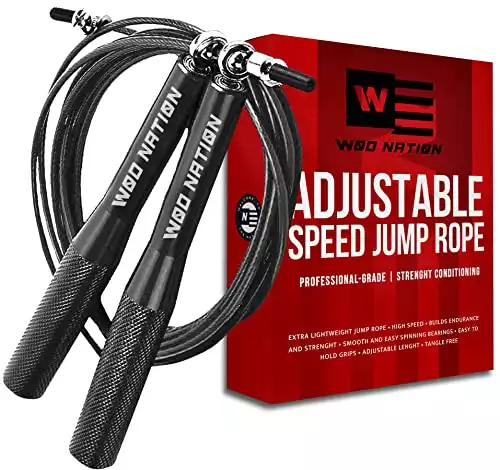
Best Jump Rope: WOD Nation High Speed Jump Rope


WOD Nation High Speed Jump Rope

  • Non-slip, lightweight handles
  • Tangle-free, rust-proof wire
  • 6.75-inch long handles


Check Price

Pros

  • Smooth rotation
  • Does not get ripped up if you use it outdoors
  • Available in several colors

Cons

  • Can leave marks on your legs if you miss a jump

If you like to jump rope to get your heart rate up, the WOD Nation High Speed jump rope is a great tool to add to your home gym arsenal. You can use it indoors or outdoors, and the swivel ball bearings enable it to rotate smoothly. Plus, it comes in five colors — black, blue, pink, red, and silver — so you can pick whichever one matches your style.

The 6.75-inch long handles are suitable even for those with large hands. They weigh one-third of a pound each, and the light weight helps reduce shoulder and arm fatigue when jumping rope for long durations. The wire is rust-proof, so you don’t have to worry about it becoming ruined if it’s exposed to moisture.

Being able to customize the length of the rope is a nice feature, but depending on how much you adjust it, you may have a lot of extra wire hanging off the ends. If this bothers you, you can trim the excess with a wire cutter.

Because the rope is made of metal wire, it will sting if you miss a jump and the rope hits your legs. For this reason, I only recommend it for those who can already jump rope efficiently (and, for CrossFitters, those who are already proficient at double-unders).

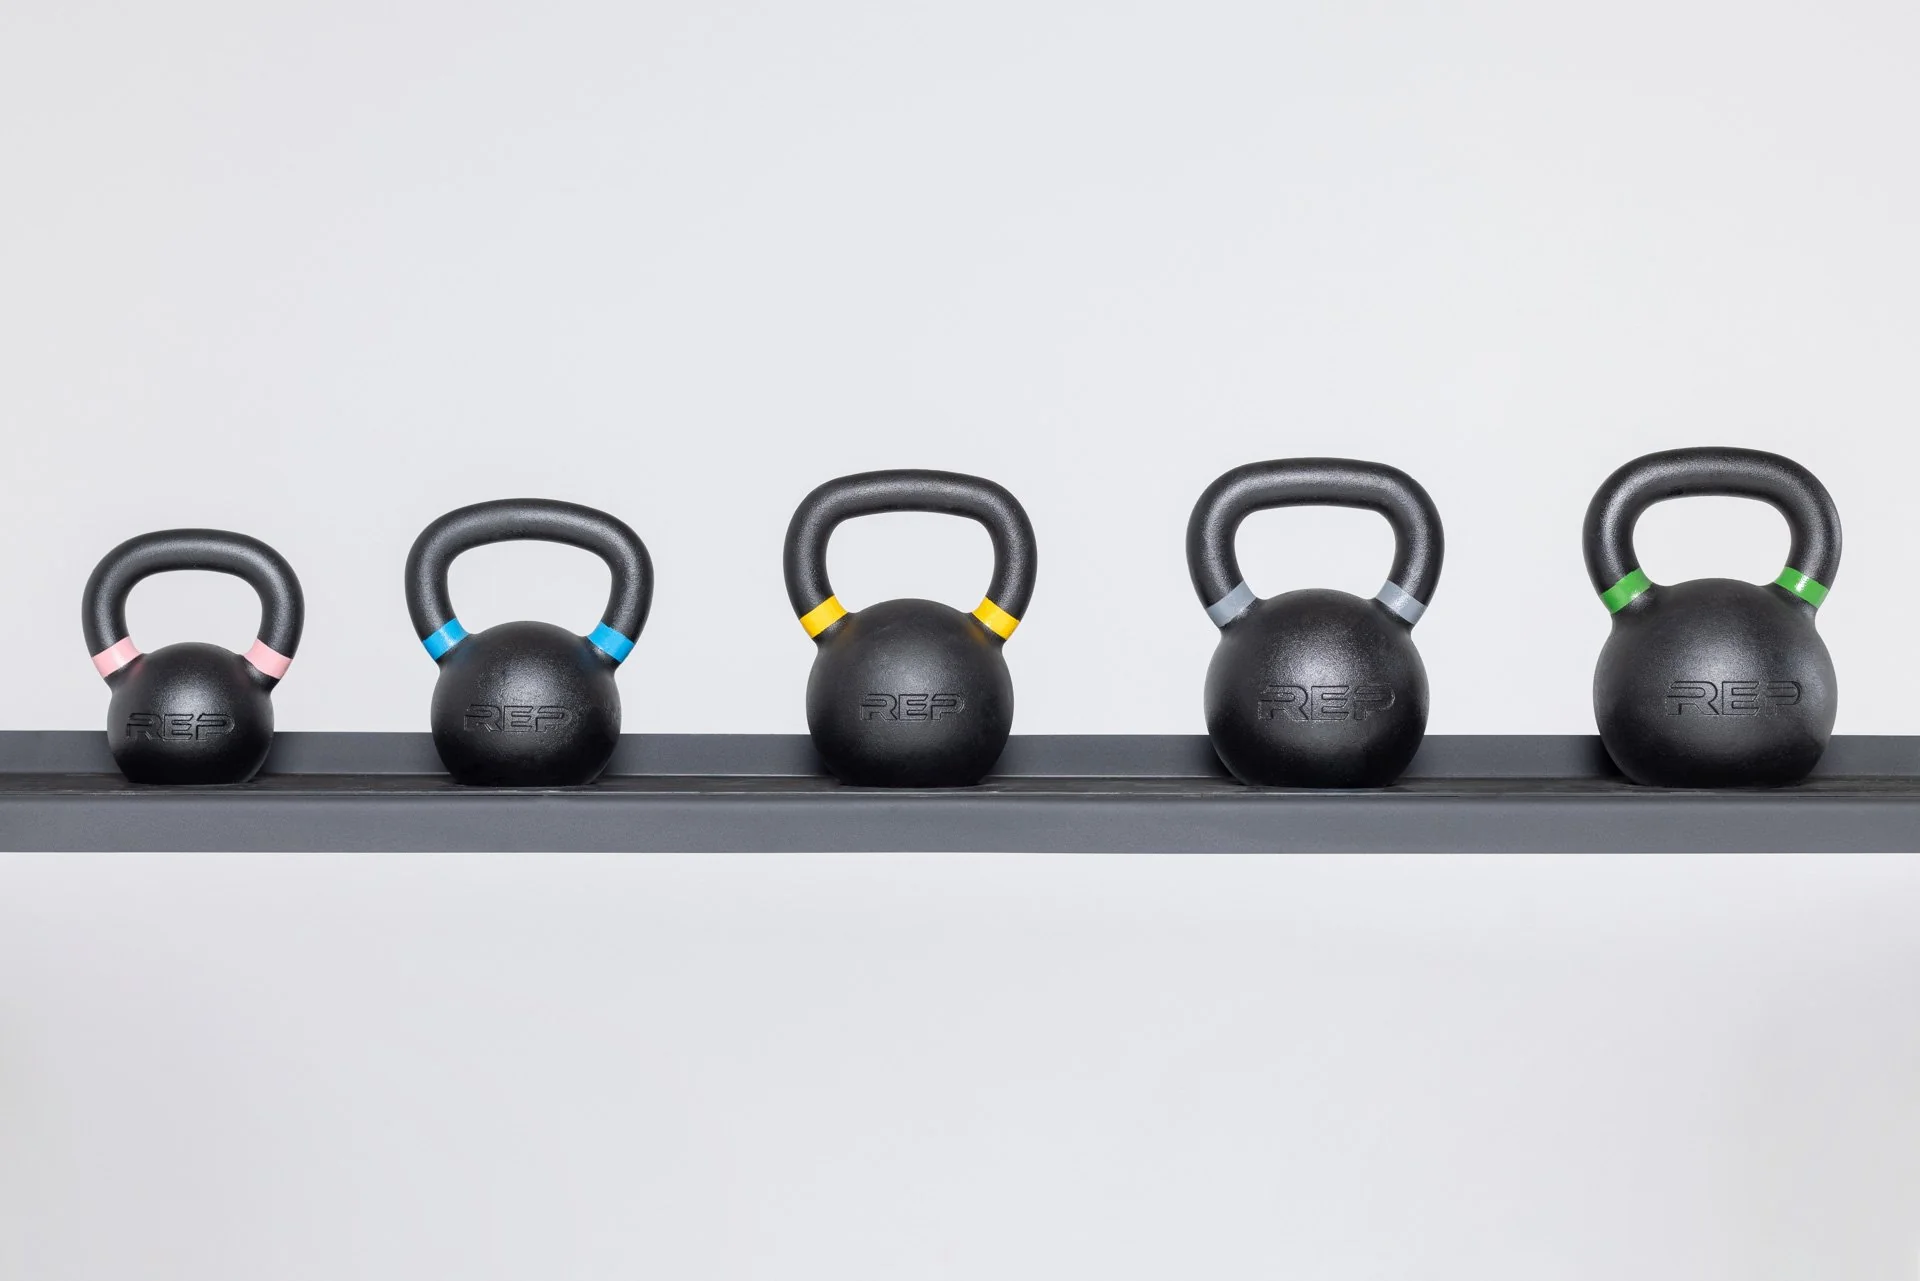
Best Kettlebells: REP Fitness Kettlebells (KG)


REP Fitness Kettlebells (KG)

  • Available in weights from one kilogram (2.2 pounds) to 48 kilograms (106 pounds)
  • Textured black coating offers a more secure grip
  • Flat base keeps the kettlebell from wobbling when on the floor
  • Comes with a limited lifetime warranty


Check Price

Pros

  • Handle holds chalk well
  • Black coating offers protection against chips and other imperfections
  • Gravity-cast construction results in a sturdier, more durable product

Cons

  • No rust protection

There are many reasons to work out with kettlebells, but I like them because I find them more versatile than dumbbells. I also like how kettlebells challenge my stability more than dumbbells due to their weight distribution.

It’s not always easy to find kettlebells that are both affordable and high quality, but the REP FItness kettlebells fit the bill. They have a gravity-cast design, meaning the iron is poured into a single mold using the force of gravity. This process enhances the kettlebells’ durability because there aren’t multiple parts attached to it that can break easily. Gravity casting also helps ensure the bottom is flat and smooth, which helps prevent the kettlebell from wobbling and makes storage easier.

The black coating gives the kettlebells a matte finish that holds chalk well, but the handle is easy to grip even if you prefer not to use chalk. However, the coating isn’t rust-proof, which is something to consider if you plan on keeping your kettlebell in a damp environment, such as a humid garage.

The REP Fitness kettlebells are available in weights from one kilogram (2.2 pounds) to 48 kilograms (106 pounds), so you have a wide range to choose from. In a home gym setting, it’s unlikely that significant damage would occur if you use and store the kettlebell properly, but the limited lifetime warranty covers defects in craftsmanship, functionality, and material if it did break.

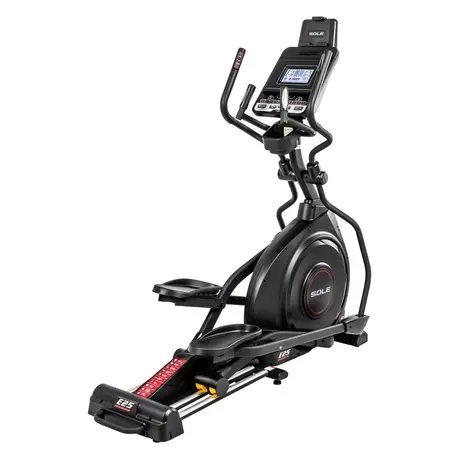
Best Elliptical: Sole E25


Sole E25 Elliptical

  • Dimensions: 70” L x 24” W x 70” H
  • 350-pound weight capacity
  • Lifetime warranty on the frame and brake
  • 20 levels of resistance and 20 inclines


Check Price

Pros

  • Built-in USB charger, cooling fans, and water bottle holder
  • Has an eddy current braking system (ECBS) that offers a quiet and smooth ride
  • Cushioned pedals with a two-degree inward slope for increased comfort during long workouts

Cons

  • No classes available on the built-in monitor
  • Large footprint

The Sole E25 may not be the fanciest elliptical on the market, but it’s a reliable option that’s suitable for anyone who wants a joint-friendly cardio machine for their home gym. The monitor clearly displays your workout metrics, the handlebars have buttons for easy adjustability of the incline and resistance, and the foot pedals have a two-degree inward slope to help reduce ankle and knee discomfort. Plus, the machine is quiet, so you won’t disturb family members during early-morning or late-night workouts.

The monitor has ten built-in workout programs, but there is no option to stream live or on-demand classes. However, the machine has a device holder, so you can follow along with workout classes on a tablet or mobile phone. There’s also a built-in USB charger, so you never have to worry about your device losing battery in the middle of your workout.

The Sole E25 is nearly six feet long and six feet high, so it’s not ideal for those who need a compact cardio machine. But if you have enough space for it and don’t want to spend a large amount of money on an elliptical, this is a solid choice.

Best Home Gym Flooring: Rubber Flooring Inc. Extreme Mats


Rubber Flooring Inc. Extreme Mats

  • 4’ x 6’ and ¾ inches thick
  • Comes with a five-year warranty
  • Made with shock-absorbent recycled rubber


Check Price

Pros

  • Do not slide around once they’re put in place
  • Will not compress over time
  • Can cut the mat with a utility knife to get a more custom size

Cons

  • Not easy to move around
  • Edges may roll up

High-quality mats are essential for any home gym because they can help prevent damage to your floors, give you a more comfortable surface to work out on, and reduce noise and vibrations if you drop your weights. The Extreme mats from Rubber Flooring Inc. are a solid choice because they’re thick, durable, and won’t compress over time, even if you place heavy pieces of equipment on top of them.

The only available size is 4’ x 6’, which may be an issue if you are outfitting a large room and need to purchase more than one mat but can’t fit all of them in your space. However, you can use a utility knife to cut the mat into smaller pieces if needed.

The mats are ¾ inches thick and weigh 96 pounds, so they’re not the easiest to move around. Plus, you’ll likely notice a strong rubber smell when you first get them. You can wash them with mild soap and water and let them air dry outdoors to get rid of the odor, but it may take a few tries before the smell goes away completely.

The edges also tend to roll up, especially when you first get them, since the mats arrive rolled up. You can resolve this by keeping stacks of weight plates, heavy dumbbells, or other weighted objects on the edges until they flatten.

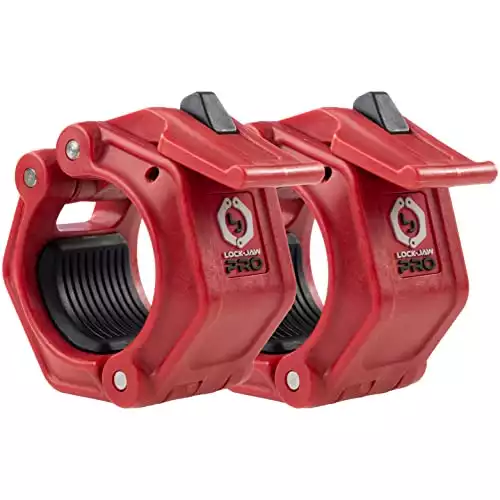
Best Barbell Collars: Lock-Jaw PRO 2 Barbell Collar


Lock-Jaw PRO 2 Barbell Collar

  • Lifetime warranty
  • Made with durable advanced composite resin
  • Patented spring-loaded snap latch design


Check Price

Pros

  • Available in a variety of colors
  • Easy to fasten and unfasten with one hand
  • Rubber pads on the interior to protect the barbell sleeves from scratches

Cons

  • Pricier than a lot of other collars

Barbell collars are necessary for keeping weight plates secured on your barbell sleeves, and the Lock-Jaw PRO 2 collars are some of the best you can buy. Whether you use them for CrossFit, powerlifting, Olympic weightlifting, or general strength training, they’ll stay clamped in place and won’t come loose. They also help prevent the weight plates from rattling or making too much noise, which is beneficial if you don’t want to disturb the people you live with as you work out.

The collars are made with advanced composite resin, a durable rust- and corrosion-resistant material. They have a spring-loaded snap latch that takes just a few seconds to fasten or unfasten, and the interiors feature rubber pads that help prevent them from sliding and protect the barbell sleeves from knicks and scratches.

Each collar weighs one pound, which isn’t significant, but you may still want to count the two extra pounds when keeping track of how much weight you lift.

The only major drawback of the Lock-Jaw PRO 2 collars is that they’re expensive. Other similar clamp-style collars are half the price, though you won’t get the same durability or strong holding power with most of the cheaper options.

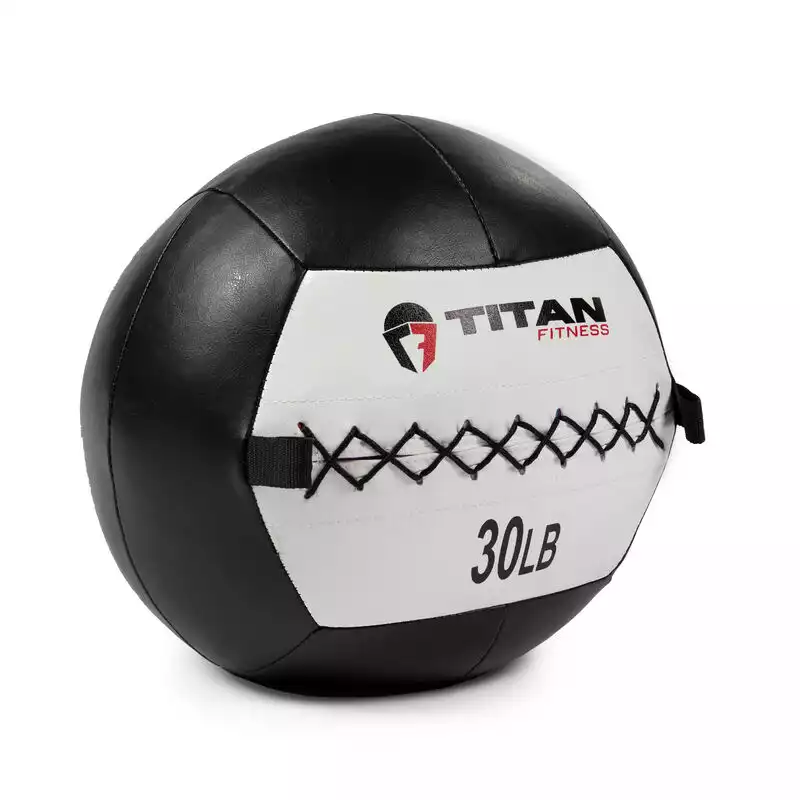
Best Medicine Ball: Titan Fitness Soft Leather Medicine Ball


Titan Fitness Soft Leather Medicine Wall Ball

  • Available in weights from six to 30 pounds
  • Double-stitched to help prevent the seams from splitting
  • Affordable price


Check Price

Pros

  • Can be used indoors or outdoors
  • Loops on each side give you a more secure grip if you use it for Russian twists
  • Weights are printed in large, clear font for easy identification

Cons

  • Can’t be used for slam ball exercises

Medicine balls are valuable tools for CrossFitters and functional fitness enthusiasts, who may perform wall balls in their workouts frequently. They can be surprisingly expensive and prone to bursting seams, but the Titan Fitness Soft Leather Medicine Ball is both affordable and durable.

It comes in weights from six to 30 pounds and has a 14-inch diameter, which is standard for this type of medicine ball. The polyurethane leather shell is smooth but grippy, so the ball won’t slip out of your hands when they get sweaty. The polypropylene cotton filling makes the medicine ball slightly malleable to reduce stress on your wrists when you catch it, but it still holds its shape well. There are also finger loops on each side to make it easy to hold onto if you use it for Russian twists or weighted sit-ups.

You can use this medicine ball indoors or outdoors, but you shouldn’t use it as a slam ball. It’s double-stitched to help prevent the seams from splitting when thrown against a wall, but using it for ball slams increases the risk of the seams bursting.

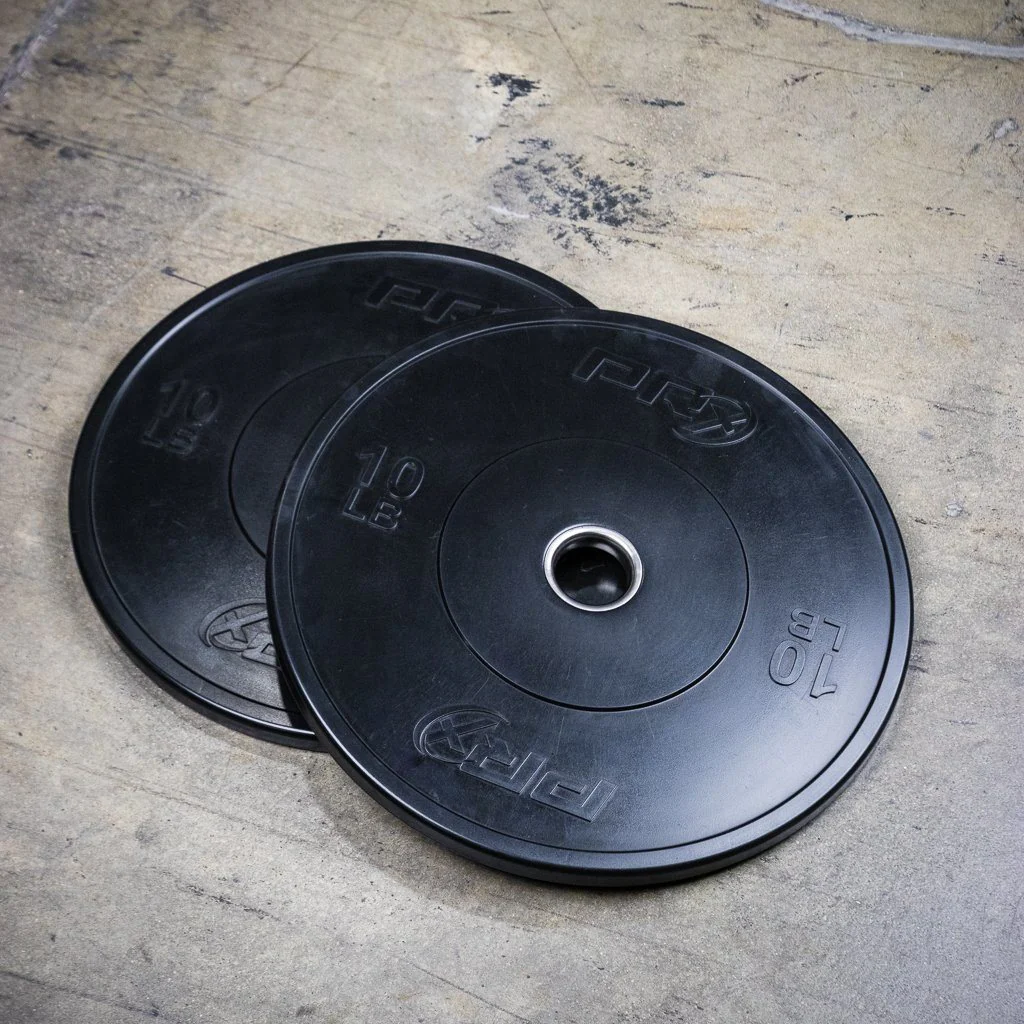
Best Weight Plates: PRx Prime Bumper Plates


PRx Prime Bumper Plates

  • Available in 10, 15, 25, 35, or 45 pounds
  • Sold in pairs or in 160- or 260-pound sets
  • 17.75-inch diameter
  • 90-day warranty on the 10-pound and 15-pound plates
  • Two-year warranty on the 25-, 35-, and 45-pound plates


Check Price

Pros

  • Raised lip makes it easier to hold the plates when loading or unloading the barbell
  • Low bounce
  • Durable

Cons

  • Not color-coded

Bumper plates are ideal for home gyms because they can cause less damage to your floor and are quieter than iron plates when you drop them. The PRx Prime Bumper Plates are an excellent option due to their low bounce, high-quality construction, and durability. As with any other set of bumper plates, you can drop the PRx Prime Bumper Plates, though PRx recommends not dropping a barbell loaded with only the 10- or 15-pound plates. Doing so can damage the inserts and voids the warranty.

The glossy rubber can feel slick, especially when your hands get sweaty or if moisture accumulates on them from humidity in your garage. But the raised lip along the border helps alleviate that issue and makes the plates easier to grab onto when loading or unloading the bar.

The Prime bumper plates are only available in black rubber, which is suitable for casual lifters but may be an issue for competitive weightlifters who prefer to train with color-coded plates like the ones used in competitions.

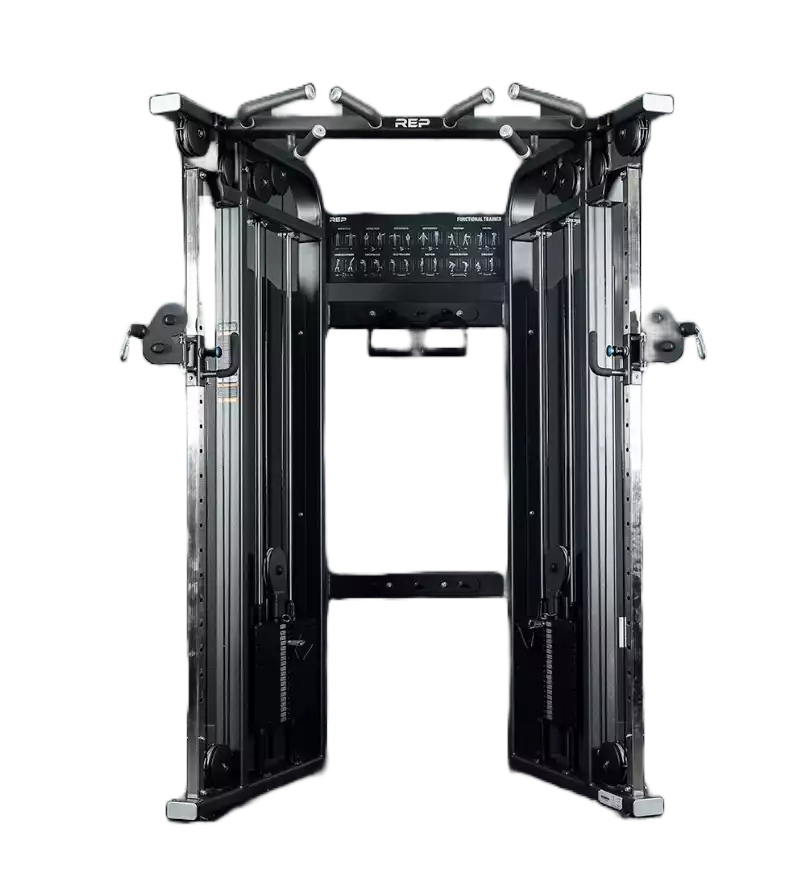
Best Cable Machine: REP Fitness FT-5000 2.0 Functional Trainer


REP Fitness FT-5000 2.0 Functional Trainer

  • Dimensions: 85.5” H x 58” W x 36” D (rear width is 33”)
  • 11-gauge steel frame
  • 224-pound weight stacks on each side
  • Multi-grip pull-up bars


Check Price

Pros

  • Comes partially pre-assembled
  • Etched numbers on the uprights make it easy to line up the handles
  • Includes storage pegs for attachments

Cons

  • May not be high enough for tall individuals to do pull-ups

A cable machine lets you perform upper body and lower body isolation exercises that aren’t possible with barbells and dumbbells, like tricep pushdowns and cable crossovers. However, most people can’t find a large cable machine in their garages or basements. The REP Fitness FT-5000 2.0 Functional Trainer is an ideal solution for home gym owners who want to do cable exercises but don’t have a lot of space.

This compact machine is the second iteration of REP Fitness’s popular functional trainer. It has cables and pull-up bars, allowing you to strengthen all of the smaller muscle groups in the body through a combination of resistance and bodyweight training. However, since the machine is just over eight feet tall, it may not be high enough for taller individuals to do pull-ups without bending their knees.

The frame is made of sturdy and durable 11-gauge steel and is coated a with chip-resistant electrostatic coating. The machine comes with two D-handles, but you may want to consider purchasing additional cable machine attachments to add more variety to your workouts.

The first iteration of the FT-5000 used nylon pulleys, but REP Fitness switched to aluminum pulleys in the upgraded model. Aluminum pulleys tend to wear faster in functional trainers in commercial gyms where dozens of people use the equipment every day. But the FT-5000 2.0 is designed for home gyms, where it doesn’t have to withstand as much abuse, so aluminum is a better choice for the pulleys because it won’t put as much wear and tear on the cables.

The weight stacks on each side go up to 224 pounds, but they have a two-to-one ratio, meaning 25 pounds will feel like 12.5 pounds. This is an advantage because the cables travel faster and more smoothly, so they won’t get stuck or feel jerky as you work out.

It’s important to note that the weights go up or down in 2.5-kilogram increments instead of pounds. For example, the first weight starts at 5.7 kilograms (12.5 pounds), then goes up to 8.2 kilograms (18 pounds), and so on. This is odd since most people buying the FT-5000 2.0 live in the US, where we use the imperial system. The weight in pounds is provided on the weight stacks as well, but the fact that the weights don’t go up in even 2.5- or five-pound increments may be annoying to some.

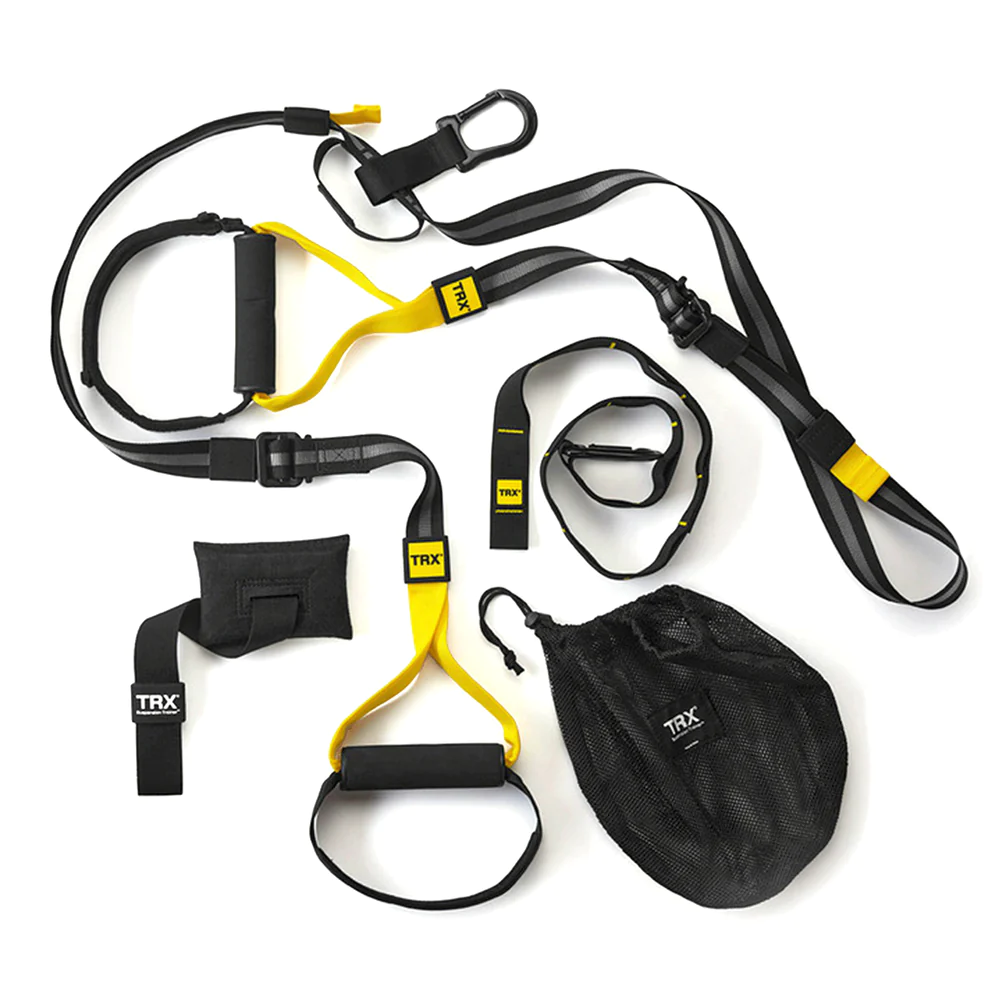
Best Suspension Trainer: TRX Home2 System


TRX Home2 System Suspension Trainer

  • Door anchor, suspension anchor, and mesh carrying bag are included
  • Comes with a 30-day trial to the TRX Training Club app
  • Two-year warranty


Check Price

Pros

  • Doesn’t require a lot of space
  • Foam handles are comfortable to hold
  • Foot handles are adjustable
  • Can set it up anywhere you have access to a sturdy anchor point

Cons

  • Expensive

A suspension trainer like the TRX Home2 System can help you get stronger, improve your flexibility, increase muscular stability, and make your cardio workouts more challenging — all while using your own body weight as resistance. Since there are no large or bulky pieces required, it can fit into an apartment or any other small home gym space, and you can set it up indoors or outdoors in just a few seconds.

The system comes with durable nylon webbing straps, two foam-padded handles, a door anchor, a suspension anchor, and a mesh carrying bag. The nylon straps can support up to 350 pounds of weight, and the foam on the handles is comfortable to hold but firm enough that it won’t compress under your grip. The door anchor enables you to set up the system anywhere indoors, while the suspension anchor lets you secure the straps to a tree, pole, or another sturdy anchor point outside.

With your purchase, you get a 30-day free trial to the TRX Training Club app, which has thousands of workouts you can stream live or on-demand. The app is a great resource if you don’t know how to get started with your TRX Home2 system. If you decide to continue with the app after the trial, it starts at just $5.99 per month.

RELATED: 5 Suspension Trainer Moves to Build Core Strength

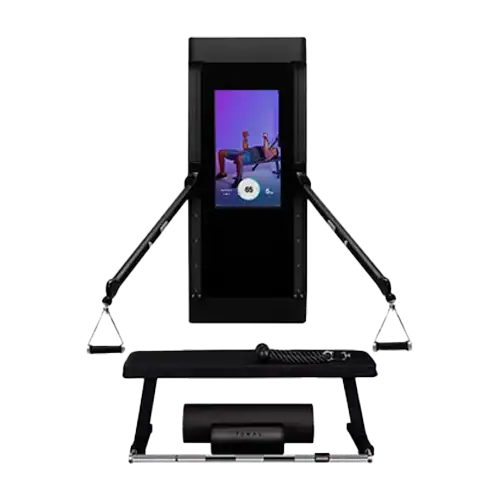
Best Smart Home Gym: Tonal


Tonal Home Gym

  • Digital resistance goes up to 200 pounds
  • Sensors in the unit that assess your form in real time
  • Comes with a 30-day trial period


Check Price

Pros

  • Offers both live and on-demand classes
  • Automatically adjusts the resistance level based on well you’re doing
  • Allows you to do both compound and isolation exercises

Cons

  • Requires a monthly subscription in addition to the cost of the unit
  • Accessories aren’t included
  • Must be installed by a professional

A common concern amongst those considering building a home gym is that their workouts won’t feel challenging or exciting, especially if they don’t have room to store various pieces of equipment. Tonal helps alleviate those concerns by offering a space-saving unit with hundreds of interactive classes that can deliver full-body workouts and help you improve your stamina, strength, and flexibility.

Tonal is a wall-mounted unit featuring a 24-inch touchscreen monitor with two pulleys on either side that offer resistance of up to 100 pounds each. The unit is only 21.5 inches wide and 50.9 inches high, so it won’t take up much room on your wall. However, Tonal recommends a footprint of at least seven feet by seven feet, as well as a ceiling height of 7’10”, to have enough space to work out safely. This might seem like a lot, but considering you won’t have things like a squat rack or a dumbbell storage rack taking up valuable floor space, Tonal is still a space-efficient option.

To get the most out of Tonal workouts, you need the smart accessory bundle, which includes smart handles, a smart bar, a rope attachment, a bench, a foam roller, and a workout mat. However, the accessory bundle costs an additional $495 — a hefty price when you’re already paying for the unit (which costs nearly $4,000) plus the monthly subscription (which costs around $60 per month).

While you can manually adjust the resistance level on the smart bar or handles with the push of a button, Tonal’s AI technology will also automatically adjust the weight based on your performance. If it thinks you’re not challenged enough, it will increase the weight. If you appear to be struggling, it will decrease the weight.

Tonal also provides real-time feedback on your form, so you can quickly make adjustments to ensure you perform each movement correctly. These are especially useful features for beginners, who may not yet have the body awareness to realize whether or not they’re being challenged enough or using the right technique. They’re also helpful for those who may be unintentionally coasting through their workouts and not pushing themselves hard enough.

How We Chose the Best Home Gym Equipment

We know that everyone has different fitness goals, budgets, and space requirements. When compiling the list above, we chose a variety of equipment and machines, so you can build an ideal home gym setup that allows you to do the cardio or weight training workouts you enjoy the most.

While some of the workout equipment we chose is on the pricey side, we picked products that offer the most value for money — in many cases, even though they require a large upfront investment, they are pieces that should last for years if you maintain them properly. We also included some space-efficient solutions, like the PRx Profile® PRO foldable squat rack and the Snode AD80 adjustable dumbbells, for home gym owners with limited space.

Benefits of a Home Gym

I started building out my garage gym around six years ago, and I’ve been working out exclusively in it for the past three years. Based on my experience, below are some of the biggest benefits of owning a home gym.

  • You can work out whenever you want. Working out at home means you’re not tied to a gym’s hours of operation or class schedules. You can train at whatever time is most convenient for you, whether it’s at four o’clock in the morning or midnight.
  • You don’t have to wait for equipment. One of the most frustrating things about going to a public gym is waiting for equipment to become available, especially during peak hours. When you have a home gym, the equipment is all yours, and you can use it whenever you want without waiting for someone else to finish their workout.
  • You can save money. A lot of fitness equipment is expensive and costs a lot of money upfront, but it’s more cost-efficient in the long run. For example, say a membership at your local gym costs $50 per month ($600 per year). You can get a squat rack for about $1,100 and a barbell for about $300. After about two and a half years, you would have spent the same amount of money on a gym membership as you did on the barbell and squat rack — except the gym will keep charging you for as long as you remain a member, while you likely would have already paid off the cost of your barbell and squat rack.
  • You can work out in private. If you’re an introvert like I am, one of the things you’ll probably enjoy most about working out at home is privacy. You don’t have to worry about getting overwhelmed in a crowded space or asking people if you can share equipment with them.
  • You don’t have to worry about childcare. Not all gyms offer childcare services, making it hard for parents to keep up with a consistent fitness routine. When you own a home gym, you can work out during your child’s nap time or let them play with some toys in your gym area so you can keep an eye on them while you work out.
  • There’s no commute. If you have to drive a long distance to get to the nearest commercial gym, an hour-long workout can be more like an hour and a half or two hours when you factor in the length of your commute. Not having to drive to the gym leaves you more time to spend with your family at the end of the day, get ready for work in the morning, or run important errands during the afternoon.

What To Consider When Buying Home Gym Equipment

How much money you’re willing to spend, how much room you have for equipment, and your fitness goals are all important to think about before building a home gym. It’s also beneficial to look at the warranty periods each brand provides, as they’ll prevent you from spending even more money if your equipment breaks due to the manufacturer’s defects.

Budget

Whether you plan to buy one piece of equipment, like a treadmill, or multiple items, like a barbell, squat rack, and weight plates, budget is important to keep in mind. You can easily spend several thousand dollars on a fully decked-out home gym with multiple cardio machines, a top-of-the-line squat rack and barbell, and several sets of dumbbells and kettlebells.

However, there’s no need to spend that much if you don’t have a ton of extra cash lying around. There are many at-home workouts you can do with just a pair of dumbbells or a kettlebell, so you may want to start there. You can save money for higher-priced items and gradually add to your home gym over time.

Training Goals

The type of equipment you’ll need for your home gym will depend on your goals. For example, if you want to train for powerlifting, you’ll need a barbell, a squat rack, a weight bench, weight plates, and workout mats to protect your floors. If you’re training for a marathon and want to be able to run when the weather’s bad, you’ll need a treadmill that’s comfortable to run on for several miles. If you just want to stay in shape and live a healthier lifestyle, a stationary bike and a pair of adjustable dumbbells may be all you need.

Available Space

Any home fitness equipment you buy will need to fit in your garage, basement, or wherever you plan on building your workout space. Measure carefully, and block out the areas where you imagine your equipment going with chalk or tape to help you visualize how everything will fit. You’ll save yourself some major headaches and the hassle of having to re-package and ship equipment back to the retailer if it doesn’t fit.

Warranties

While your home gym equipment won’t see as much use as the equipment in a commercial gym, there is still a chance it can become damaged. Look for brands that offer long warranty periods on their equipment, especially when buying larger products or things that have a lot of different parts, such as squat racks, treadmills, or functional trainers. A warranty likely won’t cover all damage — for example, a manufacturer may void the warranty on your squat rack if it falls apart because you loaded a barbell with more weight than it can hold — but it should offer a safeguard against manufacturer’s defects or faulty craftsmanship.

Final Thoughts

Whether you want a comprehensive home gym with various pieces of strength and cardio equipment or something simpler with just a pair of dumbbells and a stationary bike, the list above has you covered. You definitely don’t need every product on this list to perform effective workouts at home, so it’s important to determine your fitness goals and narrow down your options to the items that will help you reach those goals. And if you can’t afford to buy everything you want at one time, start with one or two essentials and add on from there. You can gradually build your home gym over time until you have everything you need.

FAQs

What home exercise equipment is the most effective?

Determining the most effective home exercise equipment requires you to first decide on your goals. If you want to lose weight, a treadmill or rower may be the most effective because running and rowing burn lots of calories. If you want to get stronger, a squat rack, a barbell, weight plates, and some dumbbells will be the most effective pieces of equipment.

What equipment should be in a home gym?

The equipment that should be in your home gym will depend on your goals, budget, and space. You can do a lot with a pair of dumbbells or a kettlebell if you’re short on space and have a strict budget. If you have specific goals, such as running a marathon or competing in powerlifting, you’ll need to buy sport-specific equipment that can support training for those goals.

What is the most versatile piece of home gym equipment?

An all-in-one station like the Force USA X20 Pro Multi Trainer is the most versatile piece of equipment. Although it’s expensive, you can use it for barbell movements like squats, bodyweight exercises like pull-ups, and cable exercises like low cable rows. If you don’t have room for a large functional trainer, kettlebells offer a lot of versatility because you can use them for both strength training and cardio.

The post 20 Best Home Gym Equipment Essentials for Cardio, Strength Training, and More appeared first on Breaking Muscle.

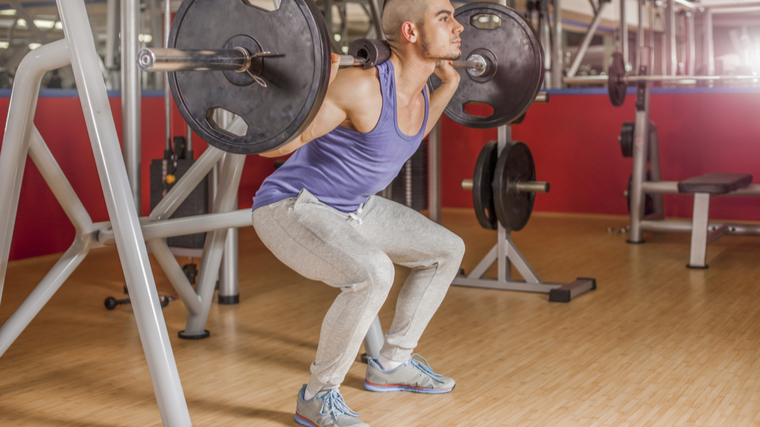
Be Nice and Share!
This post was originally published on this site

Originally Posted At: https://breakingmuscle.com/feed/rss

It’s still a ways off, but bodybuilder Hunter Labrada has set his sights on a redemptive performance at the 2023 Olympia. Following a disappointing seventh-place finish at the 2022 edition, Labrada vowed to return stronger as a competitor. He even promised a more streamlined physique focused on aesthetics rather than sheer size. Based on a recent update, he appears to be a man of his word.

On June 7, 2023, Labrada posted a video to his Instagram channel where he runs through a gamut of standard bodybuilding poses to show off his current physique. Given a simultaneously stacked and ripped look for one of the more prominent names in the sport, whatever Labrada is doing in the gym and in the kitchen seems to be working quite well thus far.

Per the caption of Labrada’s post, he maintained he’s staying more diligent than usual with his regimen. As the 2023 bodybuilding season heats up, the athlete said he’s keeping a keen eye over his look on a daily basis. He even detailed some notable shifts to his diet, especially as he centers less on mass-building.

Like his peer in reigning four-time Classic Physique Olympia champion (2019-2022) Chris Bumstead, Labrada also seems to appreciate his eating less as a path to improved sleep. It looks like a world of fitness possibilities has opened for Labrada now that he doesn’t have to worry about fitting another meal into his overall schedule.

“One of the biggest changes I want to highlight is I went from six meals a day to five!” Labrada explained. “The reason: I get two hours more of sleep! I found myself just staying up to eat a lot recently, and now that the food was low enough for it not to mess with my digestion, I told [Ben Chow, Labrada’s trainer] I wanted to give it a try and I’m glad I did! The meals are more satiating, and I’m recovering even better with the extra sleep!”

Before Labrada can even conceive of an improved Olympia performance in Orlando, FL, this November, he must first earn his qualification. At the start of 2023, the International Federation of Bodybuilding and Fitness (IFBB) changed the Olympia qualification system for all divisions. The shift necessitates only past winners and top-five finishers from the previous Olympia iteration possess roster spots by default.

By virtue of his seventh-place result from 2022, Labrada is on the outside looking in for the time being. In what perhaps further signifies his mentality this year, Labrada plans to compete in both the upcoming 2023 Texas Pro on August 18-19 in Arlington, TX, and the 2023 Tampa Pro on August 3-5 in Tampa Bay, FL. Labrada will have to win at least one of the contests to secure his place at the 2023 Olympia. Nonetheless, he could understandably have the lofty ambition to triumph in both.

In the current pantheon of Men’s Open bodybuilders, Labrada has a lot of work to catch up to some of his superstar peers, like defending Mr. Olympia champion Hadi Choopan and the 2022 runner-up in Derek Lunsford. At the very least, he seems to understand precisely how to fill in any gaps — by working as hard as possible.

Featured image: @hunterlabrada on Instagram

The post Hunter Labrada Looks Shredded Before Taking on 2023 Texas Pro and 2023 Tampa Pro appeared first on Breaking Muscle.
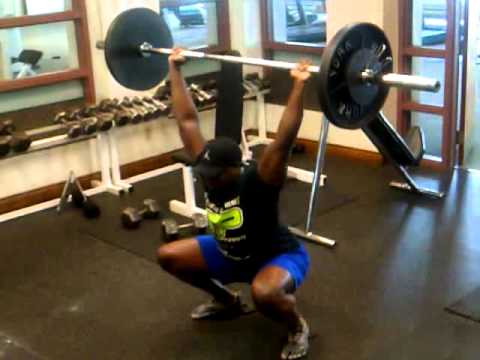
Be Nice and Share!
This post was originally published on this site

Originally Posted At: https://breakingmuscle.com/feed/rss

The lat pulldown and the pull-up are staples across many training programs — sometimes even coexisting within the same workout. Both exercises train the “vertical pulling” movement pattern and can be highly effective for targeting your back muscles, which is why some lifters regard them as nearly interchangeable. Despite how visually similar the movements may seem, they can actually offer pretty significant and distinct benefits.

long-haired person in gym doing pull-ups
Credit: Microgen / Shutterstock

Whether you should focus on pulldowns or pull-ups can depend on a few factors, including your experience and your goals. From technique, programming, and step-by-step execution, here is everything you need to know about these foundational back-building exercises.

Lat Pulldown and Pull-Up

Exercise Differences

Recognising the differences between the lat pulldown and the pull-up can put you on the fast track for better results. Some key differences involve the equipment used, or lack thereof. Some relatively subtle, but significant, differences in programming can also be found.

Human Body vs. Machine

The major visual difference between the lat pulldown and pull-up is the fact that one is a bodyweight exercise and the other requires a full cable station. This brings with it two major considerations.

The lat pulldown uses a specialized cable stack pulley system to anchor your body in place while you move an adjustable weight stack, whereas the pull-up simply requires a fixed overhead bar that can support your body weight.

Two people in gym doing pull-ups on an overhead bar
Credit: Ground Picture / Shutterstock

This can affect the relative ease of implementing each exercise into your program based upon availability of equipment, as well as your own capabilities — body weight pull-ups may be too challenging for beginners, while pulldowns can accommodate lifters of any experience or strength level.

As a calisthenics exercise, the pull-up places a greater stabilization challenge on your entire body, from your back and shoulders through your core to your lower body. The stable machine and fixed anchor points provided by the pads on a lat pulldown machine make it tremendously easier to take a seat and get to work. The machine itself provides stabilization, so you can focus targeting your back muscles.

Loading

One of the largest differences between the lat pulldown and pull-up is the range of resistance you can use. The lat pulldown is a highly adjustable machine that simply requires you to add more plates or lower the pin on the weight stack further and further — sometimes exceeding a comparable pull-up load.

The lat pulldown is more scalable than a pull-up — the resistance can be quickly and easily reduced to allow relatively weaker lifters to perform the exercise. Aside from getting creative using resistance bands to assist a pull-up or having access to a dedicated assisted pull-up machine, it can be quite challenging to overcome the baseline level (your body weight) needed to perform a pull-up. This is especially true if you want to perform multiple repetitions per set.

Sets and Repetitions

Similar to the differences in loading, the lat pulldown and pull-up are often paired with distinct set and repetition schemes. For many people, the pull-up is an upper body strength movement that lives in a lower repetition range. Whereas, the lat pulldown typically exists as an effective muscle-building tool that thrives with more moderate repetitions.

You’ll often see pull-ups performed for two to three sets of anywhere from one to 10 repetitions. While the pulldown could be performed with much heavier weights for low-rep sets, it’s nearly impossible to maintain strict form with such programming due to poor leverage. Having your lower body and core locked into position becomes a limiting factor.

In contrast, a lat pulldown is typically done for two to four sets of eight to 12 repetitions. Reaching that type of volume with pull-ups is typically reserved for experienced lifters of a significant strength level, either performed with added weight or with body weight alone.

Exercise Similarities

While there can be several key differences, the lat pulldown and pull-up do share some significant overlaps to consider, as well. They will hit many of the same primary muscle groups, both require some degree of overhead mobility, and the exercises share many basic variations.

Muscles Worked

The lat pulldown and pull-up primarily target your latissimus dorsi — a large swath of muscle located on either lateral side of your back. While the latissimus dorsi (lats) are the prime mover, both exercises will also heavily involve your upper back, biceps, and varying degrees of core musculature to stay in an efficient pulling position.

Mobility Requirements

The vertical pulling pattern used in both exercises requires you to be able to successfully, comfortably, and safely get your arms fully extended overhead. While that may sound simple enough, shoulder mobility and joint health is a very important component of avoiding training-related aches or pains in the long-term.

Muscular man performing lat pulldown in gym
Credit: martvisionlk / Shutterstock

If you can achieve the overhead position effectively, both the lat pulldown and pull-up can be effective at maintaining your overhead mobility, especially when you focus on working through a full range of motion in the stretched (overhead) position.

Grip Variations

When it’s time to introduce exercise variety, the lat pulldown and pull-up can both allow narrow or wide hand positions, which can alter the muscle emphasis from your lats to your upper back or even your biceps. (1)

Both exercises can also be performed using unique grip orientations, from neutral-grip to overhand or even freely rotating (using individual handles or straps to allow your wrists to rotate during each repetition). Like grip width, changing the orientation of your hands and forearms is an effective way of altering muscle recruitment by making slight adjustments. (2)

Technique Differences

The lat pulldown and pull-up have some definitive technique differences. Because one is a calisthenics exercise and the other is performed while seated on a machine, your overall body position will affect exercise technique.

Hollow Body

The hollow body is a full-body bracing technique that helps to create a rigid body posture. The high level of total body tension it creates allows you to better control your movement through space. This technique is especially important during the pull-up, where you will be freely moving without any anchor points aside from your grip.

YouTube Video

In order to successfully perform a pull-up, establishing a strong hollow body technique is essential to maintain stability. The lat pulldown, on the other hand, provides this stability on your behalf by offering leg pads to hold you in place.

Torso Angle

Your torso angle during each repetition is a major difference between the pull-up and lat pulldown. Because your lower body is secured under the knee pads, the lat pulldown allows you to manipulate your torso angle to target subtly different muscles. A greater degree of backward lean could emphasize more of your upper back, whereas a more vertical torso angle puts your upper back into a less advantageous position and emphasizes lat activation.

On the other hand, fairly consistent technique and upper body position is required for a proper pull-up. From a dead-hang position (gripping the bar with your arms fully straightened), you must set your shoulder blades by first “shrugging” yourself up. In doing so, you will be able to better leverage your latissimus dorsi to complete the rep and actually pull you up.

When you get this technical cue right, you will have a slightly backward-leaning torso angle while performing each repetition, but nowhere near the freedom of motion provided by the lat pulldown machine.

Lower Body Position

Your lower body positioning will certainly be a notable difference in each exercise. Similar to the stability requirements during the hollow body technique in the pull-up, your leg position will be affected by the need to stay rigid. Fully lock your legs out, leaving them either hanging straight down or angled slightly ahead of your body. You cannot achieve a strong, stable hollow body position with bent legs.

With a lat pulldown, you will be in a completely seated position with your feet flat on the ground driving your knees up against the pad. While some lifters disregard the knee pad and let their heels leave the ground during pulldowns, this poor form doesn’t add any benefit and only reduces your stability and upper body pulling power.

How to Do the Lat Pulldown

Sit on the lat pulldown machine and adjust the knee pads to snuggly anchor your legs in place with your feet flat on the ground. Stand back up and grab the lat pulldown bar evenly, about shoulder-width apart, with an overhand grip.

Brace your full body and sit down, securing your legs under the knee pads. Squeeze the bar tight, brace your core, drive your legs into the knee pads by performing a static calf raise.

YouTube Video

Lean back slightly and pull the bar toward your chest. Focus on feeling your back squeeze in the bottom position before straightening your arms to return to the starting position.

Form Tip: Be diligent to avoid momentum. Secure your body in the machine and brace hard – only move the bar by squeezing your back and pulling with your arms. Do not excessively sway your torso backwards. 

Benefits of the Lat Pulldown

  • The lat pulldown has a high degree of stability, making it a more effective way to focus on the back muscles.
  • The pulldown machine offers highly scalable loading, making it easy to perform for lifters of all experience levels.
  • Multiple handle attachments allow many variations for different benefits.
  • It’s relatively safe to take this exercise close to muscle failure.

Lat Pulldown Variations

The majority of effective lat pulldown variations will capitalize on different handle attachments to slightly change your technique and alter muscle recruitment.

Close-Grip Pulldown

Close-grip pulldowns draw your hands slightly closer together than the standard, shoulder-width grip. This increases the amount of leverage your lats have and slightly increases the range of motion — both of which can lead to a stronger training stimulus.

YouTube Video

The close-grip pulldown can make the exercise more effective when you’re just learning general technique by delivering a strong training stimulus without needing heavy weight.

Wide-Grip Pulldown

Wide-grip lat pulldowns place your hands slightly farther apart than the standard issue grip placement. This will put your lats at a greater disadvantage, making some of the supporting musculature in your upper back, shoulders, and arms contribute more. This will also reduce the load you’ll be able to lift.

YouTube Video

This is a great exercise to fill gaps in your physique or in your strength development. By strengthening relatively weaker links, wide-grip pulldowns can also prolong the amount of time you can make progress before adding weight.

Dead-Hang Pulldown

The dead-hang style of lat pulldown will have you fully “relax” your shoulder blades and assume a completely upright torso between each repetition. Your teres minor (a small shoulder muscle) will get some added work helping to stabilize your shoulder for each repetition.

YouTube Video

This is a great way to gain, and maintain, shoulder stability. The increased muscle recruitment will also help upper back development.

Single-Arm Pulldown

The single-arm lat pulldown turn the exercise into a unilateral (single-sided) version. This forces each side of your body to work independently of the other, which will greatly help to accommodate any body size or shape while addressing any natural asymmetries.

The single-arm pulldown is also a tremendously effective way to add more progression time to your lat pulldown exercise by essentially doubling the amount of load each side will have access to.

How To Do The Pull-Up

Perform the pull-up by grabbing a straight bar that is high enough for your legs to dangle freely without touching the ground. Use a small box or (safely) jump to grab the bar with an overhand grip approximately shoulder-width apart.

Perform a hollow body technique by flexing your core, depressing your shoulder blades, engaging your glutes, and locking your quads.

YouTube Video

Engage your lats and flex your arms to pull your chest toward the bar. Once you have reached the highest point that you can pull yourself to, slowly lower back to the starting position using control. Maintain your brace and perform for your target repetitions.

Form Tip: Be diligent about maintaining hollow body tension and eliminating any lower body sway. Performing a pull-up gets exponentially more difficult when you have to counter any unneeded movement. Stay braced and aim to start each repetition from a motionless position. Swinging your hips and legs may help you perform more reps, but it reduces muscular stress on your back.

Benefits of the Pull-Up

  • The pull-up requires little-to-no equipment.
  • Bodyweight exercises can improve coordination and proprioception (body awareness) which can carryover to general athleticism.
  • Scalable to suit either strength or hypertrophy goals when appropriate programming and loading is used.

Pull-Up Variations

Pull-ups can be modified to attack a few different goals. Similar to pull-ups, changing your grip position can deliver some unique benefits.

Wide-Grip Pull-up

Wide-grip pull-ups place your upper back (teres minor) on blast. A wider grip will make it harder on your lats, but also put a bigger emphasis on your ability to maintain the right shoulder positioning for each repetition.

YouTube Video

When you’re looking to train nearly your entire upper body, while also seriously roasting your shoulder stability, use the wide-grip pull-up.

Neutral-Grip Pull-up

On the opposite side of things, a neutral-grip pull-up places you in a much more inherently stable position. The relatively closer grip and neutral (palms facing in) hand placement will make it easier to harness your back muscles to pull you up, but also take some of the shoulder stability challenge away.

YouTube Video

When you’re looking to go for moderate or higher reps, or build a foundation of strength and muscle, neutral-grip pull-ups are a great option.

Towel Pull-up

Towel pull-ups are a huge boost to your grip strength. This low-tech modification, draping a simple (but sturdy) towel over a bar, will seriously challenge your ability to simply hang on.

YouTube Video

If you’re in the market for a stronger grip and bigger arms — and if you can already perform more than a handful of pull-ups — challenge yourself with towel pull-ups.

When to Program the Best Pulling Movement for Your Goal

There are several instances where either the lat pulldown or pull-up might be the better option. Your specific goals and training experience are unique factors to consider.

Beginner

When you’re a beginner, you’ll be looking to build a base of muscle and strength before eventually launching into a more structured and challenging program. With that in mind, you may struggle with pull-ups because they can be very unforgiving.

While there are ways to make pull-ups more accessible for beginner lifters, such as using resistance bands for assistance, oftentimes a pull-up is a bit of a tall order. Instead, spending some time building a super-strong lat pulldown can be a relatively lower barrier to entry. Once you’ve accomplished this, either option is freely available and effective.

Muscle Gain

Both the lat pulldown and pull-up can be very effective muscle-building tools, but there are some subtle differences that likely edge the lat pulldown ahead. The lat pulldown is a more stable training tool. This means that there will be less “moving parts” in your way while you chase highly stimulating sets that accumulate volume needed to build your back. (3)

The lat pulldown also allows for a slow, controlled, and incremental increase in loading which once again provides a boost to long-term muscle growth. The pull-up is great in its own right, but it’s hard to beat the lat pulldown for pure muscle gain.

Strength Gain

Gaining strength can be accomplished with both the lat pulldown and pull-up. However, the lat pulldown can more easily be loaded and trained for strength-focused results. With that in mind, it’s going to offer you more lat-specific strength.

On the other hand, the pull-up, as a bodyweight exercise, is more of a full-body exercise. In this instance, the pull-up will help build greater full-body strength. If you want better overall strength potential, emphasizing the pull-up will likely be the better option.

Limited Equipment

When you don’t have access to a gym, the choice is a simpler one. The lat pulldown literally requires a machine, which likely is only accessible through a commercial or home gym equivalent.

While a pull-up bar may seem mandatory for doing pull-ups, it is not actually required. A pull-up can, technically, be performed anywhere you have access to a strong, stable anchor point to safely grab. The pull-up wins when you have limited equipment. 

Advanced Athlete

If you’re an advanced athlete in nearly any sport, it’s a toss up. Once you’ve developed a strong base of muscle, strength, and coordination, both the pull-up and lat pulldown can be tailored to your needs.

Both can be loaded and progressed, both have unique variations to prolong your progress, and both are relatively easy to master after a short amount of focused time. Depending on your goals or needs, either the pull-up or lat pulldown (or even both) can be effectively programmed for athletic goals.

Prioritize Your Pulls

The lat pulldown and pull-up are both iconic staples of weight training. The exercises have unique benefits, times of superiority, and some clear drawbacks. Depending on your training age, goals, and available equipment, one option may jump out as the obvious choice. Review the information and make the best decision for your goals. Prioritize your pulls for some big gains and, one day, both classic movements may find their way into your program.

References

  1. Andersen, V., Fimland, M. S., Wiik, E., Skoglund, A., & Saeterbakken, A. H. (2014). Effects of grip width on muscle strength and activation in the lat pull-down. Journal of strength and conditioning research, 28(4), 1135–1142. https://doi.org/10.1097/JSC.0000000000000232
  2. Signorile, J. F., Zink, A. J., & Szwed, S. P. (2002). A comparative electromyographical investigation of muscle utilization patterns using various hand positions during the lat pull-down. Journal of strength and conditioning research, 16(4), 539–546.
  3. Schoenfeld, B. J., Contreras, B., Krieger, J., Grgic, J., Delcastillo, K., Belliard, R., & Alto, A. (2019). Resistance Training Volume Enhances Muscle Hypertrophy but Not Strength in Trained Men. Medicine and science in sports and exercise51(1), 94–103. https://doi.org/10.1249/MSS.0000000000001764

Featured Image: Tom Wang / Shutterstock

The post Lat Pulldown vs. Pull-Up: The Battle for a Bigger Back appeared first on Breaking Muscle.
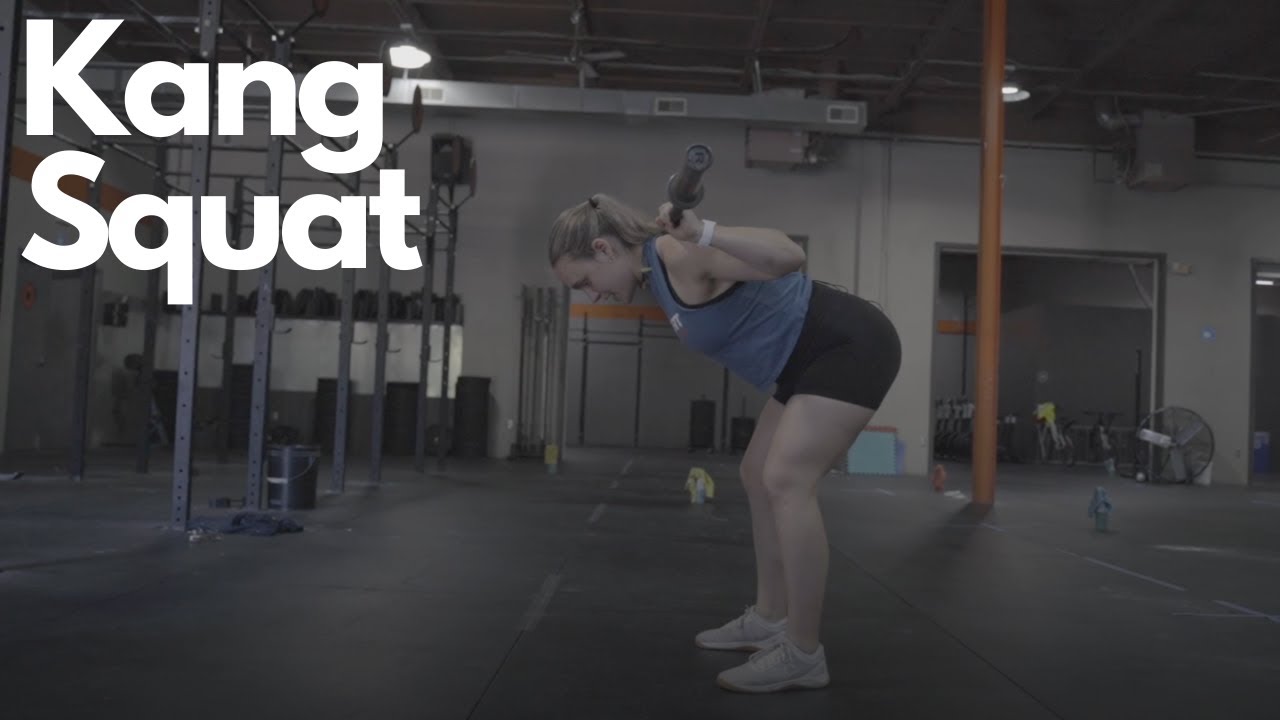
Be Nice and Share!
This post was originally published on this site

Originally Posted At: https://breakingmuscle.com/feed/rss

Kristján Jón Haraldsson is the champion of the 2023 Strongest Man in Iceland (SMI) contest. The athlete came out victorious in the strength competition that took place in Hafnarfjördur, Iceland on June 3, 2023. It’s a repeat performance for Haraldsson, who successfully defended his SMI title from 2022. According to his personal page on Strongman Archives, Haraldsson can now boast two victories in five appearances (2022-2023) at the annual SMI. The athlete previously finished as the runner-up in 2021, in third place in 2019, and in eighth place in 2018.

Joining Haraldsson on the 2023 SMI podium were Vilius Jokužys (second place) and Pálmi Gudfinnsson (third place). This is Jokužys’s second consecutive runner-up placing to Haraldsson in the SMI competition. To date, the athlete has yet to score a victory in his strongman career, per Strongman Archives, but has only competed in his native Iceland. Meanwhile, this SMI result is the first time Gudfinsson has finished on a podium in a budding career featuring just three competitive appearances.

The 2023 SMI featured eight events, which are as follows: Max Dumbbell, Bag Over Bar, Front Hold, Max Deadlift, Arm-Over-Arm Pull, Mooring Bitt Carry, Block Press, and a Farmer’s Carry and Yoke Medley. Here are the final standings of the 2023 SMI, which had 10 competitors on hand vying for victory:

2023 Strongest Man in Iceland | Final Standings

  1. Kristján Jón Haraldsson — 72.5 points
  2. Vilius Jokužys — 67.5 points
  3. Pálmi Gudfinnsson — 54 points
  4. Gudmundur Adalsteinsson — 51.5 points
  5. Stefán Karel Torfason — 43 points
  6. Aron Geir Gudmundsson — 37.5 points
  7. Birgir Gudnason — 36.5 points
  8. Alexander Andersen — 30 points
  9. Fannar Katrínarson — 27.5 points 
  10. Ólafur Haukur Tómasson — 17 points

To help his case and repeat as SMI champion, Haraldsson won five of the eight events and was a runner-up in two others in a consistently dominant display. Here’s an overview of Haraldsson’s complete performance:

Kristján Jón Haraldsson | 2023 Strongest Man in Iceland Performance

  • Max Dumbbell — 110 kilograms (242.5 pounds) | Tied for first place
  • Bag Over Bar — Six in 19.51 seconds | Second place
  • Front Hold — 37.31 seconds | Sixth place
  • Max Deadlift — 400 kilograms (881.8 pounds) | First place
  • Arm-Over-Arm Pull — 41.95 seconds | First place
  • Mooring Bitt Carry — 40 meters | First place
  • Block Press — Four in 67.31 seconds | First place
  • Farmer’s Carry & Yoke Medley — 38.15 seconds | Second place

The 2023 SMI is Haraldsson’s fourth victory in his last six contests dating back to the 2022 SMI. The strongman made his World’s Strongest Man (WSM) debut during the 2023 iteration, where he finished in fifth place in Group 2. Haraldsson entered the sport’s tentpole event as an alternate after Cheick “Iron Biby” Sanou withdrew on the first day of the contest.

Haraldsson’s continued prowess in his native country might quickly be making him the next Icelandic superstar strongman. That’s because the athlete is also the defending Iceland’s Strongest Man (2022). Provided Haraldsson continues his recent meteoric pace, he would be following in the footsteps of respective Iceland icons in 2018 WSM champion Hafthor Björnsson and four-time WSM victor (1991, 1994-1996) Magnús Ver Magnússon.

There’s a long way to go before Haraldsson can match the rap sheet of two of the greatest strongmen ever. Some of his initial momentum is, however, a positive step in the right direction toward that kind of illustrious legacy.

Featured image: @palmigudfinnsson on Instagram

The post 2023 Strongest Man in Iceland Results — Kristján Jón Haraldsson Repeats appeared first on Breaking Muscle.
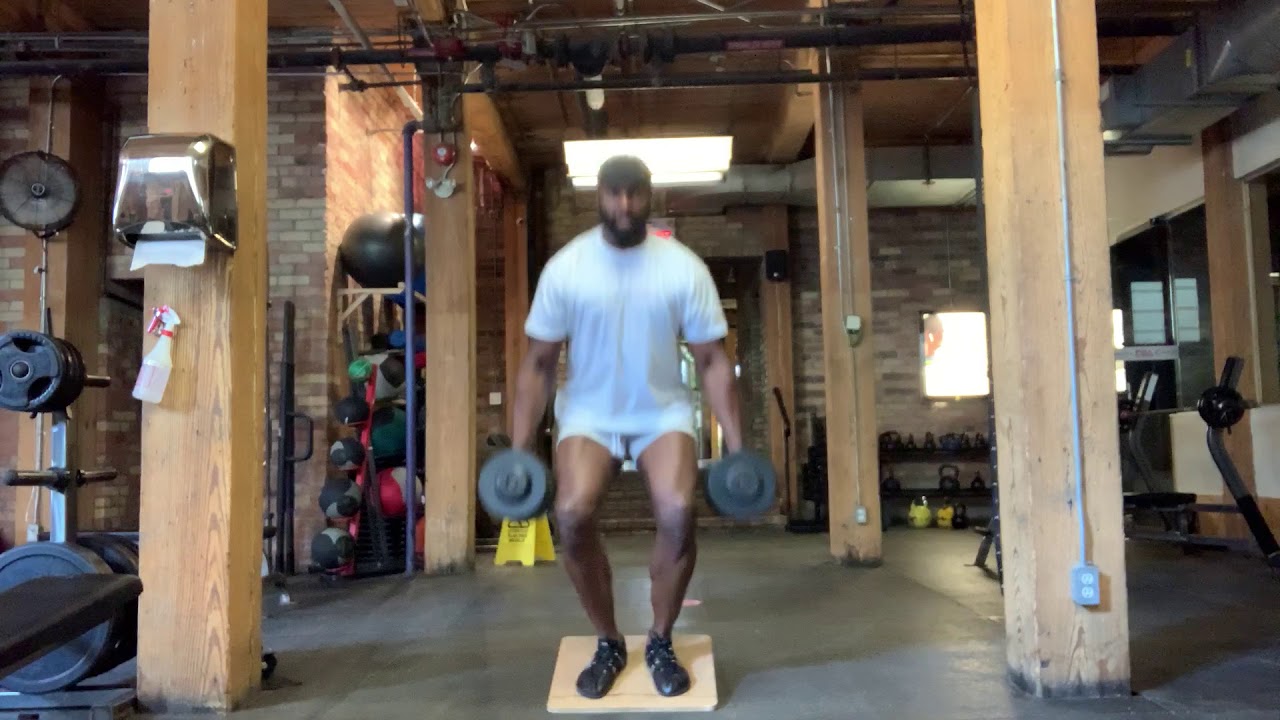
Be Nice and Share!