This post was originally published on this site

Originally Posted At: https://breakingmuscle.com/feed/rss

Whether you want to build an impressive set of wheels, boost your strength, or improve athletic performance, your training had better include some single-leg exercises. Indeed, they are invaluable for balancing your physique, addressing weaknesses, improving leg strength, and providing a nasty pump.

Close-up of lower body performing kettlebell leg exercise
Credit: Vladimir Sukhachev / Shutterstock

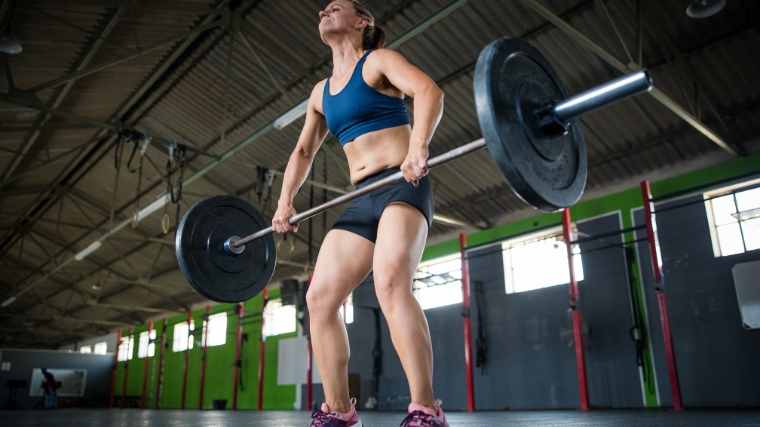
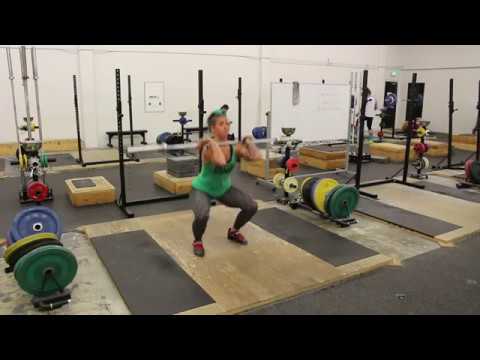
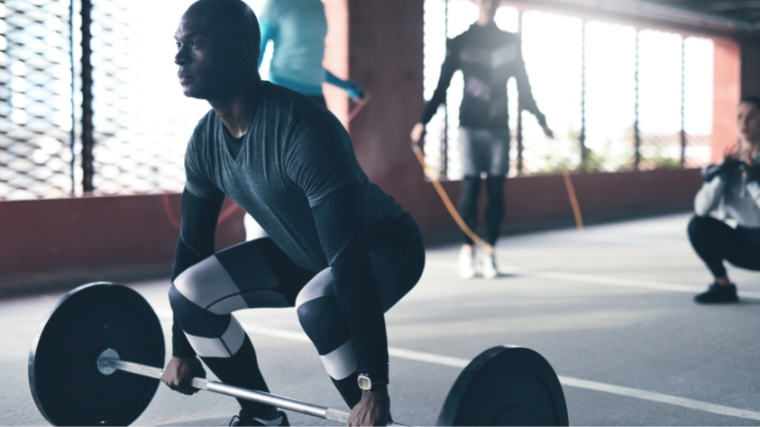
Among the best single-leg exercises are lunges, notorious for building pain tolerance along with well-developed legs. But should you perform the lunge dynamically, taking a step forward, or should it be done statically, also called a split squat? What are the differences and similarities between these exercises? Is there an even better way of doing lunges?

Let’s compare the split squat and the basic forward lunge, and figure out which could be the right choice for your plan.

Exercise Differences

At first glance, you might think there are no big differences between the forward lunge and the split squat, but you would be mistaken. One simple step forward changes several things.

Balance and Coordination

Unilateral exercises (working one limb at a time) have been shown to increase balance, agility, and coordination, as well as carrying over to injury prevention. (1) But you’re taking things a step forward with the lunge. Because your foot is not fixed in place and any added weights is moving as you step, typically dangling in your hands at arms length, the forward lunge is harder from a stability perspective because more total-body control is needed. 

This makes the lunge a more effective variation if you want to improve these qualities, for instance, if you’re an athlete. (2) On the other hand, if you are prioritizing sheer strength and muscle-building, the static squat will be the superior choice. Relatively less motor control requirement means that you can use heavier weight, apply better control on the eccentric (lowering phase), and focus more on the mind-muscle connection which is critical for muscle gains. (3)

Muscle Recruitment

The instability of the lunge will shift the focus towards stabilizing muscles, which makes sense. If you’re doing lunges for firmer glutes, then you’ll be happy to hear that the three gluteal muscles will be recruited more significantly because they stabilize the hips and the upper leg. Indeed, they externally rotate and abduct the femur. On the other hand, the adductors stabilize the leg internally, and will also be more recruited.

person in empty gym performing dumbbell lunge
Credit: Aleksandr Art / Shutterstock

The abs, the lower back, and the other core muscles will have to work extra to compensate for the weight dangling around during the stepping process. Finally, the calves will have to be involved for when the lunge is done, they are used to propel yourself up back to the initial position. On the other hand, the static squat reducing the involvement of these muscles, it will be a better choice to scorch your quadriceps. 

Exercise Similarities

The split squat, also called the static lunge, shares some clear similarities with the forward lunge. 

Unilateral Leg Training

Both exercises involve knee extension and hip extension. As such, they target the same leg muscles — your quadriceps, glutes, adductors, and hamstrings. Your core will also be challenged to support the weight and balance your upper body.

As unilateral exercises, only one leg is working at a time. To be more precise, one leg is primarily working due to the staggered stance. Your rear leg is used for support and will still contribute to the movement in a small degree, but the bulk of the weight has to be supported and driven by the front leg.

Muscular person outdoors performing walking lunge
Credit: Pressmaster / Shutterstock

Both of these exercises will contribute to improved balance, stability, and coordination. Emphasizing each leg on its own will also be helpful to balance your any potential developmental weaknesses between sides. (4)

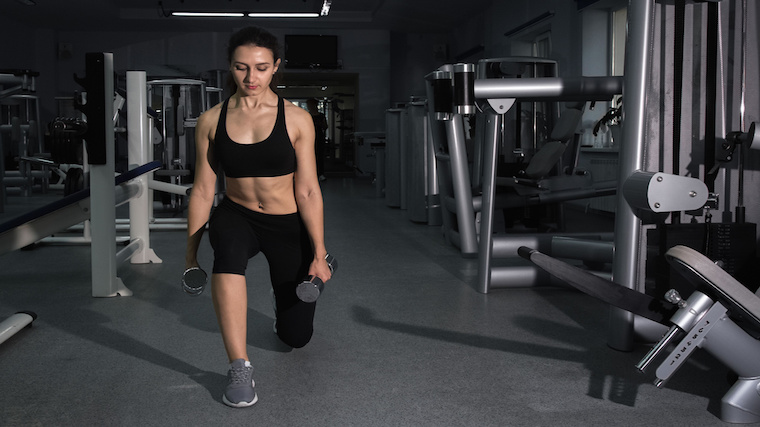
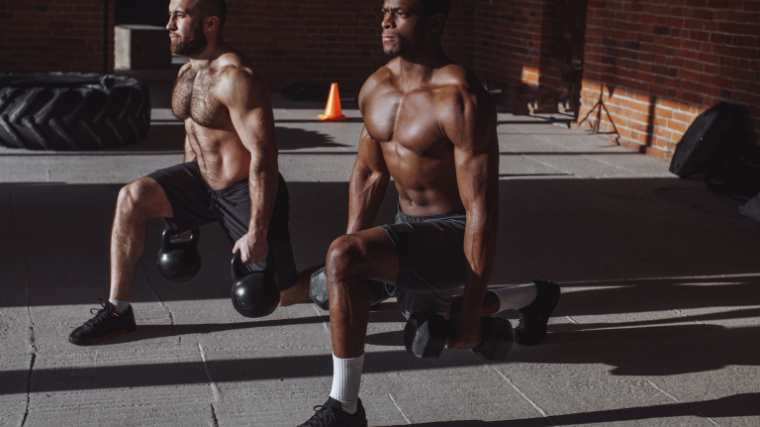
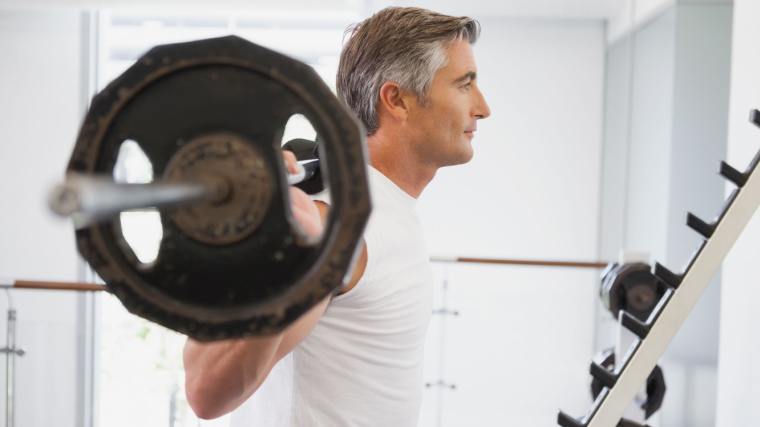
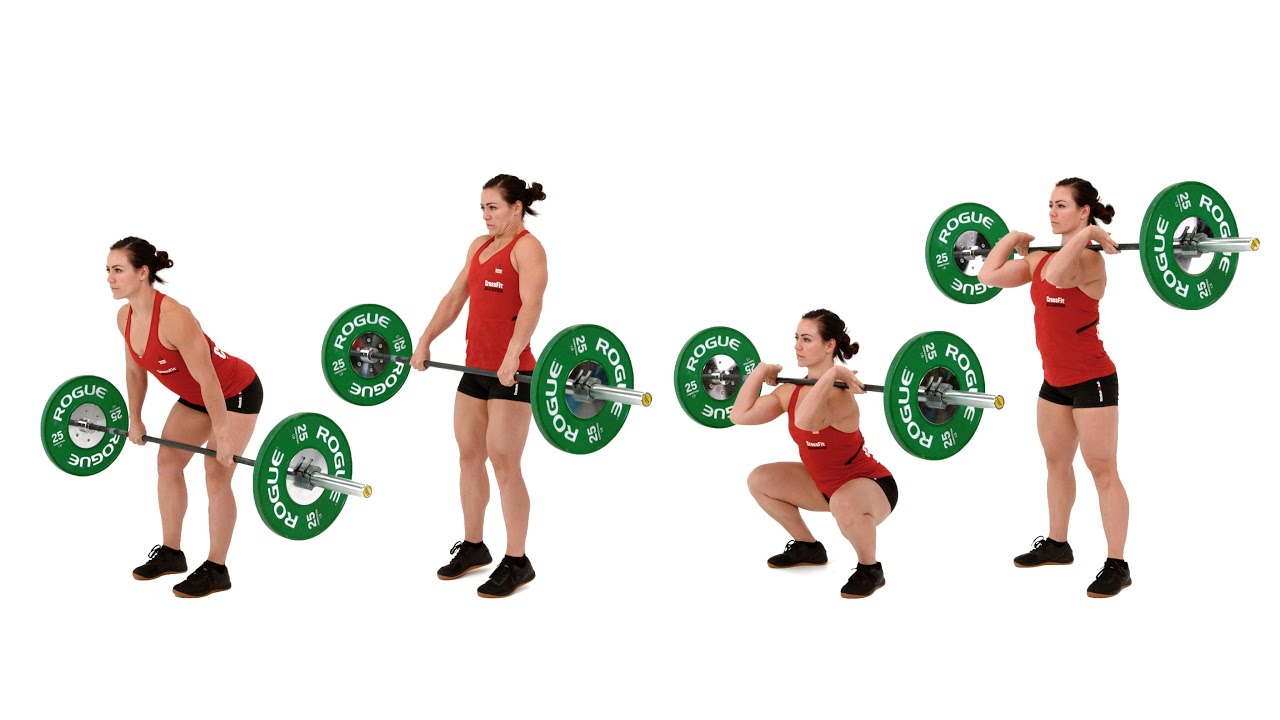
How to Do the Split Squat

With the split squat being generally more stable than the forward lunge, you can capitalize on the opportunity to safely use barbells to add resistance. Position yourself in front of a rack, place the barbell on the “shelf” of your upper back and unrack it. Take a few small steps back to make room to perform the exercise. Take a shallow step forward with one leg, and one small step backward with the other leg, ending up in a half-lunge position with a hip-width stance.

YouTube Video

Brace your core and bend your legs until your rear knee grazes the floor. Press the weight up by driving through your front foot. Make sure most of your weight is on your front leg. Repeat for the desired amount of repetitions before racking the bar and switching legs.

Form tip: Keep your front foot flat on the ground during the exercise. Focus on pushing through your heel to ensure maximal glute engagement and leg stability. 

Benefits of the Split Squat

  • The split squat is the unilateral “squatting motion” exercise that will allow you to use the most weight, making it a great choice for building strength.
  • This stable exercise allows you to focus on time under tension, mind-muscle connection, and going to failure relatively safely for an excellent hypertrophy stimulus.

Split Squat Variations

There are several ways to perform a split squat in order to better suit your specific goals. Add them, if needed, once you’ve mastered the basic split squat.

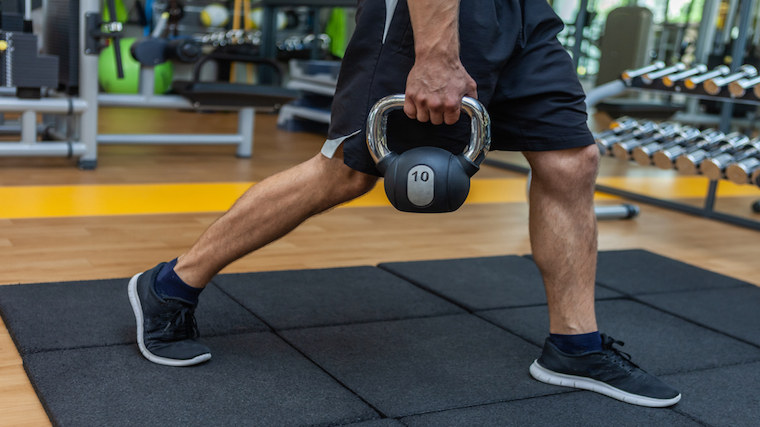
Bulgarian Split Squat

This infamous exercise, often known for creating post-workout soreness, is also one of the best lower-body builders there is. To do the Bulgarian split squat, you elevate your rear leg on a box or a bench, and then perform a traditional split squat. The elevated foot allows you to potentially reach a much deeper stretch and a longer range of motion. This can help focus even more on your glutes and build hip mobility in a new way for deeper squats and better lower body function.

YouTube Video

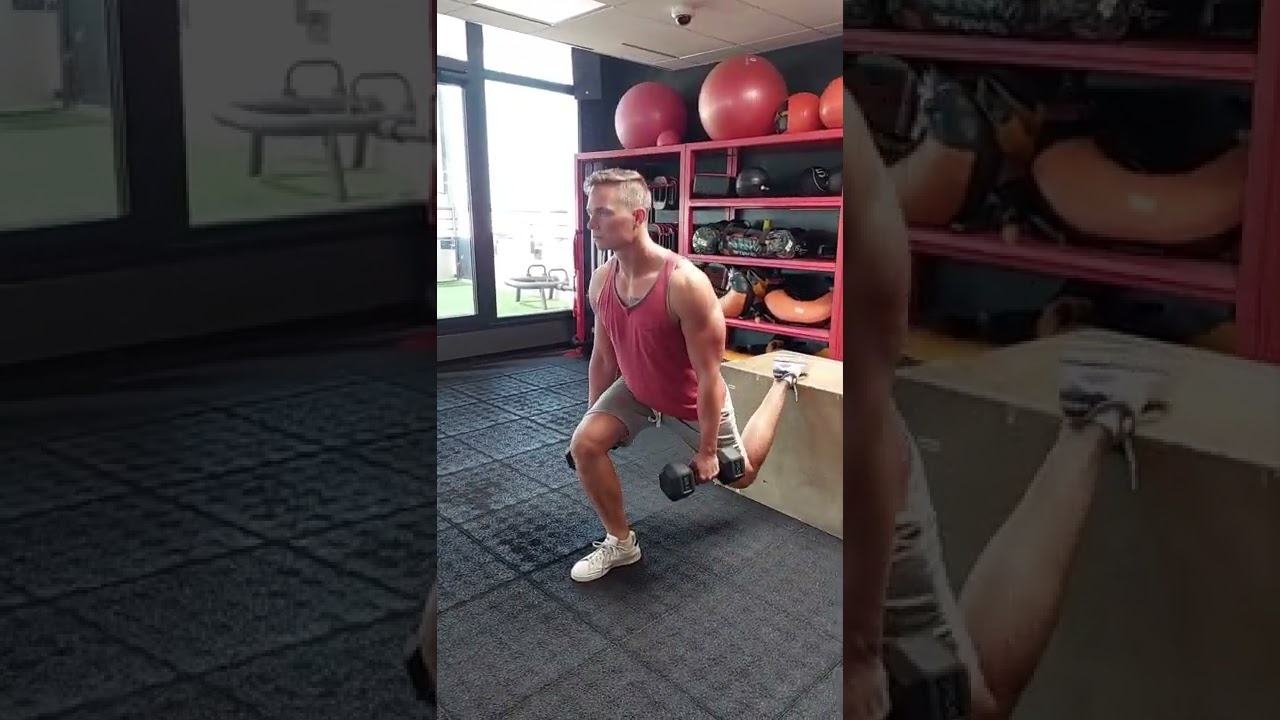
This exercise is better done later in a workout for moderate to high repetitions. If you want to challenge your glutes and core even more, hold a single dumbbell or kettlebell in the hand opposed to the front leg. 

Smith Machine Split Squat

The split squat has the advantage of being more stable, but why not take things a step further and use the Smith machine to provide maximal stability? This way, you can safely scale up the intensity, reach closer to muscular failure, and focus on the mind-muscle connection ensuring maximal hypertrophy.

YouTube Video

Position yourself in the middle of the Smith machine, assume a half-lunge position, and unrack the bar before performing the exercise. Complete all reps with one leg before switching sides.

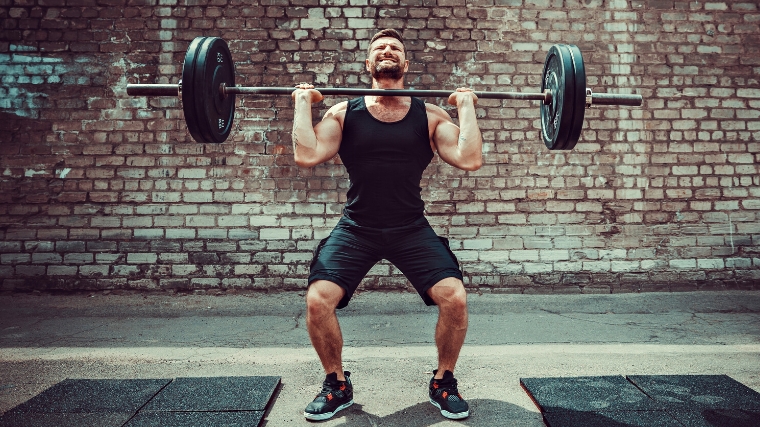
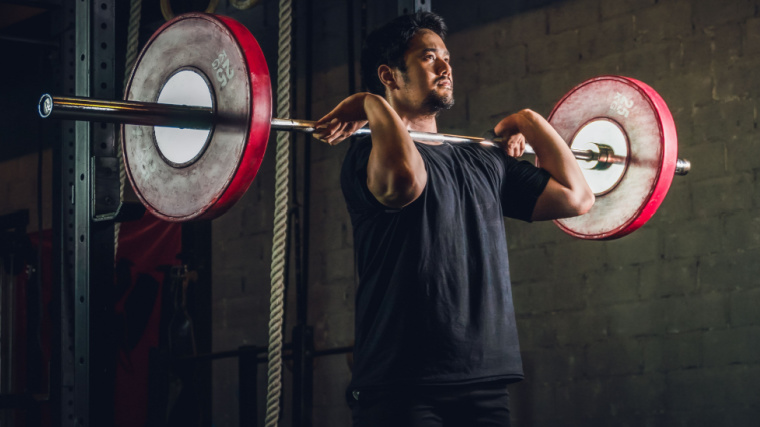
Front Rack Split Squat

The front rack split squat requires more upper body mobility to assume the front rack position with a barbell, similar to performing a front squat. Any potential awkwardness in learning the bar position is compensated by increased efficiency and greater total-body muscle.

YouTube Video

Holding the bar this way will target more your quadriceps as well as your upper back and core. If the front rack position is too hard for you, either try the “California grip” variation with your arms crossed over the bar or switch the barbell for a pair of kettlebells or dumbbells.
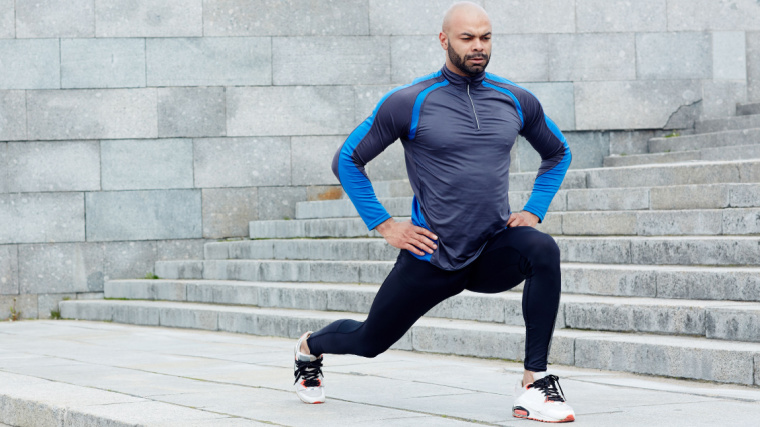
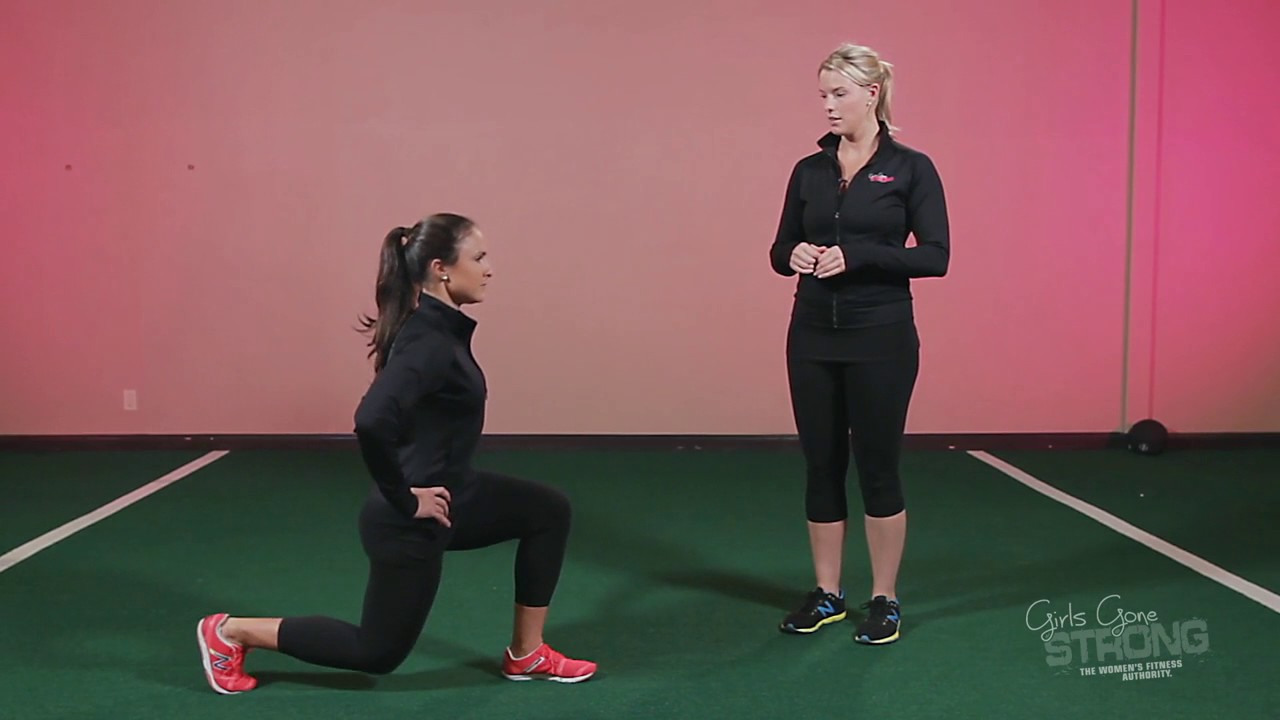
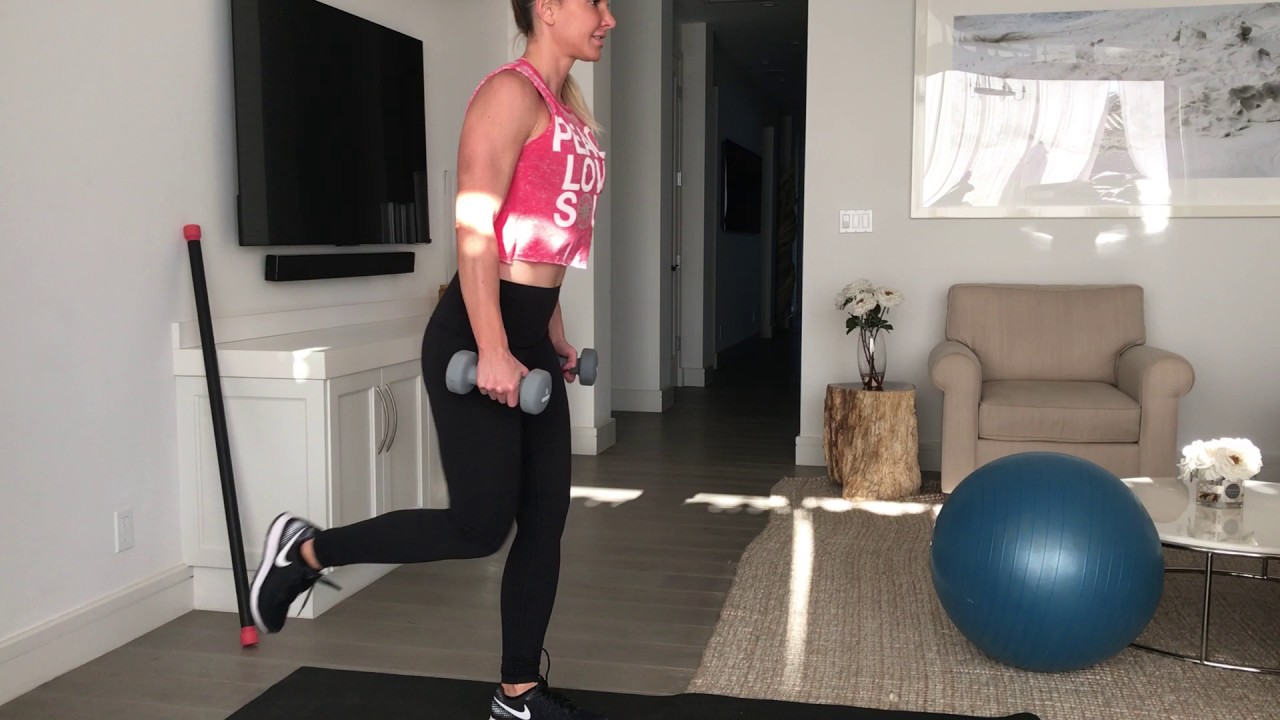
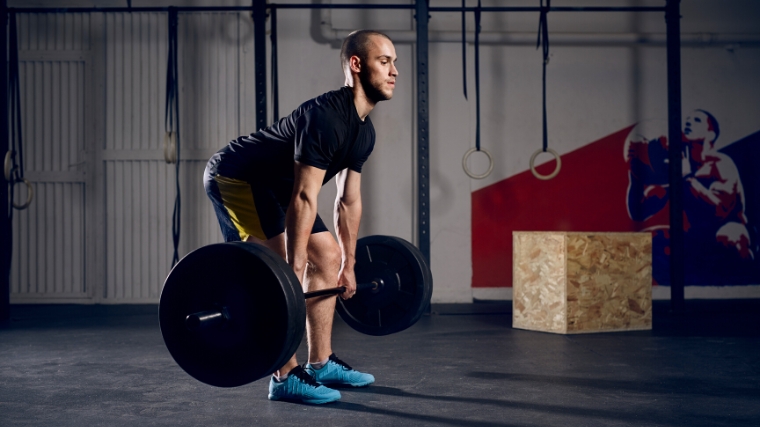
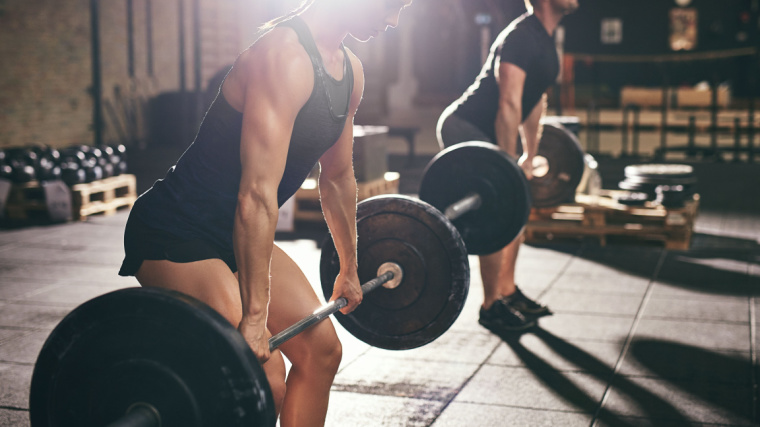
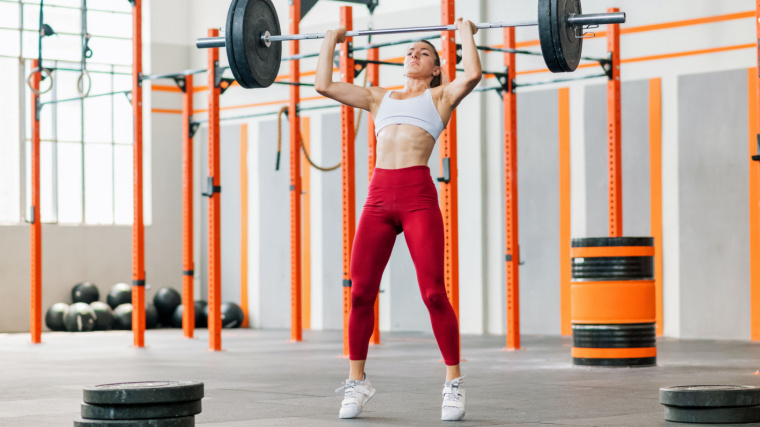
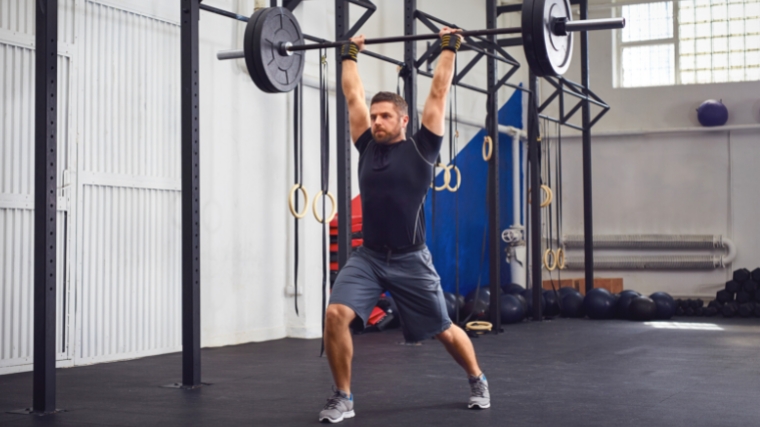
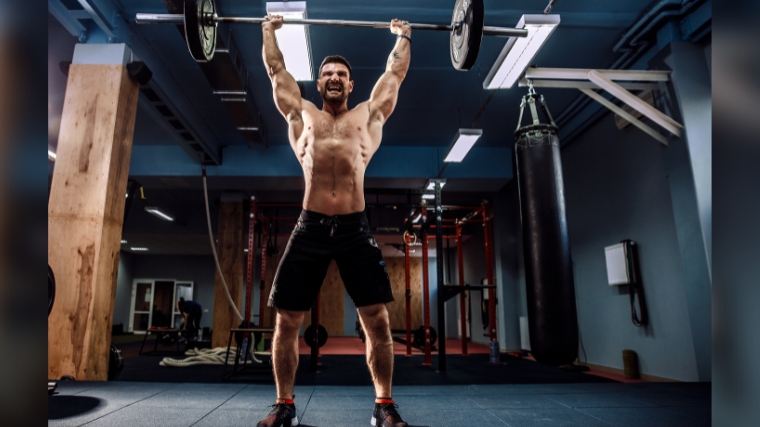
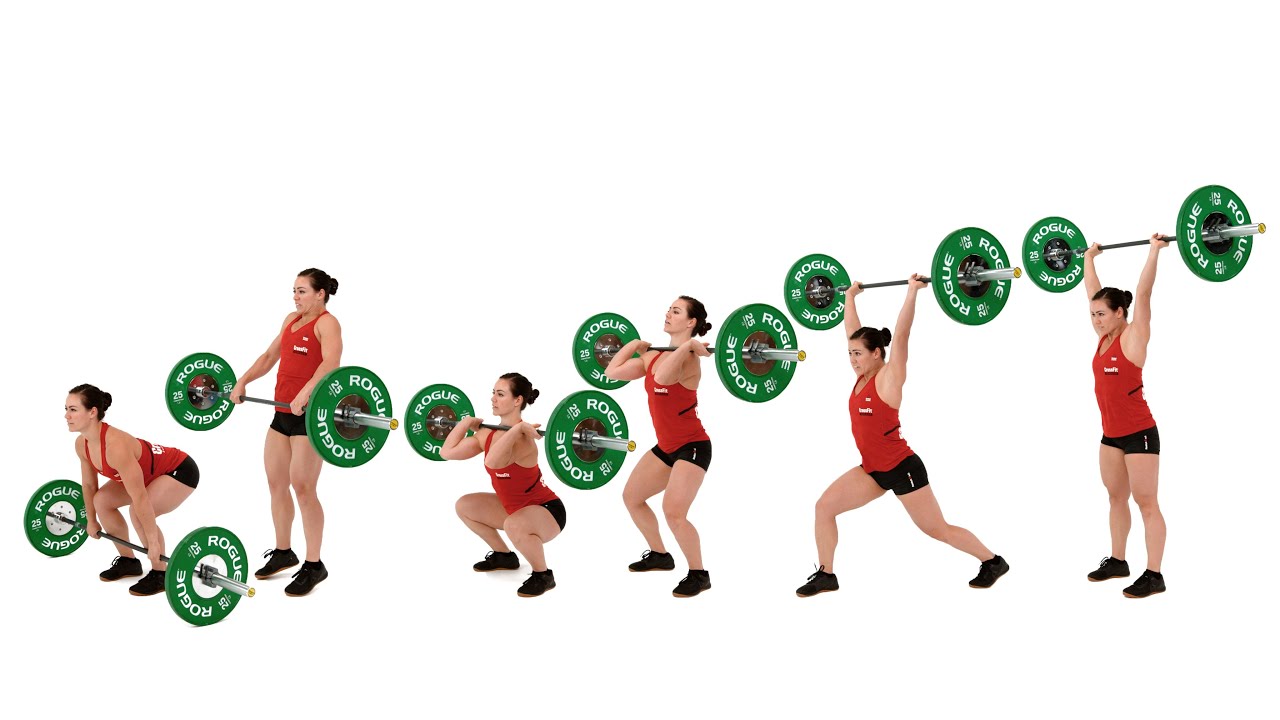
How to Do the Lunge

Stand tall with a pair of dumbbells in your hands and your arms straight down by your sides. Take a breath and brace your core before stepping forward with one foot. Keep your shoulders back and your torso upright. Bend your legs with control until they both form a nearly 90-degree angle and your rear knee barely grazes the floor. Keep your front foot flat with most of your weight on your front leg.

YouTube Video

Drive through your front heel to raise yourself back up, and push through your toe to get back in the initial position. Repeat with the other leg. Finding your forward footing is an added challenge to your stability and balance, so make sure you start with relatively lighter weights.

Form tip: Beware not to use too narrow a step forward, which will compromise your balance and stability. Stepping too far, however, will not allow a significant range of motion and will decrease muscle recruitment.

Benefits of the Lunge

  • Improved neuromuscular control, stabilization, and balance, because of the challenge created by the dynamic motion.
  • Promotes core and a complete lower-body development — quadriceps, hamstrings, glutes, and calves.

Lunge Variations

When the forward lunge is no longer a secret to you, try these variations to spice up your training or to focus more on certain benefits of the lift.

Walking Lunge

The lunge is dynamic in nature, so why not make it even more dynamic? The walking lunge will challenge your motor control and body awareness even more, as well as provide a robust stimulus for muscle growth because of the constant time under tension.

YouTube Video

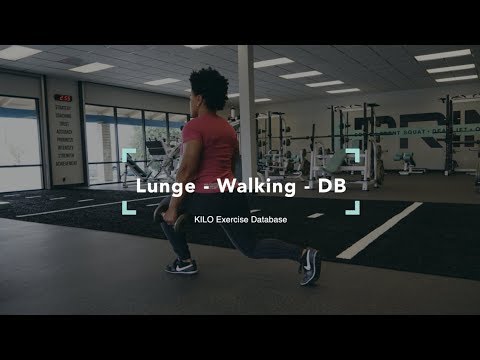
You can also use these to challenge your heart rate, and add a strength training element to your cardio routine.

Reverse Lunge

It might not seem like there’s a difference between stepping backward or stepping forward, but there actually is. The reverse lunge is a relatively safer and more stable exercise that can decrease knee stress.

YouTube Video

It’s easier to control the eccentric and maintain your balance, making it an effective choice for size and strength.

Pendulum Lunge

This advanced variation will challenge your neuromuscular control like no other. It essentially combines a forward lunge and a reverse lunge into a single repetition. To perform it, step forward into a lunge, descend, and return to the initial position. Without letting your foot rest on the ground, immediately step back and transition into a reverse lunge.

YouTube Video

This exercise challenges your whole body stability, making it a highly effective choice to reinforce your stabilizer muscles or jack up your heart rate because so many muscles are involved during each repetition.

How to Program the Right Movement

The split squat and lunge are both multi-joint free-weight exercises. As such, you can include these in any training program for a variety of goals, be it strength, size, or cardiovascular capacities.

Building Strength

Technically, experienced lifters could perform the split squat for sets of three, or even heavy single repetitions as long as form is maintained. However, the vast majority of lifters should stick to three to five sets of five to eight repetitions. This will ensure the best blend of size and strength to your wheels with a reduced risk of injuries, which can be increased during exercises with high stability requirements.

Two muscular lifters in gym doing kettlebell lunge
Credit: UfaBizPhoto / Shutterstock

The forward lunge is not well-suited to very heavy weights because knee strain and impact can be increased during the stepping portion of the movement.

Building Muscle

If you’re more concerned with maximal size and a burning sensation in your legs, two to four sets of 10 to 15 repetitions of either the split squat or the lunge will scorch your lower body and core. Both exercises will provide an excellent hypertrophy stimulus, particularly when performed after your main heavy exercises.

Bodyweight-Only Cardio Training

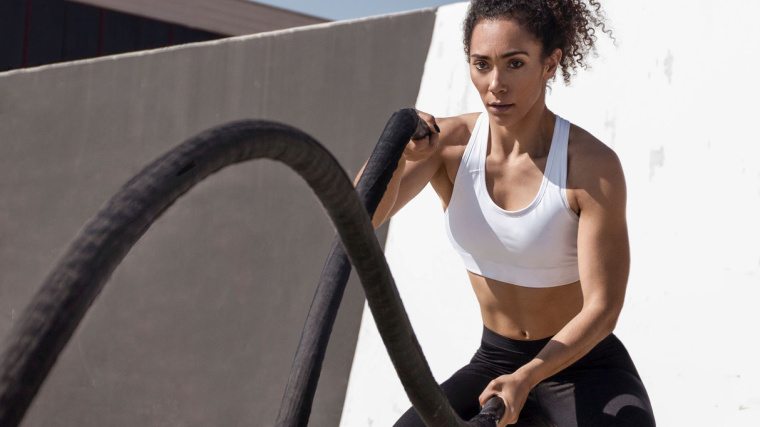
Adding a strength training element to your cardio routine is a great way to develop multiple qualities at the same time — size, cardio, athleticism, strength. In fact, science has shown that bodyweight circuits can be as effective as any other form of cardio (treadmill, biking, etc.) to build endurance and shed body fat. (5)

Including these in your circuits is a great way to build your heart and your lower body at the same time. If you want to test your mettle, you can try performing walking lunges for distance, or for very high reps, one or two days per week. Aim to increase the distance or total repetitions each week.

  • Week One: 50 lunges total reps per leg
  • Week Two: 75 lunges total reps per leg
  • Week Three: 100 lunges total reps per leg
  • Week Four: 125 lunges total reps per leg
  • Week Five: 150 lunges total reps per leg
  • Week Six: 200 lunges total reps per leg
  • Week Seven: 225 lunges total reps per leg
  • Week Eight: 250 lunges total reps per leg

Battle for Better Legs

There are many possible ways to lunge, but as long as your working includes either the split squat or lunge, you’re on the right path to bigger, stronger legs. Now that the differences and advantages of each variation are laid out, include the movement best suited to your specific goals and needs, and take a step toward stronger, more muscular, more powerful legs.

References

  1. Speirs, Derrick E.1,2; Bennett, Mark A.3; Finn, Charlotte V.4; Turner, Anthony P.2. Unilateral vs. Bilateral Squat Training for Strength, Sprints, and Agility in Academy Rugby Players. Journal of Strength and Conditioning Research 30(2):p 386-392, February 2016. | DOI: 10.1519/JSC.0000000000001096
  2. Ramirez-Campillo, Rodrigo & Burgos, Carlos & Henríquez-Olguín, Carlos & Andrade, David & Martínez, Cristian & Álvarez, Cristian & Castro-Sepulveda, Mauricio & Marques, Mário & Izquierdo, Mikel. (2015). Effect of Unilateral, Bilateral, and Combined Plyometric Training on Explosive and Endurance Performance of Young Soccer Players. The Journal of Strength and Conditioning Research. 29. 1317–1328. 10.1519/JSC.0000000000000762.
  3. Calatayud J, Vinstrup J, Jakobsen MD, Sundstrup E, Brandt M, Jay K, Colado JC, Andersen LL. Importance of mind-muscle connection during progressive resistance training. Eur J Appl Physiol. 2016 Mar;116(3):527-33. doi: 10.1007/s00421-015-3305-7. Epub 2015 Dec 23. PMID: 26700744.
  4. Núñez FJ, Santalla A, Carrasquila I, Asian JA, Reina JI, Suarez-Arrones LJ. The effects of unilateral and bilateral eccentric overload training on hypertrophy, muscle power and COD performance, and its determinants, in team sport players. PLoS One. 2018 Mar 28;13(3):e0193841. doi: 10.1371/journal.pone.0193841. PMID: 29590139; PMCID: PMC5874004.
  5. Kim JW, Ko YC, Seo TB, Kim YP. Effect of circuit training on body composition, physical fitness, and metabolic syndrome risk factors in obese female college students. J Exerc Rehabil. 2018 Jun 30;14(3):460-465. doi: 10.12965/jer.1836194.097. PMID: 30018934; PMCID: PMC6028228.

Featured Image: Serhii Bobyk / Shutterstock

The post Split Squat vs. Lunge: Upgrade Your Single-Leg Training appeared first on Breaking Muscle.

Be Nice and Share!
This post was originally published on this site

http://www.marksdailyapple.com/

Two women lying on yoga mats in savasana pose in a sunny, open-air studio.
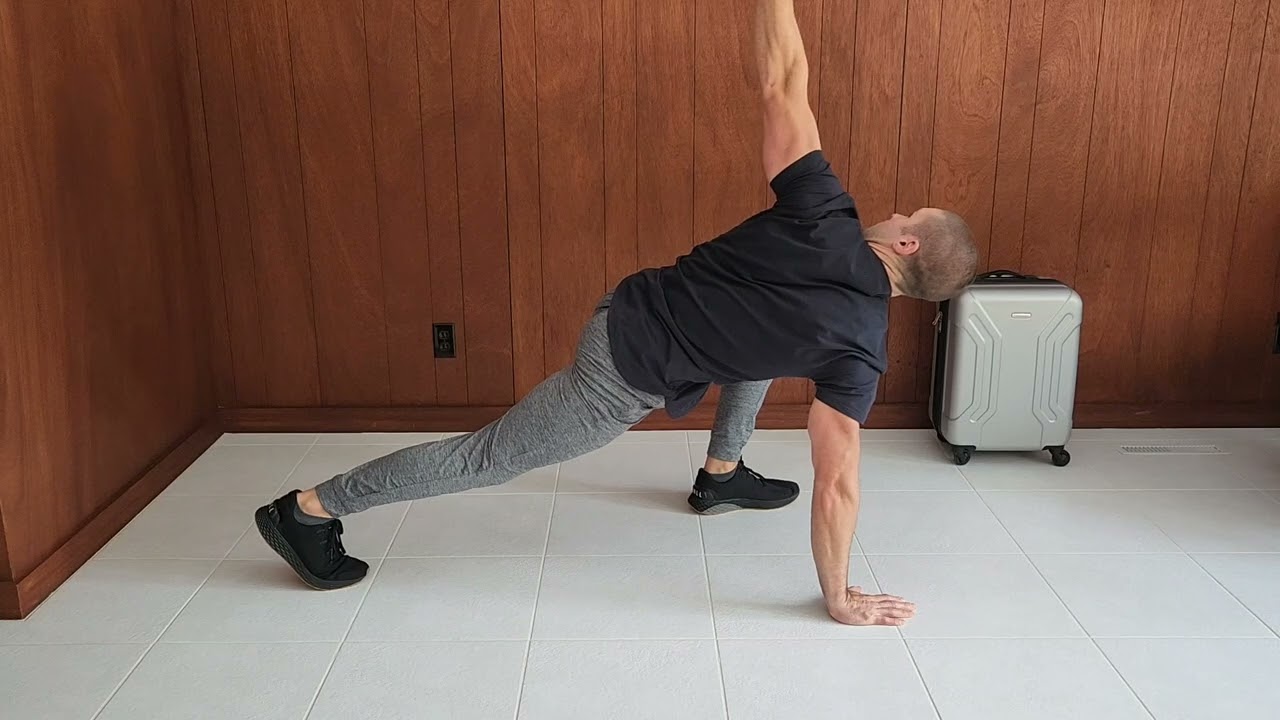
What mental image does the word “yoga” conjure for you? Probably a spandex-clad individual in downward dog or balancing on one leg in tree pose. Or maybe they’re in a complicated full-body knot that requires five times more flexibility than you’ve ever had? Does it look like hard work? 

That’s certainly one version of yoga, the kind that dominates the modern notion of yoga in the West, but it’s not at all what we’re talking about today. 

What if I told you that there is another kind of yoga, one in which you don’t move at all? You don’t even sit or stand; you lie down the whole time. That’s yoga nidra. “Yoga nidra” literally means “yogic sleep,” sometimes translated as “conscious sleep.” The goal of yoga nidra is to achieve an altered state of awareness where you are neither awake nor asleep but in a liminal space in between—or maybe surpassing both. (Technically, the term refers to the state of consciousness beyond wakefulness or sleeping. That is, “yoga nidra” is the destination, not the journey it takes to get there. But in common parlance, people use it to mean the entire practice.) 

Yoga nidra offers the opportunity to step outside your body, thoughts, and emotions. It is a state of deep relaxation and, say proponents, of deep healing where your subconscious becomes more open to learning and establishing new thought and behavior patterns, stress dissipates, and you move towards physical health and homeostasis. “Equivalent to fours hours of deep sleep!” is a common selling point. 

The latter may or may not be true, but it’s clear that yoga nidra has a lot to offer by way of promoting relaxation, better sleep, and even recovery from major stress and trauma. There isn’t a person operating in the modern world who couldn’t benefit from slowing down and intentionally tapping into relaxing, restorative practices. Is yoga nidra right for you?

A Brief History of Yoga Nidra

Modern yoga nidra practices have roots tracing back into many ancient yoga and meditation traditions. In ancient texts, yoga nidra or yoganidra sometimes referred to that non-sleep, non-waking level of consciousness or to the goddess Yoga Nidra Shakti. 1 Yoga nidra was often described as a higher state of being, one in which normal mental and bodily activities ceased, and the yogi achieved a state of bliss.2 

The type of yoga nidra practice you’re likely to encounter today was probably inspired by 19th and 20th century “relaxationists” and hypnotists who were interested in harnessing the healing power of rest, according to scholars,3 but it really got its kickstart thanks to the teachings of Swami Satyananda Saraswati. Beginning in the 1960s and 70s, Satyananda devised a method of using breathing techniques and body scans to achieve progressive relaxation and tap into yoga nidra. If you take a yoga nidra class today, there’s a good chance you’ll be following his method, or something quite like it.

Yoga nidra has since enjoyed a surge in popularity, as well as academic interest. In the 2000s, clinical psychologist and yoga scholar Dr. Richard Miller developed his iRest protocol—a version of yoga nidra—and institute of the same name to help people dealing with issues ranging from “normal” stress to severe PTSD, sleep disturbances, and chronic health issues. More recently, Stanford neuroscientist Dr. Andrew Huberman coined the term “non-sleep deep rest” (NSDR) to encompass practices that can promote stress release, neuroplasticity, more efficient learning, and better sleep, among other benefits. Huberman counts yoga nidra, hypnosis or self-hypnosis, and napping as types of NSDR.

What Happens During a Yoga Nidra Practice?

Yoga nidra involves a guided, meditative practice designed to achieve a deep state of relaxation where you transcend waking, sleeping, and dreaming states to arrive at a deeper level of consciousness. You remain aware of the outside world (unlike when you’re asleep), but you are totally detached from it. You are aware but not really awake. There but not-there. In a true state of yoga nidra, you reportedly experience not only profound relaxation but a sense of interconnectedness with the universe. 

This is where yoga nidra differs from traditional meditation in an important way. With meditation, you are usually sitting up and cultivating intense focus, sometimes on the breath, a chant, or a mental image. You are very much awake, and your conscious awareness is very much “on.” In yoga nidra, conscious thought is “turned off,” replaced by an awareness that is neither focused nor intentional. As yoga scholars Dr. Stephen Parker and Swami Veda Bharati describe it, “Neither thoughts nor images are present, and the practitioner experiences conscious, deep, dreamless sleep, possessing awareness of the surroundings but neither thinking about them nor interacting with them.”4 

Like all forms of yoga or meditation, the particulars of your practice will depend on who’s guiding you. Depending on how your guide or teacher was trained, they may follow a script or they may tap into a more intuitive flow during the session. Either way, it will probably involve a similar series of steps, something like this:

  • You begin by lying on your back in savasana, or corpse pose.
  • Set an intention, or sankalpa, for the practice. This might be something simple like “I am going to relax,” or it could be something bigger you are trying to achieve like, “I will sleep well at night” or “I will stop drinking alcohol.”
  • Next comes a series of visualization and breathing exercises. The purpose is to move you through different layers of the self toward a state of yoga nidra. Typically you would start with a body scan, moving your awareness to different points around your body, followed by instructions to bring awareness to your breathing, your senses, and your thoughts, often with specific visualization cues. Ultimately, you arrive in the desired state of deep relaxation.
  • Finally, you reaffirm your intention or sankalpa before returning to a waking state.

Benefits of Yoga Nidra

According to traditional wisdom, yoga nidra is a deeply healing state. Yoga nidra is especially touted as an effective way to alleviate stress, sleep better, and improve overall well-being. And there are plenty of studies to support these assertions, for example:

  • Yoga nidra reduced stress and anxiety among college students,5 6 nursing students,7 8 and professors.9
  • Adults with chronic insomnia were randomly assigned to receive cognitive behavioral therapy or do yoga nidra at home (using a recording) for five weeks. Both groups’ total sleep time and sleep efficiency improved, but yoga nidra outperformed CBT in terms of  changes in slow-wave sleep and total insomnia severity.10
  • Four weeks of yoga nidra was more effective than progressive muscle relaxation for improving sleep quality in male athletes (though both were helpful).11
  • Two studies found that depression and anxiety decreased, and psychological well-being improved, among women with menstrual health problems after six months of yoga nidra.12 13 (Interestingly,yoga nidra also seems to affect reproductive hormone levels.14)
  • Yoga nidra may be an effective tool for helping veterans (and potentially others) cope with PTSD symptoms.15 16 The U.S. Army Surgeon General has endorsed yoga nidra as an effective strategy for pain management.17

Scientific studies (small though they are) provide some evidence about the physiological effects underlying sthe mental and physical health benefits practitioners observe.

  • According to one study, for example, yoga nidra can activate the parasympathetic, rest-and-digest nervous system, as evidenced by higher heart rate variability (HRV).18
  • Another set of researchers put eight experienced yoga teachers in a PET scan and had them do a yoga nidra practice, during which they showed a 65 percent increase in dopamine release in the brain.19
  • Other studies suggest that a regular yoga nidra practice can reduce blood pressure,20 21 inflammation as measured by CRP,22 and blood glucose levels.23 24

Getting Started

There’s no question that all forms of yoga and meditation can offer tremendous physical, mental, and even spiritual benefits for people who practice regularly. However, other forms of yoga have barriers to entry—concerns that you might not be strong enough or flexible enough, for example—that can scare people away. And a lot of people give up on meditation because they find it too hard to quiet the monkey mind and achieve the desired focus (although that does get easier with time). 

The beauty of yoga nidra is that it can be practiced anywhere by anybody. No special equipment nor physical fitness capabilities are required. There are lots of free yoga nidra exercises online, and many yoga studios offer in-person classes. Some are as short as 10 minutes, which are great when you need to take a quick break. To really tap into the benefits, though, most yoga nidra practices will last 30 to 45 minutes or so. 

If the idea of disconnecting from the conscious mind while still retaining awareness, of “surfing the interface between sleeping and waking consciousness” (a common tag line of yoga nidra) feels a bit too abstract for you, I’d encourage you to give it a try nevertheless. All you have to do is lie still and listen to the teacher’s voice. Consider it a practice of deep relaxation to start. Who couldn’t benefit from that?

Primal Kitchen Dijon Mustard

The post What Is Yoga Nidra appeared first on Mark’s Daily Apple.

Be Nice and Share!
This post was originally published on this site

http://www.thealternativedaily.com/

Coffee sometimes gets a bad rap; however, organic coffee is loaded with helpful antioxidants, and the caffeine it contains is quite useful as well. Not only is it good to drink, but it is also great for your skin, the body’s largest organ. Incorporating coffee into your diet and your personal care routine is a […]

Be Nice and Share!
This post was originally published on this site

Originally Posted At: https://breakingmuscle.com/feed/rss

In some ways, the 2023 World Raw Powerlifting Federation (WRPF) Ghost Clash 2 might have been the first significant powerlifting meet of the calendar year. While there were a whole host of impressive and victorious performances at the Miami, FL, competition, Hunter Henderson’s output might have taken the strength cake.

On Feb. 19, 2023, as an 82.5-kilogram competitor, Henderson set an all-time World Record squat with knee sleeves of 267.5 kilograms (589.7 pounds) during the WRPF contest. With the feat, Henderson broke the previous raw record, which she also held, in the 82.5-kilogram weight class after squatting 250 kilograms (551.1 pounds). That mark occurred at the 2022 United States Powerlifting Association (USPA) Hybrid Showdown 4 in January 2022. A year later, the athlete has added 17.4 kilograms (38.6 pounds) to her previous raw best. In addition to her knee sleeves, Henderson also donned wrist wraps and a lifting belt during the squat.

It seemed apparent the lift was of little issue for Henderson. After attaining appropriate depth, Henderson exploded with ease, showing minimal signs of struggle to build on her own World Record. What’s more, Henderson appeared to use this competitive setting as a showcase, actually breaking the record on her second squat attempt when she successfully lifted 257.5 kilograms (567.7 pounds). The competitor’s final lift looked to be more about extending her own mark rather than strategically holding back in earlier attempts to focus on one impressive performance.

Her raw World Records aside, according to Open Powerlifting, Henderson possesses two squats with wraps records. One in the 75-kilogram class with a squat of 294.9 kilograms (650.3 pounds) from the 2021 WRPF Kern US Open. While the other 82.5-kilogram weight class squat of 305 kilograms (672.4 pounds) occurred at the 2022 WRPF FQ Classic 2.

Now, Henderson can add another record notch to her ever-expanding belt of accomplishments on sanctioned lifting platforms.

With 2023 still in its early stages, only time will tell what other achievements Henderson adds to her mantle in the coming months. If she’s adding that much weight to her own record within roughly a year’s time, it’s clear this is an athlete with more room to expand and more records likely to be set.

Featured image: @ironrebel on Instagram

The post Hunter Henderson (82.5KG) Notches All-Time World Record Squat of 267.5 Kilograms (589.7 Pounds) appeared first on Breaking Muscle.

Be Nice and Share!
This post was originally published on this site

Originally Posted At: https://breakingmuscle.com/feed/rss

It hasn’t even been two months in the year 2023, yet here’s Rhianon Lovelace continuing to push the boundaries of what we might think is possible from a strongwoman. After already setting the U64 Axle Press World Record of 101 kilograms (222.6 pounds) during the 2023 Kaos New Year Push/Pull 2023 contest in January, Lovelace is back to her old tricks. That is, using her Herculean strength to lift incredible amounts of weight and rewrite the record books.

On Feb. 18, 2023, during the 2023 Log Lift for Life Invitational in Tamworth, UK, Lovelace finished off a 146.8-kilogram (323.6-pound) Atlas Stone lift. According to the caption of her Instagram post of the feat, it is an all-time World Record in the U64 (64-kilogram) weight class. Lovelace wore a lifting belt, forearm-protecting sleeves, and knee sleeves for support during the record lift.

Lovelace kept her reflection on her new achievement short and sweet. It’s probably because the athlete understands there’s likely only more to come, given her intense training and commitment.

“Warm-ups flew, I knew we were on for a good day early on!” Lovelace wrote. “Only 49 days into 2023, and we’re already two World Records in, with my best lift still to come! Buckle up. Because this year’s gonna be big.”

To top a productive weekend, Lovelace would shift to the 2023 OLO Pro Invitational where, during a victorious all-around performance, she set the strict barbell curl heavyweight World Record of 55 kilograms (121.3 pounds).

Not to be outdone, Lovelace shouted out the charity money raised by the overall short event, which apparently topped the equivalent of $1,000 dollars and will go straight to men’s mental health awareness. She credited 100% C.A. Promotions, originally founded by trainer Stig Parker. Per the organization’s website masthead, it is committed to safety, inclusivity, and equal promotion for strongmen and strongwomen.

“Big shout out to the hard work from [100% C.A. Promotions] for raising nearly £1000 [$1204.28] for men’s mental health charity!” Lovelace wrote. “And for his [Parker] effort into such a great day, making sure we all had everything we needed and made sure all athletes’ safety was absolutely paramount!”

What lies ahead for Lovelace on a competitive front is unclear. For an athlete seemingly willing to take on all challenges and comers in her path, anything might be possible. The only ideal that might be obvious is that her awesome accomplishments should probably stop surprising the strongperson world.

Featured image: @rhianon.lovelace.kaosstrength on Instagram

The post Rhianon Lovelace Sets U64 Atlas Stone World Record of 146.8 Kilograms (324 Pounds) appeared first on Breaking Muscle.

Be Nice and Share!
This post was originally published on this site

Originally Posted At: https://breakingmuscle.com/feed/rss

The gym is for everyone. It’s for bodybuilders working to reach 5% body fat on stage and powerlifters who want to bench press 500 pounds. The gym is also for folks who have some gray in their hair, some well-earned laugh lines, and a few general aches and pains from more than two decades of “adulting” — that’s a term today’s kids use for the thing we just call “life.”

short-haired person in gym performing cable triceps pushdown
Credit: Lestertair / Shutterstock

If you’re checking the 40 or above age bracket on doctors’ forms, right before that doctor says, “You really should get more exercise,” you need to approach the gym with a few rules in mind. Not to be a buzzkill, but you can’t train like a 20-something because you don’t recover like a 20-something.

That certainly doesn’t mean Gen-Xers in the gym (Gym Xers?) are as delicate as the splinter-laden seesaws that used to be on the playground. You’re not stuck with light weight machine-based training or water aerobics, but you need to follow a few guidelines to get results with less pain. Here’s what to know about getting fit when you’ve got decent mileage on the chassis.

Over 40 Training Guide

Why Age Matters

The years eventually pile up on everyone and force change. Whether it’s Jennifer Grey going from an “it girl” to “who’s that girl?” or Green Day moving from punk rock revolution to Broadway musical, what matters most is acknowledging and accepting that everyone does, eventually, grow up. Just as sure as you can count on your favorite ’80s flick being resurrected as a weak remake, you can count on your body adapting to the added years. And, in both cases, it happens whether or not you want it to.

As you get older, wear and tear will eventually affect you whether it comes from lifting weights, playing tennis, working manual labor, or basic day-to-day activities. If you want to continue performing any of those activities for the long haul, it’s critical that you approach them with some kind of plan in mind.

However, this isn’t a proverbial (let alone literal) death sentence. It simply means that, if you want to begin weight training and other forms of exercise, you need to take a well-thought-out approach that will let your current body carry out the necessary pursuits.

gray-haired person in gym doing barbell squat
Credit: wavebreakmedia / Shutterstock

Particularly when it comes to weight training, research suggests that muscular recovery takes longer as a person ages. (1) So your weekly weight training plan needs to accommodate a slightly longer recovery period between sessions.

A relatively older body also doesn’t respond to volume or intensity the same way a younger body responds, so you need to establish a more carefully calculated approach to sets, repetitions, and load (weight). (2)

Lastly, if you’re coming in to the gym with any pre-existing injuries or conditions — which, of course, were totally caught early because you’ve gotten the classic full medical check-up before starting a training routine — those issues will directly impact the exercises you can or cannot (and should or should not) do. You might have your heart set on benching 315, but if you’ve lived with a torn rotator cuff since college, the lift probably isn’t in the cards.

Training for the Over 40 Beginner

There are plenty of successful competitive bodybuilders, powerlifters, Olympic weightlifters, and CrossFit athletes in their 40s, 50s, and beyond. That should indicate a clear sign that you can and should participate in some type of weight training at any age. But unless your actual goal is to compete in a specific strength sport, you’ll be best served by taking a wider outlook on how you plan your training program.

Remember in the early ‘90s when a new sport called “mixed martial arts” appeared on the scene? It highlighted what happened when a kickboxer fought a wrestler or a karate practitioner tussled with a taekwondo expert.

What eventually became obvious (over sequential MMA events and, inevitably, over the years) was that hyper-focusing on one single avenue of training limited overall development. The best modern-day mixed martial artists aren’t just a master of a single fighting style — they’re excellent at a few forms of combat.

long-haired person doing battle rope exercise outdoors
Credit: Diana Lopes / Shutterstock

To safely and effectively start training as a mature lifter, you must adopt that same well-rounded mindset. Train like a mixed martial artist. More specifically, don’t come into the training world expecting to train “like a powerlifter,” or “like a bodybuilder,” or any other relatively narrowed lens unless you have intentions of competing in a particular strength sport. But the odds are you don’t; you’re probably just here to get in shape. Here’s how you’ll get it done.

Choose The Right Exercises

Generally speaking, when it comes to picking your exercises, forget anything you’ve heard about “must-do” movements. The powerlifting big three — back squat, bench press, and conventional deadlift — are often touted as “the way” to build a base of size and strength. That’s well-intentioned advice but inapplicable and unnecessary for the over-40 crowd.

While there’s nothing inherently wrong with those three specific exercises, they’re not overwhelmingly more effective than, say, front squats, overhead presses, and trap bar deadlifts. Again: If you’re not going to be a competitive powerlifter, you’re not limited to training like a competitive powerlifter.

Choosing a variety of multi-joint and single-joint exercises will efficiently target your entire body without neglecting or over-emphasizing anything. Be sure to incorporate a range of equipment like barbells, dumbbells, cable pulleys, machines, resistance bands, kettlebells, and any useful gear you find in the gym. This can help reduce potential overuse pattern injuries compared to performing the same five exercises for months.

Most importantly, don’t force-feed your body any exercise that doesn’t mesh with your pre-existing joint issues. Suppose you have long legs for your height. In that case, you may be more comfortable performing sumo deadlifts instead of using a closer, conventional stance, even though Internet meme culture will try to convince you that sumo deads are a lesser choice.

Sets and Reps

A popular old school mindset used to advocate throwing everything plus the kitchen sink into a training session. The goal was to thoroughly breakdown the muscle fibers and dig a deep trench of fatigue that “should” later be filled in with an abundance of new muscle tissue. However, a moderate workload can stimulate muscle and strength gains more efficiently than a super-high volume plan that blasts every body part with multiple exercises for a half-dozen sets of each movement.

long-haired person in gym doing deadlift
Credit: YAKOBCHUK VIACHESLAV / Shutterstock

The specific exercises will play a factor in determining adequate volume for each movement. For example, you typically wouldn’t perform a deadlift for sets of 20 reps because cardiovascular conditioning and low back fatigue would become the limiting factor before other target muscles.

Generally speaking, six to 10 sets of five to 12 reps per body part per week is an effective place to start. (3) Ideally, this would be split into multiple movements across multiple weekly training sessions. Relatively larger body parts like your back and legs could necessitate the higher end of the workload. Smaller body parts like biceps or abdominals can be sufficiently trained with a lesser amount of direct training.

For example, you might perform five sets of lat pulldowns and three sets of cable curls on Monday, followed by five sets of rows and three sets of dumbbell curls on Thursday. Or you could train “back and biceps” one day per week and tackle three to four sets of deadlifts, rows, chin-ups, followed by two or three sets of preacher curls and hammer curls.

As a very general rule, strength-focused lifts that let you load relatively heavier weights are effective when trained with three to five sets of four to six reps. Exercises that aren’t conducive to heavy loading, like many single-joint movements, can be more effectively trained with two to four sets of eight to 12 reps.

How Heavy, How Hard?

Due to a relatively reduced capacity to recover, don’t turn the dial up to 11 in any particular training session. You want to make it through your workout and walk out of the gym feeling successful, not beaten down.

Avoid taking too many (if any) sets to complete muscular failure. Pushing to failure too often can potentially compromise technique, which can invite injury. It also increases overall recovery demands while providing little to no extra stimulus for building size or strength. (4)

Similarly, the weight used for any set should allow you to reach your target rep range with solid form. Struggling to complete a set whenever needed is fine; compromising your form and cheating the movement to get an extra rep or two is a high-risk/low-reward idea.

How Many Days Per Week?

Many people spend 40 to 50 hours per week working. Add in a daily commute, time with family, and maybe even a little time to eat every day, and your schedule can quickly become too crowded for the gym. Making time to train is one of the biggest hurdles you’ll need to overcome before you even touch a weight.

Rather than overwhelm your week by trying to fit five or more workouts into an already crowded schedule, consider starting with three weight training sessions per week. When properly programmed, and paired with a little non-gym activity, that can be a highly effective approach.

shirtless person in gym performing dumbbell shoulder exercise
Credit: Paul Aiken / Shutterstock

Rather than training just one or two body parts per day, which would require at least five training days to target your entire body, consider following an upper/lower split, a push/pull/legs plan, or a full-body training routine to set up more efficient training within the framework of three sessions per week.

On any non-lifting days, you can perform short conditioning workouts or some type of cardio training to complement the gym sessions. By staying active throughout the week, you’ll burn a few extra calories and improve your cardiovascular health. In fact, when performed as part of a comprehensive program, doing some type of cardio exercise for as little as three hours (total) per week has been associated with a reduced mortality risk. (5)

Combine that with research indicating that weight training for 60 minutes per week (a bare minimum target) is also associated with reduced mortality risk, and it’s clear why the doctor keeps harping on you to start exercising. (6) If you’re active more days of the week than not, you’ll be moving in the right direction in terms of health, physique, and performance.

Nutrition and Recovery Tips

If going to the gym was all it took to get into great shape, well, it would be a lot easier for everyone to get into great shape. However, training is only one part of the puzzle. Just like Ferris had Sloane and Cameron, your training needs support from good nutrition habits and recovery methods.

Nutrition

Once you’ve made the decision to begin training, you’ve also made the decision to support that training with a goal-focused nutrition plan. They’re linked. Otherwise, you’ll end up wasting time and energy because you won’t be able to capitalize on the fat-burning, muscle-building training stimulus.

Whether your goal is to drop some body fat or pack on more lean muscle, it’s important to pay attention to your protein intake (the critical building block for muscle tissue), monitor your total calories, and adjust on a weekly or biweekly basis according to results.

Gray-haired person cooking food in kitchen
Credit: OPOLJA / Shutterstock

There are countless specific nutrition plans available, with varying degrees of effectiveness. If you can adhere to a handful of tips, you’ll be able to stay on course.

  • Drink as few calories as possible — This includes fruit juice, soda, high-sugar coffee drinks, and alcohol.”Liquid calories” often add up quickly and sneakily, which can be a deal-breaker if you’re trying to shed some pounds.
  • Drink more water — Inconceivable, right? Drink water to improve your health. It’s still worth repeating. Proper hydration can improve everything from your blood pressure to your in-gym performance. (7) Get a half-gallon jug and finish it every day.
  • Have high-quality protein every time you eat — Carbohydrates and fats can be very important nutrients to fuel performance in and out of the gym. However, ample protein from quality sources is the only way to build more muscle tissue. Aim for .75 to one gram of protein per pound of body weight. (8)
  • Eat fresh, home-cooked food more than you eat out — Consider this the “pack a lunch, don’t hit the drive-thru” rule. Highly processed foods have been associated with higher saturated fat, higher sugar, and increased body fat gain compared to less processed foods. (9)(10

Recovery

Train all you want, but without ample recovery, you won’t get any closer to your goals. As a slightly older lifter, you’ll benefit from focusing on general recovery methods to support your training efforts. (1)

One of the most efficient ways to improve your daily recovery is to improve your sleep quality and, as best as possible, sleep quantity. Poor sleep habits have been shown to negatively impact hormone levels, strength levels, and lean muscle mass. (11)

Another overlooked recovery booster is going for a walk. Daily or frequent walks have been shown to improve cardiovascular health and fat loss. (12) Walk the dog, walk your kids to the bus stop, walk the grandkids to the playground, whatever gets the job done.

If you start your training plan and feel like it’s still too much to handle, consider swapping one workout day for a day of exercise “snacks.” These brief mini-sessions, lasting less than five minutes each, can be used either as a cardio alternative or for strength training. When done consistently, this can boost cardiovascular fitness. (13)

When you apply this throughout-the-day method to strength training exercises, it’s known as “greasing the groove” and it can be an excellent way to improve exercise technique, build strength, and trigger muscle growth. It’s most commonly applied to bodyweight exercises like push-ups or pull-ups, but it can be performed with weighted movements as well.

Mobility

If you’ve started calling your ankles, knees, and wrists “Snap, Crackle, and Pop” because of the constant noises they make, it’s probably time for some mobility work. Whether it’s a few minutes of simple stretching, an online yoga class, or some time spent on a foam roller, you can significantly reduce the general aches and pains by treating mobility work with a bit of attention.

YouTube Video

Mobility training could technically be considered an adjunct to recovery, since it can enhance general blood flow, improve flexibility, and reduce post-workout soreness. Whichever way you want to categorize it, make sure it’s on your weekly to-do list.

Don’t want to spend an entire session on mobility drills? Then try starting every weight training workout with two or three reps of the Turkish get-up. That’s one “hack” to finding out exactly where your body needs work since it’s a total-body movement that involves your ankles, knees, hips, core, elbows, shoulders, and upper back in a single go.

Sample Workout Plan

You need some strength work, and some muscle-building work, and some conditioning, and some mobility training. Fortunately, you don’t have to do everything in every workout. Plan on hitting the gym three days per week, alternating between two basic full-body workouts. Save one or two additional days for cardio/conditioning sessions and plug them in according to your schedule.

The only rule with this workout design is to not perform the same type of workout two days in a row. For example, a weight training workout can be followed by a rest day or a cardio/conditioning day, not another weight training workout.

Woman in gym performing cable row back exercise
Credit: Leika production / Shutterstock

The details of the program (exercises, sets, and reps) can be adjusted according to your specific goal, but this is an effective “all-around” starter program to become acclimated to consistent training.

Weight Training Workout One

Rest two minutes between sets of the first exercise. Rest 45 to 60 seconds between sets for other exercises.

Weight Training Workout Two

Rest two minutes between sets of the first exercise. Rest 45 to 60 seconds between sets for other exercises.

Cardio/Conditioning Workout One

Perform the following as a complex — perform one set of each exercise with no rest between movements. Rest 90 seconds after the final exercise before repeating the entire sequence. Use the same barbell and the same weight for each exercise.

Cardio/Conditioning Workout Two

Complete the farmer’s walk. Follow with a regular, plain ol’, unweighted walk either immediately or later in the day.

Welcome to the First Day of the Rest of Your Life

The Kurgan was wrong. It’s definitely not better to burn out than to fade away. Fortunately, with the right approach, you don’t have to do either. Whatever prompted you to start hitting the gym — whether it was a health scare, a little grandbaby you want to see get married some day, or just a desire to look great at your 30th high school reunion — follow the plan and you just might feel like you’ve gone back in time.

References

  1. Fell, J., & Williams, D. (2008). The effect of aging on skeletal-muscle recovery from exercise: possible implications for aging athletes. Journal of aging and physical activity, 16(1), 97–115. https://doi.org/10.1123/japa.16.1.97
  2. Foster, Carl & Wright, Glenn & Battista, Rebecca & Porcari, John. (2007). Training in the aging athlete. Current sports medicine reports. 6. 200-6. 10.1007/s11932-007-0029-4.
  3. Borde, R., Hortobágyi, T., & Granacher, U. (2015). Dose-Response Relationships of Resistance Training in Healthy Old Adults: A Systematic Review and Meta-Analysis. Sports medicine (Auckland, N.Z.), 45(12), 1693–1720. https://doi.org/10.1007/s40279-015-0385-9
  4. Grgic, J., Schoenfeld, B. J., Orazem, J., & Sabol, F. (2022). Effects of resistance training performed to repetition failure or non-failure on muscular strength and hypertrophy: A systematic review and meta-analysis. Journal of sport and health science, 11(2), 202–211. https://doi.org/10.1016/j.jshs.2021.01.007
  5. Coleman, Carver & McDonough, Daniel & Pope, Zachary & Pope, C.. (2022). Dose-response association of aerobic and muscle-strengthening physical activity with mortality: a national cohort study of 416,420 US adults. British Journal of Sports Medicine. bjsports-2022. 10.1136/bjsports-2022-105519. 
  6. Momma H, Kawakami R, Honda T, et alMuscle-strengthening activities are associated with lower risk and mortality in major non-communicable diseases: a systematic review and meta-analysis of cohort studiesBritish Journal of Sports Medicine 2022;56:755-763.
  7. Popkin, B. M., D’Anci, K. E., & Rosenberg, I. H. (2010). Water, hydration, and health. Nutrition reviews, 68(8), 439–458. https://doi.org/10.1111/j.1753-4887.2010.00304.x
  8. Morton, R. W., Murphy, K. T., McKellar, S. R., Schoenfeld, B. J., Henselmans, M., Helms, E., Aragon, A. A., Devries, M. C., Banfield, L., Krieger, J. W., & Phillips, S. M. (2018). A systematic review, meta-analysis and meta-regression of the effect of protein supplementation on resistance training-induced gains in muscle mass and strength in healthy adults. British journal of sports medicine, 52(6), 376–384. https://doi.org/10.1136/bjsports-2017-097608
  9. Poti, J.M., Braga, B. & Qin, B. Ultra-processed Food Intake and Obesity: What Really Matters for Health—Processing or Nutrient Content?. Curr Obes Rep 6, 420–431 (2017). https://doi.org/10.1007/s13679-017-0285-4
  10. Hall, K. D., Ayuketah, A., Brychta, R., Cai, H., Cassimatis, T., Chen, K. Y., Chung, S. T., Costa, E., Courville, A., Darcey, V., Fletcher, L. A., Forde, C. G., Gharib, A. M., Guo, J., Howard, R., Joseph, P. V., McGehee, S., Ouwerkerk, R., Raisinger, K., … Zhou, M. (2019). Ultra-processed diets cause excess calorie intake and weight gain: An inpatient randomized controlled trial of AD Libitum Food Intake. Cell Metabolism, 30(1). https://doi.org/10.1016/j.cmet.2019.05.008 
  11. Auyeung, T. W., Kwok, T., Leung, J., Lee, J. S., Ohlsson, C., Vandenput, L., Wing, Y. K., & Woo, J. (2015). Sleep Duration and Disturbances Were Associated With Testosterone Level, Muscle Mass, and Muscle Strength–A Cross-Sectional Study in 1274 Older Men. Journal of the American Medical Directors Association, 16(7), 630.e1–630.e6306. https://doi.org/10.1016/j.jamda.2015.04.006
  12. Serwe, K. M., Swartz, A. M., Hart, T. L., & Strath, S. J. (2011). Effectiveness of long and short bout walking on increasing physical activity in women. Journal of women’s health (2002), 20(2), 247–253. https://doi.org/10.1089/jwh.2010.2019
  13. Jenkins, E. M., Nairn, L. N., Skelly, L. E., Little, J. P., & Gibala, M. J. (2019). Do stair climbing exercise “snacks” improve cardiorespiratory fitness?. Applied physiology, nutrition, and metabolism = Physiologie appliquee, nutrition et metabolisme, 44(6), 681–684. https://doi.org/10.1139/apnm-2018-0675

Featured Image: wavebreakmedia / Shutterstock

The post How to Start Training if You’re Over 40 appeared first on Breaking Muscle.

Be Nice and Share!
This post was originally published on this site

Originally Posted At: https://breakingmuscle.com/feed/rss

Mark Felix began his World’s Strongest Man (WSM) career back in 2004, and slowly but surely chipped away. The established titan would attain his best career result in 2006 when he finished in fourth place. Now, after years of lifting Atlas Stones among the world’s best almost every spring, the 56-year-old Grenadian athlete will be focusing his strength and energy elsewhere moving forward.

On Feb. 19, 2023, Felix wrote an Instagram post where he revealed he would soon retire from WSM competition. Once the 2023 iteration of the contest is in the books after April — his 18th appearance over the past 19 years— Felix will no longer participate in the WSM. He joins the legendary Brian Shaw as the latest strongman veteran to announce their WSM retirement. Though, crucially, it won’t be the last anyone sees of Felix as a professional strongman overall.

After clarifying that he would officially be on the 2023 WSM roster, Felix made sure to nip a few potential questions in the bud. The 2023 WSM might be his last, but he’ll still be quite active on other competitive circuits.

Why? Competing in strongman appears to be his passion.

“So incredibly excited to be a confirmed athlete for my 18th [World’s Strongest Man] show and the oldest strongman ever to compete at the WSM,” Felix wrote. “I have decided that this year will be my last time I compete at the [WSM] show, but I will continue to compete at [Giants Live] shows and [Official Strongman Games] shows. Strongman is in my blood, and I will hopefully be able to continue to compete for many many years to come.”

According to Strongman Archives, Felix debuted as a strongman during a sixth-place performance at the 2004 Britain’s Strongest Man (BSM) competition. His career highlights might be his prolific 17 berths at the WSM, along with four Finals appearances. One of his better Giants Live contest results was taking fifth place at the 2021 Arnold Strongman Classic UK (ASCUK). Meanwhile, in the Official Strongman Games (OSG), he is the defending champion in the Men’s Masters 50-plus category.

When it comes to international records, Felix recently set a World Record on the Wrecking Ball Hold at the 2022 WSM when he held up the titular implement for two minutes and 20.49 seconds.

While Felix might be set to lift his last Fingal’s Fingers and pull his last vehicles in a WSM setting, the strongman community certainly hasn’t seen the last of this competitor. For someone who has been so active for so long, perhaps the opportunity to refocus will lead to improved performances in the years to come.

@markfelixwsm on Instagram

The post Mark Felix Reveals 2023 World’s Strongest Man Will Be His Final Appearance at the Contest appeared first on Breaking Muscle.

Be Nice and Share!
This post was originally published on this site

http://www.thealternativedaily.com/

Do you crave a warm shower each day to help you relax? The truth is, most of us think the health benefits of showering come from a warm shower, when turning the temperature down is actually highly therapeutic. Although it may not seem appealing at first, swapping out a few warm showers a week with […]

Be Nice and Share!
This post was originally published on this site

http://www.marksdailyapple.com/

Research of the Week

More good news about Covid immunity.

The case studies about using ketogenic diets for binge eating are impressive.

Fructose may bear some responsibility for Alzheimer’s.

Getting a Michelin star might make a restaurant more likely to fail.

Hominins were using stone tools to butcher large prey a million years earlier than expected.

New Primal Kitchen Podcasts

Primal Health Coach Radio: Closing Your Client’s Intention-Behavior Gap with Monica Reinagel

Media, Schmedia

Major German grocery chain set to reduce meat in stores.

What’s going on with egg prices, lawmakers wonder.

Interesting Blog Posts

On the impact of low-carb diets on cholesterol.

On lab meat and cancer.

Social Notes

Helluva breakfast.

How I’m eating these days.

Everything Else

Protein is the primary directive.

Things I’m Up to and Interested In

Interesting paper: Competitive middle aged athletes who switched to a high-fat, low-carb diet suffered no decrement in mile or 800 meter run performance.

Cool study: Increase the incline to make treadmill running more similar to overland running.

I want to believe: Could the hobbits of Flores Island still exist?

My favorite type of garden: Oyster garden.

Incredible: Japanese scientists quantify new antioxidants in meat.

Question I’m Asking

What do you believe that few people agree with?

Recipe Corner

Time Capsule

One year ago (Feb 11 – Feb 17)

Comment of the Week

“Those of us who need Ozympic to control our diabetes are having a hard time getting it because the weight loss community is buying all of it. Please, people, don’t interfere with our health in order to look “prettier.”

-If true, I wonder why they wouldn’t just make more to meet demand.

Primal_Essentials_640x80

The post New and Noteworthy: What I Read This Week—Edition 209 appeared first on Mark’s Daily Apple.

Be Nice and Share!
This post was originally published on this site

Originally Posted At: https://breakingmuscle.com/feed/rss

Is there a feat of strength more visually striking than taking a heavy chunk of metal from the ground, heaving it into the air, and locking it overhead? The image alone, sometimes seen in silhouette, is iconic.

The clean & jerk, along with the snatch, make up the Olympic lifts — the only strength sport currently competed in the Olympics. The “C&J” is a complete movement which can develop strength, power, coordination, speed, and muscle throughout your whole body if you can master it.

Muscular person in gym lifting barbell overhead
Credit: Photology1971 / Shutterstock

No wonder it is used in many strength and conditioning programs to produce high-performance athletes, or that the exercise made its way into CrossFit training, which emphasizes challenging your entire body as often as possible.

The clean & jerk is composed of two distinct movements: the clean and the jerk (yes, it’s that simple). Each of these lifts is complex enough on its own, and combining both during a single repetition is a challenging task. But don’t worry, you’re about to discover a detailed breakdown on how to master this beast of a lift.

Clean & Jerk

How to Do the Clean & Jerk Step by Step

The clean & jerk is an explosive movement that requires (and builds) strength, coordination, and speed. You cannot perform a correct clean & jerk slowly. This is one of the reasons why it’s so demanding. The technique requires timing, mobility, and total-body coordination.

Ideally, you’ll load the bar with specialized, rubber-coated bumper plates which allow a safer and more efficient way to perform the final phase of each repetition, but the clean & jerk can be performed (carefully) with any metal plates.

Step 1 — Get Into the Starting Position

A person starting to do a clean & jerk.
Credit: baranq / Shutterstock

Stand in front of a barbell on the ground with a hips-wide stance. Angle your toes and knees slightly outward. Bend at your hips and hinge forward to grab the bar with a slightly wider than shoulder-width grip, using a pronated (palm down) grip. 

Squat down until your shoulders are slightly above the barbell. Your hips should be lower than your shoulders but higher than your knees. Keep your back flat, your chest high, and look forward.

Form tip: Keep the bar close touching, or almost touching, your shins during the setup. This will ensure a proper bar path with less lower back strain.

Step 2 — Initiate the “First Pull”

A person doing the first pull in a clean & jerk.
Credit: baranq / Shutterstock

The first pull is the term for the start of the clean. It’s the moment you break the barbell from the ground and bring it to your knees. Brace your core, flex your lats, and drive with your legs by pushing your feet through the ground. Your hips and shoulders should raise at the same speed, while the barbell remains very close to your body. The first pull is not unlike the initial start of a standard deadlift.

Form tip: Because the clean & jerk is an explosive movement, you might be tempted to explode off the floor to generate force as quickly as possible. Don’t. Focus on being in control of the barbell with your whole body braced. Especially if you’re not sure about your technique, slow down your first pull.

Step 3 — Explode Into the “Second Pull”

two people in gym lifting barbells from ground
Credit: Ground Picture / Shutterstock

In this phase, you’ll achieve triple extension — full extension of your hips, knees, and ankles. The second pull occurs as the bar passes your knees. Now you can explode up with as much force as possible by extending your whole lower body. 

While keeping your arms straight, extend your hips and knees forcefully. As you extend, push through the balls of your feet as hard as you can. Your heels should raise off the ground. If you’ve performed a complete triple extension, your body in a complete straight line, with only your toes and the balls of your feet on the floor.

Form tip: Think of jumping as high as you can to transfer maximum power into the bar, but don’t actually lose contact with the ground. Because the movement is a hip hinge, you could be tempted to explode your hips forward like a kettlebell swing to try to generate force, but it will result in an inefficient bar path. Once you pass your knees, think “up, up, up.”

Step 4 — Transition Into the “Third Pull”

A person doing the third pull in a clean & jerk.
Credit: SOK Studio / Shutterstock

Now that you’ve transferred force from your lower body to raise the bar, the third pull is actually pulling yourself “under” the barbell to catch it. As you finish the triple extension and rise onto your toes, shrug as hard as you can to give even more energy to the bar while “pulling” yourself under it.

End up with your knees slightly bent and your chest proud, ready to receive the bar in a front rack position.

Form tip: “Attack” the ground with force. Imagine you’re trying to hit the floor as fast as you can once you stand on your toes.

Step 5 — Catch the Bar and Stand Up

Person in dark hold holding barbell on shoulders
Credit: Mongkolchon Akesin / Shutterstock

Let your arms bend and squat down to catch the bar between the front of your shoulders and your clavicles, keeping your elbows as high as you can. Perform a powerful front squat until you stand tall.

Form tip: How low you “should” squat to catch the bar depends on the weight relative to your strength, and how much force you applied to the bar. The harder and heavier it is, the deeper you’ll likely have to squat. If you have to squat to parallel or below, the movement is considered a “full clean.” If you receive the bar in a higher squat position, it’s called a “power clean.”

Step 6 — Dip Down

A person dipping during a clean & jerk.
Credit: baranq / Shutterstock

The clean phase of the lift is now complete. It’s time to tackle the jerk. From the front rack position, bend your knees and dip down a few inches to accumulate energy in your lower body. Only bend at your knees, not your hips, to ensure a vertical bar path and whole-body stability.

Form tip: Before initiating the dip, you can slightly lower your elbows, so that they are between a front squat (facing forward) and a push press (facing the ground) position. This will allow you to use a bit more shoulder power to lift the weight. Depending on your upper body mobility, you may also feel comfortable adjusting to a slightly wider hand position.

Step 7 — Jerk the Weight Up

Muscular person in gym pressing barbell overhead
Credit: Photology1971 / Shutterstock

Push as hard as you can through your legs to drive the bar up. Use the same triple extension as during the clean to generate as much force as you can — completely extend your hips, knees, and ankles — and then push the weight with your arms.

Form tip: Do not bend forward. That will sacrifice power, increase strain on your lower back, and shift the bar into a less efficient path that’s more likely to fail the lift. Keep a completely vertical bar path. 

Step 8 — Split and Catch the Barbell

A person jerking the barbell up and splitting during a clean & jerk.
Credit: baranq / Shutterstock

From this position, transition as fast as possible into your catch position by splitting into a half-lunge. Quickly position one leg in front of you, with your foot flat and your knee vertical, and one behind you, slightly bent and with your weight on your toes. Assume a shoulder-wide stance. Straighten your arms forcefully and keep them straight the rest of the exercise.

Form tip: The bar should end up directly over your upper back, not directly above your head. At lockout, your arms should be vertical and not angled to the front or back.

Step 9 — Recover and Finish the Lift

A person holding a barbell up in a complete  clean & jerk.
Credit: SOK Studio / Shutterstock

Bring your front foot back in half of the way, and then bring it directly under you. Now, bring your rear leg forward and hold the position with the bar overhead briefly. That’s it, you’ve completed a clean & jerk.

From there, if you’re on a weightlifting platform and using bumper plates, gently guide the bar back to the ground with control — don’t let it free fall wildly. If you’re lifting with metal plates, lower the bar to the front rack position across the front of your shoulders, and then lower it to your hip crease before “deadlifting” it down to the ground.

Form tip: That entire sequence was one single repetition. When the bar is returned to the ground, take a breath and refocus before performing additional reps.

Clean & Jerk Mistakes to Avoid

This exercise is very technical, so minor mistakes are bound to happen until you really nail it. Try to avoid these blunders though, as they will hinder your progress and could potentially lead to injury.

Using Too Much Weight

Technique should always come before weight with any exercise, but it rings even more true with the Olympic lifts. Using too much weight will force your body to use the path of least resistance, instead of proper technique and efficient bar path.

This results in “muscling” the weight up and grinding a lift that should be performed smoothly. You’ll never learn the proper technique that way and you’ll only risk injury, especially at the shoulder complex.

A person holding a heavy barbell.
Credit: SOK Studio / Shutterstock

Avoid it: Make sure you use appropriate weight and feel confident in your technique before increasing the load. If you change the weight and your movement is different, you have to spend more time at a lower weight. It’s not uncommon for beginning lifters to learn the clean & jerk with a broomstick before even using a 45-pound barbell.

Not Staying Over The Bar

During the clean & jerk, your shoulders have to stay slightly in front of the bar until you finish the second pull and completely extend your body. This will help you maximize bar height and path. If your body doesn’t stay in good alignment, you can’t effectively transfer force into the bar and the bar path is less likely to be vertical.

 A person trying to do a clean and jerk.
Credit: Dewald Kirsten / Shutterstock

Avoid it: Keep your weight balanced over the middle of your feet. Do not put too much weight on your toes (unless you’re supposed to be in full extension) or on your heels. Do not rush the first pull. Control the bar until the moment you explode up.

Not Keeping the Bar Close to You

Keeping the bar close to you is paramount for optimal bar path, to optimize bar height and power, as well as minimizing low back strain and upper-body involvement.

If the bar drifts away from you, you’ll most likely end up performing a “muscle clean,” a technically easier variation involving much more shoulders and upper back muscle than lower body. While it can be a good exercise, it’s not a clean. You’ll never be able to use as much weight or develop total-body power.

A person trying to do a clean and jerk.
Credit: Ground Picture / Shutterstock

Avoid it: Keep the bar close to you at absolutely all times. Slow down the start of the lift so that the bar is grazing you until you completely extend your hips. With some people, there’s even contact at the hips.

Squatting the Dip

A person squatting during a clean and jerk.
Credit: Jasminko Ibrakovic / Shutterstock

When you dip and create the leg drive, you might be tempted to squat deep. But the dip is not meant to be a squat. If you bend at your hips, you risk losing your upright position and send the bar forward instead of in a straight line in the air.

The dip should be short and fast. You shouldn’t go too low or actually squat the weight down. You’ll simply lose strength and the catch will become that much harder. 

Avoid it: Only dip down a few inches while staying as upright as possible. Remind yourself, “quick dip, not a deep squat.” 

How to Progress the Clean & Jerk 

This lift being very technical, it might be useful to incorporate several of these progressions in your training to learn and strengthen key positions of the movement. You can incorporate the technique piece by piece. You could dedicate full workouts to the lift or you can add clean progressions to your lower body days, and jerk progressions to an upper body workout.

Clean Pull

Weightlifting is all about generating power, and the clean pull is amazing at that. This progression only consists of the first and second pull of the clean, followed by a powerful shrug and upright row.

YouTube Video

Get into your clean position, raise the barbell to your knee with control, then violently explode up by extending your hips, knees, and ankles. Then shrug and let your elbows bend to raise the barbell to at least chest level, up until your chin. Keep the barbell close to your body at all times. This progression is great to learn how to generate power and the first part of the clean.

Hang Clean

Where most of the mistakes happen during the clean is actually at the start: during the set-up and the first pull. If you fail to execute this portion perfectly, the rest of the lift is bound to be subpar.

YouTube Video

The hang clean avoids this by having you start the lift “from the hang”, with the barbell at around knee level — you only have to do the second and third pull and the catch. You can practice the end of the movement more easily this way. 

Power Clean

The power clean is the opposite, you perform a clean with a lighter weight and you catch it only with your knees slightly bent over parallel. Not having to squat all the way down makes the movement easier especially if you’re not the most mobile lifter.

YouTube Video

You can make the exercise even simpler and perform it from “the hang”, combining both of the best worlds for developing raw power and simplicity. 

Muscle Clean and Press

Here we bypass the most technical aspects of the lifts to rely more on our muscles to perform it. You won’t be able to use as much weight, but this is a great exercise to add size to your frame.

YouTube Video

To perform the muscle clean, get into your clean position, pull the bar up and explode like a regular clean. But, instead of positioning yourself into a squat after the full-body extension, keep your legs and torso straight and pull the weight up with your elbows as high as you can. Once they are at maximal height, quickly bring them around the bar into the front rack position to catch the bar while standing tall. From there, press the weight up by extending the arms until the bar is locked out overhead, then lower it with control to your collarbone.

Push Press

This hybrid between a press and a jerk teaches you to dip and use your legs to assist your upper body in lifting more weight. Grab a barbell with a full grip and assume a front rack position, with the barbell sitting between your anterior deltoids (front of your shoulder) and your clavicles.

YouTube Video

Shrug your shoulders up and forward to create a kind of “muscle nest” for the bar. Lower your elbows a bit so that you’ll be able to use more arms. Dip down by bending at the knees for a few inches, then explode up as hard as you can. When your legs are completely extended, press the bar up as much as you can by trying to punch the ceiling. Then, lower it with control to the initial position. 

Power Jerk

This variation is equivalent to the power clean, but with the jerk. Begin with the barbell in a front racked position, either from a rack or after having cleaned it. Dip down, then explode up and forcefully extend your arms, like a traditional jerk.

YouTube Video

But instead of splitting your feet and catching the bar in a deep squat, you attack the ground with both feet in a traditional squat stance and receive it with your knees slightly bent. This way, you bypass the technical split catch position and focus on the first part of the jerk.

Benefits of the Clean & Jerk

If this exercise is so complicated, why do so many athletes want to learn it? It’s simple: it offers benefits no other can reciprocate (apart, perhaps, from the snatch, which is even harder). Here is what this exercise has to offer.

Increases Explosive Power

Power is the capacity to move weights as fast as possible. It’s a mixture of speed and strength, and increasing your power means you’ll most likely improve your strength and speed as well! Indeed, this exercise will teach your brain to better recruit your muscles so that they reach a higher peak force and to reach it faster.

YouTube Video

It is also very relevant for athletes who have to move their own bodies or implements fast: they aren’t weightless. It means that this exercise will help them run faster, jump higher, throw farther, and tackle harder. If you’re an athlete, this is one of the most efficient and effective exercises to make you better at your sport. (1)

Total-Body Strength

To grab a weighted barbell and balance it over your head requires tremendous strength from head to toe (or, more accurately, from traps to calves). With the clean & jerk, you can load relatively more weight than with the snatch, so it’s an explosive movement that tends toward building pure strength and power. This exercise recruits pretty much all of the muscles in your body and puts them to the test. Indeed, it alternates between pulling and pushing phases for the whole-body.

Improves Balance, Posture, and Coordination

Holding weight in the front rack position, then throwing it in the air and balancing it overheard requires a core and a back of steel and will build strong and stable shoulders. This will result in a better posture and a more resilient back.

A starting to do a clean and jerk.
Credit: Ground Picture / Shutterstock

Then, you need a great deal of coordination to move with precision, speed, and strength both upper-body and lower-body limbs at the same time. Finally, it takes a whole lot of balance to maintain the split position and catch a heavy weight that way. This exercise builds strength and speed, but for that you also have to build better body mechanics and athletic qualities. (2)

Better Cardiovascular Health

As this exercise recruits pretty much all of the muscles in the body, the demand placed on the cardiovascular system is tremendous because your heart has to pump blood everywhere. Studies have found that weightlifting improves resting heart rate, VO2 max, and blood pressure. (3)

Even with an empty barbell, properly done clean & jerks can leave you breathless. No wonder relatively high reps of these are frequently used in CrossFit to gauge the endurance capacities of athletes.

Muscles Worked by the Clean & Jerk

There’s no muscles spared by the clean & jerk. From your forearms to grip the barbell all the way down to the calves to project it in the air. Let’s cover the main movers of this exercise.

Quadriceps

The quadriceps are the biggest leg muscles, and are among the body’s strongest. They go from the femur or hip bone to the tibia in the lower leg. Their main function is to extend the knee. As such, they will be responsible for most of the power generated during the exercise.

They are extensively recruited during the triple extension to project the barbell in the air, and even more during the deep front squat that follows the catch. Then, they will also be mainly responsible for propulsing the barbell upwards during the jerk, just after the dip, and to get up from the lunge required to catch it during the split.

Pressing Muscles

During the jerk, these upper body muscles will be tremendously recruited to help pressing the bar overhead and hold it there with the arms locked out. They are your deltoids (shoulder muscles), pectoralis major (chest), and your triceps (the posterior arm muscles). 

A person's chest.
Credit: winnievinzence / Shutterstock

The deltoid goes from the clavicle and scapula (shoulder blade) to the humerus — the arm bone. This muscle will raise the arm upwards. The front delts will be the most recruited, but they all participate in the movement. The chest is also attached to the humerus, then to the sternum and ribs. Only its upper fibers will be recruited here, assisting the deltoids. Finally the triceps goes from the scapula and humerus to the ulna (forearm bone). Its function here is to extend the arm to press the weight up and keep the arms locked out.

Posterior Chain

The posterior chain, as a whole, will contribute to the movement. In the lower body, the hamstrings and glutes will extend the hips and be mainly responsible for the deadlift portion and cleaning the weight, while the calves will contribute to the explosive portion of both the clean and the jerk through ankle extension.

In the upper body, the erector spinae will help with hip extension as well as back extension in the clean, and the trapezius for the final pull upward. The whole of your back will be recruited to maintain posture as well as arm and scapular stability.

How to Program the Clean & Jerk

Because of its technical component, this movement has to be done in a specific way. Generally you want to avoid too much fatigue for it might result in technical breakdown that will reduce neural efficiency and increase the time to master the lift, as well as risking injury. 

Medium to Heavy Weight, Low Repetitions

How heavy you can go will depend on your technical proficiency, but three to five sets of one to five reps should be the bulk of your programming. You want perfect technique on all repetitions, and this is why we avoid doing longer sets, as fatigue will generate form breakdown.

YouTube Video

If you cannot move the bar fast, you cannot use good technique, and you’ll end up hurt. Staying in that one to five rep range ensures you’re performing mostly “neural” work, so muscular fatigue shouldn’t become an issue. Make sure to use ample rest periods of at least two minutes.

EMOM

The every minute on the minute format is an excellent way to learn the Olympic lift and practice technique, as the short breaks allow for quality work and increased density — meaning a lot of work in a short time. (4)

Set a timer that will ring every minute, or every 90 seconds if you want to go heavier. Every time the alarm rings, perform one to three repetitions and rest for the remaining time, for a total duration of ten to 20 minutes. You can get creative and use different weight and repetitions schemes during the period. You could also incorporate exercise progressions. Just be sure to always use perfect form.

For instance, you could do five minutes of three reps with the muscle clean and press, then five minutes of two reps using the power clean and push press, and finally five minutes of a one-rep clean & jerk.

Clean & Jerk Variations

If you don’t have access to a barbell, want to spice things up, or try a less challenging variation, don’t worry. There are several clean & jerk variations in stock.

Dumbbell Clean & Jerk

Changing the equipment will make the exercise technically easier while involving more muscles at the same time, especially in the shoulders and traps. Grab a pair of dumbbells and perform similar to the barbell clean & jerk.

YouTube Video

To avoid having to go extra deep, have only one of the heads of the dumbbells touch the ground on each repetition. Because this variation is less technical and risky, you can actually use it for longer sets and enjoy muscular fatigue to build more muscle or endurance very easily. You can also do it with a pair of kettlebells.

Clean & Squat Jerk

Only the jerk portion of the lift is different with this movement. Instead of assuming a half-lunge position to catch the barbell in a split, catch it in a deep squat. After dipping down and exploding upwards, “attack” the ground forcefully with your feet in a shoulder-width stance and squat down at the required depth.

YouTube Video

This variation requires extra mobility and balance, but has the advantage of not needing to elevate the barbell as much during the jerk in order to lift more weight because you can drop deeper in the squat position than in the lunge.

Continental Clean & Jerk

This brutal exercise typically requires an axle or fat bar. This specialized bar is used in many strongman or strongwoman contests because its two to three-inch thick grip will eventually make grip strength the limiting factor in any exercise.

To perform the continental clean, you use a mixed grip with one hand is flipped under the axle (palm up) and the other hand in a palm-down grip. Perform a traditional clean, and don’t forget to shrug hard at the top, then the bar should be guided and set at around lower sternum-level. It can help if you have a “power belly” to rest it on. Without that, a weightlifting belt can be used as a makeshift ledge.

YouTube Video

As the bar rests, switch your underhand bar to a palm-down position, and use your hips to dip down and pop the bar up to the front rack position. From there, you can either press, push press, or jerk the weight overhead. This variation will build a bulletproof core and upper back, mainly because the continental phase is so difficult.

FAQs

When should I do the clean & jerk?

This lift is best performed in a fresh start, at the beginning of the session. Indeed, you want to avoid muscular and neural fatigue in order to perform best with flawless technique. And because of its neural and power component, this exercise can also serve as activation to prime you for the subsequent exercises. For instance, doing it before heavy squats might help you lift heavier.
If you’re an experienced lifter and you’ve mastered the technique, you could also try the opposite though, and save it for last. Because your muscles are tired, your body will have no choice but to rely on technique to execute the lift.

How often should I clean & jerk?

The answer will depend upon your fitness goals and experience level, but you can certainly practice this lift somewhat often, because it’s important to avoid accumulating too much fatigue during the sessions.
Actually, doing it more often may help you progress faster. Doing it twice a week at first will yield a lot of benefits, but you could even bump it to three or four times a week. Just remember that the more you include clean & jerk sessions, the easier they should be.

A Big Lift for Big Gains

The clean & jerk is seen worldwide every four years during the Summer Olympics, but the exercise isn’t exclusive to the best weightlifters in the world. Whether you’re an athlete looking for top performance on the field or in the ring, a strength sport competitor looking to carry over strength and power, or a physique-focused lifter looking to pack on full-body muscle, adding the clean & jerk to your training menu will deliver world-class results.

References

  1. Huyghe, T., Goriss, B., DeLosAngeles, E., & Bird, S. P. (2021). Exploring The Power Clean. International Journal of Strength and Conditioning, 1(1). https://doi.org/10.47206/ijsc.v1i1.95
  2. Santos PDG, Vaz JR, Correia PF, Valamatos MJ, Veloso AP, Pezarat-Correia P. Intermuscular Coordination in the Power Clean Exercise: Comparison between Olympic Weightlifters and Untrained Individuals-A Preliminary Study. Sensors (Basel). 2021 Mar 9;21(5):1904. doi: 10.3390/s21051904. PMID: 33803182; PMCID: PMC7963197.
  3. Stone MH, Wilson GD, Blessing D, Rozenek R. Cardiovascular responses to short-term olympic style weight-training in young men. Can J Appl Sport Sci. 1983 Sep;8(3):134-9. PMID: 6640815.
  4. de-Oliveira LA, Heredia-Elvar JR, Maté-Muñoz JL, García-Manso JM, Aragão-Santos JC, Da Silva-Grigoletto ME. Analysis of Pacing Strategies in AMRAP, EMOM, and FOR TIME Training Models during “Cross” Modalities. Sports (Basel). 2021 Oct 20;9(11):144. doi: 10.3390/sports9110144. PMID: 34822344; PMCID: PMC8624389.

Featured Image: Photology1971 / Shutterstock

The post How to Do the Clean & Jerk for Total-Body Strength and Power appeared first on Breaking Muscle.

Be Nice and Share!