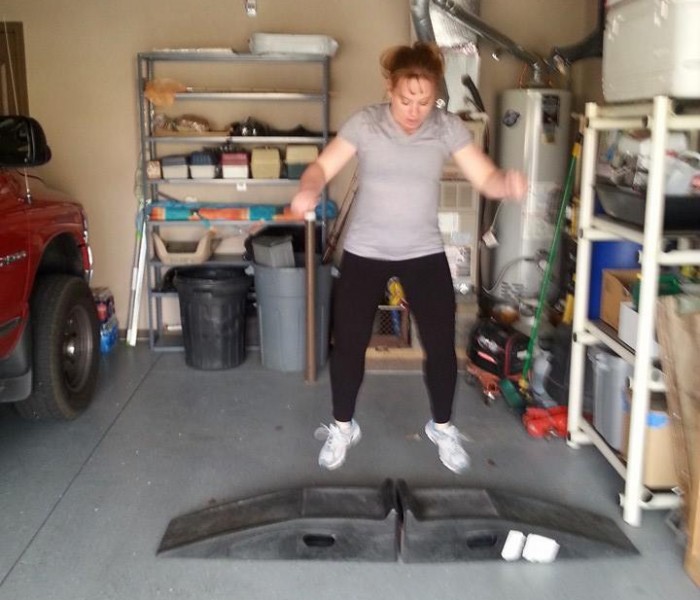
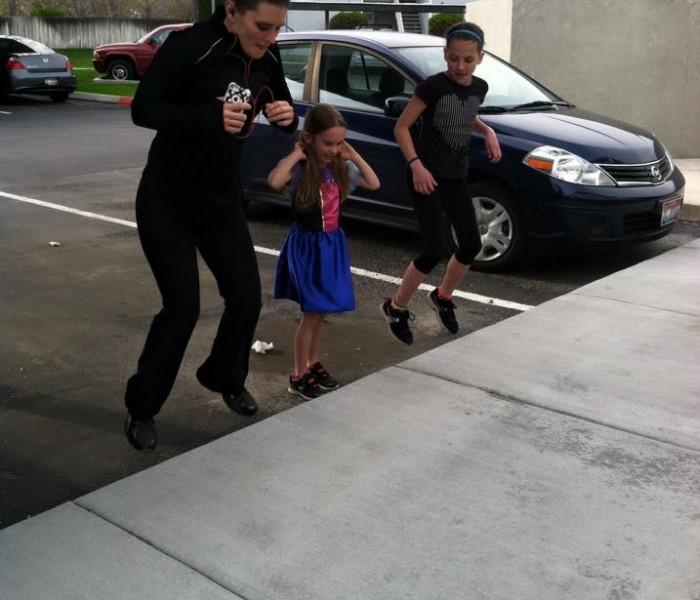
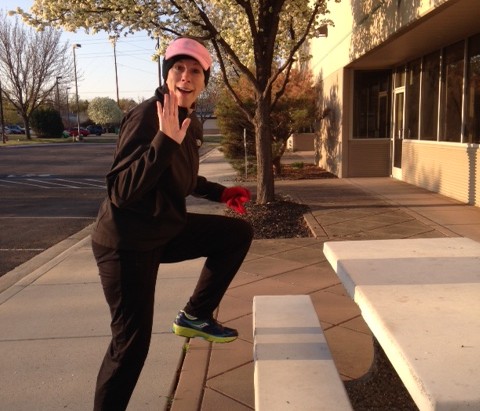
See Some Warriors Sweatin’ It Uuupp!

  • Warrior Bump
    Fist Bump Jeanne
This post was originally published on this site

Originally Posted At: https://breakingmuscle.com/feed/rss

Searching for CrossFit shoes isn’t as simple as walking into a store and grabbing the first thing you see. Or at least it shouldn’t be. It’s actually one of those things you’ll want to be intentional about because there are numerous factors you’ll want to keep in mind. For instance, you’ll want to identify which heel-to-toe drop would accommodate your workout style and if the shoe’s upper can withstand rope climbs. 

Here, we’ll not only explain what to look for in a CrossFit shoe but also share what we’ve found to be the best CrossFit shoes on the market today. 

How We Chose the Best CrossFit Shoes

One thing is for certain: folks here at Breaking Muscle are no strangers to CrossFit. Some staff members have been doing CrossFit for almost a decade and, as you might imagine, have owned their fair share of CrossFit shoes. In fact, Breaking Muscle Reviews Editor Amanda Dvorak currently has five pairs of CrossFit sneakers that she rotates through.

For the purposes of this review, we tested dozens of shoes for metcons, heavy lifting, running, and indoor and outdoor workouts. Therefore, in an effort to pick some of the best CrossFit shoes, we relied on our own experience and conducted some additional research to see what others had to say.

As we reviewed each shoe on our original list, we realized that not one pair of CrossFit shoes would appeal to everyone. Therefore, we came up with categories in which to rank each shoe, including appearance, durability, comfort, and stability. We eliminated choices until we identified the best option for each one. Now, you can more easily find the most practical choice for you before spending $100+ on a shoe that doesn’t meet your needs.

Our Top Picks for the Best CrossFit Shoes

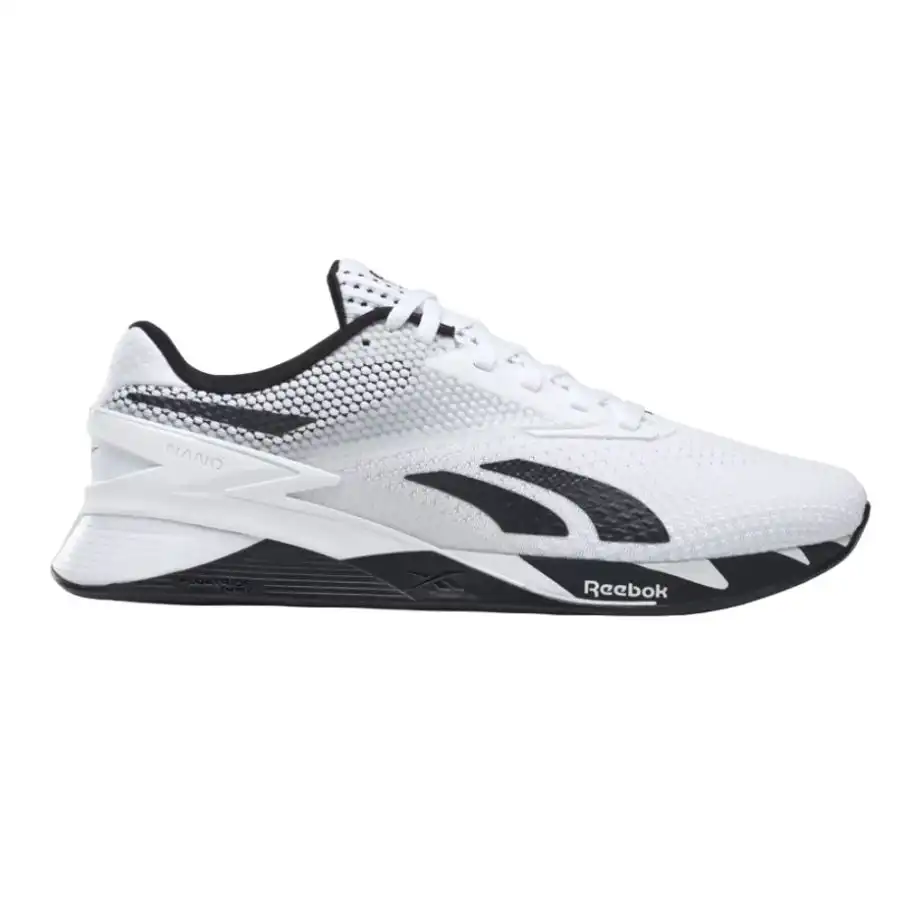
Best CrossFit Shoes Overall: Reebok Nano X3  


Reebok Nano X3


4.0
  • Heel-to-toe drop: Seven millimeters
  • Weight: 12 ounces (unisex size 9)
  • Material: Synthetic and textile upper
  • Width: Ideal for wide feet


Check Price

Pros

  • Numerous colorway designs 
  • Proprietary Lift and Chassis System
  • Improved rope guard
  • Allows for versatile workouts

Cons

  • Confusing unisex sizing
  • Expensive
  • May be too loose for some

Are you looking for a CrossFit shoe that is stylish enough to wear out with friends and solid enough to use for strength training? If so, that’s the Reebok Nano X3.

This latest iteration of the Nano, which dropped in early 2023, is the 13th version and has a lot going for it. Previous versions, like the Nano X1 and Nano X2, lacked some performance edge. For instance, the RopePro technology and Flexweave knit upper didn’t hold up well for rope climbs in either shoe. But now, with the addition of the Lift and Run Chassis System and the improved RopePro technology, CrossFitters can perform workouts more efficiently in the Nano X3. 

The Lift and Run Chassis System in the midsole provides a more stable platform than previous Nano models thanks to the dome-shaped heel piece that compresses when lifting heavy loads. The revamped RopePro+ rope guard technology in the midfoot makes the shoe even sturdier, so the front and sides of the shoes don’t get damaged as easily.

Based on our experience, we don’t think the upper is as durable as the SuperFabric on NOBULL trainers. Still, CrossFitters who do rope climbs, burpees, and other popular WOD movements can worry less about tearing up the Nano X3s. Even the Flexweave mesh upper is sturdy while being equally breathable and flexible, which led to us giving the Nano X3s 4.5 out of 5 stars for construction and durability. 

Reebok also reworked the all-surface rubber outsole in the Nano X3. The updated tread pattern allows for better traction, making you feel more stable while completing weightlifting workouts. We ranked the outsole a solid 4 out of 5.

The wide toe box is undoubtedly a pro, as it allows your toes to spread out and improves your stability for squatting-type movements. However, you have to ensure you get the correct size. With the Nano X3, Reebok implemented a unisex sizing scale. Our female product tester noted that the shoes run slightly large — though we should note that she was unable to get the size she’d normally order in a men’s shoe. The poor sizing was especially evident when she performed exercises like burpees, lunges, and wall walks.

As a result, it might be wise to get half a size down or, if possible, try them on somewhere first so you can find the best fit for you. 

Another thing to consider is the Nano X3’s seven-millimeter heel-to-toe drop (the same as the Nano X2). Most CrossFit shoes we’ve tried have a four-millimeter heel-to-toe drop. Research shows that a heel-to-toe drop of five millimeters or greater in running shoes increases knee extension and could also cause patellofemoral joint stress. (1) So, what does that mean for CrossFit shoes that have a slightly higher heel-to-toe drop? 

Well, shoes that cause you to have a more forward knee placement may change how you perform CrossFit exercises, which could be a good or bad thing. It’s good if you’re doing squats and have bad ankle mobility, as it allows you to reach proper depth more easily. However, it may not be good when doing exercises like box jumps because it can place excess stress on your knee. Therefore, figuring out the best heel-to-toe drop for you is critical. If you visit a podiatrist, they can measure your feet, which should give you some insight into the type of shoe that’s most ideal for you. 

Ultimately, the numerous colorways and the solid construction of the shoe make these the best CrossFit shoes overall. They are expensive, though, costing between $140 and $150. However, most popular CrossFit shoes fall in that price range. 

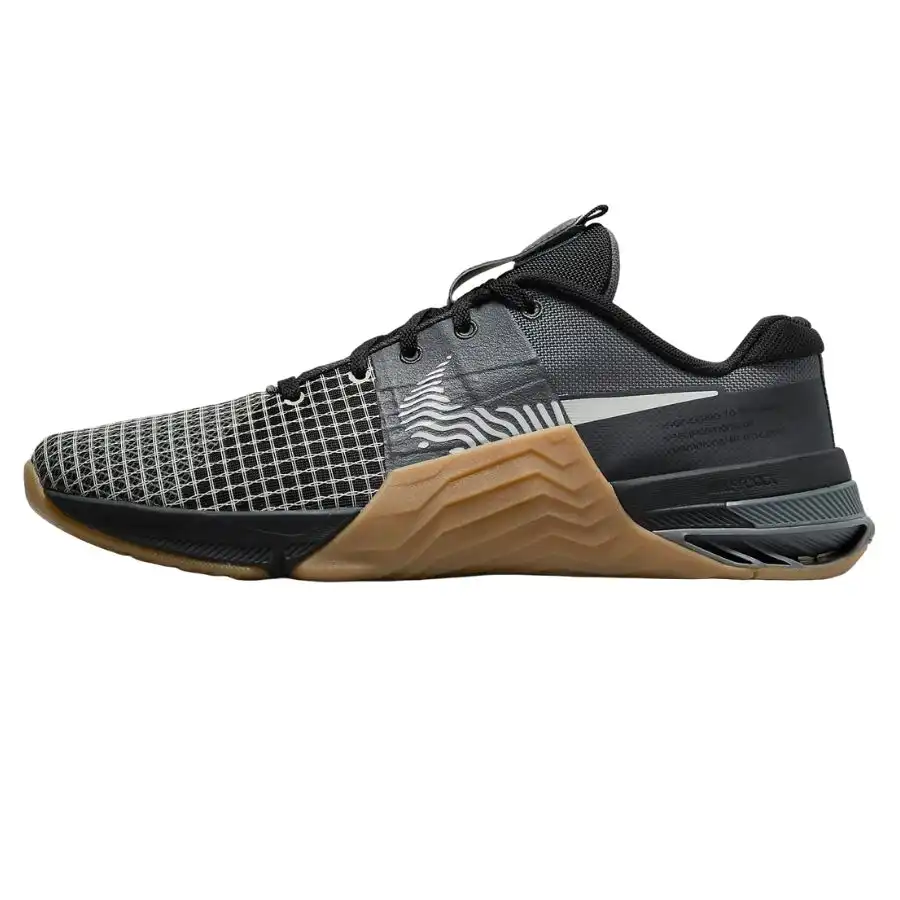
Best CrossFit Shoes For Men: Nike Metcon 8


Nike Metcon 8


4.2
  • Heel-to-toe drop: Four millimeters
  • Weight: 12.5 ounces (size 10)
  • Material: Lightweight mesh with textured overlays
  • Width: Neutral to wide


Check Price

Pros

  • Attractive price  
  • Responsive foam midsole 
  • Breathable upper
  • Lace lock mechanism

Cons

  • May run small
  • Noisy 
  • Clunky heel

Guys looking for a great CrossFit shoe should consider the Nike Metcon 8. With this being the eighth iteration of this shoe, it’s improved a lot. For instance, the chain-link mesh upper on the Metcon 7 isn’t as durable or flexible. In fact, the toe box upper ripped for some lifters. For the record, we didn’t experience this with the 7s — in fact, before the 8s came out, our team called the 7s one of the best Metcon versions they had ever tried.

Even so, Nike appears to have fixed the upper in the Metcon 8’s. The new upper is less stretchy, more breathable, and has improved stability. 

The construction of the tongue and lacing system is also different between the Metcon 7 and 8. The tongue on the Metcon 7 has a velcro lace-lock feature on the top and bottom to help keep the laces in place. The Metcon 7 also sports three middle eyelets with Nike Flywire on the lateral side of the midfoot. While the Nike Flywire feature is said to help boost support and minimize load, it’s not found on the Metcon 8. Instead, the Metcon 8 follows a more traditional lacing system with five eyelets and only has the lace-lock mechanism at the top of the tongue.

Nonetheless, the Metcon 8s provide solid midfoot stability. Our product tester wore them for deadlifts and noted that his foot really felt connected to the ground. He gave them 4 out of 5 stars for stability.

Another interesting change is that the Metcon 8s don’t have a rope guard. If you take a close look, you will notice that the shoes have a rubber-type wraparound that partially goes up the inside of the shoe. This is not a true rope guard, though it still allows for a good grip. The lack of a true rope guard might seem alarming to those who do rope climbs frequently. However, performance-wise, customer reviews suggest that the shoes still hold up well. 

The current Hyperlift heel could be annoying to some, though. Some say the heel construction feels stiff and clunky. In previous iterations, the Hyperlift heel was a removable insert that allowed you to adjust the height under your heels. This came in handy if you wanted the extra heel height for squats without changing into a pair of lifters. Today, the heel portion still goes by the same name, but it doesn’t have a separate insert. Breaking Muscle Editor Amanda Dvorak never used the insert in her Nike Metcon 2s or 6s; if you’re like her, you probably won’t miss the insert, anyway.

We agree with other customers that the heel can be uncomfortable. Based on our product tester’s feedback, the Metcon 8s aren’t ideal for running long distances or daily wear. They’re an especially poor choice for running if you’re a heel striker because the hard heel doesn’t offer much cushioning. However, it works for weightlifting, occasional sprints, and shorter 200- or 400-meter runs that frequently come up in CrossFit WODs. 

The four-millimeter heel-to-toe drop combined with the lightweight, soft Nike React Foam in the forefoot are great for folks doing heavy lifts, box jumps, and squats. Although these are a great pair of shoes to wear during a CrossFit workout, they’re occasionally out-of-stock. The attractive $130 price tag (and sometimes less) might be partially to blame for the limited supply. 

A member of the Breaking Muscle team noted that Nike is one of the only brands he trusts to make a shoe that fits his wide foot. He gave the shoe 4 out of 5 stars for adjustability and ergonomics for this reason. But some people have complained that the new toe box seems too narrow since the new construction is slightly more snug. Consider getting a half-size up if you have wider feet. 

Truthfully, the Metcon 8’s are an excellent shoe for both men and women, but only six colorways are available for women. There are 10+ colorways for men.

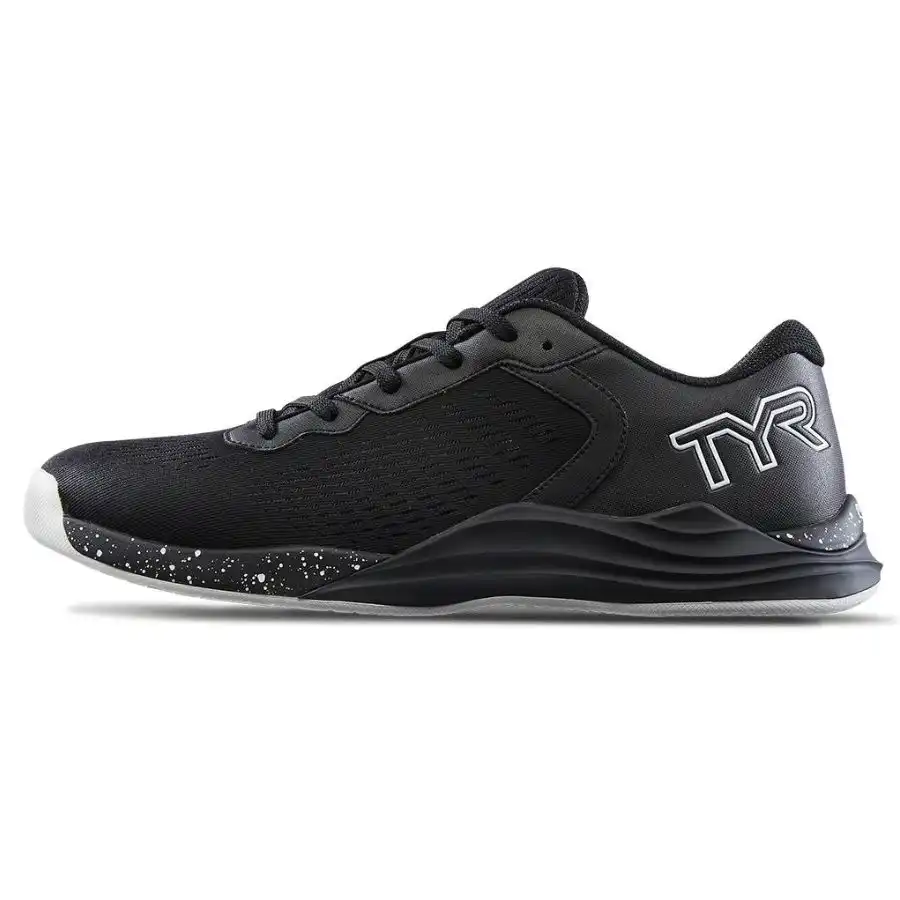
Best CrossFit Shoes for Women: TYR CXT-1 Trainer


TYR CXT-1 Trainer


4.4
  • Heel-to-toe drop: Nine mililmeters
  • Weight: 12.65 oz (for the size 10 men’s)
  • Material: Breathable upper engineered mesh construction
  • Width: Neutral


Check Price

Pros

  • Heel tab for smoother gliding
  • Patent-pending stability platform 
  • Grippy outsole 
  • High arch support

Cons

  • Not as durable for rope climbing 
  • Difficult to clean 
  • High heel-to-toe drop is not ideal for weightlifting

Usually, finding a CrossFit shoe with a low heel-to-toe drop is best, but could the TYR CXT-1 Trainer be the exception? This CrossFit shoe boasts a high 9mm drop, and people still love it. In fact, these shoes are giving other popular cross-training shoes a run for their money. But what about these kicks has folks switching out their Nano’s and Metcon’s for them? 
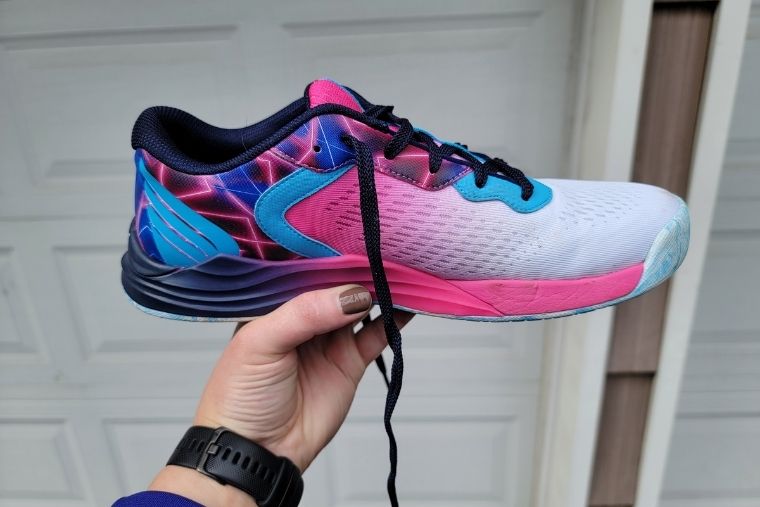
A side view of the TYR CXT-1 Trainer

Amanda Dvorak, an Editor at Breaking Muscle, has been wearing these for three months now for metcons three to four days a week and loves them. She says, “They fit my somewhat narrow feet pretty well and offer a great balance of cushioning and stability.”

Regarding the latter, a patent is pending on the stability platform built into the shoe. This platform helps the foot sit deep in the shoe, allowing you to stay grounded while doing heavy lifting. On top of that, these shoes feature a wrap-around side gripper that goes around the heel, which adds even more stability.

The outsole provides a good level of grip, too. This is useful for keeping your feet in place during squats or deadlifts and not slipping when running outdoors. Amanda says she’s never worried about her feet slipping when training in the CXT-1s, whether she’s lifting on rubber gym flooring in her garage or doing short runs outside on wet pavement. As such, she rated the outsole 4.5 out of 5 stars.

Another feature that stands out on the TYR Trainers is the Surge NRG Foam midsoles. These are incredibly responsive, meaning that when your foot hits the ground, you can sort of feel it bounce back up. That “springy” feeling may help propel you forward and absorb some of the impact. In fact, Amanda says that the CXT-1s are the first pair of CrossFit shoes she doesn’t mind running in (for up to a mile — she hasn’t tested them for distances longer than that).

The firm yet flexible cushioning in the forefoot should allow you to perform agility exercises seamlessly without discomfort. Amanda even noted, “My feet often start to ache about halfway through long WODs when I wear other shoes, but I’ve gotten through a 30-minute WOD without discomfort when I wore the TYR trainers.”

However, some say they prefer a less chunky midsole than the TYR Trainers. Amanda doesn’t find them that chunky, but she still recognizes that they wouldn’t be the best choice if you want a more minimalist shoe. 

In addition, the lightweight mesh upper makes these shoes breathable. According to Amanda, this helps keep her feet dry and comfortable even when she exercises in hot weather. 
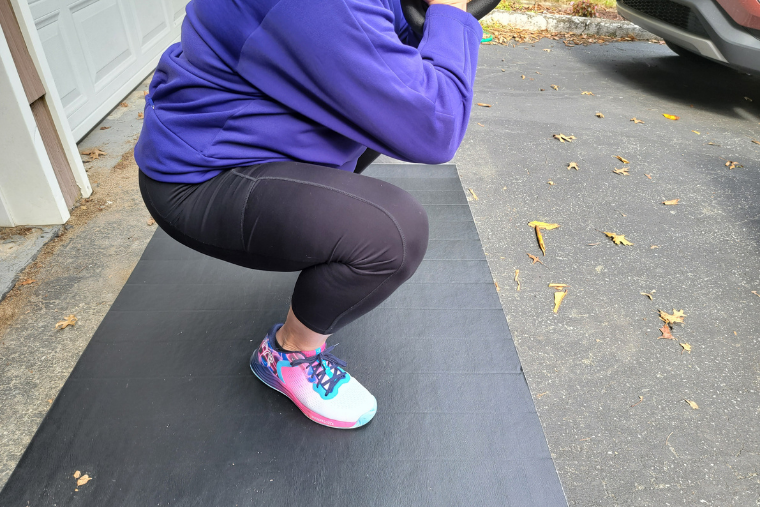
A woman doing squats while wearing the TYR CXT-1 Trainers
Amanda doing goblet squats while wearing the TYR CXT-1 Trainers

If you plan on doing handstand push-ups, you’ll appreciate the heel tab, as it can help your heels glide along the wall more easily. Also, the anatomical toe box is more spacious than those found on the Nike Metcon 8s, but still not the best choice for someone with wider feet. It fits snugly and might even feel cramped to some, so you may need to go a half-size up. 

An area where the CXT-1s might not shine is rope climbing. One buyer said doing so tore the outer sole of their right shoe. Another challenge you might encounter if exercising outside is scrubbing grass stains from the mesh on the toe box. For some reason, it’s just not easy to get the stains to come off. Amanda hasn’t worn these shoes when working out on grass, so she can’t speak to the staining issue. But if you don’t want to worry about frequently trying to scrub your shoes, consider getting a dark color that will hide any stains.

Besides those caveats, the TYR CXT-1s are solid. The arch and ankle support they provide are ideal for someone with a high arch, which may be more common in women. Interestingly, women wearing high-heeled shoes may see musculoskeletal changes over time, like an increased foot arch. (2) But the support is also adequate for athletes with flat feet. Amanda has flat feet and a history of ankle and foot injuries, and she’s satisfied with the level of support she gets from the CXT-1s. This is one reason why we consider these the best CrossFit shoes for women. 

For $140, you may be able to find a shoe that checks more boxes, but it all comes down to your preferences. 

Best CrossFit Shoes for Running: Reebok Nano X3


Reebok Nano X3


4.0
  • Heel-to-toe drop: Seven millimeters
  • Weight: 12 ounces (unisex size 9)
  • Material: Synthetic and textile upper
  • Width: Ideal for wide feet


Check Price

Pros

  • Lift and Run Chassis System
  • Ankle support from TPU-unit
  • Soft and responsive Floatride Energy Foam

Cons

  • Too heavy
  • Rigid upper 
  • Low heel-to-toe drop

A shoe so nice we had to run it back twice is the Reebok Nano X3. Honestly, it’s quite rare to find a CrossFit shoe that’s also suitable for cardio exercises, like running. This is because training shoes tend to be larger and heavier, which isn’t comfortable if you plan on going for long runs. CrossFit shoes usually aren’t as well-cushioned and, as a result, don’t properly distribute the shock of your feet hitting the ground. However, the Reebok Nano X3 is designed in a way that provides the best of both worlds…sort of.

Breaking Muscle Editor Amanda Dvorak hasn’t personally tested the Nano X3s, but she’s trained in previous models of the Nanos. The most recent Nano version she owns is the Nano X1, and she still alternates that shoe with the TYR CXT-1 trainer for WODs with a lot of running. She was pleased to see that Reebok has still included several features in the X3s that make them more suitable for running than most other CrossFit shoes.

For one, the unique Lift and Run Chassis System (which wasn’t even included in the X2 and is completely new for the X3) in the midsole offers a cushioned base that runners may appreciate as their feet repeatedly hit the pavement. Yet, it’s still flat enough for individuals to maintain their balance when lifting. This system is also attached to a thicker TPU unit within the heel that helps with ankle support and additional stability while running.

On top of that, you’ll find the Floatride Energy Foam in the forefoot fairly soft and responsive, which is an admirable feat when doing short runs. 

However, this isn’t a shoe that serious runners should be considering. The upper on the Nano X3s, in particular, is stiff, and the shoe is heavy. Running shoes usually weigh between 6.5 and 13 ounces. Weighing 12 ounces, the Nano X3 is on the heavier end. Plus, running shoes typically have a heel-to-toe drop that’s greater than seven millimeters, and the Nano X3 is right at that number.

This isn’t to say a lower heel-to-toe-drop is bad on a CrossFit running shoe. There are situations where it makes more sense, like if you strike the ground with the front of your foot first. In general, though, long-distance running just isn’t going to be very comfortable in this shoe, so it’s best to stick to sprints or short distances like 400 meters. 

Best CrossFit Shoes for Wide Feet: NOBULL Trainers


NOBULL Trainers


3.8
  • Heel-to-toe drop: Four millimeters
  • Weight: 11 ounces (Men’s 9 / Women’s 10.5)
  • Material: SuperFabric®
  • Width: Wide


Check Price

Pros

  • Minimalist shoe 
  • Wider toe box 
  • Great for strength training

Cons

  • Not for running or plyometric exercises
  • May need to break in 
  • Feels hot after prolonged use

If you have wider feet, you already know how difficult it is to find shoes that properly fit. Poorly fitting shoes can cause preventable foot pain and disorders, so finding ones that work for you is crucial. This is especially true when you’re looking for a CrossFit shoe. Fortunately, the NOBULL Trainers may be an option for those with wide feet. 
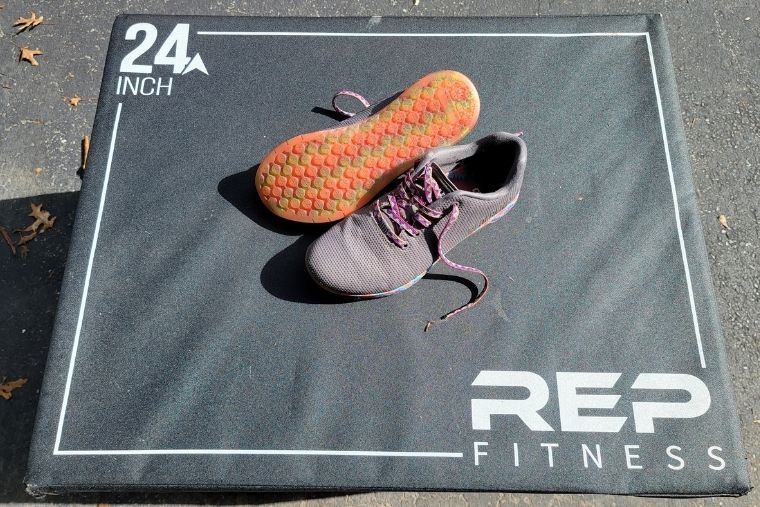
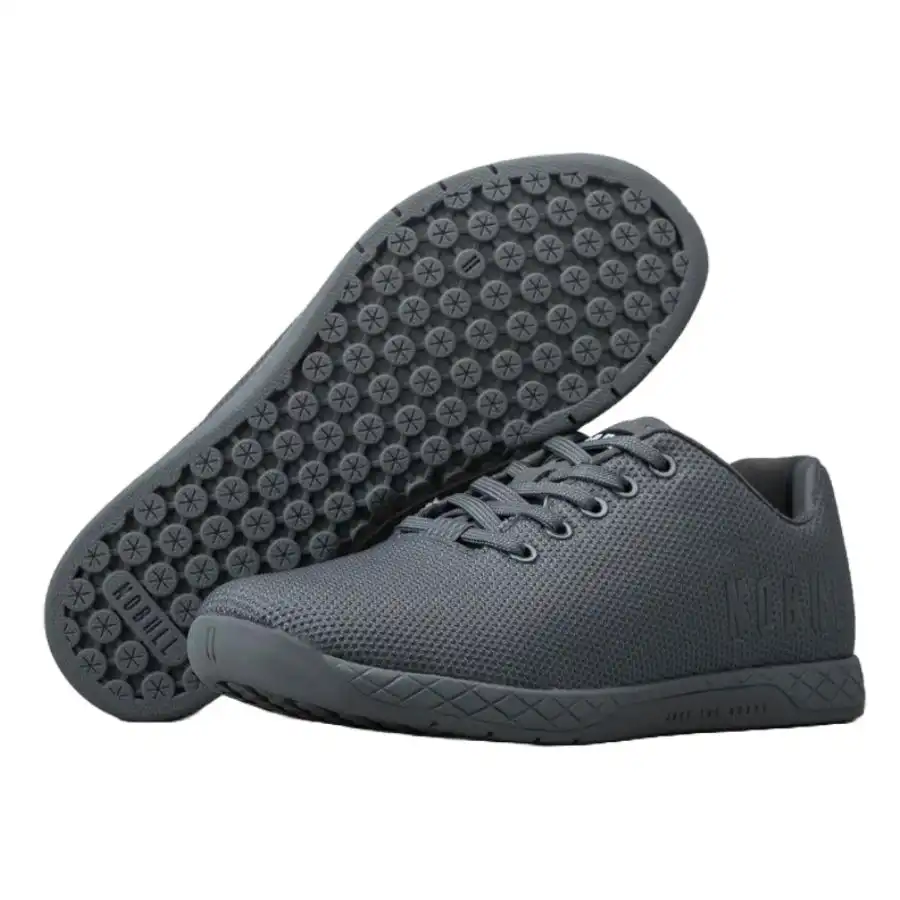
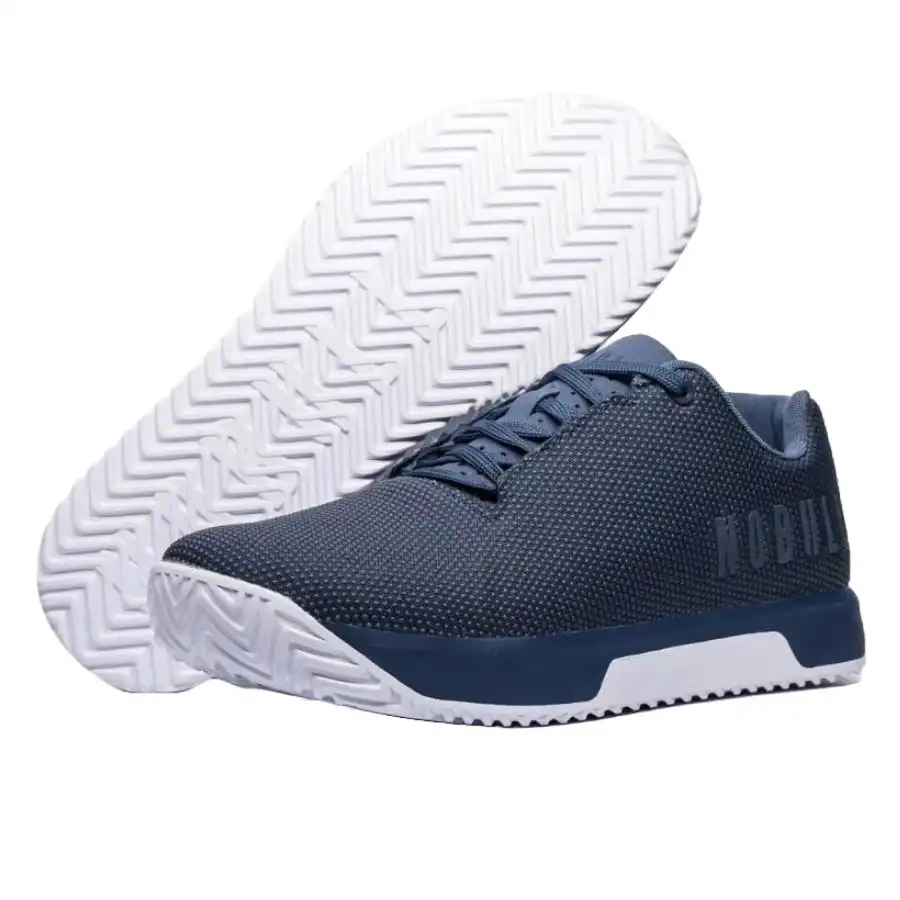
A pair of NOBULL trainers on a plyo box with the bottom of one shoe facing up
Showcasing the top and bottom of the NOBULL trainers

The NOBULL Trainer came to the market in 2015. While NOBULL has added new shoes to their lineup, they haven’t strayed too far from the original trainer. For instance, the upgraded NOBULL Trainer+ has a thicker midsole, which enhances comfort for high-impact movements like box jumps, but the original trainer offers more stability and is just as good. This level of consistency means that CrossFit athletes who want to buy new shoes from the same brand already know what to expect. You won’t experience this with Reebok Nano’s and Nike Metcon’s as they tend to change more over time.

What’s unique about NOBULL Trainers is the SuperFabric® technology they use for the upper. With SuperFabric®, they basically use regular mesh and apply guard plates to make it rigid and resistant to abrasions. As a result, doing activities like rope climbs shouldn’t cause damage to the shoe, but putting them on could prove challenging. Amanda Dvorak, Breaking Muscle’s Reviews Editor, says that when she wears her NOBULL trainers, she has to loosen the laces nearly all the way to get them on her feet.

The shoe’s midsole is made of phylon, a lightweight yet stable foam material. Therefore, you should be able to do strength training with no issues since they are pretty good at resisting compression when under heavy weight. Amanda says, “I do love the stability they offer for squatting and deadlifting.”

However, there is a caveat to having such a tough midsole construction, and that’s responsiveness. These shoes aren’t the best if you plan on doing HIIT workouts or running. They’re just uncomfortable to use for fast-paced movements, so Amanda only uses them on the days she does strength training. 

The four-millimeter heel-to-toe drop and high carbon rubber outsole also make these adequate gym shoes for heavy lifting. Plus, the wider toebox allows you to splay your toes, which can help you keep your balance when lifting heavy weights.
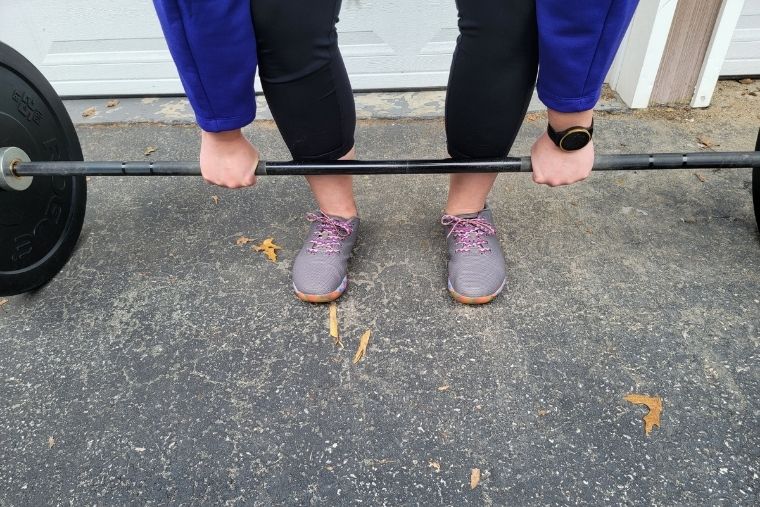
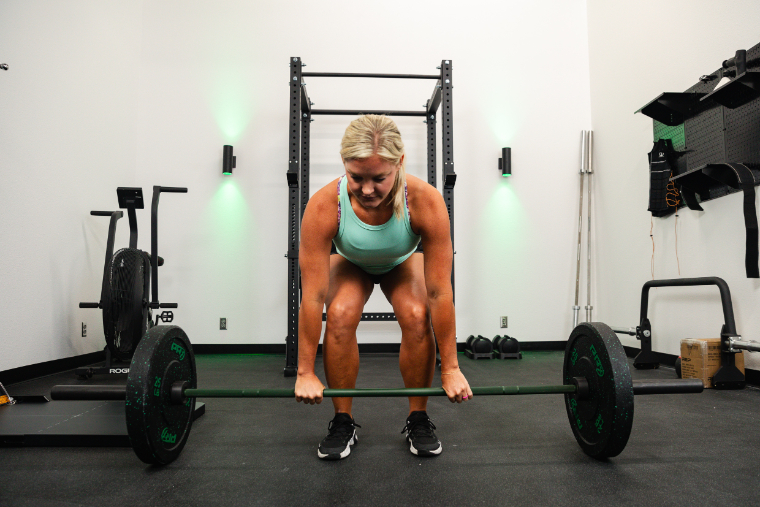
A young woman deadlifting in the NOBULL Trainers
Amanda doing deadlifts in the NOBULL trainers

However, these might not be the shoes you grab for long-distance running or walking around town. If you wear them too long, they start to get too hot. According to Amanda, the lack of cushioning also means they’re less than ideal for being on your feet for long periods. This is too bad because they offer a ton of colorways and would look nice for general wear. Most are priced between $129 and $139, which aligns with other popular CrossFit shoes like the Metcons and Nanos. 

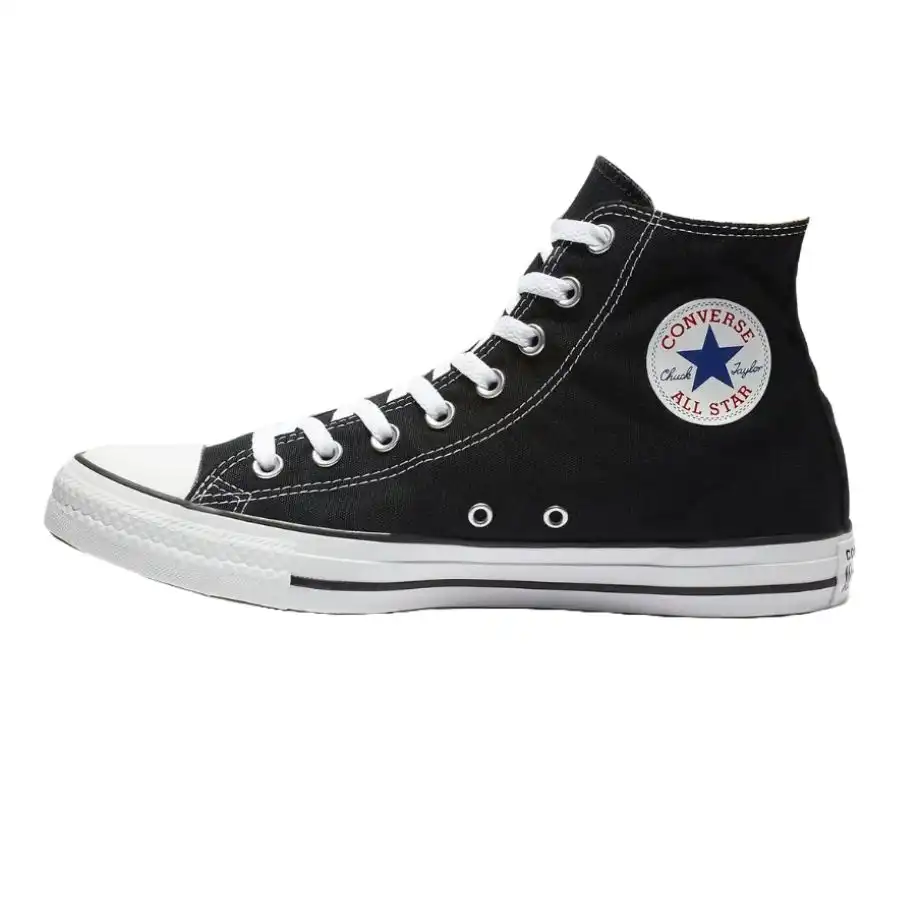
Best Budget CrossFit Shoes: Converse Chuck Taylors


Converse Chuck Taylors


3.7
  • Heel-to-toe drop: Zero millimeters
  • Weight: 14.3 ounces (size 10)
  • Material: Cotton canvas and rubber
  • Width: Narrow


Check Price

Pros

  • Very affordable 
  • Stylish 
  • Minimalist shoe
  • Comfortable for daily wear

Cons

  • Not the best for high-impact movements 
  • Heavy 
  • Narrow midfoot

If you’re not ready to spend $100+ on a pair of CrossFit shoes, look at the Converse Chuck Taylors. These popular and stylish shoes are only around $65, about half the price of the Nanos, TYR trainers, and Metcons. Given their budget-friendly price tag, it’s not surprising that I see so many people wearing them in the free weights section of the gym. But how does this shoe really hold up when doing CrossFit, weightlifting, and running?

When people think of a minimalist shoe, Chuck Taylors are often the first to come to mind. The zero heel-to-toe drop (barefoot style) allows your foot to be closer to the ground, which permits a more natural movement. The flat rubber soles are sturdy, making it easier to maintain your balance as you push off the ground. They grip well on gym floors, wooden platforms, and even carpets.

If you’re a lifter who wants to feel a stable connection to the ground during deadlifts, squats, and other heavy lifts, these can help you achieve that. If you opt for a high-top style, they can also offer good ankle support, which is a bonus for CrossFitters with a history of ankle injuries.

Depending on the type of exercises you’ll be doing, they might not be the best CrossFit shoes. To start, the sole lacks cushion. While this is helpful for deadlifts, it’s not what you look for when doing high-impact movements like box jumps. With exercises like that, it helps to have some cushion that’ll absorb the shock. If needed, you can put an orthotic insert (which you’ll need to buy separately) in your Chuck Taylors for more cushioning.

At 14 ounces, Converse Chuck Taylors are also heavier than most CrossFit shoes. For comparison, the Nike Metcon 8s weigh 12.5 ounces, and the Nano X3s weigh 12 ounces. As you might imagine, the heavier weight can make workouts with a speed component uncomfortable. Although these clunky shoes are awesome for daily wear, they may not be a proper choice for those who want shoes that can handle exercise versatility. 

If you take a closer look at the toe box and midfoot areas of Converse, you’ll see another reason why you shouldn’t use these for certain CrossFit WODs. The shoe narrows through the midfoot, making it too snug, especially for those with wider feet. The toe box is tight, too, so your toes might have trouble spreading out to help you maintain your balance. Lastly, the canvas uppers might not be the most durable for repetitive training. I’ve heard people complain about them ripping during rope climbs. 

Overall, these aren’t a bad choice if most of your CrossFit routine involves lifting. But if you plan on mainly doing running and jumping movements, go for another option on our best CrossFit shoe list. 

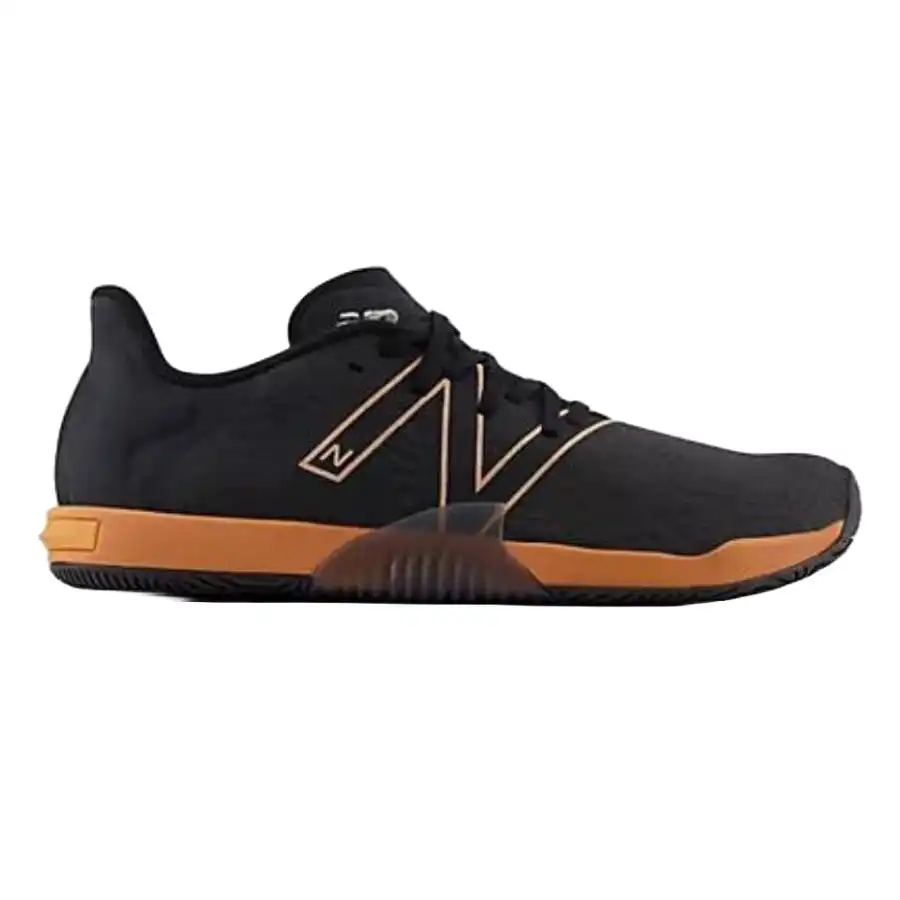
Best CrossFit Shoes For Flat Feet: New Balance Minimus TR


New Balance Men’s Minimus


3.5
  • Heel-to-toe drop: Zero millimeters 
  • Weight: 8.1 ounces
  • Material: Mesh upper
  • Width: Narrow


Check Price

Pros

  • Outsole has great grip and traction 
  • Rubber shank for added stability  
  • Rebound effect 
  • Can wear without socks

Cons

  • Not ideal for outdoor use
  • Takes time to break in 
  • Too tight for those with wide feet

If you’ve got flat feet or are just looking for a minimalist shoe, take a look at the New Balance Minimus TR. They’re a narrow-fitting shoe that admittedly won’t work for everyone but could be the proper choice for athletes with narrow feet. For instance, if you’ve tried a few neutral or wider-fitting shoes, like the Nano X3s, that just didn’t make your feet feel secure, these might help. After all, the last thing you want to deal with while doing CrossFit movements is heel slipping.

The well-cushioned rubber midsole on this shoe doesn’t collapse and is made to handle pressure. This sturdiness is further maintained by the rubber shank that travels across the midfoot, allowing trainees to remain stable. You might even notice a slight rebound that gives you an extra bounce, thanks to its TPU (Thermoplastic Polyurethane)-infused design. This rebound effect is beneficial when you’re doing double-unders. But, as with all things, this may not be a feature you’ll like, as some people find it unnatural. 

The outsole pattern on the New Balance Minimus TR mirrors those found on gym floors. In fact, it almost seems to stick to manufactured surfaces. If you’re looking for a shoe with a strong grip that can handle your lifting heavy weights, you’ll find it with these. Unfortunately, that means this isn’t a great outdoor shoe, as the tread might not give you the traction you’d want when training on rough surfaces.  

The mesh upper on this shoe is surprisingly responsive, breathable, and lightweight. These seem to handle plyometric workouts pretty well. Therefore, you shouldn’t experience much heel slippage when doing agility exercises since the upper helps to keep your foot in place.

Do keep in mind that the wrap-around upper might take about a week or so to break in when you first get them. For some, it may almost feel too tight on the foot. However, some people prefer the sock-like fit. 

If you plan on doing a lot of rope climbing, this shoe may not hold up as well in terms of performance and durability. But handstand push-ups shouldn’t be a problem due to the TPU heel clip aids. 

As with most things, it all comes down to your personal preference. For around $100 to $150, this is a decent cross-trainer for someone with flat and/or narrow feet. 

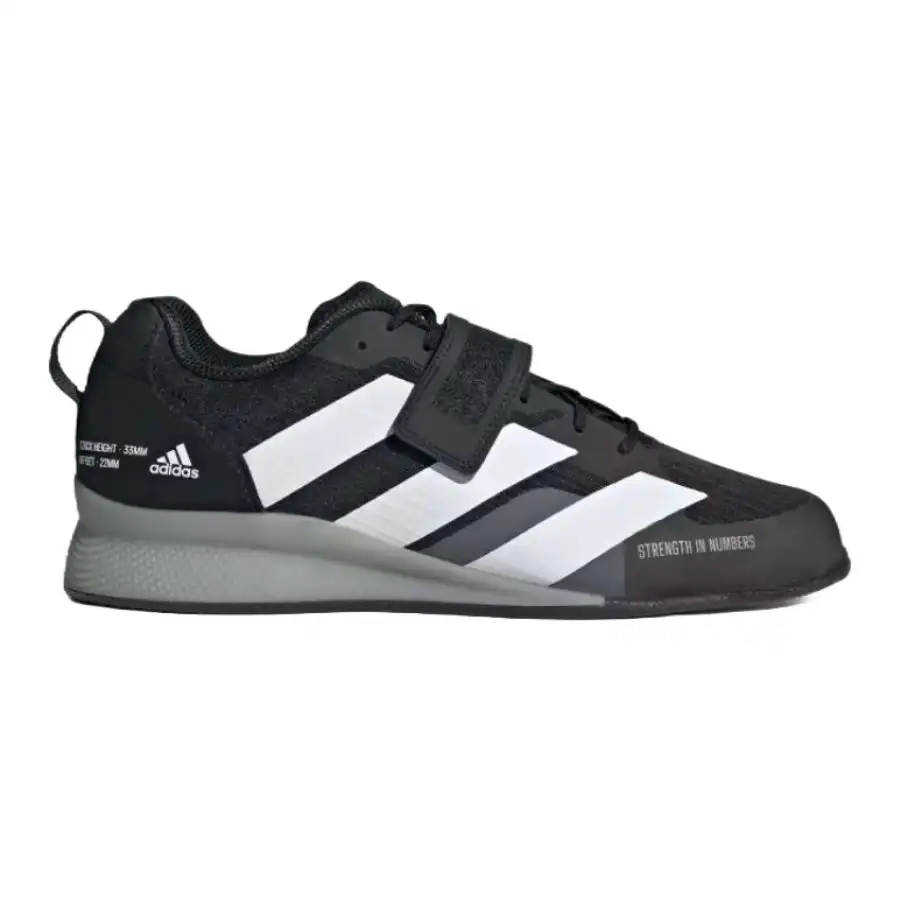
Best CrossFit Lifting Shoes: Adidas Adipower 3


Adidas Adipower


4.0
  • Heel-to-toe drop: 22 millimeters
  • Weight: 16.4 ounces
  • Material: Canvas upper
  • Width: Neutral


Check Price

Pros

  • Well-constructed and durable
  • Grippy outsole 
  • Stylish with many colorways  
  • Lace and strap design

Cons

  • Expensive
  • Narrow toe box
  • Often out-of-stock

If you plan on doing some serious barbell WODs and want a shoe that can handle the heavy lifting, you might be interested in the Adidas Adipower Weightlifting 3 shoes. But what makes these the best CrossFit shoes for lifting?

To start, they weigh 16.4 ounces, which is heavier than any of the other shoes on this list. This extra weight will help your feet plant to the floor and keep you stable while under heavy loads. You’ll also find that this shoe has a significant 22-millimeter heel-to-toe drop, which is ideal for weightlifting. A greater offset improves the range of motion in your hips and ankles. As a result, they may help you achieve a deeper squat, even if your ankles aren’t very flexible.

Like a few other shoes on this list, the Adidas Adipower 3 has previous iterations. The much-loved OG Adipower launched in 2012. The less successful second iteration wasn’t released until 2019. In 2022, the Adipower 3 came out and quickly became a favorite, much like the originals. The newest version is almost two millimeters taller than the Adipower 2s. The additional height can benefit athletes with long femurs or poor ankle mobility, as it can promote better squat mechanics and make it easier to get the hip crease below the knee.

The Adipower 3 also has a revamped ripstop upper that’s made up of 50 percent recycled material. The ripstop material is highly durable but breathable and doesn’t add much extra weight to the shoe. In fact, the Adipower 3 is 1.3 ounces lighter than the Adipower 2. Besides that, Adidas hasn’t changed much with the shoe. 

What makes the Adipower line-up so popular is how well-constructed it is. The durable canvas has a lace and strap design that’ll assist in keeping your feet locked in, while the ripstop fabric upper includes synthetic overlays for greater durability. Even with these features, the shoes remain breathable, so you can comfortably get through longer weightlifting sessions. 

The high-density midsole is another feature that consumers like. It’s firm, which will help you maintain stability as you power through various workouts. However, it does clash with the narrow toe box and makes for an extra snug fit. Those with wider feet may find this troubling. 

The low-sitting rubber outsole provides a good grip, probably due to its barbell knurling-like pattern. It’s definitely the type of traction you’d want when doing heavy lifting. However, while you could technically wear them for WODs with movements like burpees, box jumps, or double-unders, their ruggedness may weigh your feet down. The hard, flat sole will also not be very shock-absorbent. On the other hand, the Adipower 3s would be suitable for WODs with lower-impact movements like wall balls and thrusters.

The Adipower 3s come in various colors and sport the classic three stripes people have come to love and associate with Adidas. To get the sleek design and favorable features this weightlifting shoe offers, expect to shell out about $230. 

Benefits of CrossFit Shoes 

Whether you’re new to CrossFit training or have been doing it for a while, you’ve probably wondered if you actually need CrossFit shoes. While the word “need” might be a stretch, there are some benefits to getting shoes designed for the varied functional movements incorporated into this type of fitness regimen. The constantly changing mix of higher weights, rapid movements, gymnastics, and longer distances is meant to help you become stronger, faster, and more flexible. 

CrossFit shoes are designed to handle those things, so they tend to have a lower heel-to-toe drop, ample heel support, and better traction. These factors may help improve your performance (thanks to the increased stability) and decrease the likelihood of injury. The shoes are cushioned in areas where you’d need the most support but not so thick or plush that they leave you off-balanced for heavy lifts.

What Is the Difference Between CrossFit Shoes and Running Shoes?

CrossFit shoes differ from running shoes in a few ways. They tend to have a lower heel-to-toe drop and are made with more durable fabrics to withstand abrasions better. While cushioning is important in both running and CrossFit shoes, specifically in the forefoot and heel areas, it’s minimal in CrossFit shoes to prioritize stability. You’ll want a firm CrossFit shoe when you’re doing something like deadlifts and squats. The sole also tends to be more flexible so that you can complete dynamic and lateral movements.

As one study found, running shoes, in general, should be “lightweight, comfortable, and have as minimal pronation control technology as possible.” (3) Running shoes need to be breathable and lightweight so you can efficiently propel forward, whether you’re going a long or short distance.

To further assist in propelling you forward is a higher heel-to-toe drop, which is why you’ll find many running shoes with drops between eight and 12 millimeters. In comparison, CrossFit shoes tend to have a heel-to-toe drop of no more than nine millimeters (unless it’s more of a weightlifting shoe — those can have heel-to-toe drops of up to 25 millimeters).

In addition, cushioning in the forefoot and midfoot areas in running shoes helps absorb the impact of your foot hitting the ground. 

Pronation, which refers to your foot’s natural side-to-side movement as you walk or run, should be limited in running shoes. Usually, the foot rolls somewhat inward when you step to help absorb the shock of your foot hitting the ground. However, some shoes implement pronation control that could result in pain or injury of the knee while running, so it’s not recommended in running shoes unless you genuinely need it. (4)

What To Look For in a CrossFit Shoe

Low Heel-to-Toe Drop

When shopping for CrossFit shoes, you’ll likely want to pick a pair with a low heel-to-toe drop between two and six millimeters. With lower-drop shoes, the weight distributes similarly to if you weren’t wearing any shoes at all. This is why you’ll find some individuals seeking minimalist shoes, which permits more balance and stability. One study even suggests that a minimalist shoe may prevent injury and boost performance. (5)

Now, there are certain situations when you might want a higher heel-to-toe drop. For example, if your CrossFit workout includes lots of heavy squats or snatches, you may prefer a shoe like the 22-millimeter Adipower 3s. The greater heel-to-toe drop can make it easier for you to reach proper squat depth. CrossFit folks who run a lot might opt for the nine-millimeter Nano X3s. 

Durability

Heavy weights and fast, functional movements are a recipe for torn-up shoes. The upper, midsole, and sole will likely experience a lot of impact from workouts like rope climbs, burpees, and even handstand push-ups. Therefore, you’ll want CrossFit shoes made with materials that can withstand abrasion while still being breathable enough that your feet don’t overheat.

Wide Toe Box

If you pay close attention, you’ll notice that your toes naturally try to spread out when doing specific movements like squats. This “grounding of your toes” helps with balance, so you’ll want a wider toe box that accommodates this. In our experience, the Nike Metcons are suitable for athletes with wide feet or those who simply prefer a shoe with a wide toe box.

However, this is a matter of preference. If you have narrow feet, you might feel like your feet are swimming in shoes with a wider toe box. In this situation, Converse Chuck Taylor’s might be a good choice. 

Rigid Sole

CrossFit training tends to be versatile, so you’ll want a sole that supports and protects your feet. One 2020 study even found that a rigid sole can decrease plantar pressure in the forefoot and reduce the rate of plantar re-ulceration. (6) Therefore, it’s worth ensuring your shoes’ soles meet your needs. The NOBULL trainers have one of the most rigid soles we’ve seen in a CrossFit shoe.

Minimal Cushioning

While a lot of cushioning may sound good, it’s not what you should look for in a CrossFit shoe. Too much cushioning could interfere with your balance and stability, especially when deadlifting or squatting. Aim for firm cushioning that can help with shock absorption during plyometric movements but that doesn’t impede your ability to push through the floor for squats, deadlifts, and other heavy lifts. We find that the Nike Metcon 8s, Reebok Nano X3s, and TYR CXT-1 trainers have an ideal balance of cushioning and stability.

Versatility

CrossFit doesn’t just consist of one type of exercise. It involves many different push, pull, and squat actions. There are also a lot of running, gymnastics, and bodyweight movements. As a result, you’ll need a shoe that can handle the different workout styles you plan to do so that you don’t have to keep changing your shoes. Will you mainly be doing WODs with heavy barbell work or WODs with lots of running and jumping? Will you be spending lots of time trying to perfect your rope climbs? Depending on your answer, pick the shoe that resonates with that. 

Breathability

Some shoes don’t have the greatest airflow, and that can make you want to cut your workout short. Hot CrossFit shoes that make your feet sweat aren’t what you want when doing an intense workout. Therefore, look for shoes constructed with mesh, as those are more breathable. On the flip side, synthetic materials and knits have decreased breathability but they’re more durable. So consider a shoe that has a blend of mesh and other materials, as that may give you the best of both worlds. 

Price

Whether you’re on a tighter budget or have a little money to spare, there’s a CrossFit shoe on this list that may work for you. However, as with all things, a lower price may mean fewer desirable features. For instance, a lower-priced option like the $65 Converse Chuck Taylor is a fashionable choice for a beginner lifter, but it might not handle more aggressive CrossFit movements well. In contrast, the $150 Reebok Nano X3s can take on plyometric exercises but how they’re sized throws everyone off. 

Ultimately, regardless of price, each shoe has pros and cons. In other words, don’t assume that the most expensive shoe will automatically meet your needs. It could very well have features you don’t want or need.   

Final Thoughts

Now that you’ve learned about some of the best CrossFit shoes on the market, which pair will you go with? By reflecting on your own preferences, goals, and style, you should be able to find an option here that works for you. For example, if your CrossFit routine primarily involves weightlifting, the Adidas Adipower 3 is a good choice, but if it’s running, the Reebok Nano X3 is a possible contender. From kicks for wide and flat feet to the best CrossFit shoes for men and women, there’s something for everybody.

Best CrossFit Shoes: Side-by-Side Comparison

Best CrossFit Shoes Overall

Best CrossFit Shoes for Men

Best CrossFit Shoes for Women

Best CrossFit Shoes for Wide Feet

Best Budget CrossFit Shoes

Best CrossFit Shoes for Flat Feet

Best CrossFit Lifting Shoes


4.0


4.2


4.4


3.8


3.7


3.5


4.0


Description:
  • Heel-to-toe drop: Seven millimeters
  • Weight: 12 ounces (unisex size 9)
  • Material: Synthetic and textile upper
  • Width: Ideal for wide feet

Description:
  • Heel-to-toe drop: Four millimeters
  • Weight: 12.5 ounces (size 10)
  • Material: Lightweight mesh with textured overlays
  • Width: Neutral to wide

Description:
  • Heel-to-toe drop: Nine mililmeters
  • Weight: 12.65 oz (for the size 10 men’s)
  • Material: Breathable upper engineered mesh construction
  • Width: Neutral

Description:
  • Heel-to-toe drop: Four millimeters
  • Weight: 11 ounces (Men’s 9 / Women’s 10.5)
  • Material: SuperFabric®
  • Width: Wide

Description:
  • Heel-to-toe drop: Zero millimeters
  • Weight: 14.3 ounces (size 10)
  • Material: Cotton canvas and rubber
  • Width: Narrow

Description:
  • Heel-to-toe drop: Zero millimeters 
  • Weight: 8.1 ounces
  • Material: Mesh upper
  • Width: Narrow

Description:
  • Heel-to-toe drop: 22 millimeters
  • Weight: 16.4 ounces
  • Material: Canvas upper
  • Width: Neutral

Best CrossFit Shoes Overall


4.0


Description:
  • Heel-to-toe drop: Seven millimeters
  • Weight: 12 ounces (unisex size 9)
  • Material: Synthetic and textile upper
  • Width: Ideal for wide feet

Best CrossFit Shoes for Men


4.2


Description:
  • Heel-to-toe drop: Four millimeters
  • Weight: 12.5 ounces (size 10)
  • Material: Lightweight mesh with textured overlays
  • Width: Neutral to wide

Best CrossFit Shoes for Women


4.4


Description:
  • Heel-to-toe drop: Nine mililmeters
  • Weight: 12.65 oz (for the size 10 men’s)
  • Material: Breathable upper engineered mesh construction
  • Width: Neutral

Best CrossFit Shoes for Wide Feet


3.8


Description:
  • Heel-to-toe drop: Four millimeters
  • Weight: 11 ounces (Men’s 9 / Women’s 10.5)
  • Material: SuperFabric®
  • Width: Wide

Best Budget CrossFit Shoes


3.7


Description:
  • Heel-to-toe drop: Zero millimeters
  • Weight: 14.3 ounces (size 10)
  • Material: Cotton canvas and rubber
  • Width: Narrow

Best CrossFit Shoes for Flat Feet


3.5


Description:
  • Heel-to-toe drop: Zero millimeters 
  • Weight: 8.1 ounces
  • Material: Mesh upper
  • Width: Narrow

Best CrossFit Lifting Shoes


4.0


Description:
  • Heel-to-toe drop: 22 millimeters
  • Weight: 16.4 ounces
  • Material: Canvas upper
  • Width: Neutral

FAQs

What are the best shoes to use for CrossFit?

The best shoes for CrossFit honestly depend on your fitness goals, workout style, and the width of your feet. That said, we consider the Reebok Nano X3s the best CrossFit shoes because they’re stable enough for lifting weights, have adequate cushioning for jumping and short-distance running, and

What kind of shoes do CrossFit athletes wear?

CrossFit athletes tend to wear shoes with a low heel-to-toe drop, minimal cushioning, solid sole, and an extremely durable upper. Shoes like the Reebok Nano X3s, Nike Metcon 8s, and NOBULL Trainers all fit the bill.

What CrossFit shoes are good for knee pain?

One study discovered that shoes with a high heel-to-toe drop may increase knee stress. (1) The Nike Metcon 8s have a four-millimeter heel-to-toe drop, which is lower than other CrossFit shoes we’ve tested. Therefore, it may be safe to assume that they are less likely to cause knee pain.

Do CrossFit shoes make a difference?

CrossFit shoes are constructed differently from regular, everyday shoes and even other athletic shoes like running sneakers. A good CrossFit shoe may help improve your performance and decrease the probability of injury. It can also withstand the versatility of CrossFit WODs, which can include a combination of running, gymnastics, heavy barbell lifting, and bodyweight movements.

Are CrossFit shoes good for lifting?

Not all CrossFit shoes are suitable for lifting. In our experience, shoes like the Reebok Nano X3s have just a bit too much cushioning for pushing into the floor during heavy squats and deadlifts. Good CrossFit lifting shoes typically have a flat, rigid sole, like the Converse Chuck Taylors. If you plan on doing a lot of Olympic weightlifting in addition to your CrossFit WODs, you may also want to consider a strict weightlifting shoe, like the Adidas Adipower 3.

Research

  1. Zhang, M., Zhou, X., Zhang, L., Liu, H., & Yu, B. (2022). The effect of heel-to-toe drop of running shoes on patellofemoral joint stress during running. Gait & posture, 93, 230–234. https://doi.org/10.1016/j.gaitpost.2022.02.008
  2. Özandaç Polat, S., & Yücel, A. H. (2018). Wearing high-heeled shoes increases the foot arch angle inducing measurable changes in the musculoskeletal system. Journal of back and musculoskeletal rehabilitation, 31(6), 1119–1129. https://doi.org/10.3233/BMR-170891
  3. Agresta, C., Giacomazzi, C., Harrast, M., & Zendler, J. (2022). Running Injury Paradigms and Their Influence on Footwear Design Features and Runner Assessment Methods: A Focused Review to Advance Evidence-Based Practice for Running Medicine Clinicians. Frontiers in sports and active living, 4, 815675. https://doi.org/10.3389/fspor.2022.815675
  4. Agresta, C., Giacomazzi, C., Harrast, M., & Zendler, J. (2022). Running Injury Paradigms and Their Influence on Footwear Design Features and Runner Assessment Methods: A Focused Review to Advance Evidence-Based Practice for Running Medicine Clinicians. Frontiers in sports and active living, 4, 815675. https://doi.org/10.3389/fspor.2022.815675
  5. Xu, J., Saliba, S. A., & Jaffri, A. H. (2023). The Effects of Minimalist Shoes on Plantar Intrinsic Foot Muscle Size and Strength: A Systematic Review. International journal of sports medicine, 44(5), 320–328. https://doi.org/10.1055/a-1908-8867
  6. López-Moral, M., Molines-Barroso, R. J., Álvaro-Afonso, F. J., Uccioli, L., Senneville, E., & Lázaro-Martínez, J. L. (2020). Importance of Footwear Outsole Rigidity in Improving Spatiotemporal Parameters in Patients with Diabetes and Previous Forefoot Ulcerations. Journal of clinical medicine, 9(4), 907. https://doi.org/10.3390/jcm9040907

The post Best CrossFit Shoes for Flat Feet, Wide Feet, and More (2023) appeared first on Breaking Muscle.

Be Nice and Share!
This post was originally published on this site

Originally Posted At: https://breakingmuscle.com/feed/rss

Among experienced lifters, heading into the gym for a focused chest and triceps workout stands as a testament to serious commitment. From powerlifters aiming for their next bench press PR to bodybuilders striving for a near-perfect physique, these sessions are fundamental in the lifting world. It’s not just about the aesthetics; it’s about strength, resilience, and dedication.

Training your chest and triceps together offers a balanced approach, maximizing both push mechanics and muscle engagement. Whether you’re a seasoned athlete or someone just starting out, there’s always room to refine technique, push boundaries, and see genuine progress.

Person in gym doing chest exercise on machine
Credit: Prostock-studio / Shutterstock

This workout uses an approach inspired by the “Mountain Dog” — legendary bodybuilding coach John Meadows. This method consists in a specific sequencing of exercises thought out to maximize the mind-muscle connection, build the muscular pump, and preserve longevity in the gym. Time to dive in and elevate your chest and triceps game to the next level.

Chest and Triceps Workout

How to Warm-up for a Better Chest and Triceps Workout

Warming up before diving into an intense chest and triceps workout isn’t just a suggestion — it’s an essential step. A proper warm-up primes the body, gradually increasing the heart rate, enhancing blood flow to the muscles, and lubricating the joints. This ensures not only optimal muscle engagement and flexibility but also significantly reduces the risk of injuries. (1)

This is especially true for sessions involving the shoulder joint (chest, shoulders, or “pushing” workouts) as it is the most flexible, but also relatively fragile, in the body. Without this preparatory phase, muscles remain stiff, making them more susceptible to strains or pulls, and joints can be caught off guard, leading to unnecessary stress or even long-term damage.

Warming up has mental benefits, as well. It provides a transition period, allowing you to mentally prepare and focus on the upcoming workout. This mental shift from rest to activity is crucial for optimal performance, ensuring that both the body and mind are in sync. Thus, skipping the warm-up not only jeopardizes physical health but also diminishes the overall quality and effectiveness of the workout. (2)

YouTube Video

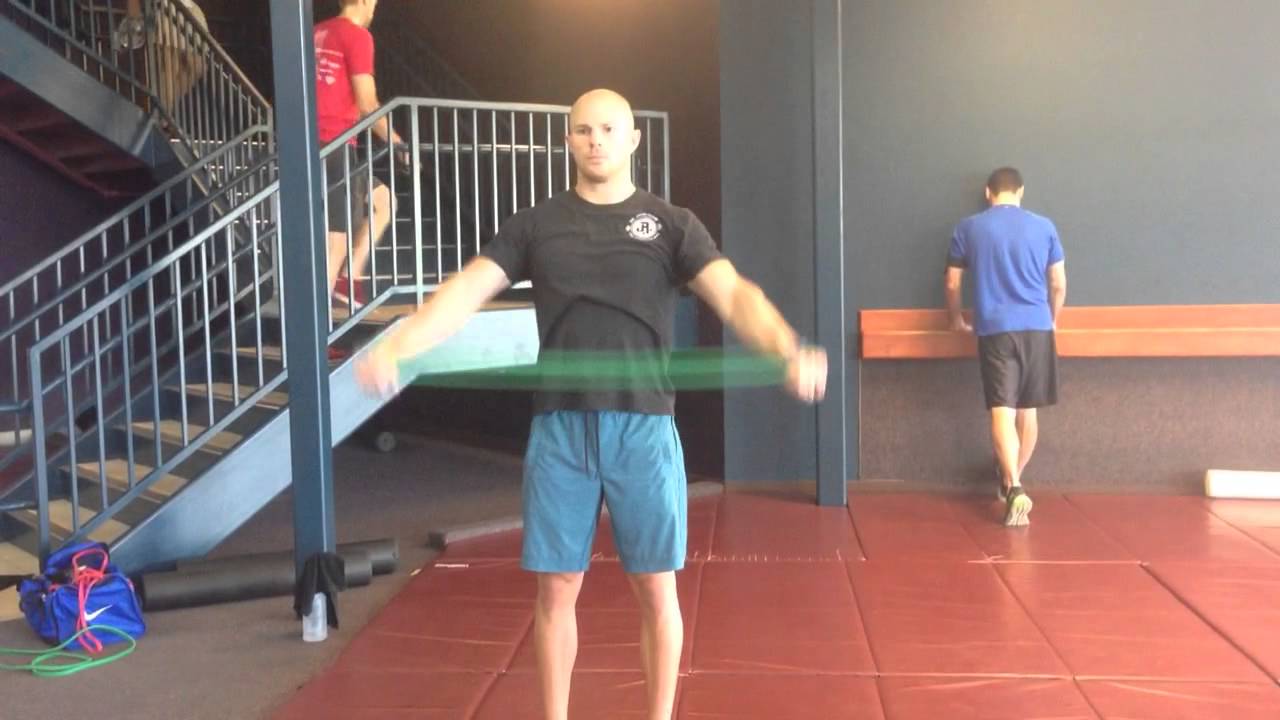
  1. Band Over-and-Back: Hold a light resistance band at shoulder-height with an overhand grip and your elbows straight. Slightly hinge forward so that you don’t “cheat” the exercise by arching your back. Remain in that position, squeeze your shoulder blades together, and extend your arms out to the sides to provide tension. Keep your arms straight the whole time and move the band from in front of you, up and overhead, and behind your back as far as comfort and mobility allow. Then bring the band back to the initial position. Perform 10 repetitions before moving on the next exercise.
  2. Band Pull-Apart: Stand fully upright and begin with your hands together in front of you at chest-height. Stretch the band by pulling the band apart and squeezing your shoulder blades together until your arms are extended to form a T-shape out to the sides. Repeat for 12 to 15 repetitions and move on to the last exercise.
  3. Band Triceps Extension: Loop the band around a stable overhead support like a power rack so that it is above head-height. Grab the band with both hands, brace your core, and bend slightly forward. While keeping your elbows glued to your ribs, extend your forearms down, then flex your upper arms to stretch your triceps before extending them again. Repeat for 30 to 50 reps. Repeat this entire circuit one or two more times for a thorough warm-up.

The Tried and True Chest and Triceps Workout

This workout consists of six exercises — four chest exercises and two triceps exercises —  organized in a specific manner to reap the most benefits. You can perform it once or twice per week, depending on whether you find these body parts to be a “weak point” or not.

The chest and triceps workout can be include in either a traditional body part-focused workout split or as a “pushing workout” in a push/pull/leg plan, with a second push day focusing on the shoulders instead of the chest.

Chest and Triceps Workout Summary

  • Slight Decline Dumbbell Bench Press — 4 x 8
  • Slight Incline Barbell Bench Press — 3 x 6-8
  • Machine Chest Press — 1 x 15 with triple rest-pause
  • Pec-Deck — 2 x 12-15 with iso-holds
  • Rope Pushdown — 2 x 12-15
  • Lying Triceps Extension — 3 x 8-12

Slight Decline Dumbbell Bench Press

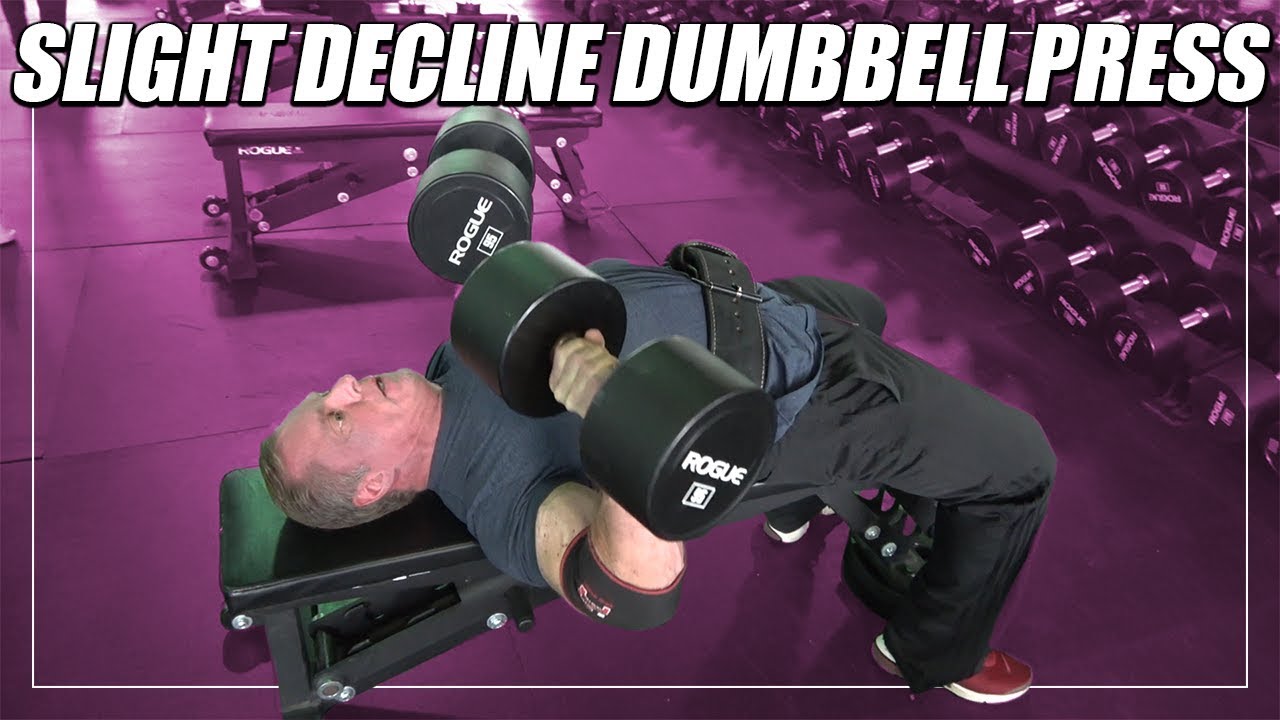
First, we launch with the decline dumbbell bench press. It’s all about activation — think of the exercise as coffee for your chest. Discard the typical “barbell exercise first” approach many lifters use and, instead, take a more for a joint-friendly approach. The decline position, as well as using dumbbells, will help you feel and activate your chest muscles better. (3)(4) This way, you’ll reduce the risk of injury and you’ll be able to recruit your chest better in the next exercises.

YouTube Video

The devil’s in the detail and, for a better chest recruitment and comfort, we want to use slight angles or we risk shifting the load away from the pecs and onto the shoulders or triceps. So don’t get crazy with the decline and use a roughly 10-degree angle — or place a single 25 or 45-pound weight plate under the foot-end of a flat bench. Always perform a few warm-up sets beforehand, as it is the first exercise of the session and your shoulder joints still need gradual preparation. 

  • How to do it: Lay down on the decline bench with a pair of dumbbells in your hands. Depending on your individual set-up, secure your feet under the pad, on a step, or on the plate you put under the bench for elevation. Slightly arch your upper back, squeeze your shoulder blades, and press the weight up while exhaling, making sure you keep your elbows and wrists aligned without flaring them or tilting them backward. Lower the weight with your palms facing forward, using control until the sides of the dumbbells are almost touching your chest. Press back to the starting position.
  • Sets and Reps: 4 x 8
  • Rest Time: Rest 90 to 120 seconds between sets.

Benefits of the Slight Decline Dumbbell Bench Press

  • The dumbbells allow for a more natural and joint-friendly motion, making it an ideal exercise to start a session.
  • The slight decline increases the recruitment of the chest compared to the triceps and shoulders, improving your mind-muscle connection and muscle growth.
  • The slight decline focuses on the sternal portion of the pectoralis (lower chest) which can be a benefit if your physique is lagging in this area.

Slight Incline Barbell Bench Press

Next up is the incline barbell bench press for those craving power and oomph. After the “activation” exercise, it’s time for the “explosive” phase with a big barbell movement. This will let you use a ton of weight to promote hypertrophy through mechanical tension. It’s still early in the session, so you should have a good deal of strength left.

This is called the “explosive” exercise because we want to move the barbell as fast as possible during the concentric phase (when you push the weight up) in order to improve strength and recruit as many type II fibers as possible — these are the biggest muscle fibers, the ones we’re after to optimize growth.

YouTube Video

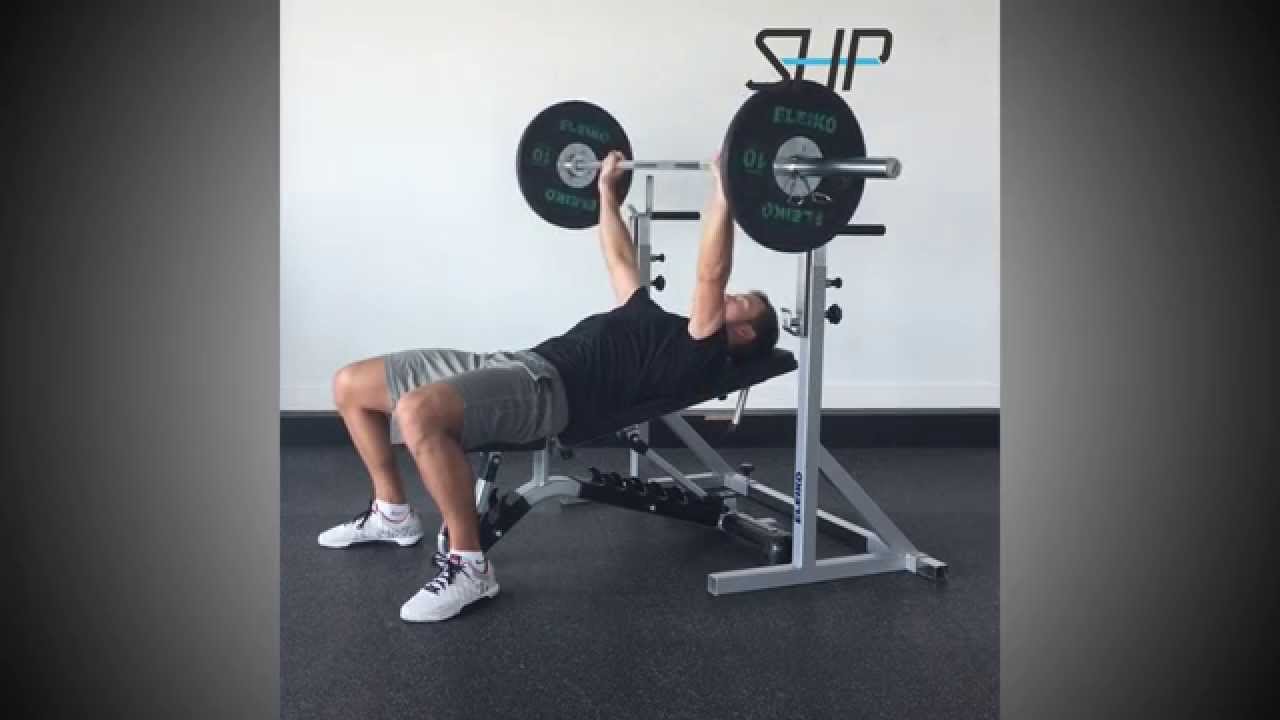
The slight incline bench press is an excellent pièce de résistance, as the incline will focus on the upper chest, a body part many lifters are deficient in. Once again, aim for a slight angle instead of a steep incline. Something like 15 to 30-degrees will better recruit the chest instead of the anterior deltoids. (5) Aim for heavy sets of six the first week, then try to do 7, then 8 reps with the same weight the following weeks before increasing it.

  • How to do it: Set up an adjustable bench to a 15 to 30-degree angle and lay on it. Squeeze your shoulder blades together so they lay flat on the bench. Unrack the barbell, using a grip around 1.5-times your shoulder-width. Squeeze the bar hard and lower it with control toward your clavicles or upper chest. Stop a couple inches before touching it, if your shoulders are problematic, and press the weight up as hard and fast as you can while exhaling.
  • Sets and Reps: 3 x 6-8
  • Rest Time: Rest two to three minutes between sets.

Benefits of the Slight Incline Barbell Bench Press

  • An incline angle, even a slight one, activates the clavicular head (upper part) of the pectoralis major more than a flat bench. This makes it particularly useful for those looking to enhance the definition and size of their upper chest.
  • The slight incline position may reduce the amount of stress on the anterior deltoid and the rotator cuff, as compared to a flat bench press. This potentially minimizes the risk of shoulder injuries, especially for those with pre-existing shoulder conditions.
  • The slight incline angle might have more carryover to everyday activities and sports that require pushing or throwing at an upward angle. This functional strength is useful not just for athletes but also in daily life scenarios.

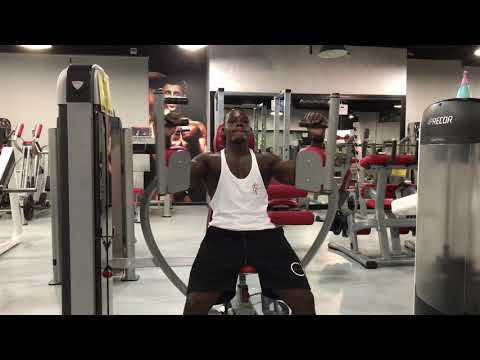
Machine Chest Press

Now we use a chest press machine to chase that coveted pump. Ever been so pumped you felt like you could bounce coins off your chest? If not, you soon might be. We’re aiming for that in the “pump” phase by driving a lot of nutrients, metabolites, and blood into the muscles to stimulate sarcoplasmic hypertrophy. This can increase the volume of the muscle cells and potentially trigger even more growth. For a great pump effect, you want an exercise which will be relatively safe to go to failure so you can really push yourself, while also targeting your chest as much as possible.

YouTube Video

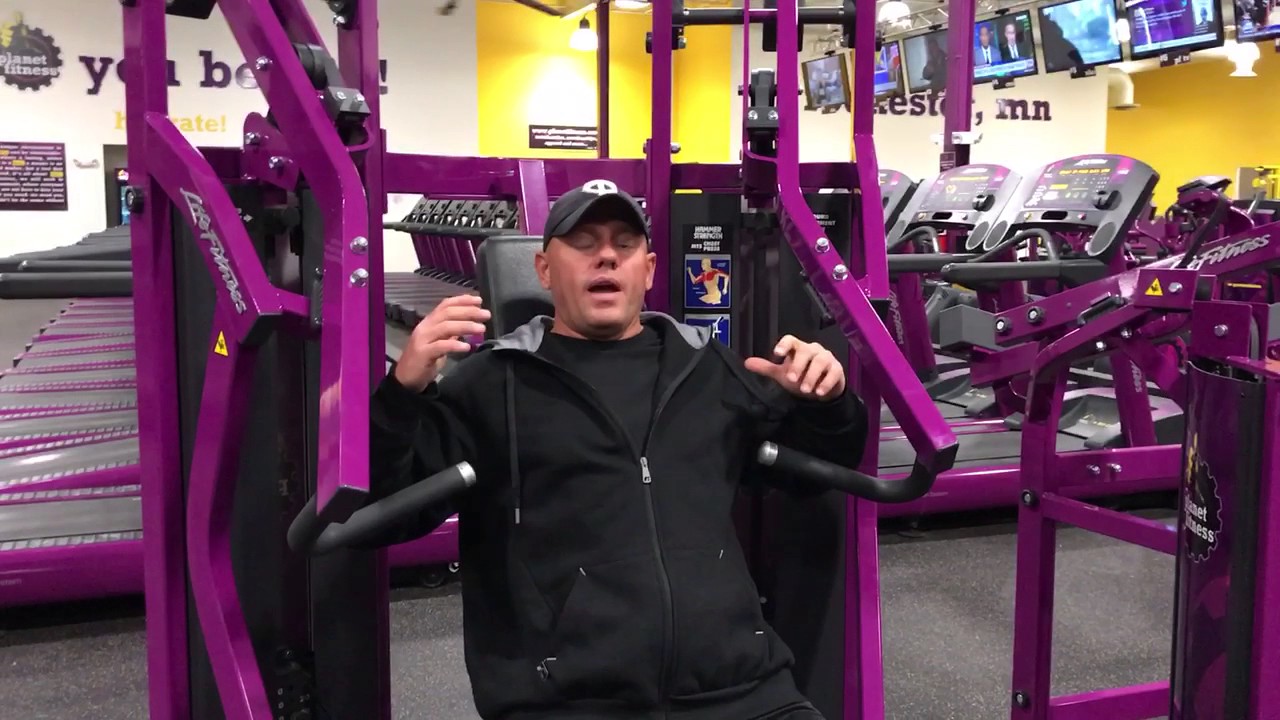
The machine chest press is a perfect fit as it develops the chest as a whole, rounding out the previous angle-focused pummeling. A quality machine doesn’t necessitate balance or high-level technique, so the movement is more secure. End with the high-intensity rest-pause technique to push yourself out of your comfort zone and stimulate maximum muscle growth. (6) Aim for a very hard set of 15 repetitions, then wait for 20 seconds, and do as many reps as you can with the same weight. Then do it again twice! It will mostly likely be only a few reps the last time.

  • How to do it: Find your favorite chest press machine and get in securely. Set the bench height so your hands are around mid-chest level in the starting position. Load the machine, puff your chest and squeeze your shoulder blades, and extend your arms by pushing through the handles until they are straight. Reverse the motion with control, while still remaining braced.
  • Sets and Reps: 1 x 15 with triple rest-pause — perform 15 reps to muscular failure, rest briefly, reduce the weight and perform more reps to failure. Rest briefly, reduce the weight and continue. Rest briefly again, and repeat one final time.
  • Rest Time: Rest 20 to 30 seconds for each rest-pause.

Benefits of the Machine Chest Press

  • One of the main advantages of using machines is safety. For those lifting heavy or working up to (or beyond) muscle fatigue, machines reduce the risk of dropping weights or failing mid-rep.
  • The machine chest press can provide targeted stimulation without the interference of stabilizing muscles, allowing you to fully feel and focus on your chest.
  • The rest-pause method effectively increases time under tension and metabolic stress, both of which are critical factors for muscle growth.

Pec-Deck Machine

Rounding off the chest, the pec-deck (or machine chest flye) offers the stretch you didn’t know you needed but won’t forget anytime soon. Now that our muscles are really warmed up, we can safely use exercises emphasizing the stretch without injury. The stretch is not only great to improve mobility, but also is linked to more muscle growth. (7)

YouTube Video

You could use cable crossovers instead, but the pec-deck machine has the benefit of nullifying the balance and bracing needed so that you can only focus on your muscles. It’s a superb exercise to isolate your chest and deep dive into the stretch with a minimal set-up time and effort. Do hard sets of 15 repetitions and, after the final rep, pause in the stretch position for 15 seconds to keep stimulating the muscle beyond failure.

  • How to do it: Sit on the machine and set the seat height so that your arms are at shoulder-level or slightly lower. Squeeze your shoulder blades together and brace your core. Bring your arms together in front of you and flex your chest as hard as possible on each repetition. Reverse the motion with control as far as possible while still being able to keep tension in your chest and repeat for the desired amount of repetitions. On the last repetition, hold the stretch position for 15 seconds.
  • Sets and Reps: 2 x 12-15 using a 15-second iso-hold at the end of each set.
  • Rest Time: Rest 90 seconds between sets.

Benefits of the Pec-Deck Machine

  • The pec-deck isolates the pectoral muscles effectively, allowing for a concentrated workout on the chest without assistance from the shoulders or triceps.
  • The pec-deck allows for a deep stretch at the beginning phase of the movement, which can gradually increase range of motion in the shoulder joint and potentially promote muscle hypertrophy. 
  • The fixed path of the machine ensures a consistent range of motion, ensuring that the muscles are worked through a specific and consistent arc. This can be particularly beneficial for reinforcing proper movement patterns and ensuring balanced development on both sides of the body.

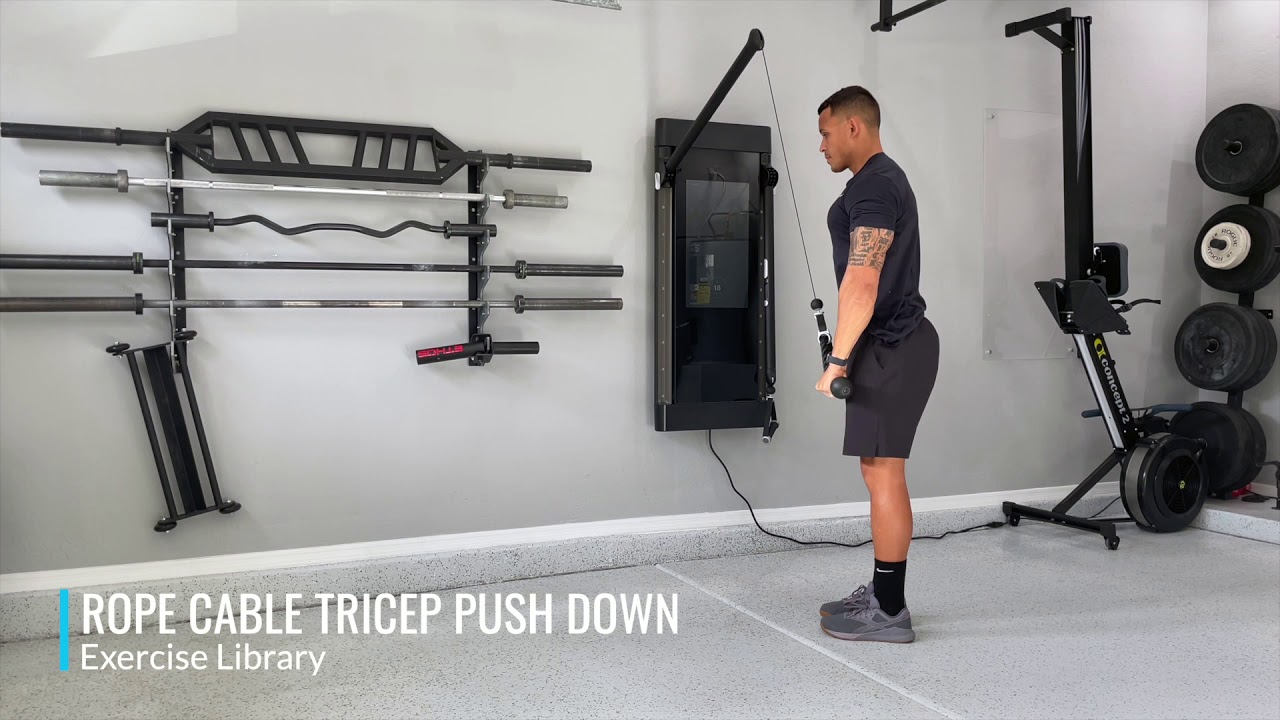
Rope Pushdown

Now it’s time to hammer your triceps. Doing them last ensures you can lift the most weight during your chest exercises, and that your sensitive elbow joints are completely ready for the pummeling ahead. In the same spirit, we’re going to use the classic triceps pushdown with a rope attachment, a very joint-friendly exercise. Stick to isolation exercises to simply finish off your triceps because they were already stimulated a lot during the chest-focused part of the session. 

YouTube Video

This exercise is a perfect fit to start the triceps segment as the rope allows for a smooth and natural motion, enhancing mind-muscle connection without putting excessive stress on the elbows. 

  • How to do it: Stand in front of a pulley station and set it as high as possible. Attach a rope to it. If you’re a long-limbed lifter, you could even attach two ropes for an increased range of motion, grabbing one with each hand. Slightly bend your knees and hinge forward so that you don’t accidentally hit yourself below the belt while performing the exercise. Brace your core and extend your arms down while making sure that only your forearms are moving. In the bottom position, squeeze your triceps as hard as you can for a second. Slowly flex back your arms to stretch your triceps and repeat for the desired amount of reps.
  • Sets and Reps: 2 x 12-15
  • Rest Time: Rest 60 to 90 seconds between sets.

Benefits of the Rope Pushdown

  • Using a rope attachment allows for greater range of motion than a straight bar, ensuring optimal triceps engagement compared to other triceps exercises.
  • The controlled movement of the pushdown, especially when done using cables and a rope, places less stress on the elbow joint compared to free-weight triceps exercises. This can be advantageous for those with elbow issues or looking to prevent strain.
  • The rope allows users to spread the ends apart at the bottom of the movement, providing an additional contraction or “squeeze” in the triceps. This can further enhance muscle activation and hypertrophy potential.

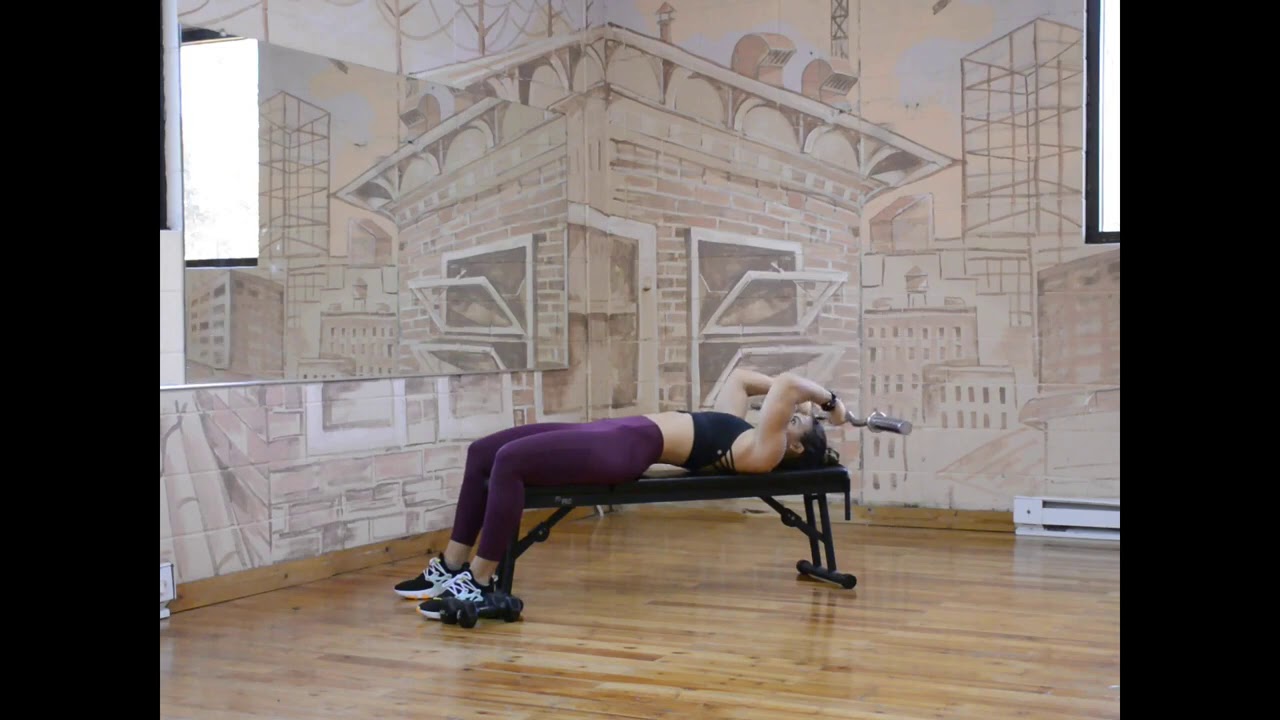
Lying Triceps Extension

We’re saving the best for last, as the lying triceps extension is a meat and potatoes movement in triceps training. You can use a ton of weight, thus promoting incredible strength and hypertrophy. But this exercise can be hard on the joints and we want to keep egos in check to avoid any injury. This exercise is also called the “skull crusher,” so doing it at the end of a session means that your joints will better tolerate the stress, and you won’t be able to use as much weight because of the cumulative fatigue.

YouTube Video

In any case, this exercise remains the king of triceps isolation exercises, so don’t think for a minute that it won’t make your arms stretch your sleeves. If you have bad wrists, feel free to use the EZ bar, as this squiggly thing can be easier on the joints.

  • How to do it: Grab a barbell with a pronated (palm down) grip, shoulder-width or slightly closer, and lay down on a flat bench. Extend your arms toward the ceiling and brace your core. From there, bend your arms and have the barbell stop an inch before it touches your forehead — move only your forearms, not your upper arms or shoulders — then press the weight up forcefully.
  • Sets and Reps: 3 x 8-12
  • Rest Time: Rest 60 to 90 seconds between sets.

Benefits of the Lying Triceps Extension

  • One of the primary benefits of this exercise is the ability to use relatively heavy weights compared to some other triceps isolation exercises. Heavier loads can produce greater mechanical tension on the muscle fibers, a critical factor for muscle growth.
  • The lying triceps extension is particularly effective at targeting the long head of the triceps, which is the largest of the three triceps heads.
  • This exercise has a pronounced eccentric (muscle-lengthening or lowering) phase. Eccentric actions have been associated with greater muscle damage, which can be a stimulus for muscle repair and growth.

Muscles Trained During the Workout

When you’re performing a chest and triceps workout, you’ll use various exercises to target these muscles, ensuring comprehensive development. Compound movements like bench presses engage multiple muscle groups, while isolation exercises like triceps pushdowns or chest flies focus more specifically on one group.

Pectoralis Major

This is the largest muscle in the chest, well, the one we simply call “the chest.” The clavicular head (upper chest) originates from the clavicle and helps in flexing the humerus (as in lifting the arm in front of you). The sternal head (lower/mid-chest) originates from the sternum and aids in adducting and rotating the humerus (as in flapping the arm down and inward).

Exercises done on an horizontal plane work the pectoralis as whole, while incline variations target the upper chest, and decline exercises work more the lower chest.

Triceps Brachii

Located on the back of the upper arm, it has three heads. The long head is the largest and runs along the back of the arm. It plays a role in extending the arm and adducting it (moving it toward the body). The lateral head is located on the outer side of the arm, giving the triceps its horseshoe shape. Finally, the medial head is deeper and runs beneath the long and lateral heads. It assists in extending the forearm.

Deltoids

While the pectorals and triceps are the primary focus, the anterior deltoid (front shoulder) is unavoidably activated and worked to a significant degree. This overlap is one reason why many training programs often pair chest with shoulders or allow adequate rest between chest and shoulder workouts to ensure the anterior deltoids recover properly. The middle and posterior deltoids are also recruited to an extent especially on incline movements or as stabilizer. 

Unlocking Upper Body Excellence

There’s an art and science to effective training and this workout beautifully melds both. By prioritizing joint health and muscle activation, we’re not just lifting weights; we’re sculpting an upper body masterpiece. The thoughtful arrangement of exercises, combined with techniques like iso-holds and rest-pauses, ensures each muscle fiber is recruited for maximum gain. 

So as you power through each rep, remember that it’s more than just motion — it’s purposeful progress. Whether you’re a seasoned gym-goer or stepping onto the workout floor for the first time, this chest and triceps routine promises results that speak for themselves. Give it your all and watch as strength, definition, and confidence become your workout rewards.

References

  1. Fradkin AJ, Gabbe BJ, Cameron PA. Does warming up prevent injury in sport? The evidence from randomised controlled trials? J Sci Med Sport. 2006 Jun;9(3):214-20. doi: 10.1016/j.jsams.2006.03.026. Epub 2006 May 6. PMID: 16679062.
  2. McCrary JM, Ackermann BJ, Halaki M. A systematic review of the effects of upper body warm-up on performance and injury. British Journal of Sports Medicine 2015;49:935-942.
  3. Farias DA, Willardson JM, Paz GA, Bezerra ES, Miranda H. Maximal Strength Performance and Muscle Activation for the Bench Press and Triceps Extension Exercises Adopting Dumbbell, Barbell, and Machine Modalities Over Multiple Sets. J Strength Cond Res. 2017 Jul;31(7):1879-1887. doi: 10.1519/JSC.0000000000001651. PMID: 27669189.
  4. Saeterbakken AH, Mo DA, Scott S, Andersen V. The Effects of Bench Press Variations in Competitive Athletes on Muscle Activity and Performance. J Hum Kinet. 2017 Jun 22;57:61-71. doi: 10.1515/hukin-2017-0047. PMID: 28713459; PMCID: PMC5504579.
  5. Rodríguez-Ridao, D.; Antequera-Vique, J.A.; Martín-Fuentes, I.; Muyor, J.M. Effect of Five Bench Inclinations on the Electromyographic Activity of the Pectoralis Major, Anterior Deltoid, and Triceps Brachii during the Bench Press Exercise. Int. J. Environ. Res. Public Health 2020, 17, 7339. https://doi.org/10.3390/ijerph17197339 
  6. Krzysztofik M, Wilk M, Wojdała G, Gołaś A. Maximizing Muscle Hypertrophy: A Systematic Review of Advanced Resistance Training Techniques and Methods. Int J Environ Res Public Health. 2019 Dec 4;16(24):4897. doi: 10.3390/ijerph16244897. PMID: 31817252; PMCID: PMC6950543.
  7. Warneke K, Brinkmann A, Hillebrecht M, Schiemann S. Influence of Long-Lasting Static Stretching on Maximal Strength, Muscle Thickness and Flexibility. Front Physiol. 2022 May 25;13:878955. doi: 10.3389/fphys.2022.878955. PMID: 35694390; PMCID: PMC9174468.

Featured Image: MDV Edwards / Shutterstock

The post A Chest and Triceps Workout for Classic Size and Strength appeared first on Breaking Muscle.

Be Nice and Share!
This post was originally published on this site

Originally Posted At: https://breakingmuscle.com/feed/rss

When I started CrossFit in 2015, it only took about a week for me to develop an unhealthy obsession with shopping for the best CrossFit shoes. Even though the NOBULL brand launched in that same year, I didn’t buy my first pair of their trainers until 2019. Having put them through hundreds of workouts since then, I’m well-equipped to deliver this NOBULL shoes review.

Based on comments I used to hear at the box where I started my CrossFit journey, and from the feedback I’ve collected from other Breaking Muscle staff members, one thing is clear: NOBULL trainers can be quite controversial. Below, I’ll explore why this is and discuss the shoes’ benefits, drawbacks, key features, and who they’re best suited for.

Key Takeaways

  • The NOBULL trainers retail for around $129 to $149, depending on which colorway you choose. 
  • The SuperFabric technology used for the upper is durable, but breathability may be an issue — something to consider if you live and train in a hot climate.
  • NOBULL trainers fit true to size, though the toe box runs narrow.


NOBULL Trainers


3.8
  • Heel-to-toe drop: Four millimeters
  • Weight: 11 ounces (Men’s 9 / Women’s 10.5)
  • Material: SuperFabric®
  • Width: Wide


Check Price

NOBULL Shoes Pros

  • NOBULL shoes come in lots of colors and prints. If you want to stand out in the gym or like wearing color-coordinated gym attire, you should be able to find a colorway that suits your style.
  • They are durable. I still have the first pair of NOBULL trainers I bought in 2019, and they don’t look much different now than when I first took them out of the box.
  • The lug-patterned outsole provides a lot of traction whether you’re training indoors or outdoors.

NOBULL Shoes Cons

  • The trainers aren’t good for running or lots of jumping due to the lack of cushioning, poor arch support, and minimal forefoot flexibility.
  • While their price point of around $129 to $149 is on par with other CrossFit shoes, other brands regularly offer sales and discounts. NOBULL shoes are rarely on sale, which can be a drawback for budget-conscious CrossFitters.
  • The SuperFabric® material used for the upper can be stiff, and the trainers may take a few weeks to break in.

NOBULL Shoes Rating

At Breaking Muscle, we’ve tested dozens of training shoes, including the latest models of  CrossFit-specific shoes, like the Nike Metcons and Reebok Nanos. I personally have also bought and trained in at least 20 different CrossFit shoes throughout the years. Here’s how the NOBULL trainers scored after we put them through our proprietary factor methodology system.

Factor Rating (out of 5)
Appearance 4.5
Materials 3.5
Outsole 4.3
Midsole 3
Heel-to-toe drop 4.2
Versatility 3
Price 4
Durability 4

NOBULL Shoes Overview

NOBULL shoes are meant to be a somewhat minimalist, back-to-basics type of training shoe. They’re designed to withstand rope climbs, burpees, handstand push-ups, powerlifting movements, Olympic weightlifting movements, and anything else your workout of the day (WOD) has in store.

However, they can be quite polarizing. Some CrossFitters claim NOBULL trainers are the most comfortable shoes they’ve ever worn. Others claim the shoes lack design ingenuity and don’t perform as well as other well-known shoes, like the Nike Metcons.

While NOBULL has released new shoe models over the years — for instance, the Rec Trainers and the NOBULL runners — the original trainers haven’t changed much. The NOBULL Trainer+ came out in 2022 with some improvements over the original trainer, which I’ll discuss in the comparison section later on. But in general, NOBULL hasn’t strayed too far from the design of their original trainers.

Who Are NOBULL Shoes Good For?

  • The overall stability of the shoe and the rigidity of the flat sole can make NOBULL trainers good for athletes who focus primarily on strength training.
  • In our experience, NOBULL trainers don’t have a super wide toe box, so they are more suitable for athletes with narrow feet.

Who Are NOBULL Shoes Not Good For?

  • Because of the hard bottom, lack of arch support, and minimal cushioning, the NOBULL trainers may not be suitable for anyone who wants a comfortable sneaker they can wear all day.
  • Athletes who prefer to wear heeled weightlifting shoes for squats will likely not enjoy the four-millimeter heel-to-toe drop on the NOBULL trainers. (Note, however, that NOBULL sells weightlifting shoes with 17.5- and 18.5-millimeter heel-to-toe drops.)

NOBULL Shoes In-Depth Review

Appearance

The design of the NOBULL trainers is one thing that makes them so controversial. Some people love the minimalist aesthetic while others consider it quite basic and uninspired. I’m part of the latter camp — I don’t necessarily think that NOBULL has accomplished anything groundbreaking or unique with its trainer.

However, NOBULL makes up for this by offering their shoes in unique colors and prints. For example, as of this writing, the women’s shoes are available in fun colorways, such as neon blue, bright pink camo, multiple floral patterns, and highlighter yellow. If you prefer more understated footwear, you can opt for solid colors, like black, gray, or navy.

I don’t like my gym shoes to be too flashy, but I don’t want them to be too boring, either. When I bought my first pair of NOBULL trainers, I chose a gray upper with a blue, pink, and purple patterned sole and matching laces. I like that this colorway has a small pop of color that keeps them from being too drab without being so bright that you can spot me from a mile away when I wear them.

The NOBULL trainers also have one of the largest selections of prints and colors I’ve seen in any gym sneaker, let alone a CrossFit shoe. You can even get them in high tops, similar to the Converse Chuck Taylors. They get a solid 4.5 out of 5 stars for aesthetics from this CrossFit shoe junkie.

RELATED: Is CrossFit Bad for You?

Materials

NOBULL shoes are made with SuperFabric® technology. NOBULL takes normal mesh fabric and applies tiny guard plates to it, resulting in a material that is highly resistant to abrasions. I’m not always gentle with how I treat my shoes, but my NOBULL trainers hardly have any scuff marks or imperfections on them.

However, the SuperFabric® material is not very breathable. I appreciate this in the winter when I’m training in my cold garage because it helps keep my feet warm. But I don’t particularly enjoy the lack of breathability in the summer because it makes my feet overly hot and sweaty. The suede tongue has holes for ventilation, but I don’t think they do much.

The material is also stiff. I still have to loosen the shoelaces nearly all the way to get the shoes on, and I’ve had the trainers for four years now. Because of the material’s stiffness and minimal breathability, I give it 3.5 out of 5 stars.

Outsole

NOBULL trainers have a flat, stable carbon rubber outsole with a grippy lug pattern and a reinforced sidewall. The shoes don’t slide around easily when I’m lifting on the rubber gym flooring in my garage, and on the rare occasions that I have worn them for outdoor runs, I haven’t felt like I was going to slip.

The bottoms have less traction now than when I first got the shoes, but the outsoles haven’t worn down as quickly as many of my other cross-training shoes. I gave the outsole 4.3 out of 5 stars for this reason.

Midsole

The midsole features a lightweight foam material that doesn’t compress. This is a great feature when you’re lifting heavy weights, as you want your shoes to help you feel balanced and stable. However, it’s a drawback for sprints, jumping, and other high-impact activities because the midsole isn’t very shock-absorbing or responsive (meaning it doesn’t offer much energy transfer when your feet hit the ground). I only scored the midsole 3 out of 5 stars because, as I’ll discuss below, the shoe’s minimal midsole limits its versatility.

Heel-to-Toe Drop

NOBULL trainers have a four-millimeter heel-to-doe drop. The low heel-to-toe drop makes it ideal for heavy lifts because it keeps you more balanced and stable. In fact, the NOBULL trainers are my go-to shoes for days when I’m only doing strength training.

I give them 4.2 stars for the heel-to-toe drop, however, because I prefer a heeled lifting shoe for heavy squats. I’m 5’8 and have long legs, and a higher heel-to-toe drop makes it easier for me to squat below parallel.

That said, I do think they’re a good shoe for lifters who prefer squatting in a flatter shoe. They just don’t work for me for most barbell squat variations.

RELATED: Best Weightlifting Belts

Versatility

When it comes to versatility, I only give NOBULL trainers a 3 out of 5. They’re supposed to be all-purpose shoes that are good for running, jumping, and lifting weights. However, in my experience, they don’t work well for anything high-impact.

I’ve long since given up on wearing them for any workouts that include a lot of running (even short distances), box jumps, or double-unders. I only wear them for my strict strength training days, when my CrossFit WODs call for mostly static movements, or when I’m using a low-impact cardio machine like a rower or exercise bike. I have flat feet and have had multiple foot and ankle injuries. For high-impact movements, I reach for shoes with more cushioning and arch support.

I wouldn’t even recommend wearing the NOBULL trainers for running errands or walking around town. I’ve tried wearing them while strolling through a shopping mall and while walking my dog, and my feet ached for hours afterward. If you’re looking for a shoe that can double as a workout shoe and a recreational, a NOBULL pair of shoes may not cut it.

Price

NOBULL trainers cost between $129 and $149, depending on which style and colorway you choose. I give them 4 out of 5 stars for the cost. Even though the price tag may seem high, I don’t fault NOBULL for it too much. It’s hard to find CrossFit shoes that are much cheaper unless you’re lucky enough to get them on sale.

Durability

The NOBULL trainers get 4 out of 5 stars from me for durability. I’ve had my first pair since 2019, and they look nearly the same now as they did when they arrived at my doorstep. The only reason I knocked off a point is that I train at home in a cramped garage gym with a low ceiling and zero empty wall space, so I don’t have room for things like rope climbs and handstand push-ups. I can’t give the shoes a perfect score for durability since I haven’t really put them through a complete test.

NOBULL Trainer Customer Reviews

The NOBULL women’s trainers have over 19,500 reviews on the brand’s website, with the majority of customers rating them 5 out of 5 stars. Buyers praise the trainers for their stability, wide color selection, and true-to-size fit. Those who left negative reviews state the shoes aren’t breathable and take a long time to break in.

NOBULL Trainer vs. NOBULL Trainer+

The NOBULL Trainer+ boasts a thicker EVA midsole and a more cushioned heel cup. I haven’t personally tested the NOBULL Trainer+, but a Breaking Muscle product tester who wore them said these updated features can be both good and bad. For instance, the thicker midsole and increased cushioning offer more shock-absorbing capabilities for running and jumping but make the shoes feel less stable when lifting heavy weights.

Another new feature on the NOBULL Trainer+ is the herringbone-patterned outsole. While I never had a problem with slippage when wearing the original trainer, the new outsole is designed to provide even greater traction. The Trainer+ also has a larger toe bumper and a sturdier sidewall guard for enhanced durability. The SuperFabric material has carried over from the original trainer to the Trainer+.

The Trainer+ costs around $139 to $149, though some colorways are priced even higher at about $169. You can find some colorways in the original trainer for cheaper, but in general, the prices of the two versions are about the same.


NOBULL Trainer+


3.5
  • Heel-to-toe drop: Four millimeters
  • Weight: 13.13 ounces (Men’s 9 / Women’s 10.5)
  • Material: SuperFabric®
  • Width: Wide


Check Price

NOBULL Trainers vs. Nike Metcons

Up until a few months ago when I bought my first pair of TYR CXT-1 trainers, the Nike Metcons were my go-to shoes for all of my CrossFit workouts. I haven’t tried the Metcon 8s or 9s — I still have two pairs of Nike Metcon 6s that I rotate through sometimes. I also used to own a pair of Metcon 2s and a pair of Nike Metcon Flyknits (which it looks like Nike no longer makes). I pretty much wore both of them into the ground because I loved them so much. Suffice it to say, I would generally recommend the Metcons over the NOBULL trainers any day.

Like the NOBULL trainers, the Nike Metcons have a four-millimeter heel-to-toe drop. They aren’t overly cushioned, so I’m still able to push against the floor when doing heavy static lifts like squats and deadlifts. While I don’t enjoy doing any jumping movements in my NOBULL trainers, I can tolerate them in the Nike Metcons. 

The Nike shoes aren’t the best for running long distances because the hard plastic heel can be uncomfortable (especially if you heel strike, which I tend to do when I get fatigued). But overall, I find the Metcons more comfortable than the NOBULL shoes.

At around $150, the Metcons cost about the same as or slightly more than the NOBULL trainers (depending on which color you get). Nike tends to run sales on their sneakers from time to time, though. If price is a determining factor for you, it may be worthwhile to keep an eye out for sales and opt for a pair of Metcons.


Nike Metcon 8


4.2
  • Heel-to-toe drop: Four millimeters
  • Weight: 12.5 ounces (size 10)
  • Material: Lightweight mesh with textured overlays
  • Width: Neutral to wide


Check Price

NOBULL Trainers vs. Reebok Nano

I’ve never really loved any of the Reebok Nano’s I’ve tried, but I haven’t hated them, either. I’ve actually found Nano’s to be more comfortable for running than the NOBULL trainers. They are springier and more responsive and therefore also better for box jumps, double-unders, and other high-impact movements.

However, I don’t feel as stable lifting near-maximal loads in the Nanos as I do in the NOBULL trainers. I only reach for my Nanos when I’m lifting at around 70 to 75 percent of my one-rep maxes or doing CrossFit WODs with a lot of running or cardio machine work.

The Nano X3s have a seven-millimeter heel-to-toe drop, which is three millimeters more than the NOBULL trainers. Based on the feedback I’ve received from other Breaking Muscle staff members, the Nano X3s are more breathable.

The Nano X3s cost around $140 to $150, about the same as the NOBULL trainers. But if you need a more cushioned CrossFit shoe, the Nanos may be a better choice.


Reebok Nano X3


4.0
  • Heel-to-toe drop: Seven millimeters
  • Weight: 12 ounces (unisex size 9)
  • Material: Synthetic and textile upper
  • Width: Ideal for wide feet


Check Price

Final Thoughts: Are the NOBULL Trainers Worth It?

Whether you’re a fitness enthusiast or a competitive CrossFit athlete, the NOBULL trainers can be worth it. Understand, however, that they may not work for all types of exercises, depending on your foot anatomy and how much support you like in a cross-training shoe. They can be uncomfortable for high-impact activities due to their rigidity and minimal cushioning, but they’re ideal for heavy weightlifting because they offer a stable platform and allow you to still feel connected to the ground.

Before shelling out at least $129, consider the type of movements you do most often in your CrossFit WODs. If you do a lot of heavy barbell cycling or machine work, the NOBULL trainers may be a good choice. But if you like to program a lot of running, box jumps, and double-unders in your WODs, you may want to consider a shoe that will be more comfortable for those movements.

FAQs

Is NOBULL a good shoe brand?

NOBULL is a good shoe brand and has a strong following within the CrossFit community. They also sponsor NFL players, Olympians, pro golfers, NHL players, and other professional athletes. However, their suitability for you depends on the type of training you do. In our experience, NOBULL trainers are best for general weight training and low-impact activities. They aren’t ideal for long-distance running or lots of jumping due to their lack of cushioning and rigid soles.

Is NOBULL owned by Reebok?

NOBULL is not owned by Reebok. However, NOBULL did take over for Reebok as the title sponsor for the CrossFit Games beginning in 2021. 

Should I size up for NOBULL shoes?

In our experience, NOBULL shoes fit true to size. Breaking Muscle staff members who have worn them have all gotten their usual size and had no complaints about the fit.

Can you run long distances in NOBULL shoes?

We don’t recommend running long distances in the NOBULL trainers. They have a hard, rigid bottom and don’t offer much cushioning or arch support. If you’ll be running any distance over a mile, opt for traditional running shoes instead.

Note that you can also buy NOBULL runners, but we don’t necessarily recommend those for serious running, either. We found durability to be an issue, and they weren’t quite as supportive as shoes from Brooks (a brand with a solid reputation in the running community).

The post NOBULL Shoes Review (2023): Tested in 100+ Workouts appeared first on Breaking Muscle.

Be Nice and Share!
This post was originally published on this site

http://www.marksdailyapple.com/

Research of the Week

A diabetes diagnosis lowers life expectancy.

Pea protein fares pretty well against whey protein, but the dose must be extremely high.

Astaxanthin improves gut health.

Better alignment between light exposure and activity levels will reduce cognitive decline.

Diabetics get the best results with resistance training using 3 sets per exercise and 8-10 reps per set.

New Primal Kitchen Podcasts

Primal Kitchen Podcast: So What’s Your Gut Telling You?

Primal Health Coach Radio: Marcus Farris

Media, Schmedia

Is “net-zero” realistic or even possible?

CRISPR-edited pig kidneys kept monkeys alive for 2 years.

Interesting Blog Posts

Vegan companies are turning to more “masculine” marketing.

Social Notes

A phrase I hate.

Everything Else

In the 3rd millennium BC, the Northern Baltic region had a bunch of parallel societies of hunters, fishers, foragers, and farmers with very little integration. What a wild time that must have been.

Capers are a superfood.

They’re now able to read ancient Hellenic scrolls previously illegible.

Things I’m Up to and Interested In

Might explain why they were such good marine explorers: Austronesian cultures often practiced extensive human sacrifice.

Not surprised: Insulin resistance linked to depression.

Look at that: Exposure to artificial light at night during teen years linked to higher blood pressure as an adult.

Interesting: The role of cholesterol in synapse synthesis and function.

Of course: More medium intensity activity throughout the day is best for adults with depression.

Question I’m Asking

Do you listen to your gut?

Recipe Corner

Time Capsule

One year ago (Oct 7 – Oct 13)

Comment of the Week

“Lab grown meat, fully autonomous self driving vehicles, robot dogs, AI (or AGI) – it’s all hype. We forget that we are an aspect of reality able to perform certain actions within that reality. We are not creators – in the sense of originators – of reality. Thinking we are would be like a robot in a car factory thinking it could become CEO. There are levels to things, and we are not above nature or outside of it. We are one with it.

-Well said.

Primal Kitchen Buffalo

The post New and Noteworthy: What I Read This Week—Edition 241 appeared first on Mark’s Daily Apple.

Be Nice and Share!
This post was originally published on this site

http://www.marksdailyapple.com/

Picture of young woman tasting pumpkin soup in the kitchen.Imagine this: It’s a crisp autumn afternoon. A breeze is blowing crunchy leaves off the trees. There’s a fire in the fireplace. You’re wearing your comfiest sweater. Maybe a pumpkin candle burns in the background. It’s perfect, right?

Not quite.

The only thing this idyllic scene needs to achieve fall perfection is a pot of soup simmering on the stove.

Soup is the ultimate one-pot meal, but that’s not all it has going for it. There’s a reason you crave soup when you’re coming down with a cold or flu. Bone broth and other common soup ingredients like garlic and fresh herbs boast immune-supporting compounds, and the hot liquid itself can help relieve congestion. Soup is also great for folks who like to prepare meals in bulk to freeze and enjoy later. And, it’s a great way to use up the random meat and veggies in the fridge to prevent food waste

Here are a dozen of our favorite soup recipes that will get you pumped to say, “Soup’s on!”

12 Soups to Enjoy This Fall (Or Any Time!)

Chicken Soup Recipes

Ginger Turmeric Chicken Soup

If you only try one recipe from this list, make it this one. It’s everything you love about chicken soup but turned up a few notches with the addition of ginger and turmerictwo are staple ingredients in traditional medicine thanks to their many beneficial properties.

Two bowls of ginger turmeric chicken soup on pink cloth with fresh ginger in background.

Get the Recipe


Instant Pot Chicken “Noodle” Soup

Your classic chicken noodle soup made Primal, paleo, and keto friendly with a low-carb noodle alternative. (No, it’s not zucchini.) The Instant Pot pressure cooker  saves time and is ideal for times when you don’t want to tend a pot on the stovetop.

Overhead shot of chicken noodle soup with large wooden spoon and blue napkin.

Get the Recipe

Seafood Soup Recipes

Cioppino

Bring the flavors of Italy and San Francisco together (yes, you read that right) in this tomato-y, garlicky masterpiece. It’s easier than you might think.

Close-up shot of two bowls of cioppino, fresh tomatoes.

Get the Recipe


Coconut and Red Palm Oil Salmon Chowder

A powerhouse of healthy fats that combines some ingredients you might not have tried before—red palm oil and kohlrabi or rutabaga—with Primal favorites salmon and coconut milk. Try this soup next time you’re feeling stuck in a menu rut.

White bowl of orange-hued salmon chowder with spoon.

Get the Recipe

Vegetable Soup Recipes

Garlic Soup with Mushrooms and Chive Oil

Calling all garlic lovers! You simply must try this simple yet elegant and oh-so-delicious soup. (We like to load up on garlic during the cold and flu season.)

White bowl of creamy garlic soup with mushrooms and green chive oil on top.

Get the Recipe


Creamy Broccoli Spinach Soup

Get a hefty serving of sulfur-rich broccoli in this creamy soup that somehow manages to be both light and filling. The recipe is dairy-free, but feel free to add a little (or a lot of) shredded cheese to your bowl!

Rectangular white bowl with vibrant green broccoli soup and fresh spinach.

Get the Recipe


Silky Celery Root Soup

Most people ignore celeriac, or celery root, at the grocery store. We get it. It looks kind of like a dirty, hairy, misshapen potato—but looks are deceiving here. Celery root has a lovely delicate flavor that makes for an absolutely wonderful blended soup.

Square green bowl of blended celery root soup surrounded by fresh herbs.

Get the Recipe


Butternut Squash Soup Recipe

A fall classic, you can’t pass up butternut squash soup!

Overhead shot of a bowl of butternut squash soup with sage, wooden spoons, black and white checkered kitchen towel.

Get the Recipe

And Now for Something A Little Different…

Tomato Soup with Gluten-free Spicy Mini Meatballs

This tomato soup recipe features a unique time-saving ingredient. Shhh! 

White bowl of tomato soup with spicy meatballs, Primal Kitchen Arrabbiata Sauce.

Get the Recipe


Kale Soup with Turmeric and Ground Lamb

Here is another great option with immune-boosting ingredients. If you don’t care for lamb, substitute ground turkey instead.

Turmeric and kale soup with ground lamb in a bowl with spoon and half a lemon.

Get the Recipe


Slow-Simmered Cabbage Soup

Cabbage is abundant and affordable at farmer’s markets in the fall. If you’ve only had cabbage in coleslaw, try this recipe! When you slowly simmer it, the flavor changes considerably, becoming mild and lightly sweet.

White bowl of cabbage soup with sausage. White background, head of green cabbage.

Get the Recipe


Pork Belly and Kimchi Soup

Spicy and rich, this soup is like nothing else on this list. Try it with different types of kimchi to discover unique flavors.

Overhead shot of large oval bowl of pork belly soup in red broth.

Get the Recipe

Let us know in the comments which of these soups you’re going to make first!

Oil_&_Vinegar_640x80

The post Fantastic Fall Soup Recipes appeared first on Mark’s Daily Apple.

Be Nice and Share!
This post was originally published on this site

Originally Posted At: https://breakingmuscle.com/feed/rss

So, you have limited money and want the best budget home gym equipment? Sorting through which products are worth it — and which ones are just disappointments waiting to happen — is no simple task. Lucky for you, we’ve combined decades of training experience and actual product testing to minimize the risk and maximize the payoff for you.

Benches, barbells, dumbbells, cardio machines, all-in-one trainers — this roundup hits every style of training. If you’re on the hunt for equipment that delivers big functionality without a big price tag, meet your one-stop roadmap to the home gym of your dreams.

How We Chose the Best Budget Home Gym Equipment

We’ve done the homework, and the home workouts, to ensure our recommendations are the best. Breaking Muscle’s knowledgeable team of product experts includes certified strength and conditioning coaches, CrossFitters, certified personal trainers, and diehard fitness enthusiasts. 

We even have a dedicated testing facility in Springfield, MO, where we put cardio and strength training equipment through rigorous testing to determine which items are worth your hard-earned dollars. Several of our Breaking Muscle team members own the products below in their home gyms, so we’ve included their feedback. I’ve also been a fitness writer and editor for over three years, during which time I’ve screened hundreds of home gyms and CrossFit boxes and constructed my own complete home gym that uses a number of these products. 

To ensure our home gym equipment picks stay within a reasonable price range, we set a limit of $2,000, but most items on this list came in far lower. 

Our Top Picks for the Best Budget Home Gym Equipment

Best Budget Weight Bench: REP Fitness AB-3100


REP Fitness AB-3100


4.4
  • Dimensions: 50.5″ L x 23″ L x 16.75″ H
  • Bench weight: 70 pounds
  • Back pad positions: Six angles
  • Weight capacity: 700 pounds


Check Price

Pros

  • Highly versatile flat and incline bench
  • Stable design & sturdy 700-pound capacity
  • Easy to move, despite weighing 70 pounds
  • Excellent vinyl upholstery bench pad
  • Available in multiple colors

Cons

  • 1.7-inch gap between seat and back pad
  • No decline angle

I’ve owned this bench from REP Fitness for 2.5 years, and love how it hits a sweet spot of versatility, ease of use, and straight-up toughness. The AB-3100 has held up to my regular use, the padding hasn’t ripped or compressed, and the frame shows no rusting.

For me, the most remarkable feature of this bench is its versatility. The three seat angles and six back pad positions unlock more exercises than any flat bench can offer. The ladder-style adjustment system makes changing the angle easy on either pad. Whether your workout calls for incline bench presses, chest-supported rows, shoulder presses, or arm training, the quick customization of an adjustable bench makes it a serious upgrade for any home gym. 

Despite the bench’s 70-pound weight, the handle and wheels make it easy to move around. I’ve tried a beefier bench from REP (the AB-5200) and noticed it was heavy and hard to move. The AB-3100 isn’t difficult to move; I just grab the handle at the front of the bench and stand it up, then wheel it wherever I need it. If portability is important to you, I’d recommend the AB-3100 over REP’s larger adjustable benches.

Although it’s easy to move, it’s also quite sturdy, and I’ve never felt unstable or unsupported on this bench. Part of that likely is due to the three-post design, where the posts have rubber grips on the bottoms for added stability. I appreciate this design because I can easily tuck my feet back on bench presses. Other benches I’ve tried have wide bases that prevent me from doing this.

The covering on the bench pad is also quite grippy, and I rarely slip whether I’m wearing a T-shirt or tank top. Finally, its 700-pound capacity gives me peace of mind when training solo.

The main drawback most commenters notice about the AB-3100 is the noticeable 1.7-inch gap between the seat and back pads. Some find the gap an eyesore; others experience low back discomfort because that area isn’t supported. Personally, I don’t have any issues with it. 

I’m tall and have a long body, but I can position myself so that I’m not hitting the gap when the bench is flat — the same applies when the back pad is inclined. I’ve even heard of some lifters reversing the bench by using the seat as a headrest with your neck in the gap. That may sound strange, but your gym, your rules.

It’s worth noting that this REP bench has no decline angle — only flat and six incline positions. If you love to decline bench press or have an obsession with lower ab exercises, you might long for this feature. But I haven’t missed it, especially since the bench doesn’t come with leg rollers — a must-have for decline exercises to stop you from sliding off the bench. 

RELATED: Best Weight Benches for Beginners, Small Spaces, With Racks, and More

Best Budget Barbell: REP Fitness Colorado Bar


REP Fitness Colorado Bar


4.5
  • Material: Steel
  • Weight: 20 kilograms (44 pounds)
  • Weight capacity: 680.2 kilograms (1,500 pounds)
  • Tensile strength: 190 KSI
  • Loadable sleeve length: 16.1 inches
  • Knurling: Moderate
  • Warranty: Lifetime


Check Price

Pros

  • Excellent multi-purpose build
  • Mixed-use design saves space and money
  • Extra-strong 1,500-pound capacity
  • Available in multiple Cerakote colors
  • Lifetime warranty (conditions apply)

Cons

  • Lacks a center knurl
  • Higher priced for a budget bar

This popular barbell blends features of powerlifting bars and Olympic weightlifting bars into a single all-purpose lifting powerhouse.

A blonde woman doing deadlifts with the REP Colorado Bar
Doing deadlifts with the REP Fitness Colorado Bar

Our product testers tried the Colorado bar and reported that it was packaged well and arrived at the facility without damage. They instantly appreciated the dual knurl marks and said that the medium volcano knurling felt good on their hands: somewhat aggressive, but not so much that it would tear their hands during a high-rep workout. The composite bushings rotated smoothly, and they were surprised by how quiet they were.

Like a number of all-purpose bars on the market right now, the Colorado bar comes in two finish options: hard chrome with hard chrome collars, or Cerakote with Rep’s proprietary black “Duracoat” collars. Both options are highly corrosion-resistant, but the Cerakote version comes brings a couple of perks. A big one: the Duracoat collars harden the steel rather than simply coating or bonding with it, so they won’t flake off over time.

The option of getting it with a Cerakote finish also gives you multiple color options and rust resistance — provided you maintain it. This usually involves wiping it down with gentle, alcohol-free dish soap and water and scrubbing off any chalk residue every couple of weeks (depending on how often you use it and how much of a chalk hog you are). 

Our Breaking Muscle team members were particularly impressed with the bar’s 1,500-pound capacity (not that anyone was in danger of reaching it). They noticed that it’s even got a respectable F2 rating according to Rogue’s F-Rating scale, which indicates it would last decades even when getting regularly dropped during grueling high-rep CrossFit workouts.

If your training includes heavy back squats, you might be disappointed about the lack of a center knurl on this bar. For Olympic lifts or power cleans, this is a plus, since the knurling won’t scratch your throat or chest. But a strip of knurling in the middle of a barbell is helpful on low-bar back squats because the bar can more easily shift around without one.

However, if you’re moving seriously heavy weights in the first place, a dedicated deadlift or power bar is probably already on your wishlist (or in your gym already). The great thing about a mixed-use bar like this one is that it’s good enough at most lifts, for most people. Instead of buying a powerlifting bar and an Olympic weightlifting bar, you can save space and money by investing in a high-quality multi-purpose bar like the Colorado Bar that will meet the demands of whatever training style you enjoy. 

Showing the endcap of the REP Colorado Bar, which shows a picture of mountains and the name of the bar
The endcap of the REP Colorado Bar

At the time of writing, the REP Colorado Bar retails for $319.99 to $329.99, depending on whether you get the Cerakote or hard chrome finish. These prices put it on the higher end for a budget barbell. In our best budget barbells round-up article, the nine bars that made our list ranged from roughly $85 to $330, with a couple of mixed-use bars priced at $150 or less.

Sure, you could save yourself a couple of hundred bucks and go cheap if you’re only an occasional barbell user. But if you’re looking for a more durable, versatile bar to anchor your home gym, the REP Colorado Bar should last a lifetime. 

Best Budget Weight Plates: Fringe Sport Milspec Bumper Plates


Fringe Sport MilSpec Bumper Plates


4.3
  • Material: Virgin rubber
  • Diameter: 450 millimeters (~17.7 inches)
  • Increments (pounds): 10, 15, 25, 35, 45, 55
  • Warranty: 90 days to one year


Check Price

Pros

  • Made from virgin (new) rubber
  • Military-approved quality
  • Comprehensive weight range options

Cons

  • 90-day or one-year warranty only
  • Return shipping not covered

The Fringe Sport MilSpec bumpers offer the premium look and feel of elite international brands, but at a far more home gym-friendly price point from a US-based brand. 

One big plus that our testers loved is that these bumpers are made using virgin rubber. Virgin rubber offers better durability than the cheaper, recycled rubber crumb that tends to be used to make bumper plates. It also results in a bumper plate with minimal bounce. And finally, the virgin rubber bumpers received by our product tester had no odor, whereas many recycled rubber bumpers can be quite smelly.

The high quality of these MilSpec bumper plates has permitted them to meet the Army Combat Fitness Test (APFT). They’re also approved to be used outdoors, a serious benefit for high-volume gyms like those on military bases where indoor gym space can be limited. Fringe even states that the 10-pound bumpers can be dropped, which is a distinctive advantage over other companies who make their 10s too thin, and dropping causes them to bend and warp like a taco shell.

For example, the 10-pound bumpers from Fringe are 1.05 inches wide, which is significantly thicker than the 10-pound Rogue Echo Bumper Plates that are only 0.83 inches wide. Over thousands of repetitions, that extra 0.2-inch width can be the difference on whether a bumper plate endures or fails.

Fringe offers their bumper pairs in a full weight range: 10, 15, 25, 35, 45, and 55 pounds. Few companies provide 15-pound and 55-pound sizes, and Fringe’s more extensive selection creates flexibility in crafting a custom set to suit your training needs. For example, if starting your warm-ups with 10-pound bumpers feels too light, you can opt for a 15-pound pair instead. Additionally, you can select 55-pound pairs instead of 45s if you compete in powerlifting because they’re equivalent to 25-kilogram plates.

Just remember that the 55-pound plates are 3.2 inches wide, so you’ll only be able to fit five of them per side with little to no room for a barbell collar — capping you at a total of 595 pounds if you’re using a typical 45-pound Olympic barbell.

However, it’s worth noting that the warranty for these bumper plates is limited. The 10s and 15s have a 90-day guarantee, with the remaining plates covered under a one-year warranty. Considering the high quality of these bumpers, it’s unlikely you’ll need to return them. But if you do, you’ll be on the hook for return shipping charges. 

Best Budget Squat Rack: Titan T-2 Power Rack


Titan T-2 Power Rack


4.4
  • Dimensions: 57″ W x 50″ D x 71″ or 83″ H 
  • Tubing size: 2×2
  • Hole spacing: Two inches
  • Rackable capacity: 850 pounds


Check Price

Pros

  • Excellent value for the price
  • Sturdy construction
  • Easy to assemble

Cons

  • Not ideal for tall people
  • Assembly instructions lack detail

The T-2 power rack by Titan Fitness is an excellent budget option for anyone looking for a sturdy, compact squat rack with a few important bonuses thrown in.

At the time of writing, the price of the T-2 is $419.99 for the 83-inch tall version and $399.99 for the 71-inch. To perform barbell lifts safely at an all-in cost of roughly $400 is reasonable on its own. But the rack’s complementary pieces are what make it a real bargain, and a truly versatile lifting base. 

For example, the base model T-2 comes with plate horns, so your weight plates won’t get strewn across your floor. It also includes pin-pipe safeties to ensure you stay safe while lifting solo, plus a set of reinforced J-hooks and a pull-up bar. Seriously, that’s all just with the base model! Many companies charge extra for these attachments or include them but at a total cost that is significantly higher than Titan’s.

Despite being budget-friendly, this rack has an impressive construction. It features heavy-duty 2-inch x 2-inch uprights built using 14-gauge steel. And with an 850-pound rackable capacity, it’s enough for everyone but the most elite-level lifters. 

Personally, I love that the Titan rack has a flat-foot design. Many power racks only have the bottom of each post on the floor, but the T-2 features steel tubing along the entire base directly against the floor. This makes the rack significantly more stable, to the point that you don’t necessarily need to bolt it down. However, it includes bolt holes in the feet to secure it to your floor if you want extra stability with heavier weights.

While the T-2 comes with an impressive set of attachments, Titan also offers more advanced accessories you can buy separately later when you have the funds and/or interest. From additional j-hook and safety options to specialized add-ons like monolift arms and a leg press attachment, you can expand your power rack into a highly versatile training station at an affordable cost.

The main downside to the Titan T-2 is its height. Even the tallest option is only 83 inches, which puts a noticeable constraint on how high up you can mount your J-hooks. Since the highest tubing hole is about eight inches below the top of the rack, you’ll only be able to mount a bar as high as approximately 75 inches, or 6 feet, 3 inches. If you’re a very tall lifter, you might find this an annoyance for certain lifts like back squats or military presses, but for most people, it’s more than adequate.

One other downside: assembling the Titan T-2 can be a challenging project that requires a team effort. The assembly manual appears to be little more than exploded diagrams of somewhat confusing part numbers and arrows. Despite its simplicity, a second person is most likely required to hold the uprights as you bolt them to the flat foot components.

RELATED: Best Squat Racks for Small Spaces, Beginners, and More

Best Budget Dumbbells: NordicTrack Select-a-Weight Adjustable Dumbbells


NordicTrack Select-a-Weight Adjustable Dumbbell


4.1
  • Weight range: 10 to 55 pounds
  • Weight increments: 2.5 to five pounds
  • Adjustment type: Sliding pins
  • Dimensions: 19.4” L x 11.4” W x 8.5” H with storage tray 
  • Materials: Steel, plastic
  • Warranty: 90 days


Check Price

Pros

  • Replaces 30 dumbbells
  • Convenient storage trays included
  • Easy-to-use weight selector

Cons

  • Lacks some weight increments: 17.5, 27.5, 37.5, 47.5 pounds
  • Short 90-day warranty period

The NordicTrack Select-a-Weight Adjustable Dumbbells are an excellent choice if you’re looking for a versatile and space-saving solution. With these adjustable dumbbells, you can say goodbye to a cluttered home gym and hello to a more streamlined workout experience.

A young woman bending down to pick up the NordicTrack Select-a-Weight Dumbbells
Getting ready to work out with the NordicTrack Select-a-Weight Dumbbells

The standout feature of these dumbbells is their 10 to 55-pound range, which is adjustable in both 2.5 and 5-pound increments. This means they can effectively replace 30 individual  dumbbells, saving you hundreds if not thousands of dollars in purchase price and shipping, as well as plenty of floor and shelf space.

The convenient storage trays with the dumbbells make keeping your workout area tidy and organized easy. Some brands sell their trays separately, but NordicTrack includes theirs by default, so you won’t be tripping over loose weights or searching for where you left them. Simply place the dumbbells back in their designated slots after each set, and you’ll never find yourself wondering where they are.

Another great feature is the easy-to-use weight selector. Thanks to the intuitive tab system, changing the weight on these adjustable dumbbells is a breeze. Simply pinch the bright tab in the center of the plate channel, slide it to the weight increment you need, and release. Within seconds, you can get back to your workout. Need an in-between weight, like 22.5 pounds? Just slide the tab near the handle to add the smaller 2.5-pound microplate. 

A young woman bench pressing with the NordicTrack Select-a-Weight Dumbbells
Doing incline bench presses with the NordicTrack Select-a-Weight Dumbbells

It’s worth noting that these dumbbells lack certain weight increments: specifically 17.5, 27.5, 37.5, and 47.5 pounds. This is because the weight selector tab on the handle allows you to add 2.5 or 5 pounds, but not both simultaneously. If these specific weight increments are crucial to your training routine for some reason, you may want to consider an alternative.

Further, the 90-day warranty period might be shorter than expected for some users, and it’s crucial to know that the 90-day guarantee only covers manufacturing defects. I was expecting a much longer warranty on these, and knowing that they aren’t covered if you accidentally drop (and break) them within the first 90 days would definitely prevent me from tossing them on the ground like a gym bro. 

Best Budget Exercise Bike: Diamondback Fitness 1260sc


Diamondback Fitness 1260Sc


3.9
  • Overall dimensions: 59” L x 23” W x 50” H
  • Weight: 130 pounds
  • Weight capacity: 300 pounds
  • Display: LCD monitor to track workout metrics


Check Price

Pros

  • Commercial-gym quality bike
  • Console highly compatible with popular tech
  • Highly customizable and ergonomic

Cons

  • More expensive than alternatives
  • Basic console; no programs

The Diamondback 1260sc is an excellent choice for home gym enthusiasts looking for a sturdy and durable bike for home use. Our testers found that it brought a commercial-gym quality build that was ready to withstand even the most intense home gym workouts.

A young man riding the Diamondback 1260Sc
A Breaking Muscle product tester riding the Diamondback 1260Sc

 It’s worth noting that this bike is noticeably more expensive than some of the alternatives. At the time of writing, the 1260sc was on sale for $999.99, but it’s regularly priced at $1,538.45. You can find other decent-quality bikes available for less than $1,000, but the features and build quality of the Diamondback 1260sc make it a great value.

During their test drive, our product testers noticed that the bike felt extremely smooth due to its reinforced pedals and cranks. The resistance click lever made it easy to apply magnetic resistance to ramp up the intensity. 

But the little things are what really made this bike stand out: the included water bottle holder, the multiple handlebar grips, and the rear-wheel drive that helps to keep sweat from dripping down the wheel and causing corrosion. 

Another big plus of the Diamondback 1260sc is its highly versatile digital console. Rather than sticking to proprietary programming, this bike plays nicely with a wide range of apps and any wearable technology that is ANT+ compatible, such as Garmin and Wahoo devices. The BLE FTMS connectivity easily pairs with Zwift, Rouvy, Myzone, and SPIVI apps. There’s even an integrated tablet holder, so you can stream workout classes while using your bike. 

No apps? No problem. The console still shows you all the fundamental data to track your workouts and effort consistently, including watts, time, distance, RPM, and heart rate. Although it shows these basics, the console is still barebones compared to other bikes on the market. It doesn’t offer any programs, so you must be your own trainer, look up free fitness classes online, or join a subscription service.

A young man adjusting the seat on the Diamondback 1260sc
Adjusting the seat on the Diamondback 1260Sc

Despite being a more budget-friendly model, this bike has the customizability of a high-end spin bike. It features a v-shaped frame with highly adjustable handlebars, so you can fine-tune the height and fore/aft to get an ideal fit. You can raise or lower the seat to fit your leg length, and the fore/aft is also adjustable to ensure you’re comfortable during long rides. You can even choose between classic or SPD clipless pedals by flipping the pedal around to get the exact riding experience you crave.

Best Budget Treadmill: ProForm City L6


ProForm City L6


3.0
  • Overall dimensions: 70.25” L x 29” W x 44.5” H
  • Weight: 125 pounds
  • Weight capacity: 250 pounds
  • Display: LED display for workout stats


Check Price

Pros

  • Compact and foldable to save space
  • Budget-friendly price
  • Easy to use and assemble
  • Connects to iFIT

Cons

  • 1.6 CHP motor lacks power
  • Smaller deck size feels cramped

The ProForm City L6 is an easy-to-use and compact treadmill for people who like walking or light jogging and using iFit’s wide range of workouts and programs. 

The price of this foldable treadmill is part of what makes it so attractive. At the time of publication, it retails for $699.99. This is definitely in the budget range for a treadmill, as most units with similar features cost at least $1,000.

Our Breaking Muscle testers found the assembly process basic and straightforward, as the ProForm City L6 has fewer parts than a typical treadmill. It’s doable as a one-person job but would be easier with two.

Our product testers were also impressed with how compact this treadmill is. It has a foldable frame, which makes it ideal for small workout spaces. For instance, the frame folds down small enough that our product tester could fit it under a bed. Despite its 125-pound weight, the front wheels make it surprisingly easy to move — a handy benefit for smaller users.

One downside: our Breaking Muscle team members found that the 1.6 CHP motor wasn’t fully up to the challenge of intense training. One product tester is nowhere near the 250-pound limit, and when they brought it up to its 8 MPH max speed, it shook a lot as they ran — which wasn’t even a full-out sprint. Serious runners or sprinters doing HIIT treadmill workouts should consider a different treadmill with a stronger motor, but for lower-intensity running and jogging, the L6 should be more than adequate.

Additionally, you might feel cramped on this treadmill due to its deck size if you’re on the tall side. Our product tester is 5-foot-3 and it worked well for them, but if you’re much taller than about 5-foot-10, its 17.5-inch wide and 45-inch long deck might feel too small to run comfortably.

Best Budget Elliptical: Sole E20


Sole E20


3.5
  • Overall dimensions: 72” L x 24” W; 60” H
  • Weight: 325 pounds
  • Weight capacity: 300 pounds
  • Display: 5.5-inch LED


Check Price

Pros

  • User-friendly build
  • Great value
  • Solid warranty

Cons

  • Large bulky footprint
  • Hard to move

A well-made elliptical from a reputable brand can often run you $1,000 to $2,000. The Sole Fitness E20 provides a stable, low-impact ride and a respectable warranty for far, far less, making it an easy choice for a budget elliptical. At the time of writing, it’s on sale for $599.99, and can usually be found new for no more than $700.

The E20’s console is simple and easy to use. It features built-in pulse grips and is compatible with wireless heart rate chest straps, so you can know how hard you work without missing a beat. Additionally, there’s a handy-dandy media shelf on the console. This means you can store your tablet or smartphone on the ledge to watch TV or movies without worrying about your device falling off and getting damaged. There’s even a water bottle holder, which might seem like a mandatory accessory for an elliptical, but is missing from a surprising number of budget-friendly units.

Sole Fitness is known for its stellar warranties. Despite this being a budget model, the E20 still has impressive coverage: unlimited warranty on frame, 3-year warranty on electronics, 1-year warranty on parts, and 1-year labor warranty. If you ever need warranty work, their service center is just a call away, with all their technicians based in the US.

One downside: the E20 can’t fold. This means you’ll need an entire 70” x 64” area to store the machine permanently, plus additional room around the unit to access it without tripping over your other fitness equipment.

Another downside to the E20 (and most ellipticals): it’s quite heavy at 175 pounds. The E20 has two transport wheels, but you’ll have to lift the machine from the back for it to kick in. This means you’ll have to use some serious elbow grease if you ever have to move it.

Best Budget Rower: Sunny Health Magnetic Rowing Machine


Sunny Health Magnetic Rowing Machine


3.4
  • Dimensions: 89″ D x 18.9 “W x 23.6” H
  • Storage: Folds in half for vertical storage
  • Resistance: Magnetic
  • Weight capacity: 250 pounds
  • Display: LCD monitor
  • Available programming: None


Check Price

Pros

  • Reasonably priced rowing machine
  • Eight quiet magnetic resistance levels
  • Foldable frame to save space

Cons

  • Monitor lacks total distance metric
  • No built-in programs

Sunny Health’s magnetic rower features a range of resistance that make this cardio machine suitable for beginner and intermediate rowers — and finding your sweet spot is as simple as turning a knob. But even better, the resistance is applied magnetically, which makes it quiet compared to air-powered rowers.

Although not very wide, rowers are notorious for taking up a large amount of floor space due to their length — they can be up to 95 inches long. The Sunny Health Rower folds up to just 43.3 inches by 18.9 inches, saving a lot of space in your living room or home gym. You can fold it up by simply removing one of the cotter pins on the rails, so you’re unlikely to find yourself leaving it unfolded. 

The “budget” side of this rower feels more apparent when using the monitor, which claims to track time, total distance, and calories. But many commenters feel it only does one of those features (time) with any dependability or accuracy. More than a few users have noted that they use it only as a timer. Advanced rowers will definitely notice the lack of a sophisticated monitor.

Similarly, the basic monitor lacks any programs or interactive features. If you’re using your smartphone, this isn’t a big deal. However, I would have appreciated a few simple workout programs to be included.

RELATED: Best Rowing Machines for Beginners, Small Spaces, Seniors, and More

Best Budget All-in-One Home Gym: Force USA G3


Force USA G3


4.0
  • Dimensions: 87” H x 78” W x 60.5” D
  • Maximum resistance: Up to 772 pounds for Smith machine
  • Type: Plate-loaded
  • Warranty: Lifetime structural


Check Price

Pros

  • Highly versatile 6-in-1 machine
  • Built-in storage for attachments and bars
  • 18 additional add-on attachments

Cons

  • Costs $1,999.99
  • Weight plates sold separately
  • Barbell for power rack sold separately

The Force USA G3 is an affordable all-in-one trainer that combines six machines: a power rack, Smith machine, and functional trainer, along with a chin-up station, core trainer, and suspension trainer station. The amount of versatility you get in a footprint that’s basically a squat-rack-and-half is pretty incredible. 

What I especially like about the G3 is that only the essential attachments are included, while many extras are optional. Keeping extra attachments optional keeps the overall price as low as possible while allowing you to purchase only the attachments you’d actually use. 

But if you want to expand this unit’s capabilities, you have tons of options. The 18 attachments they offer for the G3 even include popular new-school training tools like lever arms. These allow you to simulate dozens of machine-like exercises at an affordable price. Since they mount directly to the guide rod uprights, you can fine-tune their position for any exercise.

Despite its incredible versatility, the G3 isn’t cheap. It retails for $1,999.99, which makes it the most expensive home gym equipment piece on this list. This is a hefty price tag for a budget item and might require some time for you to save up if you want to pay for it upfront. At the time of writing, Force USA does offer a financing option through Affirm.

Another downside to this unit is that you’ll need your own weight plates. Unlike the selectorized G20, the G3 is a plate-loaded all-in-one-trainer, meaning it requires plates to provide resistance.

While the amount of plates you’ll need will vary based on your current strength level (or aspirations), don’t forget that if you’re using the Smith machine or functional trainer components, the cable system has a 2:1 pulley ratio — so 100 pounds will only feel like 50 pounds. The small but crucial detail means you must provide double the weight to feel your desired resistance. If you love heavy weights, this is worth factoring into your budget. 

Similar to the weight plates, you’ll also need your own barbell (may I recommend the REP Colorado Bar?) if you want to use the power rack for traditional barbell exercises. 

What Are the Benefits of Having a Home Gym?

  • Versatility: You can exercise whenever you want because a home gym is open 24/7. There’s no need to worry about gym hours or waiting for equipment to become available.
  • Privacy: You can work out in the comfort of your own home without feeling self-conscious or judged by others. Plus, there are no restrictive clothing rules to adhere to.
  • Convenience: You don’t have to travel to a gym, saving you time and money on transportation.
  • Customization: You can choose the equipment that best suits your specific needs, goals, and preferences.
  • Hygiene: When you’re the only person in your gym, you don’t need to worry about messes or germs from public users. 
  • Motivation: A home gym can help you stay motivated and committed to your fitness goals.
  • Costeffective: A home gym can end up being more cost-effective than a gym membership over time. 
  • Family time: You can work out with your family members, making it a fun and healthy activity for everyone.

What Home Gym Equipment Should You Start Out With?

The number of home gym items that sit around for years without use could make anyone cry. But not all of these neglected tools are bad workout equipment. Plenty of them are just a bad fit. 

And despite the fitness tech or gym equipment trending right now, there are only three things that you actually need to exercise at home:

  1. Equipment to apply resistance to your muscles
  2. Equipment to challenge your cardiovascular system
  3. Space for the equipment

Pretty simple, isn’t it? So, the home gym equipment that you start with should be equipment that you’ll actually use. 

And the easiest way to figure out what you’ll use is to ask yourself, “How do I like to train?”

Enjoy running? Get a treadmill. Hate running but love cycling? Exercise bike it is. Have a passion for rowing? A rowing machine will be your new best friend.

Apply this same question to resistance training, and you’ll figure out whether you should invest in free weights, resistance bands, bodyweight training equipment, or machines.

What To Consider When Buying Home Gym Equipment

Price

Home gym equipment can vary widely in price, depending on the product’s quality, features, and brand. Set a realistic budget for your home gym and look for equipment that offers the best value for your money. 

When comparing prices, factor in the cost of maintenance, warranty, and delivery. This is especially important for oversized items like treadmills and elliptical machines.

Training Style

Home gym equipment can be classified into two main categories: cardio and resistance training. Cardio equipment like treadmills, bikes, and rowers are designed to improve cardiovascular fitness. Resistance training equipment, such as dumbbells, benches, and resistance bands are designed to build muscle and increase strength. 

The most important thing you should do is choose equipment that matches your training style and preferences. This will ensure you actually use the equipment instead of it getting used for a couple of months and then collecting dust.

Goals

Home gym equipment can help you achieve different fitness goals, such as weight loss, muscle gain, endurance, strength, or flexibility. You should have a clear idea of what you want to accomplish with your home gym equipment and only choose items that will help you reach those specific goals. 

For example, you should look for cardio equipment if you’re interested in improving your cardiovascular fitness because it will give you a practical way to train in that manner. If you want to gain muscle, you should look for resistance training equipment that can provide progressive overload and work major muscle groups, like the Force USA G3 all-in-one trainer.

Available Space

Home gym equipment can take up a lot of space in your home, especially if you have multiple pieces of equipment. Before purchasing, measure the available space in your home and choose equipment that can fit comfortably and safely in your designated area. You can also look for equipment that is foldable or compact, which can save you some space when not in use.

You should also consider the equipment’s weight and ensure it won’t exceed the capacity of your floor or walls for wall-mounted items. Just 10 to 15 minutes of planning can save you a ton of headaches (and home repairs).

Final Thoughts

If you want to build a home gym that suits your needs and budget, you don’t have to spend a fortune on fancy equipment. You can get high-quality equipment without breaking the bank as long as you’re intentional and honest about how you like to train and focus on covering the basics instead of opting for luxurious products. 

FAQs

What is a good inexpensive home gym?

A good inexpensive home gym is the Force USA G3. It features six machines combined into a single footprint: a power rack, smith machine, and functional trainer, along with a chin-up bar, core trainer, and suspension trainer station. The exercise versatility you get in a single footprint is incredible despite its larger upfront price.

What equipment is best for a small home gym?

The best gym setup for a small space needs to be versatile equipment that you’ll actually use. You can get a great full-body workout with nothing more than a bit of floor space to do push-ups and a yoga mat. But if you add in a dumbbell or two, you’ll get far more training options while only taking up an additional foot or two of floor space. 

Is it cheaper to go to the gym or buy your own equipment?

You can buy your own equipment to supply an impressive home gym with as little as $1,000 to $2,000. Going to an average gym will cost roughly $600 per year at minimum. This means that you’ll break even in about 3.3 years or less, and it will be cheaper using your own equipment every day after that — as long as you don’t continue buying more gear.

What are two types of inexpensive equipment that you can purchase to exercise at home?

Two types of inexpensive equipment that you can purchase to exercise at home are resistance bands and a jump rope. Add in a weight training tool like a dumbbell or kettlebell, and you can challenge all of the major muscle groups in the lower body and upper body without breaking the bank. 

The post Best Budget Home Gym Equipment: Affordable Barbells, Treadmills, Squat Racks, and More (2023) appeared first on Breaking Muscle.

Be Nice and Share!
This post was originally published on this site

Originally Posted At: https://breakingmuscle.com/feed/rss

With 10 of the world’s premier athletes scheduled to square off at Dell Diamond Stadium on Oct. 27-28, 2023, there’s plenty of anticipation surrounding the 2023 Rogue Strongman Invitational. A stacked roster headlined by reigning champion Oleksii Novikov will have an opportunity to not only impress the crowd in Round Rock, Texas, but also secure a record-setting prize purse of $133,785.83, as of the time of this publication.

To emerge victorious, participants like Novikov and 2023 World’s Strongest Man Mitchell Hooper must go through a grueling gauntlet of six challenges over the course of the two-day contest. And with competition date inching closer, Rogue Invitational officially released the full lineup of strongman events on Oct. 10, 2023.

Day One (Friday, Oct. 27, 2023)

The first day of the 2023 Rogue Strongman Invitational will feature three events, all of which will test the athletes’ strength, power, and conditioning. Here’s a breakdown of each event, starting with an ultra-demanding deadlift challenge that made its debut in 2022.

Event 1: Tower of PowerDeadlift for Reps

Rogue ramped up its annual strongman competition a year ago by putting together the Tower of Power event. Ukrainian former powerlifter Pavlo Nakonechnyy proved to be the most proficient at the newly unveiled event by completing 12 reps of 18-inch barbell deadlifts during the 60-second time allotment.

As if lifting 900 pounds (408 kilograms) as many times as possible in one minute wasn’t challenging enough, competitors had to deal with much different leverages due to the height of the tower platform. Back again for the 2023 Rogue Strongman Invitational, this event should bring the best out of Nakonechnyy and 2023 North America’s Strongest Man Trey Mitchell, who completed 10 reps in his first encounter with the Tower of Power. Starting the day with a deadlift for reps competition will certainly set the tone for event No. 2.

Event 2: The Iron Bull Sled Pull

No specifics were provided about this event. However, sled pulls are undoubtedly one of the most popular feats of strength fans enjoy watching, especially when vehicles are involved.

Event 3: Ultimate Log Medley

Although we don’t know exactly what the Ultimate Log Medley will entail, the 2022 Rogue Strongman Invitational included an event called “Yoke Carry, Overhead Log Lift Medley” that consisted of carrying a 1,000-pound (453.5-kilogram) yoke for 50 feet, followed by performing three reps of an overhead press with a 360-pound (163-kilogram) log. Mitchell Hooper easily outpaced the rest of the pack by completing the circuit in just 32.69 seconds.

Meanwhile, 2022 Canada’s Strongest Man Maxime Boudreault took another 14.1 seconds to wrap up the No. 2 spot. If the final event of the first day of the 2023 Rogue Strongman Invitational features the log press again, that could be a chance for 2022 America’s Strongest Man Bobby Thompson to earn some valuable points. Coming off consecutive third-place finishes at the Arnold Strongman Classic, Thompson showcased his upper-body strength at the 2023 event by hitting three reps of a 430-pound (195-kilogram) log press on the Austrian Oak challenge, which tied for second with Hooper.

Day Two (Saturday, Oct. 28, 2023)

Day Two of the 2023 Rogue Strongman Invitational will kick off with another event that captivated last year’s audience and wrap up with one that could have some CrossFit inspiration behind its name.

Event 4: Rogue-A-Coaster

Just like the competitors, the Round Rock crowd will be locked in for 90 seconds during the dynamic Rogue-A-Coaster event. Particularly taxing on the lats and rear delts, it takes pull day to another level — and then some. The athletes will start their Saturday morning by sitting at the bottom of a section of a rollercoaster and attempting to pull 600 pounds (272 kilograms) worth of sandbags loaded onto a cart up to the top and dump them over within the 90-second limit.

This 54-inch incline rope pull didn’t pose much trouble for Nakonechnyy (38.51 seconds) or Novikov (39.04 seconds) in 2022. However, neither could outdo 2021 Rogue Strongman Invitational champion Martins Licis (33:83 seconds), who will not be at this year’s event.

Event 5: Apollon’s Wheels

No specifics were provided about this event. However, it’s safe to say all the participants should have some idea of what’s to come.

Made famous by French strongman Louis “Apollon the Mighty” Uni, Apollon’s Wheels was his 366-pound (166-kilogram) barbell loaded with a pair of railway car wheels. Featuring a thick diameter of nearly two inches, it requires excellent grip strength just to handle the bar. It takes incredible coordination to power clean it off the floor and get it into a front rack position And it takes serious strength to press that weight overhead.

The fifth event (also named Apollon’s Wheels) at the 2018 Arnold Classic Strongman Classic utilized a replica reproduced by Ivanko Barbell Company that weighed 400 pounds (181 kilograms). Hafþór Björnsson, who went on to win the World’s Strongest Man title later that year, took home first place by performing four full reps of a clean and press in the two-minute timeframe. Rogue certainly seems to be paying homage to the famous barbell in 2023 based on the name of the penultimate event.

Event 6: The Duel

“The Duel II” was an elimination-style, multi-round event at the 2022 CrossFit Rogue Invitational that consisted of a legless rope climb, 10 overhead squats, and a sandbag carry. Although CrossFit and Strongman competitors may not cross paths often, the final event of the 2023 Rogue Strongman Invitational could have a similar feel as “The Duel II” but with a different array of exercises and much heavier loads.

Complete 2023 Rogue Strongman Invitational Roster

  • Oleksii Novikov (Ukraine)
  • Mitchell Hooper (Canada)
  • Trey Mitchell (USA)
  • Luke Stoltman (UK)
  • Mateusz Kieliszkowski (Poland)
  • Pavlo Nakonechnyy (Ukraine)
  • Bobby Thompson (USA)
  • Tom Stoltman (UK)
  • Evan Singleton (USA)
  • Maxime Boudreault (Canada)

Novikov’s campaign to become a back-to-back Rogue Strongman Invitational champion will come down to his ability to dominate both new and repeat events. Whether he can fend off the likes of Hooper and Mitchell remains to be seen when the strongest men in the world reunite at Red Rock.

Featured Image: @rogueinvitational / Instagram

The post 2023 Rogue Strongman Invitational Complete Event Lineup appeared first on Breaking Muscle.
Be Nice and Share!
This post was originally published on this site

Originally Posted At: https://breakingmuscle.com/feed/rss

Steady-state cardio — plodding along at a consistent pace for the duration of a session — can have its place in a training program. However, high-intensity interval training (HIIT) can actually be a more efficient means to reach your fitness goals. And just like there are a variety of ways to build the ultimate physique, there are different machines you can rely upon  to help get you there. 

Although a treadmill offers the unique advantage of being able to train on an incline, it doesn’t give you a true full-body workout. Meanwhile, an elliptical machine may be a low-impact option for your joints, but that also comes at the expense of any muscle-building upside. 

Luckily, there’s a piece of home gym equipment that provides the best of both worlds: the rower, sometimes called an erg or rowerg. In fact, you’ll be hard-pressed to find a machine that tests your muscular strength and endurance (and mental fortitude) quite like the erg.

Muscular person in gym using rowing machine
Credit: Prostock-studio / Shutterstock

Whether your primary goal is to burn body fat or boost your conditioning, these HIIT rowing workouts will get the job done. And if you’re just getting your feet wet with this type of training, there’s a beginner-friendly plan that will put you on the path to becoming more proficient and confident on the rowing machine

HIIT Rowing Workouts 

HIIT Rowing Workout for Fat Loss 

A successful fat loss plan focuses on two factors: how you fuel up and how you put those resources to work. If your primary goal is to trim a few extra pounds off your frame, pairing interval training with a nutritional protocol that prioritizes protein and limits processed foods will provide the perfect stimulus to help accomplish that feat. Although this rowing workout may seem easy on the surface, you’ll quickly learn how challenging (and effective) time-specific training can be.

Tabata Intervals  

There’s a reason the Tabata protocol remains one of the most popular styles of high-intensity interval training: It works. Designed in an easy-to-follow format, a workout consists of clearly defined intervals of max-effort exercise and complete rest. Typically, the high-intensity interval lasts for 20 seconds, forcing you to go all out for what sounds like a fairly reasonable amount of time.

However, the difficult part about Tabata-style training is that you only get a rest period of 10 seconds, or half the amount of the high-intensity interval. That back-and-forth battle usually wages on for eight cycles, adding up to a four-minute round. Most workouts run around 20 minutes, which includes a brief rest period of 1-2 minutes between each completed round.

Person in gym using rowing machine
Credit: Drazen Zigic / Shutterstock

Despite its short working intervals, Tabata delivers impressive results. It has been shown to be effective for improving both body fat composition and some cardiometabolic health outcomes in university female students. (1) Additionally, a 2020 study on the impact of Tabata training showed it was also effective in reducing body fat percentage and waist-to-hip ratio in overweight individuals. (2)

Ultimately, there’s no reason to make things complicated when it comes to your fat loss journey. This rowing workout relies upon a tried-and-true setup that should leave you feeling gassed by the end. It’s best to leave this for the end of a strength training session as a high-impact finisher, or perform it on a non-lifting day to reap the rewards of aerobic and anaerobic exercise. 

Tabata Rowing Circuit 

  • How to Do it: Sit on the rowing machine seat and strap your feet in. Set the drag level between three and five. Grab the handle, maintain an upright posture, and simultaneously push with your legs while pulling with your upper body. Warm up at a comfortable pace for one minute before increasing to max effort for your first high-intensity interval. 
  • Programming: Perform 8-10 sets (one round) of 20 seconds of max-effort rowing followed by 10 seconds of rest. Repeat for three to five rounds, depending on your fitness level. 
  • Rest Time: Rest one to two minutes after each round.  

HIIT Rowing Workout for Conditioning 

Metabolic conditioning can have some crossover with fat loss training, but it also brings muscle-building benefits. And out of all the home gym equipment you should consider investing in, a rowing machine is a fantastic choice since it is capable of helping you achieve your dream physique in multiple ways.

This all-inclusive workout combines sprint intervals on the erg with various strength exercises for the ultimate conditioning session. 

On/Off Circuit

Prepare to move around with this workout. At the same time, prepare to enjoy the conditioning rewards of mixing max-effort speed intervals on the rower with muscle-building exercises that will test your strength and stamina.

Grey-haired person in gym using rowing machine
Credit: Kostiantyn Voitenko / Shutterstock

Rather than rowing for a specific time interval, your goal is to complete 250 meters as fast as possible. Then, you will go through a type of superset using resistance training exercises that target your chest, shoulders, triceps, quads, and glutes. Working hard on the rower will target your back muscles, so doubling up by targeting them with a strength-training exercise could cause excessive fatigue without added benefit.

This workout can serve as the baseline for your creative efforts. You can vary the routine in a variety of ways by increasing your target distance on the erg, increasing the time or load for the supplementary movements, or by choosing specific exercises based on your personal physique goals. Ultimately, the point is to push yourself through each phase, take a few minutes to recover, and find a way to keep going. 

Rowing Speed Interval

  • How to Do it: Sit on the rowing machine seat and strap your feet in. Set the drag level between five and seven for added resistance. Grab the handle, maintain an upright posture, and simultaneously push with your legs while pulling with your upper body. Warm up at a comfortable pace for one minute before increasing to max effort for your first high-intensity interval.
  • Programming: Complete a 250-meter row as quickly as possible.
  • Rest Time: No rest before moving to the next exercise.

Paused Push-Up

  • How to Do it: Begin in the top of a traditional push-up position with your hands directly under your shoulders, your arms locked out, hips and legs straight, and toes on the ground. Lower yourself down until your chest is one to two inches from the floor and hold for two seconds. Engage your triceps and extend your arms to return to the starting point. 
  • Sets and Reps: Perform as many reps as possible in 30 seconds.
  • Rest Time: No rest before moving to the next exercise.

Goblet Squat

  • How to Do it: Stand with your feet shoulder-width apart and your toes slightly pointed out. Hold a kettlebell or dumbbell with both hands at chest-level (the “goblet” position), engaging your front deltoids (shoulders) to support the weight. While keeping your torso upright, push your hips back, bend your knees, and sit into a deep squat position. Drive through your heels and return to the starting position.  
  • Sets and Reps: Perform as many reps as possible in 30 seconds. Use a weight that allows at least 10 to 12 repetitions in the first round.
  • Rest Time: No rest before moving to the next exercise.

Dumbbell Overhead Press

  • How to Do it: Stand with your feet hip-width apart with a dumbbell in each hand at shoulder-level. Keep your wrists in a neutral position (palms facing each other) and push the weights toward the ceiling, fully extending your arms and locking out your triceps. Slowly lower the dumbbells back down to the starting position, maintaining full control on the eccentric (lowering) portion of the lift.  
  • Sets and Reps: Perform as many reps as possible in 30 seconds. Use a weight that allows at least 10 to 12 repetitions in the first round.
  • Rest Time: Rest two to three minutes before repeating the first exercise.

HIIT Rowing Workout for Beginners

If you’re new to cardio training, or just new to the rowing machine, don’t be intimidated by the idea of an intense session on the erg. Instead, embrace the concept of pushing yourself for short spurts so you can earn some well-deserved rest. Plus, you can look forward to improving your technique with each and every stroke. 

1:2 Work-to-Rest Intervals

A key difference between the previous fat-burning and conditioning workouts and this beginner-friendly plan is the amount of time you’ll spend working at a lower intensity. Instead of following a 1:1 work-to-rest ratio, beginners should opt for a 1:2 work-to-rest rate. 

This structure is essentially the opposite of Tabata, which requires you to recover in half the amount of time as your high-intensity interval. Using a specific work/rest approach will give you the benefits of improving your VO2 max while also allowing a sufficient period for recuperation. (3)

Long-haired person using rowing machine outdoors
Credit: Microgen / Shutterstock

You’ll be starting out with 20 seconds of work, followed by 40 seconds of rest. However, don’t be afraid to switch up that 1:2 ratio as you get more comfortable on the rower. Once you have completed this workout a few times, you can ramp up the difficulty by cutting the rest interval to 30 seconds. Then, trim it down another 5-10 seconds as you improve. 

20 On/40 Off Rowing Circuit

  • How to Do it: Sit on the rowing machine seat and strap your feet in. Set the drag level between three and five. Grab the handle, maintain an upright posture, and simultaneously push with your legs while pulling with your upper body. Warm up at a comfortable pace for one minute before increasing to near-max effort for your first high-intensity interval. Make sure to rest for double the amount of work-time for each cycle.
  • Programming: Two sets of 8 rounds — each round requires 20 seconds of hard rowing, followed by 40 seconds of easy rowing.
  • Rest Time: Rest for three minutes after completing the first round.

How to Warm-Up for a HIIT Rowing Workout

A structured warm-up isn’t just a means to break a sweat or get your head in the game prior to a workout. Besides being beneficial for performance, it’s also a proactive measure that can help prevent injuries. (4)

Because the erg requires you to recruit essentially every major muscle group, you need to prepare accordingly. Diving straight into any of the three HIIT workouts isn’t a sound strategy — especially if you’re hitting the gym after sitting at a desk for hours.

YouTube Video

Set yourself up for success by completing this four-part warm-up which focuses on getting your shoulders, back, quads, and hamstrings ready for a rowing session that will leave you feeling accomplished from head to toe. 

HIIT Rowing Workout Warm-Up

  1. Arm Circle: Stand with your feet about shoulder-width apart and your arms fully extended out to your sides so they are parallel with the floor. Keep your arms straight and begin making small circular motions in a forward direction. Progress to bigger circles for a wider range of motion. for 20 to 30 seconds. Then, perform the same movement in the opposite direction for another 20 to 30 seconds.  
  2. Inch Worm: Stand tall with your feet about hip-width apart and your hands by your sides. Look down at the floor and start reaching your hands out in front of your feet as you allow your knees to bend slightly. Carefully walk your hands forward until they are directly under your shoulders and your body is parallel to the floor. From that full plank position, keep your legs straight and walk your hands back toward your feet. Brace your core and raise your upper body to return to the starting position. Perform 10 repetitions before moving to the next exercise. 
  3. Paused Bodyweight Squat: Stand with your feet at a shoulder-width distance and your toes pointed slightly out. Brace your core, push your hips back, and slowly lower yourself down until your thighs are parallel to the floor. Hold for two seconds, then push through your heels and drive upward until you reach the starting position. Complete 15 to 20 full-depth squats before finishing up with the final part of the warm-up. 
  4. Rowing Machine: Get on a rowing machine and set the damper to a low level (between one and four). Maintain a steady but comfortable pace for three to five minutes to prime your muscles and get in the flow for the high-intensity workout to follow. 

Full-Body Benefits in Far Less Time

While you will most certainly work harder, you’ll also be working smarter with these HIIT rowing workouts. Ramping up the intensity means you won’t have to spend nearly as much time repeating the same motion until you’ve reached a state of boredom. Instead, efficient interval-style training will let you reap the full-body rewards of centering your next workout around the simple but incredibly effective rowing machine. 

References

  1. Lu, Y., Wiltshire, H., Baker, J. S., Wang, Q., & Ying, S. (2023). The effect of Tabata-style functional high-intensity interval training on cardiometabolic health and physical activity in female university students. Frontiers in Physiology, 14. https://doi.org/10.3389/fphys.2023.1095315
  2. Domaradzki, J., Cichy, I., Rokita, A., & Popowczak, M. (2020). Effects of Tabata training during physical education classes on body composition, aerobic capacity, and anaerobic performance of under-, normal- and overweight adolescents. International Journal of Environmental Research and Public Health, 17(3), 876. https://doi.org/10.3390/ijerph17030876
  3. Helgerud, J., Høydal, K. L., Wang, E., Karlsen, T., Berg, P. R., Bjerkaas, M., Simonsen, T., Helgesen, C. S., Hjorth, N. L., Bach, R., & Hoff, J. (2007). Aerobic High-Intensity intervals improve VO2max more than moderate training. Medicine and Science in Sports and Exercise, 39(4), 665–671. https://doi.org/10.1249/mss.0b013e3180304570
  4. Ding, L., Luo, J., Smith, D. M., Mackey, M. J., Fu, H., Davis, M. M., & Hu, Y. (2022). Effectiveness of Warm-Up Intervention Programs to Prevent Sports Injuries among Children and Adolescents: A Systematic Review and Meta-Analysis. International Journal of Environmental Research and Public Health, 19(10), 6336. https://doi.org/10.3390/ijerph19106336

Featured Image: Microgen / Shutterstock

The post HIIT Rowing Workouts for Fat Loss, Conditioning, and Beginners appeared first on Breaking Muscle.
Be Nice and Share!
This post was originally published on this site

Originally Posted At: https://breakingmuscle.com/feed/rss

As a registered dietitian, I am asked almost every day for recommendations on the best type of protein supplement. And while I’m sure to only recommend proteins whose quality and formulation I can stand behind, there’s another feature that’s also pretty important: the flavor.

If you don’t like how a protein powder tastes, you are pretty unlikely to stick with it all the way to the bottom of the jug. This is a shame because the benefits of a higher-protein diet are really something that only happens over the course of weeks and months.  

If you want to increase your muscle mass, control cravings while losing weight, or boost recovery from your workouts, these are the best-tasting protein powders that may help make it happen. 

Medical disclaimer: This article is intended for educational and informational purposes only. It is not intended as a substitute for medical advice. For health advice, contact a licensed healthcare provider.

How We Chose the Best Tasting Protein Powder

Our process for choosing what protein powders taste the best is very selective. And yes, to be clear, it involves us actually tasting over 75 proteins.

But to ensure that you can make a well-informed decision and don’t end up with an actual milkshake instead of a protein shake, we test for a wide range of criteria. These include not only flavor, but also price, formulation, solubility, side effects, third-party testing, and the customer experience. Try any of our recommendations and be confident that we did the homework so you don’t have to.

Our Top Picks for the Best Tasting Protein Powder

Best Tasting Protein Powder Overall: Jacked Factory Authentic Iso


Jacked Factory Authentic ISO


4.0
  • Protein type: Whey isolate
  • Number of servings: 30
  • Cost per serving: $1.20 to $1.33
  • Calories per serving: 110 to 130
  • Protein per serving: 25 grams, depending on the flavor
  • Flavors: Cookies & Cream, Unflavored (if you buy from Amazon)
  • Third-party tested: No


Check Price

Pros

  • Made in the USA, in an FDA-registered facility 
  • Manufactured without fillers or dyes 
  • Offers a 100% money-back guarantee for the first 30 days of purchase

Cons

  • Uses the artificial sweetener sucralose

Jacked Factory Authentic Iso is an affordable, high-quality, great-tasting protein powder that packs a lot of flavor and a solid 25 grams of protein into a surprisingly low-calorie serving. 

A container of Jacked Factory Authentic ISO on a black surface with a wood background
A container of Jacked Factory Authentic ISO at the Breaking Muscle testing facility

This protein has a personal connection, as my hubby is a lifter on an eternal quest to find the protein that’ll help him build muscle mass the quickest, while still tasting like a well-earned post-workout treat. Jacked Factory’s rich chocolate-flavored whey supplement is the one he keeps coming back to.

The protein in Jacked Factory Authentics Iso powder is sourced from whey — a byproduct of dairy cheese production. Whey isolates aren’t usually considered to be the tastiest or creamiest of proteins since they have less fat and carb content than either whey concentrate or milk isolate protein. However, Jacked Authentic gets consistently high ratings from reviewers — and from my husband — for how well it mixes and the overall flavor.

As a dietitian, I like how simple the formulation is, with no fillers, gums, or dyes. It does use the artificial sweetener sucralose in its formulation which is a deal-breaker for some people, but does help in keeping the overall calories so low. There are a few users who report that they found this product overly sweet, but the general consensus is that each of the eight flavor options currently available brings the goods and tastes like what they promise.  

At the time of this writing, this product has a 4.4 out of five star overall rating on Amazon. Out of 509 reviewers, Jacked Factory Authentic Iso is given a 4.6 out of five stars for how easily it blends, 4.3 out of five stars for the quality of the ingredients used, and 4.2 out of five stars with regard to flavor.

RELATED: Best Protein Shakes

Best Tasting Protein Powder for Women: Ritual Essential Protein Powder


Ritual Essential Protein Powder


4.4
  • Protein type: Pea protein
  • Number of servings: 15
  • Cost per serving: $2.66
  • Calories per serving: 115 
  • Protein per serving: 20 grams 
  • Flavors: Vanilla
  • Third-party tested: Yes


Check Price

Pros

  • Each scoop/serving has 493 milligrams of l-methionine
  • Legitimate vanilla flavor from Madagascar vanilla beans
  • Provides 8 grams of essential amino acids and 4 grams of branched-chain amino acids in every serving 
  • Does not contain any artificial colors, flavors, or sweeteners

Cons

  • Comparatively more expensive than other protein powders on the market 
  • Only one flavor

Whether you are picking up toddlers all day, carrying heavy grocery bags, or hitting the weights, you need adequate protein to power you through it. Ritual Daily Shake is our top choice for women to help us accomplish everything we do in our day-to-day. It only has one flavor option available. However, you won’t be disappointed by the handcrafted vanilla, which is sourced from vanilla bean extract farmed and harvested in Madagascar. 

Building muscle and maintaining muscle mass requires good protein intake. Ritual uses organic pea protein and we know from randomized trials that pea protein positively helps repair muscle damage after exercise. (8) And as a mom of two small kids, I am here to tell you: yes, running after your wild toddlers in the yard definitely counts as exercise. 

To really determine if the flavor blends well, our product tester tried Ritual Daily Shake two ways: in a blender cup with plain water and in a smoothie with strawberries and blueberries. She gave it a 5 out of 5 rating for solubility. It dissolved easily in water alone and had a great consistency and a smooth texture.

Our tester noticed a slightly chalky aftertaste, but it wasn’t enough to keep her from finishing her drink or using the protein powder again in the future. She also found that the taste enhanced the smoothie and did not overwhelm it. She ranks the taste for Ritual Daily Shake as a 4 out of 5. 

Best Tasting Chocolate Protein Powder: XWERKS Grow


XWERKS Grow


4.3

Protein type: Whey protein isolate

Number of servings: 30

Cost: $1.97 per serving

Calories per serving: 110

Protein per serving: 23 to 25 grams

Flavors: Chocolate, Peanut Butter, Strawberry, Vanilla

Third-party tested: No


Check Price

Pros

  • Sourced from dairy cows in New Zealand that are 100% grass-fed
  • Around 6,000 milligrams of branched-chain amino acids in every scoop 
  • Manufactured with 4,226 milligrams of glutamic acid per serving, which may assist muscle growth
  • Mixes easily

Cons

  • Not third-party tested at the time of writing 
  • Limited flavor options

XWERKS Grow protein powder is sourced from dairy cows that are not exposed to hormones, antibiotics, or pesticides and are 100% grass-fed only. The formulation is simple, clean, and doesn’t contain any artificial ingredients, sweeteners, flavors, or coloring. 

A bag of XWERKS Grow on a black surface with a wood background
A bag of XWERKS Grow at the Breaking Muscle testing facility

Like some of our other top picks, this powder’s protein source is whey isolate, which means it has been micro-filtered to remove excess calories caused by non-protein sources like fat. (3) XWERKS Grow also has about 4 grams of glutamic acid per scoop. Glutamic acid is noteworthy for its ability to assist in muscle growth, but it is also a flavor enhancer that can improve our sensitivity to the fifth basic taste: umami. (4)(5)

Our supplement tester scored XWERKS Grow protein powder’s formulation, taste, and solubility as a 5 out of five. They really emphasized that this product is incredibly smooth – your days of gritty chocolate flavoring are over. Our Breaking Muscle team member reported this as the “finest protein powder I’ve ever drank” and was excited by how easily XWERKS dissolves. You barely need a shaker and blender ball to mix this protein powder to get the perfect amount of chocolate flavoring. 

Best Tasting Plant-Based Protein Powder: Transparent Labs Rice & Pea Protein Powder


Transparent Labs Organic Vegan Rice & Pea Protein


4.5
  • Protein type: Pea protein isolate, rice protein
  • Number of servings: 30
  • Cost: $1.67 per serving
  • Calories per serving: 130 to 150
  • Protein per serving: 24 grams
  • Flavors: Chocolate, French Vanilla 
  • Third-party tested: Yes, by independent labs


Check Price

Pros

  • Contains no added sugars or artificial sweeteners 
  • You will receive a complete plant-based protein profile in every scoop 
  • Manufactured without the use of genetically modified organisms (GMOs)

Cons

  • Limited flavor options

As more of the population becomes health-conscious, there has been a big push to create plant-based protein powders. Plant-derived protein sources may have protective factors against chronic diseases like diabetes, hyperlipidemia, and chronic kidney disease. (6) Of the plant-based protein powders currently available, Transparent Labs Rice & Pea protein powder is our top pick. 

What made it stand out? Transparent Labs brand does a fantastic job of being exactly that — transparent. There are no proprietary blends in any of their supplements. They tell you exactly how much of each ingredient you get in a serving of their products. For every 32.05 gram scoop of the vegan protein powder, you get 20,000 milligrams of organic rice protein and 9,411 milligrams of organic pea protein isolate. Blending these two organic protein sources creates a “complete protein,” which means it contains sufficient amounts of all nine essential amino acids. 

While Transparent Labs’ chocolate vegan protein powder can work in water alone, the texture doesn’t lend itself to this simple preparation as readily as egg or whey. Our tester reports that this powder had a somewhat gritty texture.

This seems to be the recurring theme among reviewers on their website as well. Out of 286 reviews, Transparent Labs Rice & Pea Protein holds 4.2 out of 5 stars. Many reviewers report that they really “clicked” with this protein once they added it to hot and cold cereals, pancake mix, or in a non-water beverage such as almond milk. 

Best Tasting Whey Protein Powder: Legion Whey+


Legion Whey+


4.0
  • Protein type: Whey isolate
  • Number of servings: 30 to 78
  • Cost per serving: $1.54 to $2.00
  • Calories per serving: 100 to 130
  • Protein per serving: 21 to 24 grams
  • Flavors: Apple Pie, Banana Bread, Cinnamon Cereal, Dutch Chocolate, Birthday Cake, Chocolate Peanut Butter, Cocoa Cereal, Cookies & Cream, French Vanilla, Fruity Cereal, Honey Cereal, Mocha Cappucino, Pumpkin Pie, Salted Caramel, Strawberry Banana, Unflavored
  • Third-party tested: Labdoor


Check Price

Pros

  • Made in the USA in an NSF-certified and FDA-inspected and cGMP-compliant facility 
  • Hormone-free, no added sugar, non-GMO, and antibiotic-free
  • Gluten-free and made without lactose
  • 5,600 milligrams of BCAAs in every scoop

Cons

  • Some users are overwhelmed by the vast options for flavoring (this is definitely a “Pro” in some people’s books)

The “best tasting whey protein powder” title goes to a product that is made without the use of added sugars, has 100 percent natural ingredients (meaning it is naturally flavored and sweetened), and has a third-party testing grade of “A” from Labdoor. Legion Whey+ is sure to have a flavor that you will enjoy because there are just over 15 flavor options!

The Breaking Muscle product review staff gushed about the Cinnamon Cereal flavor option and gave it a 4.5 out of 5 because it left them wanting more of that well-known Cinnamon Toast Crunch cereal flavor. If you don’t like cinnamon, another one of the classic or unique options, such as Banana Bread, might speak to you.

Many reviewers specifically praise this lactose-free protein for how easy it is to digest. This makes it a popular choice for fortifying everyday foods with protein-rich flavor. For example, you could add cereal-type flavors to literal cereal, add French vanilla to tropical fruit breakfast smoothies, or put birthday cake protein powder in cake balls. 

This protein powder blends perfectly and many users (including our product tester) report no issues with Legion Whey+ powder’s solubility.

The only complaint our review staff lodged was against the Legion website itself. The customer service policies and actual customer service team are all great, but navigating the website requires getting past a ton of obnoxious pop-up ads and personal email requests. If you can get past these and add the powder to your shopping cart, your prize will be what we think is the best-tasting whey protein powder on the market. 

RELATED: Best Whey Protein Powder

Best Tasting Vegan Protein Powder: Vega Sport Premium Protein Powder


Vega Sport Protein


4.2
  • Protein type: Alfalfa, pea, pumpkin seed, sunflower seed
  • Number of servings: 12 to 20
  • Cost: $2.22 to $3.55 per serving
  • Calories per serving: 170 to 180
  • Protein per serving: 30 grams
  • Flavors: Berry, Chocolate, Mocha, Peanut Butter, Vanilla
  • Third-party tested: NSF Certified for Sport


Check Price

Pros

  • 5 grams of branched-chain amino acids (BCAAs) in every serving 
  • Manufactured with the addition of two billion CFUs of the probiotic Bacillus coagulans
  • Has some tart cherry in its formulation
  • Multiple plant-based protein sources for a complete amino acid profile

Cons

  • Made with gum filler

If you are a practicing vegan or simply prefer plant-based protein powder, Vega Sport Premium hits some big checkboxes: a complete amino acid profile, third-party testing, and user-beloved flavors.  

Vega Sport Premium is sourced from a unique protein blend combination of peas, pumpkin seeds, organic sunflower seeds, and alfalfa. This gives it a light, not overly pea-y texture that mixes equally well in plain water, a smoothie, or any dairy-free beverage.

This supplement is made without any added sugars — meaning that the creamy flavor you get comes from all-natural ingredients, plus the plant-based sweetener stevia. While many stevia-flavored protein powders can have a unique flavor or aftertaste, our testers report that the stevia in Vega is undetectable, and the overall flavor is natural and clean. With regard to flavor, users couldn’t be happier.

On their website, they have had 499 reviewers say their peace. Of the 499 reviews, 419 gave this product a 5 out of 5-star rating, 56 gave it a 4 out of 5, 22 gave it 3 out of 5 stars, and 1 user each gave a 2-star and 1-star rating.  

With regard to mixability, this product has earned a 4.5 out of five stars from us because it blends so easily. Try this supplement in coffee, a blueberry and strawberry smoothie, and even mixed in with peanut butter on a PB&J sandwich!

RELATED: Best Pea Protein Powder

Best Tasting Vanilla Protein Powder: Swolverine Whey Protein Isolate


Swolverine Whey Protein Isolate


3.6
  • Protein type: Whey isolate
  • Number of servings: 30
  • Cost: $2.10 per serving
  • Calories per serving: 110
  • Protein per serving: 26 grams
  • Flavors: Chocolate, Honey Cinnamon Peanut Butter, Mint Chocolate Chip, Strawberry, Vanilla
  • Third-party tested: Lief and Micro Quality Labs


Check Price

Pros

  • Added digestive enzymes in every scoop (papain and protease) 
  • Protein is sourced from cows that are grass-fed and rBGH-free (recombinant bovine growth hormone)
  • No proprietary blends of ingredients — 100% transparent about what you are getting per scoop

Cons

  • Comparatively expensive
  • Texture can be a little thin and watery
  • Contains sucralose and the thickener/sweetener xanthan gum

Vanilla-flavored protein powders are flooding the protein supplement market right now. In fact, if you were to search “vanilla protein powder” on Amazon, you’d find over 2,000 results. We don’t hand out the award for our top pick for best-tasting vanilla powder lightly, but Swolverine Whey Protein Isolate certainly earned it. 

While it’s more expensive than most other protein powders on our list, our Breaking Muscle testing team gave Swolverine a solid 5 out of 5 for its formulation. For only 110 calories, you get 26 grams of protein but only one gram of carbs, and 0.5 grams of fat. 

This makes this product ideal for those looking to maintain muscle mass while dieting. Consuming whey protein has been directly correlated with a reduced risk of muscle mass loss, increasing skeletal lean muscle mass, and preventing muscle mass from being used for energy when utilizing caloric restriction. (2)

Our testers gave Swolverine Whey Protein Isolate a 4 out of 5 ranking for both taste and solubility. They report that a serving-size scoop blends quickly and completely in a run-of-the-mill blender bottle, even noting that it was “kinda weird” how easily this powder turns into a thin mixture. This may be off-putting for some users though who prefer their protein shakes to be thicker.

For this reason, if you’re someone who prefers a thicker protein shake, consider adding Swolverine to milk or dairy-free milk. When mixed with milk, Swolverine received high praise from our tester who said it was very rich and tasted great.

Best Tasting Protein Powder for Weight Loss: Myprotein Impact Whey Protein


Myprotein Impact Whey Protein Powder


3.8
  • Protein type: Whey protein concentrate
  • Number of servings: 10 to 200
  • Cost: $0.95 to $1.30 per serving
  • Calories per serving: 100
  • Protein per serving: 19 grams
  • Flavors: Birthday Cake, Chocolate, Chocolate Brownie, Chocolate Mint, Chocolate Smooth, Chocolate Stevia, Cinnamon Cereal, Fruity Cereal, Marshmallow Cereal, Mocha, Salted Caramel, Strawberry Cream, Unflavored, Vanilla, Vanilla Stevia, White Chocolate Peppermint
  • Third-party tested: No


Check Price

Pros

  • Loads of flavor options! 
  • You will get 2,500 milligrams of glutamine per serving 
  • Each serving has less than 1 gram of fat and 3 grams of carbohydrates

Cons

  • Lower protein per serving than other options
  • The cost per serving increases with the more servings per bag you purchase.

If you are picky about flavor, MyProtein Impact Whey Protein powder probably has the answer. At the time of writing, it comes in 20 different flavors. Flavors like white chocolate peppermint, salted caramel, and birthday cake give you a wide range of non-junk food options to support your weight loss journey, making this an easy pick for the best-tasting protein powder for weight loss. 

A scoop of MyProtein Impact provides 18 grams of protein, which is on the low side, but impressively, it does it with just 1.5 to two grams of fat, three grams of carbohydrates, and 95 to 100 calories per serving (depending on which flavor you decide to roll with). Plenty of research has supported whey protein supplementation as a way to manage caloric intake, reduce fat mass, and prevent muscle mass catabolism (breakdown) when dieting. (7) And when you’re dieting, your protein needs might actually be higher than when you’re eating in a caloric surplus. MyProtein Impact can be a low-calorie way to reach your recommended daily intake of protein, while still getting to partake in fun, dessert-like flavors. 

Of all the flavor options available, the Cookies and Cream option doesn’t appear to be very popular. However, the Fruity Cereal, Chocolate Brownie, and Birthday Cake options get the most consistently high marks from our reviewers. But because there are so many fun flavor options, try and get creative in the way you use them. You could add protein powder to a fruity smoothie bowl or make high-protein baked goods. Several reviewers love how easily this product mixes without leaving a gritty texture, even when mixed with plain water or low-fat milk. 

RELATED: Best Supplements for Weight Loss

Best Tasting Casein Protein Powder: Kaged Casein


Kaged Casein


4.0
  • Protein type: Isolated Micellar Casein 
  • Number of servings: 29
  • Cost per serving: $1.38
  • Calories per serving: 110
  • Protein per serving: 25 grams 
  • Flavors: Chocolate Peanut Butter 
  • Third-party tested: Informed Sport


Check Price

Pros

  • 608 milligrams of calcium per serving
  • Slow-digesting protein for overnight or meal replacement
  • 10.5 grams of essential amino acids in every scoop 
  • Made with a proprietary blend of medium-chain triglyceride oil powder

Cons

  • Only one flavor

If you have searched for protein powder supplements, you have probably found whey protein to be the most popular. However, it is not the only dairy-based protein source. Allow me to introduce casein. Casein isn’t as popular in the protein powder world as whey, but it offers some unique advantages that are worth taking seriously. First and foremost, it’s a slow-digesting protein, whereas whey gets digested quickly. (9) But this just means that you can use casein protein powders, like Kaged Casein, for different scenarios than whey protein. 

Since casein hangs out in the digestive tract longer than whey protein, it helps you to feel fuller for longer, while also helping to control glucose (blood sugar) levels, and facilitating muscle growth and repair. When compared to whey, casein is best used during periods of fasting, such as long breaks between meals and even sleep. (9

Kaged also packs a punch when it comes to calcium – delivering 608 milligrams per scoop. This is a hefty dose of calcium when compared to other protein powders. To put it in perspective, the amount of calcium present in the other powders in this review varies from 0 milligrams (Transparent Labs Rice & Pea Protein Powder) to 260 milligrams (Vega Sport Premium Protein Powder). Calcium is an important mineral and electrolyte used for muscle contraction. Without it, we would not be able to flush our muscles with energy in the form of glucose during exercise and post-workout recovery. (10) So, we appreciate that Kaged Casein adds in a healthy amount.  

Most protein powders that use casein in their formulation are thicker in texture than plain whey. Our Breaking Muscle review staff gave this product a 4 out of 5 for formulation and solubility. We deducted a point for mixability due to how long it takes to get this protein to actually dissolve. However, after a little while, the mixture became pretty smooth and ended up creamier and richer than any whey shake.

We also gave it 4 out of 5 stars for taste. We tried the Vanilla Shake flavor, which doesn’t currently appear to be available. However, customers on Kaged’s website have praised the Chocolate Peanut Butter flavor. One customer called it “amazing” and another said he has “tried a few others and always come[s] back to Kaged chocolate peanut butter.”

Many reviewers actually appreciate this extra thickness, as it results in a milkshake-like treat, especially if you cool it down in the fridge or freezer before drinking. Kasein also works great in food preparations like chia seed pudding, protein ice cream, or no-bake cheesecake bites.  

Best Tasting Low-Carb Protein Powder: Onnit Whey Protein


Onnit Whey Protein


4.4
  • Protein type: Whey isolate
  • Number of servings: 30
  • Cost: $2.00 per serving
  • Calories per serving: 110
  • Protein per serving: 20 grams
  • Flavors: Mexican Chocolate, Vanilla
  • Third-party tested: Informed Sport


Check Price

Pros

  • Made with a digestive enzyme complex blend 
  • Contains a proprietary blend of the probiotic Lactobacillus acidophilus 
  • Has medium-chain triglyceride powder in its formulation 

Cons

  • Manufactured with gum fillers
  • Thin texture
  • Spendy

For only three grams of carbs per serving, Onnit Whey brings offers unique flavors and a few perks for your digestive system. Along with 20 grams of whey protein isolate, each scoop brings a blend of digestive enzymes and a dose of the healthy probiotic Lactobacillus acidophilus. These added components are known to aid in carbohydrate digestion. Those who struggle with whey-based protein powders may find Onnit Whey easier to digest and experience fewer GI symptoms. 

Our product review team gives Onnit Whey Protein powder a 5 out of 5 stars for solubility but a 3.75 out of 5 stars for taste. Our reviewer found the texture to be rather thin when mixed with water alone, but far superior when added to oat milk. However, she loved the Mexican Chocolate flavor, finding it more unique than the usual chocolate protein formula. 

Reviewers on Onnit’s website concur that the mixability is great and that the protein powder blends smoothly into smoothies, cereals, and milk (both animal and plant-based). However, not all long-time users rave about the new vanilla flavor ingredient formulation. If you try this powder and decide that it’s not for you, don’t worry — we rank Onnit’s customer service 5 out of 5 stars due to their responsiveness online and their money-back guarantee. 

Benefits of Protein Powder

Protein powder supplements offer plenty of benefits. You should consider adding one to your diet if any of the following support your health and fitness goals: 

  • Increased overall muscle mass and strength (1)
  • Slowing or preventing muscle loss from dieting or aging (2)(7)
  • Improving weight loss and weight management(7)
  • Reduced risk of certain chronic diseases (6
  • Quicker post-workout recovery time (1)
  • Improved satiety (your sensation of fullness) (7)

What To Look For in the Best Tasting Protein Powder

Choosing which dietary supplement to roll with is a big decision. We understand that there are a lot of things to consider when researching which protein powder will fit the bill for your individualized health goal and be enjoyable to drink. As a registered dietitian, I also recommend considering solubility, texture, cost, calories per scoop, macro and micronutrient formulation, added ingredients, and lingering side effects.

Macronutrients

When you read a nutrition food label, you will notice percentages to the right of the fat and carbohydrate listings. However, if you keep scrolling down the label, you will find that our third and final macronutrient, protein, does not have a percentage for the daily value listed next to it. Percent daily value is based on a 2,000-calorie daily intake. This percentage is not required to be listed on the food label for protein.

Since the amount of protein needed in a day varies so drastically with regard to physical activity, medical concerns, age, sex, and anthropometrics (such as height and weight), you will only find it represented as grams. What your body needs from a protein powder will be based on your desired nutrition targets.  

  • Physical activity. Multiply your body weight in kilograms by 0.8 grams of protein to determine your daily protein needs. As you increase your output through minimal, moderate, and high-intensity workouts, you will need to multiply your body weight in kilograms by 1.0, 1.3, and 1.6 grams of protein, respectively, to build lean body mass appropriately. It would be wise to incorporate a protein powder with some carbohydrates for post-workout recovery to help replenish your muscles’ energy storage. 
  • Anthropometrics and overall goal. You will need to adjust the amount of protein you intake daily to align with your nutrition goals. If you want to gain muscle mass and recover quicker post-workout, a powder with a higher protein content can help. If you want to lose weight and implement protein intake as a way to help with satiety, the amount you will need will heavily depend on your current height and weight. 
  • Medical concerns. To promote healing, our protein needs generally increase post-surgery and even when recovering from illness. Those who have diabetes usually need a higher protein intake than the general population. However, those who are not on dialysis but have impaired renal function will have decreased protein needs. 

Protein Source 

Protein can come from a wide range of plant or animal-based sources. The most common form of protein found in protein powders is whey protein. Whey, along with casein, is a byproduct of the cheese-making process. The main difference between these two popular proteins is the rate at which we absorb them. 

Casein is digested and absorbed slowly because it curdles when exposed to stomach acid. It can take as much as  5 hours or more to fully digest. On the contrary, your body breaks down whey usually within 90 minutes after consumption. Casein is great for when we know we won’t eat for a long time and need slow-released amino acids — such as before going to bed. Whey protein is ideal for post-workout recovery and muscle synthesis. (9)(11)

Plant-based protein is just as reliable as whey protein when it comes to gaining muscle and cultivating lean body mass. Many studies have shown that when pea protein and brown rice protein contain the same amount of protein as animal sources, they are as effective at delaying workout fatigue and improving post-workout recovery times. So if you are vegan, vegetarian, or just looking for a plant-friendly option, don’t feel like you have to compromise in either quality or taste. 

Other Ingredients

Be sure to review the list of ingredients on the nutrition facts label when choosing a protein powder. The manufacturer will note on the label if their protein powder contains common allergens. Check the label carefully to make sure you are not exposed to anything that could cause an allergic reaction or gastrointestinal upset, such as soy, artificial sweeteners, dairy, nuts, or gluten. 

It is always a good idea to consult with a registered dietitian nutritionist who can personalize dietary supplements to your health needs. Things like fiber, probiotics, digestive enzymes, vitamins, minerals, and antioxidants should be taken into consideration when choosing a dietary supplement, to ensure it helps bolster your health targets. 

Flavor and Solubility 

We can’t skip over flavor when considering which protein powders taste the best. Drinking the same protein powder every day can feel repetitive and boring, which can discourage us from using our protein supplements as we should. To prevent this, I encourage my clients to shake up the way they approach protein powder and incorporate it into their diets in a creative way. 

For example, adding chocolate peanut butter-flavored protein powder to muffin mix would be a great way to fortify the mix with more nutrients. Mixing vanilla protein powder into a cold coffee can make a yummy iced latte. Cinnamon cereal and pumpkin spice choices would be delicious flavor options to put in pancake batter, bread dough, and overnight oats.

Solubility is another crucial factor to consider. If a protein powder doesn’t dissolve well and forms clumps when you mix it, you probably won’t want to consume it again. According to our testers, the products above had varying levels of solubility. The Transparent Labs Organic Vegan Rice & Pea Protein Powder scored a 3.75. The other products we tested scored a 4 or 5 on the grading scale, with 5 being deemed perfect for mixability.

Third-Party Testing  

Third-party testing for label accuracy and purity isn’t the norm in the supplement industry, but it’s important to look for. Third-party testing shows that a manufacturer went the extra mile to prove that their ingredient list is free of banned substances, microbial life, heavy metals, and toxins and that it contains only what the label says. 

Final Thoughts

Incorporating protein powder into your fitness and health routine doesn’t have to be boring. To help stir your tastebuds, we have compiled our picks for the best-tasting protein powder currently on the market. We have a rigorous vetting process for testing products and out of the nearly 100 protein powders we have tried, only 10 made the cut. 

Protein powder is an excellent way to supplement your diet to increase your overall protein consumption. Keep in mind that protein powder should be exactly that though – supplemental and not serve as a routine meal replacement. A diversified, well-balanced diet consisting of whole food sources from each food group should constitute your normal eating patterns. However, if you are looking for a great-tasting, low-carbohydrate, low-fat, calorie-conscious protein supplement, we have you covered. Protein powder is used to increase muscle mass, curb hunger, improve exercise endurance, delay fatigue onset during a workout, and recover quicker so you can hit the gym again feeling fresh. 

Best Tasting Protein Powder: Side-by-Side Comparison

Best Tasting Protein Powder Overall

Best Tasting Vegan Protein Powder

Best Tasting Vanilla Protein Powder

Best Tasting Chocolate Protein Powder

Best Tasting Plant-Based Protein Powder

Best Tasting Protein Powder for Weight Loss

Best Tasting Protein Powder for Women

Best Tasting Whey Protein Powder

Best Tasting Casein Protein Powder

Best Tasting Low-Carb Protein Powder


4.0


4.2


3.6


4.3


4.5


3.8


4.4


4.0


4.0


4.4


Description:
  • Protein type: Whey isolate
  • Number of servings: 30
  • Cost per serving: $1.20 to $1.33
  • Calories per serving: 110 to 130
  • Protein per serving: 25 grams, depending on the flavor
  • Flavors: Cookies & Cream, Unflavored (if you buy from Amazon)
  • Third-party tested: No

Description:
  • Protein type: Alfalfa, pea, pumpkin seed, sunflower seed
  • Number of servings: 12 to 20
  • Cost: $2.22 to $3.55 per serving
  • Calories per serving: 170 to 180
  • Protein per serving: 30 grams
  • Flavors: Berry, Chocolate, Mocha, Peanut Butter, Vanilla
  • Third-party tested: NSF Certified for Sport

Description:
  • Protein type: Whey isolate
  • Number of servings: 30
  • Cost: $2.10 per serving
  • Calories per serving: 110
  • Protein per serving: 26 grams
  • Flavors: Chocolate, Honey Cinnamon Peanut Butter, Mint Chocolate Chip, Strawberry, Vanilla
  • Third-party tested: Lief and Micro Quality Labs

Description:
  • Protein type: Whey protein isolate
  • Number of servings: 30
  • Cost: $1.97 per serving
  • Calories per serving: 110
  • Protein per serving: 23 to 25 grams
  • Flavors: Chocolate, Peanut Butter, Strawberry, Vanilla
  • Third-party tested: No

Description:
  • Protein type: Pea protein isolate, rice protein
  • Number of servings: 30
  • Cost: $1.67 per serving
  • Calories per serving: 130 to 150
  • Protein per serving: 24 grams
  • Flavors: Chocolate, French Vanilla 
  • Third-party tested: Yes, by independent labs

Description:
  • Protein type: Whey protein concentrate
  • Number of servings: 10 to 200
  • Cost: $0.95 to $1.30 per serving
  • Calories per serving: 100
  • Protein per serving: 19 grams
  • Flavors: Birthday Cake, Chocolate, Chocolate Brownie, Chocolate Mint, Chocolate Smooth, Chocolate Stevia, Cinnamon Cereal, Fruity Cereal, Marshmallow Cereal, Mocha, Salted Caramel, Strawberry Cream, Unflavored, Vanilla, Vanilla Stevia, White Chocolate Peppermint
  • Third-party tested: No

Description:
  • Protein type: Pea protein
  • Number of servings: 15
  • Cost per serving: $2.66
  • Calories per serving: 115 
  • Protein per serving: 20 grams 
  • Flavors: Vanilla
  • Third-party tested: Yes

Description:
  • Protein type: Whey isolate
  • Number of servings: 30 to 78
  • Cost per serving: $1.54 to $2.00
  • Calories per serving: 100 to 130
  • Protein per serving: 21 to 24 grams
  • Flavors: Apple Pie, Banana Bread, Cinnamon Cereal, Dutch Chocolate, Birthday Cake, Chocolate Peanut Butter, Cocoa Cereal, Cookies & Cream, French Vanilla, Fruity Cereal, Honey Cereal, Mocha Cappucino, Pumpkin Pie, Salted Caramel, Strawberry Banana, Unflavored
  • Third-party tested: Labdoor

Description:
  • Protein type: Isolated Micellar Casein 
  • Number of servings: 29
  • Cost per serving: $1.38
  • Calories per serving: 110
  • Protein per serving: 25 grams 
  • Flavors: Chocolate Peanut Butter 
  • Third-party tested: Informed Sport

Description:
  • Protein type: Whey isolate
  • Number of servings: 30
  • Cost: $2.00 per serving
  • Calories per serving: 110
  • Protein per serving: 20 grams
  • Flavors: Mexican Chocolate, Vanilla
  • Third-party tested: Informed Sport

Best Tasting Protein Powder Overall


4.0


Description:
  • Protein type: Whey isolate
  • Number of servings: 30
  • Cost per serving: $1.20 to $1.33
  • Calories per serving: 110 to 130
  • Protein per serving: 25 grams, depending on the flavor
  • Flavors: Cookies & Cream, Unflavored (if you buy from Amazon)
  • Third-party tested: No

Best Tasting Vegan Protein Powder


4.2


Description:
  • Protein type: Alfalfa, pea, pumpkin seed, sunflower seed
  • Number of servings: 12 to 20
  • Cost: $2.22 to $3.55 per serving
  • Calories per serving: 170 to 180
  • Protein per serving: 30 grams
  • Flavors: Berry, Chocolate, Mocha, Peanut Butter, Vanilla
  • Third-party tested: NSF Certified for Sport

Best Tasting Vanilla Protein Powder


3.6


Description:
  • Protein type: Whey isolate
  • Number of servings: 30
  • Cost: $2.10 per serving
  • Calories per serving: 110
  • Protein per serving: 26 grams
  • Flavors: Chocolate, Honey Cinnamon Peanut Butter, Mint Chocolate Chip, Strawberry, Vanilla
  • Third-party tested: Lief and Micro Quality Labs

Best Tasting Chocolate Protein Powder


4.3


Description:
  • Protein type: Whey protein isolate
  • Number of servings: 30
  • Cost: $1.97 per serving
  • Calories per serving: 110
  • Protein per serving: 23 to 25 grams
  • Flavors: Chocolate, Peanut Butter, Strawberry, Vanilla
  • Third-party tested: No

Best Tasting Plant-Based Protein Powder


4.5


Description:
  • Protein type: Pea protein isolate, rice protein
  • Number of servings: 30
  • Cost: $1.67 per serving
  • Calories per serving: 130 to 150
  • Protein per serving: 24 grams
  • Flavors: Chocolate, French Vanilla 
  • Third-party tested: Yes, by independent labs

Best Tasting Protein Powder for Weight Loss


3.8


Description:
  • Protein type: Whey protein concentrate
  • Number of servings: 10 to 200
  • Cost: $0.95 to $1.30 per serving
  • Calories per serving: 100
  • Protein per serving: 19 grams
  • Flavors: Birthday Cake, Chocolate, Chocolate Brownie, Chocolate Mint, Chocolate Smooth, Chocolate Stevia, Cinnamon Cereal, Fruity Cereal, Marshmallow Cereal, Mocha, Salted Caramel, Strawberry Cream, Unflavored, Vanilla, Vanilla Stevia, White Chocolate Peppermint
  • Third-party tested: No

Best Tasting Protein Powder for Women


4.4


Description:
  • Protein type: Pea protein
  • Number of servings: 15
  • Cost per serving: $2.66
  • Calories per serving: 115 
  • Protein per serving: 20 grams 
  • Flavors: Vanilla
  • Third-party tested: Yes

Best Tasting Whey Protein Powder


4.0


Description:
  • Protein type: Whey isolate
  • Number of servings: 30 to 78
  • Cost per serving: $1.54 to $2.00
  • Calories per serving: 100 to 130
  • Protein per serving: 21 to 24 grams
  • Flavors: Apple Pie, Banana Bread, Cinnamon Cereal, Dutch Chocolate, Birthday Cake, Chocolate Peanut Butter, Cocoa Cereal, Cookies & Cream, French Vanilla, Fruity Cereal, Honey Cereal, Mocha Cappucino, Pumpkin Pie, Salted Caramel, Strawberry Banana, Unflavored
  • Third-party tested: Labdoor

Best Tasting Casein Protein Powder


4.0


Description:
  • Protein type: Isolated Micellar Casein 
  • Number of servings: 29
  • Cost per serving: $1.38
  • Calories per serving: 110
  • Protein per serving: 25 grams 
  • Flavors: Chocolate Peanut Butter 
  • Third-party tested: Informed Sport

Best Tasting Low-Carb Protein Powder


4.4


Description:
  • Protein type: Whey isolate
  • Number of servings: 30
  • Cost: $2.00 per serving
  • Calories per serving: 110
  • Protein per serving: 20 grams
  • Flavors: Mexican Chocolate, Vanilla
  • Third-party tested: Informed Sport

FAQs

Which protein powder tastes the best?

Our Breaking Muscle team hands the title for best-tasting protein powder to Jacked Factory Authentic Iso. This is based on taste testing and comparing over 73 protein powder supplements. Spoiler alert: this is also one of the most affordable options we have tested, and it comes in eight stellar flavors. 

What are the top three protein powders?

After careful consideration and an in-depth internal testing process, we believe the top three protein powders are Legion Whey+, XWERKS Grow, and Kaged Casein. These three supplements consistently scored the highest for taste in every flavor option they offer. 

Is there a protein powder that doesn’t taste like anything?

Many brands offer “unflavored” protein powders, such as Legion Whey+ and Jacked Factory Authentic ISO. However, generally speaking, you won’t find a protein powder that tastes like truly nothing. Most will incorporate other ingredients, such as stevia or Himalayan rock salt, that can influence the taste. These options are still good for adding beneficial nutrients to coffee, muffin mix, cookie batter, or other foods without changing their original flavor profile. 

Research

  1. Kadam BR, Ambadkar RK, Rathod KS, et al. Health benefits of whey – a brief review. Intern Journ of Livestock Res. 2018;8(5):31-49. doi: 10.5455/ijlr.20170411022323
  2. Devries MC, Phillips SM. Supplemental protein in support of muscle mass and health: advantage whey. Journ of Food Sci. 2015;80:8-15. doi: 10.1111/1750-3841.12802
  3. Foegeding EA, Davis JP, Doucet D, et al. Advances in modifying and understanding whey protein functionality. Trends in Food Sci & Tech. 2002;13(5):151-159. Doi: 10.1016/S0924-2244(02)00111-5
  4. Kamei Y, Hatazawa Y, Uchitomi R, et al. Regulation of skeletal muscle function by amino acids. Nutrients. 2020;12(1):261. doi: 10.3390/nu12010261
  5. Kurihra K. Umami the fifth basic taste: history of studies on receptor mechanisms and role as a food flavor. BioMed Res Intern. 2015. doi: 10.1155/2015/189402
  6. Cao X, Liao W, Wang S. Food protein-derived biocative peptides ofr the management of nutrition related chronic diseases. Adv in Food and Nutr Res. 2022;101:277-307. doi: 10.1016/bs.afnr.2022.04.004 
  7. Samal JRK, Samal IR . Protein supplements: pros and cons. Journ of Diet Supp. 2018;15(3):365-371. doi: 10.1080/19390211.2017.1353567
  8. Nieman DC, Zwetsloot KA, Simonson AJ, et al. Effects of whey and pea protein supplementation on post-eccentric exercise muscle damage: a randomized trial. Nutrients. 2020;12(8):2382. doi: 10.3390/nu12082382
  9. Lambers TT, Van den Bosch WG, Jong S. Fast and slow proteins: modulation of the gastric behavior of whey and casein in vitro. Food Dig. 2013;4:1-6. doi: 10.1007/s13228-012-0028-7
  10. Girgis CM, Clifton-Bligh RJ, Hamrick MW, et al. The roles of vitamin D in skeletal muscle: form, function, and metabolism. Endo Rev. 2013;34(1):33-83. doi: 10.1210/er.2012-1012
  11. Dangin M, Boirie Y, Guillet C, et al. Influence of the protein digestion rate on protein turnover in young and elderly subjects. J Nutr. 2002;132(10):3228S-33S. doi:10.1093/jn/131.10.3228S

The post Best Tasting Protein Powder (2023): Flavors You’ll Crave and Quality You Can Trust appeared first on Breaking Muscle.
Be Nice and Share!
This post was originally published on this site

Originally Posted At: https://breakingmuscle.com/feed/rss

Shortly after switching the location of the 2024 CrossFit Games from Madison, Wisconsin to Fort Worth, Texas, CrossFit HQ has shifted gears yet again by making significant changes for the upcoming season. However, unlike the decision to host the sport’s preeminent event at Dickie’s Arena next year, choosing to overhaul the Adaptive and Age-Group divisions will likely be met with more criticism than excitement. 

On Oct. 10, 2023, CrossFit HQ delivered a press release detailing major changes for the 2024 season. 

“CrossFit is excited to announce three new partnerships that will help grow the CrossFit Games championship competition and create new opportunities to shine a spotlight on athletes across all divisions. WheelWOD Games, Pit Teen Throwdown, and Legends Championship will host the adaptive and age-group championships for the 2024 CrossFit Games season.

The change will dramatically increase the number of masters and teenage athletes competing in the finals, nearly double the number of divisions for adaptive athletes, and provide a chance for CrossFit to evolve its competition model to make the CrossFit Games internationally scalable in the future.” 

Although the partnerships will give more athletes a chance to participate, taking away the opportunity for competitors in the Adaptive and Age-Group divisions to share the same stage as the top Individual and Team performers in the championship round represents an obvious drawback.

Instead, qualifying Masters athletes (ages 35-65+) will move through the online Quarterfinals and Semifinals before advancing to the Legends Championship for an in-person Final. While the 2023 Legends Championship will take place in Tempe, Arizona from Dec. 7-10, it is unclear if the 2024 edition will happen in the same location. 

Athletes in the Teens division (ages 14-17) will follow the traditional CrossFit Games stages (Open, Quarterfinals, and Semifinals) before wrapping up their season at the Pit Teen Throwdown. The 2024 edition will still take place in Three Rivers, Michigan, which has hosted the annual fitness competition for several years. 

Per the CrossFit press release: “The Pit Teen Throwdown offers a highly competitive arena for world-class athletes to test their skill, strength, and stamina against their peers,” CrossFit HQ wrote in the press release. “Big names in the sport have competed in the Throwdown in the past such as 2023 Rookie of the Year Olivia Kerstetter and 2022’s second-Fittest Woman on Earth Mal O’Brien.” 

The 2023 NOBULL CrossFit Games, which took place in August, crowned several new champions in the Teen division, including:

  • Maria Granizo (14-15 Girls)
  • Jeremie Jourdan (14-15 Boys)
  • Lucy McGonigle (16-17 Girls)
  • Ty Jenkins (16-17 Boys)

Moving forward, though, talented youngsters like Granizo and Jourdan will have to settle for showcasing their strength, agility, and fitness at the Pit Teen Throwdown rather than at what should be a jam-packed Dickie’s Arena.

Meanwhile, the entire Adaptive athlete season will be run exclusively by WheelWOD, an organization that brings more than a decade of experience hosting annual competitions. The new partnership will not only expand the number of competitive divisions from eight to 15, but it will also allow athletes from all 15 to have a chance to advance to the in-person final.

The current Adaptive divisions include:

  • Vision
  • Intellectual
  • Seated With Hip Function
  • Seated Without Hip Function
  • Short Stature
  • Multi Extremity
  • Lower Extremity
  • Upper Extremity

Considering only three divisions (Multi Extremity, Lower Extremity, and Upper Extremity) moved on to the final at the most recent CrossFit Games, the new format should be viewed positively from a participation perspective — especially with WheelWOD offering additional divisions such as Sensory (which includes both vision and hearing) and more specific Upper and Lower Extremity categories as defined by an athlete’s “points of contact” with their relevant limbs.

With the 2023 WheelWOD Games taking place in Raleigh, North Carolina from Nov. 30-Dec. 3, Adaptive athletes can get a hint of what next year’s competition might look like. However, CrossFit HQ said the dates and location for 2024 will be shared at a later time.

Despite shifting directions in such considerable fashion, CrossFit General Manager of Sport and Education Dave Castro believes the changes “will benefit each division in significant ways, most importantly more than doubling qualifying spots for masters and teens and allowing every adaptive division a place at the in-person championship.” 

Only time will tell whether the athletes affected share the same sentiment. However, there’s little doubt that the 2024 CrossFit Games will look quite different, and after delivering substantial announcements in successive months, don’t be surprised if more changes are unveiled moving forward.

Featured Image: @crossfitgames / Instagram

The post CrossFit HQ Announces Major Changes to Adaptive and Age-Group Divisions for 2024 Season appeared first on Breaking Muscle.
Be Nice and Share!